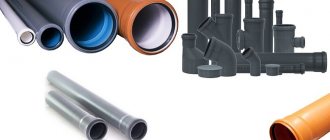
11/29/2012During a major renovation of a premises, a complete replacement of pipelines is often carried out. If you want to save on paying for services, you can do most of the work yourself. Let's look at how sewer pipes are installed. Materials and components used for sewer systems Pipes made of polymer materials.
For wastewater, pipes with a diameter of 50 mm are used; for risers and toilet outlets, pipes of 110 mm are needed. Tees. Available in different sizes, they are distinguished by straight tees with an angle of 90 degrees and oblique tees with an angle of 45 degrees. Couplings. Parts required for joining pipes.
For work, you may need couplings with a diameter of 50 and 110 mm. Corners or bends. These parts also differ in diameter and angles of inclination. Bends with an angle of 45, 35 or 90 degrees may be needed. Transitions.
Parts that are used to connect plastic pipes of different diameters. Crosses. Parts that are used if you need to connect 4 branches into one. They can be single-plane or double-plane.
In the first case, all gadflies are located in the same plane. In the second, the part resembles a piece of pipe into which two sockets are welded at an angle of 45 degrees. Revision. The part necessary for servicing the sewer system looks like a tee, but instead of a socket, it has a threaded cap installed on it. Sealing collars.
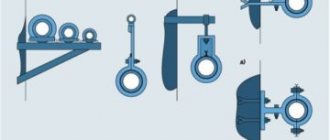
Rubber parts used to seal connections. Clamps. Parts that are used to fasten pipes to walls. In addition to the listed parts, when installing sewer pipes, additional elements may be needed. For example, when installing a shower cabin without a tray, a special fitting is required, which is called a drain.
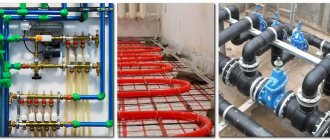
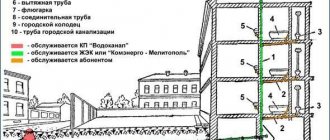
When installing a sewer system in a private house, you will need ventilation fittings. Where to start? It is advisable to begin any work by drawing up a plan. Especially if this work is associated with such precise diagrams as utility lines. Let's consider the main stages of preparation. First, you need to draw up a detailed diagram of the future system, estimating where the water drainage points will be located. Having such a diagram, you can easily imagine where you will need to install fittings, what types of fasteners will be needed, and it will also be possible to clarify the required length of pipes. Work always begins from the lower point of entry into the sewer. This is due to the fact that it is from this point that the pipes slope.
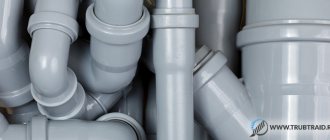
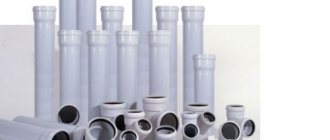
Since, in most cases, a gravity-flow system is planned, the installation of sewer pipes is carried out on a slope; for every meter of pipe, one centimeter of slope is planned. It is convenient to install pipes using a building level. The assembly of pipes must be carried out so that the socket is directed upward. Rules for installing internal sewerageInstallation of internal sewerageInternal is a system that runs inside the building; it includes all the plumbing elements in the house and the pipeline connecting them. To create internal systems, different types of sewer pipes can be used, but, most often, polypropylene pipes are used for these purposes. Advice! When selecting fittings, you need to remember that the use of straight tees is permissible only in a vertical plane, for example, if the pipe is connected to a sewer riser. In the event that the connection is mounted in a horizontal plane, then it is necessary to use oblique tees and two-plane crosses.
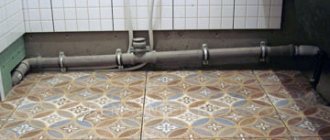
Inspections must be installed at pipeline turning points. Exceptions are possible for turning areas that can be accessed without installing inspections, for example, if a washbasin is installed nearby. In multi-storey buildings, inspections are installed every three floors; if the house is five-story, then inspections are installed on the lower and upper floors. In addition, this fitting can also be installed on straight sections of the pipeline located horizontally, the length of which exceeds 12 meters. The pipes of the internal drainage system can be laid openly or using hidden installation, in which the pipeline is embedded in the floor or walls.
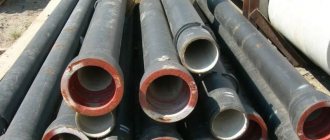
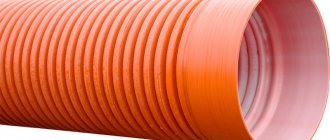
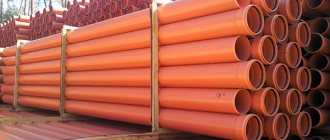
Clamps for attaching pipes to walls are installed at a distance of one meter with a pipe diameter of 100 mm and every 50 cm with a pipe diameter of 50 mm. Rules for installing external sewerage Installation of external sewerage If apartment owners, as a rule, are only interested in internal sewerage, then those who lives in private houses, who have, for example, an autonomous sewer system, it is necessary to take care of the external pipeline through which wastewater is transported to the collector or local treatment facilities. For external pipelines, PVC sewer pipes are usually used - the installation of this type of pipe has its own characteristics . In addition, corrugated polypropylene pipes specially made for use in external networks are sometimes used. Such pipes have an increased level of strength, so they can be used if high loads are expected. For example, if the pipeline is installed at great depth or there will be a roadway above it. So, how to replace a sewer pipe made of PVC?
As a rule, such pipes are mounted in a socket with a rubber cuff installed. For greater sealing, it is worth using silicone grease. In addition, a chemical “cold welding” method is used, in which a special glue is applied to the joined edges, in contrast to welding using the conventional pipe method. PVC pipes are not flexible, so different types of fittings must be used to install the pipeline.
This property allows the use of methods for pipeline calculations that were used for systems assembled from steel pipes. As can be seen from the above, installation of sewer pipes is an operation that does not require the use of special tools and the use of special professional skills. This work can easily be completed without the involvement of professional craftsmen, which will significantly reduce the construction budget. loading…
Modern materials for sewerage in private homes make this task very easy to solve. The tees for pipes that exist today, used for the installation of plastic sewerage, simplify as much as possible the task of implementing any design scheme for a drainage system in a private house of different floors. And the main thing is that the use of tees for plastic sewer pipes does not require the use of any complex tools or equipment. Use tees for plastic sewer pipes do not require the use of any complex tools or equipment. Types of tees for plastic sewer pipes In the arrangement of private sewerage, three types of connecting tees are used, which perform their specific functions. What are these varieties? PVC sewer tee at 90° or 87°.
This distributing part is used to connect vertical risers to horizontally oriented sections of the sewer network. PVC sewer tee at 45°. Such connecting elements can be used to fasten plastic pipes when forming any horizontal branches. PVC inspection. This type of connection is a coupling with an additional third hole, which is screwed on with a special cap.
The inspection is used so that it is possible to deal with blockages in one or another part of the sewer. Types of tees for the drain pipe. These three types of branches are quite enough for the comfortable arrangement of drainage in a private house. When creating a home sewerage system, it is very important to rely exclusively on this kind of distribution connections. Tees also differ in the diameter of the pipe connection. All types of parts mentioned have a standard set of diameters: 110, 160, 200, 250, 315 mm.
Connections with a diameter of 400 and 500 mm are also made to order, however, such large diameters are not used in the arrangement of private houses. In addition, tees at 45°, 87° and 90° can combine elements with different diameters, which is very convenient when pipes of different diameters are used in the sewerage system to form different sections of it. The design of the tees is very simple: the outlet part has the shape a regular pipe, and the two inlet parts are equipped with special socket couplings, thanks to which there is a very convenient and tight connection with the ends of the pipes entering them. In addition, these socket couplings are equipped with special rubber rings that seal the connection, making it completely suitable for long-term use. General rules for using tees for pipes Installation of sewerage using the tee connections in question is as simple as possible.
You just need to follow a few simple rules: For horizontal wiring, only 45-degree connecting parts are used. The use of perpendicular distributions is likely to lead to clogging. The coupling-socket ends should always be directed to a higher, starting point of the sewer network. That is, the socket is always the entrance to the connecting element, and the pipe end is the exit. You cannot remove the sealing rubber rings yourself or trim them.
If the end of the pipe does not fit freely into the socket of the appropriate diameter, you can lubricate the sealing rubber bands with a simple soap solution. It is advisable, and sometimes mandatory, to fasten the junctions of pipes with distributions to the walls with clamp holders-brackets. Inspections should be located in such places of the sewer network as far as there is free access. In a private home, such revision elements are usually not required. It will be enough to install them in 2-3 places, evenly distributed along the entire length of the drainage system. Thus, using very convenient and simple devices to ensure the sewer network branches planned in the project, you can solve installation problems very simply and without the use of any tools or equipment on arranging the drainage system of a private home. Share a useful article: Similar articles:
Everyone knows that no major renovation is complete without replacing utility lines. The arrangement of the sewer system is one of the most important aspects of this issue, so we must approach it with the utmost seriousness.
Without knowledge of how to properly connect plastic sewer pipes, their proper installation is not possible. Why is it so important to connect the pipes correctly and rationally? The place where the pipes are connected is the weakest point in the sewer system. It is there, if the joint is incorrect, that blockages and leaks occur, even to the point of rupture of the pipes themselves. Therefore, before starting the installation of plastic sewer pipes, let's look at how they can be connected, so that later we can forget about repairing this communication for a long time.
Today, technology provides us with a lot of ways to connect pipes. Your choice will depend on what results you want to achieve and what materials you have.
Return to content
Preparatory work
Before connecting sewer pipes, consider several stages of preparatory work.
1. You should start by purchasing the required amount of material and all sorts of related products. These can be connecting parts (various types of seals, adhesives or cleaning fluids) or personal protective equipment (gloves, heat-resistant mittens, etc.)
2. Determine the location of the future communication and prepare the area for work. Create a pipe placement plan or take specific measurements.
3.
Having everything you need, start cutting the existing material. In accordance with the placement plan and predetermined dimensions, mark your workpieces. To avoid wasting material, cut from larger sizes to smaller ones.
4.
Using the marks made, cut the pipe into pieces of the required length using a sharp joiner's saw.5. The cut areas should be carefully prepared for joining. Preparation involves removing burrs formed as a result of sawing, removing contamination from waste material, as well as degreasing with special solutions.6. Metal pipes are provided with internal or external threads, in accordance with the fittings. Now you can proceed directly to the connection.Return to contents
What tools and materials are required
Before connecting the toilet to the sewer, you need to select the necessary building materials and auxiliary tools. The type of fittings used to form connecting parts depends largely on the connection method, product model and desired location.
Basic tools needed for installation:
- silicone;
- corrugation for sewerage;
- hammer, marker, construction tape;
- hacksaw for metal or plastic elements;
- plastic bends and special corners;
- eccentric cuff;
- sealing collar;
- rubber adapters;
- parts required to dismantle the components of the previous connection to the riser and firmly fix the plumbing.
If previously cast iron pipes were used to connect to the sewer system, then most likely you will need professional equipment (a special hammer drill and a grinder).
However, in such a situation, it is advisable not to carry out the dismantling procedure yourself; it is advisable to contact specialists who have the necessary equipment.
Detachable connections for sewer pipes
Detachable connections are suitable for forming a communication system directly inside apartments.
This method does not require any chemical or thermal effects and is simply simple to perform. It is also called coupling. In addition, it allows you to quickly detect and eliminate system malfunctions, since the docking points are easily disassembled.
To connect two pipes, the technology provides special parts that ensure a reliable and tight fit.
There are two types of such connections: fitting and flange. The effectiveness of such connections is due to the presence of rubber seals. It should be noted that a flange connection is almost indispensable for connecting pipes of different materials with a large cross-section, and fittings for smaller ones, such as those that are optimal for residential premises.
Fittings for sewerage are divided into two types: compression and cast.
Different parts are used for different purposes.
1. The transition coupling is used to connect pipes with different diameters. 2.
A straight coupling is used to connect pipes of the same section. 3. Tees are needed for installing branches in the sewer system.
4. The crosspiece is designed for cross-joining the pipeline.
As well as many other varieties, such as plugs, saddles, flange adapters and so on.
Attention! To make it easier for the pipe to fit into the fitting, use silicone grease. Grease-based lubricants are not acceptable for use with rubber seals.
Types of connecting elements
If it is impossible to directly connect the toilet to the sewer due to the design features, auxiliary materials are used - connecting pipes. In most cases, the following types are used:
- corrugation;
- eccentric cuffs;
- corners and elbows made of plastic;
- pipes of various materials, but plastic is preferable.
Connecting the toilet to the sewer with corrugated pipes is used if the alignment of the pipes is not maintained. The advantage of this type is the ability to install the product at an arbitrary angle.
The disadvantages of using corrugations to connect the toilet to the sewer include the large minimum length. If the distance between the pipes is about 12 cm, it is better to opt for other connecting components.
Eccentric cuffs outwardly look like 2 bends with shifted centers. Before purchasing the part, it is recommended to measure the offset between the sewer line and the toilet flush.
This data will allow you to choose the most suitable cuff model in the store. The disadvantage of the eccentric part is its short length, which implies the possibility of installation only with a small distance between the nozzles (up to 12 cm).
Bends and corners are installed in cases where the corrugation cannot be used for some reason. Their advantage compared to corrugation is that the wall is smooth on the inside, which significantly reduces the risk of blockages.
The main disadvantage is rigidity, which leads to leakage even with a slight misalignment. Plastic products can be cut to fit, unlike cast iron.
In most cases, steel pipes are used when there is a risk of failure of the water seal mechanism (find out what a water seal for sewerage is, its operating principles, what types there are, etc.). If the throughput of the riser is insufficient, liquid from the siphon will be drawn into it.
As a result, the water seal does not work, and the stench from the sewer enters the room. In such a situation, a pipe product with an automatic valve is connected to the riser or pipe connected to the toilet. When draining, a special valve opens and air enters, which prevents the water seal from breaking.
However, to implement such a function it is not necessary to use steel pipes. There are also eccentrics and adapters that give the pipeline similar properties. To ensure reliable connection, it is recommended to use sealant when using any type of connecting elements.
For these purposes, it is advisable to purchase a special waterproof product intended for plumbing fixtures. By loosening the rubber sealing collar, the sealant will prevent leakage.
Corrugated connection
As a rule, installation of a toilet with direct and oblique outlet is carried out using corrugation. It has an affordable price, can be bent in any direction and used as a temporary connecting element. When purchasing, you should focus on the length from the sewer outlet to the toilet outlet; the corrugation should be a third larger than this value.
What is a toilet flush? This is a drain hole that connects the apartment’s plumbing to the sewer system. There are three varieties - horizontal, vertical and oblique drain outlet.
Brief algorithm of actions:
- Coat the joint with silicone and insert the corrugation with the seal into the hole in the pipeline. It is advisable not to move it until the silicone-based product has completely dried.
- Place the toilet and check its stability. If the product wobbles, it is necessary to level the floor or install special stands.
- Insert the corrugation into the toilet pipe; there is no need to lubricate the connection with anything.
- Pour in a few liters of liquid, wait 1 minute, then make sure there are no leaks. If the connection leaks, you need to disconnect the corrugation, check the correct location of the seals and carefully reinstall it.
- If there are no leaks, you can mark the mounting points of the plumbing fixture with a pencil or marker.
- Secure the product so that it does not swing.
- Connect to sewer.
- After 2 hours, carry out testing by performing several drains. Wait 5 minutes, if the pipe does not leak, you can begin installing the tank and other elements.
- Lubricate the joint with sealant from the outside to prevent future leaks.
If a small leak (a few drops) was detected during the last test, all liquid must be completely removed and the corrugation removed. Then apply silicone again to the elastic band of the product and install it on the toilet pipe.
Find out what you need to do if the toilet tank suddenly starts leaking: 9 reasons why it is leaking and video instructions for repair.
Adhesive connection
The adhesive connection is carried out by applying special glue to the cuts of both ends of polyvinyl chloride pipes. The basis of this glue is methylene chloride, the effectiveness of which is based on the dissolution of plastic and subsequent connection at the molecular level. This method is good because it does not require any special devices other than a standard set of tools.
Attention! The glue contains volatile substances, so the estimated time between applying the glue and splicing the parts should be quite short and not exceed one and a half minutes.
Welding connections of sewer pipes
A welding or thermal connection is used for pipes of the same cross-section and material. It is unacceptable to weld a metal-plastic pipe with a polyvinyl chloride pipe.
This type of joint guarantees a very strong connection and is recommended for installation of water and gas communications. However, butt welding is also suitable for sewer systems.
This method involves the use of a special heating element, specifically a welding machine with a heated disk. Smooth, grease-free ends are placed in clamps on both sides of the disc at the same time.
The temperature effect on the plastic leads to melting of the sections, after which the two workpieces are connected with pressure, forming a welded edge. The thickness of such an edge ranges from one to two millimeters. The resulting seam is subject to slow cooling, which can take from three to seven minutes.
After complete cooling, the pipe is ready for use. The socket method can also be used for welding. It differs from the end one in that in this case plastic fittings are used and welding occurs not outside, but inside the fastening unit. It should be noted that this method is not suitable for sewer installation. And finally, one more piece of advice.
Before starting work on laying and connecting plastic sewer pipes, do not forget to properly design the wiring. Connecting a washing machine or dishwasher, installing a sink, installing a bidel or toilet - in all of the above and other similar cases, you cannot do without creating additional water intake points. And for this it will be necessary to organize new working outlets from the main sewer pipe. There are several options for connecting to the system - below we suggest, with photos and videos, how to properly cut into a plastic sewer pipe in the three most common and reliable ways: using a tee, an adapter and a saddle.
Insert with tee
If a pipe that exactly matches the diameter of the main sewer pipe cuts into the drainage system, a standard tee can be used for connection.
For work you will need: a hacksaw, a file, a plastic tee with a plug, silicone sealant and a special compensating pipe - a piece of pipe with a variable diameter.
Tees for inserting into sewer pipes
Before you start inserting, you should determine the height of the tee as accurately as possible. The latter should be located at such a level that the pipe connected to it is at a slight slope - such a position will ensure effective drainage of sewage into the general system.
Advice. Use a tee with an angled pipe connection towards the drain - such a connection will reduce the risk of sewer blockages in the system.
After the preparatory work, you can proceed to the direct insertion into the sewer:
- Cut a piece of sewer pipe that exactly matches the length of the tee being connected. Using a file, process the inner surface of the pipeline to remove all burrs. Treat the outside of the pipeline with sealant. Place a compensating pipe on the first truncated sewer pipe - place it from bottom to top with the wide part. Mount on the second truncated pipe plastic tee. Treat the narrow part of the compensating pipe with sealant and press it tightly into the tee socket.
- Seal all joints between the pipes and the tee. Place a plug on the tee.
Tapping using an adapter
Often it is not possible to cut and disassemble a sewer pipe for one reason or another, but it is still necessary to organize new outlets.
What to do in this situation? The best option is to use an adapter. This device has the form of a cap with outlets for the connected pipe.
Important! When deciding to use an adapter, keep in mind that it is designed to connect only those pipes whose diameter is half the diameter of the main sewer pipeline.
To insert into the sewer using an adapter, you will need a file, a drill bit with a crown, an adapter sleeve, silicone sealant, clamps and fittings. The work is performed according to the following scheme:
- In the radius of the cutout for the adapter, clean and thoroughly dry the working surface of the pipeline. Using a core drill, drill a hole in the pipeline for the adapter. Prepare the fitting, treat it with sealant and secure it to the plastic pipe using clamps. There is no need to tighten the fitting all the way so as not to deform the plastic. Insert the adapter sleeve into the fitting pipe and connect the adapter to it, having previously lubricated it with silicone sealant. It is important that the connection between the cuff and the adapter is as tight as possible, otherwise leaks and malfunction of the sewer pipeline cannot be avoided.
Tapping using an adapter
If the sewer pipeline into which the new outlet is inserted is located horizontally, the adapter must be connected with a slope from the vertical of no more than 45 degrees.
Methods for connecting a toilet to a sewer system
How exactly the toilet will be connected to the sewer riser depends on the design of the system. It is important to note that you should select the shape of the toilet basing on the collector system.
There are three main types:
- vertical - similar plumbing models are in most cases found in old buildings, where the socket of the sewer pipes in the floor goes into a riser located under the ceiling of the room below. Today, cottage owners also choose such a connection, because... thanks to this, you can completely hide the sewer pipeline;
- direct – also allows you to remove communications from sight. The advantage of this approach is the possibility of installing the toilet at a short distance from the wall;
- an oblique connection option is used when it is important to ensure operation even in the event of damage or loss of tightness. Sometimes the owners of the premises decide to connect the toilet outlet directly to the riser, however, this increases the risk of leakage, so it is undesirable to implement this approach; it is better to use a special adapter.
Insert with saddle
The easiest and fastest way to cut into a plastic sewer pipe is to use a saddle. This is a variation of a compression fitting, the design of which can be presented either in the form of a clamp or in the form of an overlay.
In the first case, we are dealing with a crimping piece that tightens the sewer pipe on both sides, and in the second, we are dealing with a small overlay that is welded onto the pipeline. As practice shows, a crimp clamp is more reliable and practical, so it is better to use it for tapping. Such a saddle can either be selected for a specific diameter of the sewer pipe, or be universal - providing the ability to adjust the scope of the clamp depending on the size of the pipeline.
The saddle can be mounted on a pipe in two ways - by welding or tightening. But in both cases, the installation scheme is quite simple to implement:
- Determine the insertion location and drill a hole in the pipe that corresponds to the diameter of the outlet of the saddle being used. Alternately place the upper and lower halves of the saddle onto the sewer pipe. Make sure that the rubber gasket of the upper half fits tightly onto the hole in the pipe.
- Connect the two halves: weld them or tighten them on the sides with special fasteners that come with the device. Treat all connections with silicone sealant.
Thus, we have three ways to cut into a sewer plastic pipe: a tee, an adapter and a saddle. Whatever option you choose for connecting to the system, do not forget that only competently performed work will make it possible to install a new outlet without hassle - do not neglect the instructions provided, and then you are guaranteed a high-quality connection to the sewer.
How to dismantle the riser
Before replacing the tee in the sewer riser, you will need to partially disassemble the vertical part of the system. Considering the pipe connection technology, two disassembly methods can be used:
- sequential dismantling of the entire riser, starting from the top point;
- partial dismantling of a riser section in one apartment.
The first option can be applied if the work is carried out on the penultimate or top floor of the building. The second method is most often used - partial disassembly.
Action plan:
- shut off the water in the apartment;
- temporarily dismantle the toilet;
- disconnect the horizontal part of the system;
- the riser is cut at approximately 1-1.2 m above floor level;
- remove the remaining part of the straight pipe;
- remove the defective element.
It's easy to cut a plastic pipe. If the riser is cast iron, cutting is performed according to a certain pattern:
- make two cuts one above the other;
- the riser is securely suspended from the top to ensure the immobility of the assembly located above;
- A chisel or chisel is inserted into the upper cut, and a part of the pipe is broken out with gentle blows;
- after this, the remaining part is cut and the defective elements are removed.
Replacing a cast iron sewer tee is a procedure that requires accuracy and thoroughness. It is quite difficult to remove the problematic element. Especially if the riser has worked for many years before and all connections are tightly cemented. The parts must be removed carefully, without shaking them too much in their sockets. If the safety of the components to be replaced is not important, then the socket of the lower part of the riser must be kept in normal condition. This is important, since the lower part will have to be replaced from the apartment located on the floor below. This will create unnecessary complications, so such danger should be avoided. Sometimes a cross is used instead of a tee. It is usually used in apartments of old construction or in private houses. Replacing a crosspiece in a sewer riser is practically no different, only you will have to disconnect the horizontal part of the system from both sides.