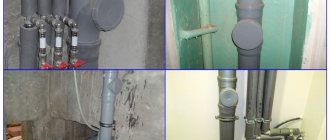
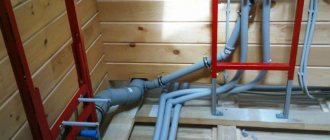
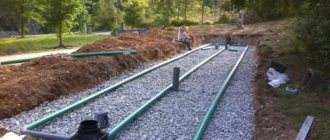
A sewer system is installed in every apartment and private house. The design includes various elements. The most important thing in the system is the sewer riser. For the installation of the riser, pipes made of high-quality materials are used so that they last a long time and do not require frequent replacement, because during the repair of the riser it is necessary to turn off the power to all residents in the apartment building.
Sometimes you still have to replace the riser pipes. To do this, you need to know the parts of the structure, as well as the instructions for carrying out the work.
What are water supply risers in an apartment building?
The vertical water supply system that delivers water from the main water supply of the house to the apartments (apartment inlet) is called water supply risers.
The risers are mounted in pairs and parallel. By paired gasket we mean the installation of hot and cold water supply (DHW and cold water supply). Parallel installation means that hot water and cold water are laid along parallel routes, usually in the bathroom. The distance between the DHW and cold water risers is from 250 mm.
For example, in the photo we see risers made of galvanized steel pipe with a welded connection.
risers made of galvanized steel pipe
Components of a sewer riser
Attention! The purpose of the sewer riser is to divert wastewater from the toilet into a cesspool or into a central system.
With the help of a riser, wastewater is removed from the house or apartment. The risers of a private house and an apartment building have the same design. It consists of the following elements:
1.from the main vertical pipe. Until recently, only cast iron pipes could be used. Today, reliable plastic pipes are produced for these purposes. Rolled pipes are light in weight, but at the same time durable. They are easy to install yourself.
2. crosspieces on which the toilet will be mounted later. It is installed very first from the bottom of the entire system. Below this level, it is prohibited to install other sewer pipes, so as not to break the water seals when flushing the toilet.
3. compensator, which is needed to make the transition from one type of pipe rolling to another. In old apartments there are risers made of cast iron; they are replaced using plastic pipes. To create a reliable, high-quality interface between the elements, a compensator is used.
4.revisions, in the form of a small section on the pipe, on which a hatch of optimal diameter is made. The design simply unscrews when a blockage forms in the pipe. During self-installation, people forget to make an inspection, and when there is a blockage, they are forced to break the entire riser.
5. a tee, with the help of which the number of outputs for connecting plumbing fixtures increases. The cross-section of the tee should be over 10 centimeters.
When installing a riser, you should correctly calculate its diameter. If there is a toilet in the house, the diameter of the outlet hole should be more than ten centimeters. It is permissible to use a pipe with a cross-section of at least five centimeters.
If the riser is installed in a country house, then a fan riser is made in the form of a pipe, which extends from the main sewer riser. It is designed to remove harmful odors from the room when the water seal is broken. The pipe for this purpose is led out through the roof. Even cleaning the sewer pipes will not get rid of the odors.
Material for water pipes
Since water supply risers belong to the water supply system of an apartment building, any available water pipes are suitable for riser pipes. Namely,
- metal-polymer pipes (SP 40-103-98);
- galvanized steel water and gas pipes (GOST 3262-62),
- seamless steel cold/heat-drawn, cold/warm-rolled pipes (GOST 8733-66) with protective coatings against corrosion;
Read: What is a water distribution comb
And also, according to SNIP 2.04.01-85:
- plastic pipes made of polyethylene, polypropylene, polyvinyl chloride, polybutylene;
- fiberglass pipe
- pipes made of other plastics.
In addition, pipes (according to SNIP 2.04.01-85) from:
- Copper, bronze and brass.
As you can see, according to the standards, water supply risers in an apartment building can be installed from any water pipes.
The same statement applies to replacing riser pipes (risers) in a single apartment.
Who is responsible for what
Repair and replacement of water supply risers must be carried out by a service organization.
The riser belongs to the area of responsibility of the organization that services the house. All activities carried out with it - repairs, replacement, etc. - are carried out at the expense of the rent paid monthly by apartment owners. Sunbeds are the property of the apartment owners, so all repair and replacement costs fall on their shoulders. This also applies to the locking device.
If the water supply riser requires repair, and the management organization is delaying it, the residents of the house can carry it out themselves. This event must be agreed upon with the management organization. The contract specifies the timing of the work, because during this period the water supply to several apartments located above each other will be turned off.
To replace the riser, it is necessary to agree on the type of pipe so that unforeseen situations do not occur in the future. The pipe material is usually indicated in the building passport.
Features of installation of risers
In practice, and most likely according to regulations, there are the following rules for installing water pipe risers:
- The hot water pipe is located to the right of the hot water riser;
- When laying parallel along the horizon, the cold water pipe is mounted under the hot water pipe to avoid the formation of water drops due to condensation;
- On all risers made of metal pipes, in front of the shut-off valves, both at the mains and at the collapsible water supply of the apartment, drains must be installed;
- HVS risers are attached to the walls with hooks. DHW risers are attached to the walls with clamps;
- In an apartment building, risers are mounted on half the floor.
Read: Three methods to measure water pressure in an apartment
How to change it yourself
Partial or complete replacement of a cast iron riser is possible only with a plastic analogue, this is due to the fact that during installation the riser column is installed from the bottom up with pipes on top of each other in the nozzles, and to replace one of the fragments, a special compensation coupling is required, which allows inserting less than long pipe. Such products are difficult to find in shaped elements for the installation of cast iron, but they are produced in a wide range in the PVC pipe product line.
Tools and components
Before replacing the sewer riser in an apartment, purchase the following components:
- A plastic pipe along the height of the riser with a standard outer diameter of 110 mm.
- A typical cross with two 50 mm outlets for connecting drain pipes in the bathroom and kitchen sink and with one outlet for connecting a toilet. If the apartment has only one common outlet for transporting gray waste, use the appropriate tee.
- Rubber cuffs (in the absence of adapters from cast iron to plastic), one will be needed when installing a cross (tee) into the neck of the lower cast iron pipe, the other is put on the outside on the pipe end coming out from above.
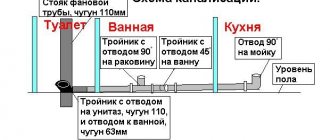
Rice. 6 Single-pipe sewerage distribution inside the apartment
- An expansion coupling, which is a piece of pipe with an elongated expanded pipe with an internal diameter of 110 mm - thanks to this, the inserted pipe element can be moved within it over a certain distance.
- A transitional plastic coupling with a built-in cuff, which, if necessary, is installed in the socket of the lower sewer pipe and serves to adjust the cross to the required height if it is impossible to directly connect it with a cast iron saddle recessed in the floor.
- A transitional PVC coupling from plastic to cast iron with a rubber cuff inside the socket for the upper connection, its lower end is inserted into an expanded pipe with a rubber ring of a vertical plastic pipe.
- Metal clamps with rubber gaskets with an internal diameter of 110 mm, designed for fastening plastic riser pipes to the wall.
Rice.
7 Tools From plumbing and construction tools you will need to carry out the work:
- Angle grinder (grinder) with a metal disc for cutting cast iron and plastic pipes.
- A hammer drill for drilling holes in the wall, removing screeds and cement caulking in cast iron joints.
- Chisel, chisel, heavy hammer or sledgehammer for caulking joints and breaking cast iron pipes.
- Pencil, tape measure or ruler.
- A blowtorch for melting caulking materials - sulfur, lead, epoxy resin, is used in case of incomplete replacement of the riser, if it is necessary to leave the cross or part of the pipe intact.
- Protective clothing, gloves, glasses, respirator.
Rice. 8 Dismantling a wall riser - basic operations
Dismantling and caulking
When joining cast iron riser pipes, a pipe connection was previously used, in which a variety of materials were used to seal the joints instead of a rubber seal. Workers carried out the joining using various methods, depending on the technology adopted in the organizations: poured molten sulfur or lead into the cracks, laid fabric and coated the outside with thick cement, poured epoxy resin, pushed in a cord or rope soaked in bitumen mastic.
The main task of dismantling is to destroy the cast iron pipe connection using several methods. Depending on the sealing material, it is carried out in the following sequence:
- Before starting work, be sure to visit all neighbors on the floors above and ask them not to use the kitchen sink, bathtub, and toilet for some time.
- The toilet is removed and put away; to do this, disconnect the corrugation from the riser outlet, having first drained the water from the tank and shutting off its flow with the tap below, unscrew the toilet mounting screws and the supply hose, and take the toilet outside the sanitary unit.
Tip: After removing the toilet, be sure to lean the tank against the wall - otherwise, under the weight of the flush tank, it will turn over and most likely break.
Rice. 9 Methods for caulking cast iron joints
- Using a puncher, knock down the screed at the bottom, freeing and cleaning the junction of the cross with the pipe; if the solution from above interferes with dismantling and covers the outer shell of the exiting pipe, it is also knocked out.
- Use a grinder to cut the vertical pipe of the riser in the transverse direction at any convenient distance from the floor (about 0.5 m, so that you can place a bucket under the pipe); if it is impossible to get close to the pipe shell near the wall with a machine, use a practically used metal disc of small diameter. It is not necessary to make a through cut - if the pipe is not needed, it is subsequently broken with a heavy sledgehammer or hammer.
- Insert the chisel into the seam on the pipe obtained from the grinder disk and hit it forcefully with a hammer, trying to break the body; after it bursts, remove the fragments to the side. To avoid unexpected water flow from above, despite the warning, place a bucket under the cut pipe.
- They try to pull the cross out of the pipe of the lower pipe (you should be careful here; if the riser is broken, the expansion pipe may be damaged); if this presents difficulties, they use various methods of disconnection.
Note: When cement-sand sealing, the mortar is knocked out with a hammer and chisel, the frozen sulfur, lead, soaked rope and epoxy resin are heated and melted with a blowtorch, after which the crosspiece is pulled up.
- After dismantling the crosspiece, clean the lower pipe from dirt and debris to avoid blockages and begin dismantling the upper section of the pipe. It is pulled down, if resistance is encountered, the outer pipe is heated with a blowtorch, the shell can be carefully broken with a hammer, being careful not to damage the end of the riser coming out from the ceiling.
- After dismantling work, a fragment of the shell of the upper cast-iron pipe should remain on the ceiling, and in the floor there should be an expanding pipe of the lower pipe with the outer and inner surfaces, respectively, cleared of dirt.
If none of the above methods fails to remove the lower tee or upper pipe, they are cut with a grinder and adapters or couplings of a suitable outer or inner diameter are selected.
Rice. 10 Assembly diagram with examples
Installation of a new riser
After preparing the end sections of the inlet and outlet cast iron pipes, they begin to install the plastic riser, in which case it is necessary to join the cast iron and plastic pipes with internal bore diameters of 100 mm. The outer diameter of a standard cast iron pipe is 118 mm, the internal size of its cone-shaped socket is 123 - 127 mm. The plastic sewer PVC pipe has an outer size of 110 mm, and the inner diameters of the shell are 100 mm, and the socket is 110.4 mm.
It follows from this that to connect the PVC pipe at the top you will need an adapter from plastic to cast iron with outer and inner diameters of 110x120 mm, respectively, and a built-in rubber cuff. If the tee is being replaced from below in a sewer riser, the adapter from plastic to cast iron should have dimensions of 110x120 mm (inner and outer diameter) and an outer cuff, which is inserted into the cast iron socket (Fig. 10).
Installation of the riser is carried out in the following sequence:
- Place a transition coupling from plastic to cast iron with an internal rubber seal on a section of cast iron pipe protruding from the ceiling.
- Install a cross with a rubber cuff into the saddle of the lower cast iron riser; if necessary, install an adapter from plastic to cast iron with a similar seal.
- Place a vertical riser PVC pipe into the gap between the upper and lower sections, cut it 30 - 50 mm shorter, and put an expansion sleeve on its lower end until it stops.
- Place the assembled system vertically in the riser; if the length is too long, the pipe is further trimmed. After the ends of the structure coincide in height with the inlet and outlet openings, the compensation pipe is lowered down the pipe, immersing it in the tee at a distance of 30 - 50 mm.
- The riser is secured with rubber clamps to the mating part of the clamps with screws screwed into the wall in advance, the distance between the fasteners is about 400 mm.
Rice. 11 Installation of the riser
approximate price
The average cost of replacing 1 riser in central Russia ranges from 2,500 rubles for plastic pipes without passing through the ceiling , to 5,000 rubles with passing through the ceiling.
Replacing with any metal ones will cost 2,000 - 3,000 rubles more. In Moscow the price is 1.5 - 2 times higher. The approximate cost of work in a simplified form is shown in the table:
| Name of works | Cost, rub. |
| Dismantling the riser | 500 — 1000 |
| Riser installation | 1000 — 2500 |
| Passage of 1st floor | 500 — 800 |
| Passage of the 2nd floor | 500 — 800 |
| Cost of materials | 1000 — 1500 |
| Total: | 3500 — 6600 |
| Additional costs are possible for disconnecting, connecting, crimping the riser, sealing the water meter | At UK prices |
When discussing the final price, you should focus on market prices in the region, and not on the estimate provided by the contractor. The estimate can easily justify a cost that is many times higher than current prices.
What does a sewer riser consist of?
If you ask an ordinary plumber about what elements a riser consists of, he will answer something like this:
“At the very bottom there is a cross that goes under the toilet, then a compensator, a pipe, an inspection, then everything ends with a pipe again. In addition, between the compensator and the cross there is a 50x100 mm tee for connection to the sink. This is a standard scheme."
At first glance, everything is extremely vague and incomprehensible. But the images of the sewer riser below clearly demonstrate all the elements of this design.
Structure of the sewer riser
What documents are issued to the property owner?
Upon completion of the installation of the MKD water riser pipe, a “Certificate of Work Completed” must be drawn up, which will state the following:
- date of drawing up the contract;
- serial number of the agreement according to which the act is issued;
- the volume of work performed and all actions taken;
- cost of work;
- name of the person performing the repair work;
- signatures of the contractor and the customer.
This document is made in 2 copies, one of which is given to the contractor, and the second remains with the customer. The contractor is the organization that replaces the damaged element. The customer can be the management company (in which case one copy remains with them and is not given to the owner of the apartment) or directly the owner of the property.
Even if the agreement was drawn up by a representative of the management company and the repair company, the apartment owner should make himself a copy of this act.
Important Tips
When carrying out operations to replace the riser with your own hands or with the help of plumbers, it is useful to adhere to the following recommendations:
- The main reason for replacing a cast iron sewer riser is frequent blockages associated with low channel permeability, or significant damage in the form of cracks and falling out fragments . All other malfunctions in the form of leaks, fistulas can be easily eliminated with your own hands using sealing materials: cold welding, epoxy resin and others. Large damaged areas can be covered with applied rubber cuffs secured with clamps - due to the low pressure in the sewer line, high strength patches are not required to repair any damage.
- Many novice and experienced plumbers carry out meaningless manipulations with sealant, covering cuffs and rubber seals in pipes with it. The sealant is intended for sealing cracks and seams between hard surfaces and is not an adhesive; when deformed, it will not adhere to elastic rubber and will even cause harm, preventing the rubber seal from fitting tightly to the pipe casings.
- When installing brittle plastic into a vertical gap in a cast-iron sewer line, there is a high probability of it being compressed by the upper column; to eliminate the danger, measures should be taken to additionally secure the upper pipe. Its protruding end is attached to the wall with additional clamps; if possible, you can coat the shell with concrete contact, special glue, and wall up the free area in the wall using materials with good adhesion to cast iron or its new coating.
- In order not to waste a lot of time when dismantling the old and installing a new riser, it is better to caulk it in advance without removing the pipes. Using a chisel or a sharp screwdriver, knock out the most common cement putty at the top and bottom; if a leak suddenly appears, it is temporarily sealed with plasticine.
Rice.
12 Price list for the services of one of the companies Replacing a cast-iron riser pipe with a plastic one can be done with your own hands; the task is greatly simplified if the apartment is located on the upper floors and the caulking is done poorly using fragile materials. To install a polymer riser, you will need a pair of transition couplings from cast iron to plastic, a cross or tee, a piece of pipe of suitable length, in addition to the standard construction tool in the form of an angle grinder and a hammer drill, you may need a blowtorch.
Dismantling diagram
Dismantling begins by retreating 10 cm from the upper end of the pipe, and then making an incision. Stepping down 1 m from it, make another circular one, performing it in the form of a spiral. This is a precautionary measure so that the grinder disc will not jam. The worker will not be injured if the rebound occurs.
After this, take a hammer and chisel. The cut is tapped until the pipe bursts. If you do everything carefully, it will split along the cut line. If it is very rusty, it can be chipped off in parts.
When installing cast iron risers in old buildings, a caulking method was used or the pipe was fixed in a socket. Finding out how the pipe is held in place is easy. You need to hit it several times with a rubber sledgehammer, and then swing the riser.
An example of a sewerage diagram.
If you use carbolic acid, it will begin to fall out of the socket. If sulfur was used as fastening, blows with a sledgehammer will not budge it. In this case, you should take a blowtorch and start heating the pipe at the junction.
As a result of heating, the sulfur mass melts. The pipe is swung, held with pliers or an adjustable wrench, and then removed. The bell is cleaned of carbolic acid or traces of sulfur.
Sulfur fumes are poisonous, so you cannot work without a gas mask. After dismantling is completed, the room must be ventilated.
Part of the pipeline is the tee socket. It is required to connect the sewer pipe running from the kitchen to the toilet with a riser. It is most convenient to install tees made of plastic. To prevent leaks, all joints are coated with sealant.
Who should perform
Most users are sure that replacing risers is the responsibility of the apartment owner. However, it is not. Since risers are common property, replacement must be carried out by employees of management companies.
Moreover, independent actions can be regarded as an unauthorized change in the state of common property. This may result in fines, orders and other sanctions.
However, such consequences can only exist in theory.
In practice, replacing the riser is only welcome if it is performed technically competently and without violations. If the pipe diameter is chosen correctly, shut-off valves or metering devices are not installed, and the transfer of water to users on the upper floors is not difficult, the initiative of the apartment owner is viewed quite favorably.
Problems may arise if the water supply is disrupted or access to resources for other subscribers is stopped.
Therefore, if the owner of an apartment does not turn to the employees of the management company, but chooses a private team of plumbers to replace the riser and other water supply elements (located in the apartment, this is important), then he usually does not encounter any obstacles.
If the house does not belong to the management company, the replacement of risers is organized and paid for by the owners. This could be the HOA, or the apartment owner himself (naturally, he only pays for work within his own floor).
Some users, having the necessary skills and equipment, change the pipes themselves. This allows you to save money and choose a time that is convenient for you. However, only a small number of apartment owners have the skills and experience. Most residents prefer to entrust work to specialists from management companies or specialized organizations.
How to indent a sewer riser
If you need to make an indent, that is, move the riser horizontally, then it is recommended to follow the following recommendations.
- The width of the indentation should not exceed one meter, otherwise in the inclined area the movement of sewage will accelerate and create noise.
- Sometimes they resort to creating an indentation in order to slow down the movement of wastewater and thereby reduce the noise level. In this case, you will need bends at an angle of 45°, as well as a vertical pipe, the length of which must be more than two diameters of the riser.
- None of the elbows used to create a setback should exceed 45° in slope.
Using the diagram below, you can become more familiar with the features of the indentation in the sewer riser.
Indentation in the sewer riser
When should you change?
Common reasons, other than major repairs, are:
- water leaks through fistulas as a result of severe corrosion of the pipe;
- the welding seam of the pipe has broken;
- there is no pressure, the pipes are clogged with deposits and rust;
- The apartment is being renovated and the pipes are being changed at the same time, so as not to return to this issue later.
Frequently asked questions
In the course of preparing and organizing the replacement of a riser, a lot of questions arise that require correct and timely answers. Some unclear points can be clarified in advance, without waiting for them to arise and stop work.
Which pipes are best to choose for replacement?
In this matter, it is necessary to take into account the operating water pressure, operating conditions of the networks and other factors. It is recommended to consult with the management company’s employees in advance and find out which pipes they work with most often. The quality of the connections plays a dominant role here, and the availability of experience determines the level of performance of the work.
The neighbors below are going to replace the riser. Should I join them to carry out replacements in two apartments at the same time?
This is the best option, but you will have to coordinate the issue with the residents of the upper apartments, with the employees of the management company (or plumbers from third-party organizations), and purchase pipes.
If there is no information about when the pipes were replaced, is it worth organizing it yourself and not waiting for problems to arise?
It is necessary to visually assess the state of the system. You can invite management company employees and conduct an examination of the riser. They will be able to determine the degree of readiness of the pipe for possible loads and give the necessary recommendations.
What problems might arise if the replacement is carried out by an outsider working unofficially?
It all depends on the qualifications of the worker. The problem may be poor quality of work and lack of guarantees. If an experienced specialist is invited, you should not expect problems.
Is it possible to replace part of the riser with polypropylene pipes if the rest of the riser is steel?
Yes, you can. Threaded connections are used for this. However, it is necessary to find out in advance what pressure occurs in the system, whether drops and other emergency situations are possible. It is especially important to ensure normal operation for a polypropylene hot water riser.
Basic Rules
As a rule, there are many different pipes in the bathroom, ranging from water pipes to sewer pipes. Extra, not very aesthetic details spoil the interior of the room, distracting attention, so most homeowners try to hide them during the renovation process.
If you are determined to close risers or other utilities in the bathroom, then you must follow the following rules:
- To close risers and sewer pipes laid in an open way, heavy materials and solid walls cannot be used. If communications are tightly walled up, then it will be impossible to get to them during an accident. And if you use heavy materials for embedding, then dismantling them in an emergency will take too much time.
- Water pipes and other communications must not be covered with solid structures. It is important to provide inspection windows or doors that do not spoil the appearance of the room, but at the same time provide free access to the pipes for maintenance and repair.
- The material covering the risers must be highly resistant to moisture and corrosion. Firstly, there is high humidity in the bathroom, which is why non-moisture-resistant material will quickly lose its appearance. Secondly, due to temperature changes, condensation often settles on the surface of the pipes, which also has a negative effect on the lining material from the inside.
- Before sealing the wiring with plastic panels, it is necessary to replace the pipes with new ones to prevent leaks in the future. In addition, you should check the waterproofing of the joints.
Difficulties with the law when doing independent repair work
There is no ban on changing the riser yourself, as such, but there are nuances. Residents are allowed to repair common property on their own using their own money, but before starting work, they will have to inform the management company that the owner wants to deal with his riser on his own, and also obtain permission from the neighbors through whose apartments communications pass. It is difficult to get permission from the management company, because the owner is often not a specialist.
If you decide to change the riser without the knowledge of the management company and other neighbors, then such an operation will be considered illegal, and the owner who carried out the secret replacement risks receiving a subpoena from his management company.
Check out other materials on our website about water supply and the problems that arise with it. Read about what standards of water quality and pressure, under what circumstances the resource can be turned off, how to pay for water according to standards and meters, what standards are without meters, as well as about the recalculation procedure and what to do if the water pressure decreases weak.
.
Options that do not require installation
It often happens that the appearance of a bathroom with openly passing risers bothers homeowners, but there is no way to do anything drastic. In this case, you can use ideas for masking communications using improvised means:
- You can hide pipes from prying eyes using roller shutters. They perfectly disguise unsightly pipes, meters and other devices, but at the same time provide access to them at any time in case of breakdown.
Roller shutters - Curtains will help disguise communications . This may not be the most aesthetic solution, but it will help hide rusty pipes for the first time.
- In order not to waste space in the box for risers, you can arrange a closet . Additional storage space will never be superfluous in the bathroom.
Executor
- Where to go if there is a problem with the water supply system?
For minor leaks and other malfunctions that are not related to the threat of flooding of your and neighboring apartments, contact the maintenance service of the service organization. If the apartment is flooded with water (even during the working hours of the maintenance department), it makes sense to call the emergency service (the same service organization or the city one).
A nuance: in the vast majority of cases, the emergency alarm does not eliminate the malfunction, but shuts off the water to a riser or a group of risers to eliminate the leak. Restoration of the pipeline will be carried out by the maintenance service during working hours.
The emergency service turns off the water and transfers the request to current repairs.
- Is it possible to contact a third-party commercial organization to troubleshoot water supply problems?
Of course.
But there are a couple of nuances here:
- In this case, no one will reimburse you for the cost of the work, even if we are talking about the common property of the residents of an apartment building;
- At the same time, you accept full responsibility for the quality of the work performed. For example, if after replacing a section of a riser using materials other than those provided for in the building design, it bursts and water floods the neighbors below, you may well be billed for repairs to the premises and damaged household appliances.
Consequences of apartment flooding
Connection to horizontal collector
At the point of connection to the horizontal collector, the sewage drains sharply change direction, as a result of which the pressure on the walls of the structure increases and the noise output increases. The level of noise and pressure depends only on how this transition was designed. There are three standard execution schemes.
Methods for connecting to a horizontal collector
- In method A, the outlet is installed at a right angle (90°), so resorting to such a scheme is not recommended - the noise level and pressure in this case reach a maximum. Despite its simplicity, this method of execution is associated with the risk of clogging the sewer.
- Method B uses two taps installed in series. This makes it possible to minimize noise and pressure in the system. Often this scheme is resorted to if there is not enough space for method B.
- Method B also uses two bends, only between them there is another pipe, the length of which should be equal to two diameters of the riser (or more). This is an optimal installation scheme, in which noise output and pressure are reduced by a third compared to option A, and the risk of system clogging is minimized.
Note! The choice of one method or another does not depend on the location of the collector, although if you seal the transition with concrete mortar, the noise level will decrease by 75 percent.
How to organize the replacement procedure?
Standard procedure:
- appeal to the Criminal Code or Housing Department. You will have to write an application and indicate exactly what work needs to be done;
- organize the presence of neighbors in the apartments below and above (there may be different options here) on the appointed day;
- notify all residents of the entrance about the upcoming work (the water supply will be cut off, it is necessary to prepare a supply of water for household and hygienic needs);
- purchase pipes from the required material.
It must be borne in mind that the replacement and repair of common property is the responsibility of the management company, and there is no need to pay for it. However, most companies provide a minimum set of free services.
If you need to install copper or stainless steel tubes, you will have to pay extra. It is necessary to immediately find out whether the management specialists work with these materials. If not, you will have to contact independent companies. Here you need to choose official organizations that provide a guarantee for their work. Otherwise, you can lose money and get into a lot of difficulties.
In any case, the employees of the management company (or housing department) will shut off the water. If the replacement is performed by representatives of third-party companies, you will have to pay for this procedure.
A problem may be allowing neighbors into the apartment. They are not always at home, or expensive repairs have been made that do not allow connecting the pipe above the ceiling. Here you will have to make a connection under (or above) the ceiling, which is somewhat worse - a section of the old pipe remains. Over time, it can cause leaks or more serious accidents.


