Acrylic bathtubs are preferred by many today for their versatility, aesthetic appearance, affordable cost, light weight and many other advantages. They appeared on the Russian market at the end of the last century and today have firmly occupied their niche on it, acquiring an army of thousands of admirers. Acrylic is reliable and environmentally friendly, maintains water temperature for a long time, bathtubs made from it are easy to clean, varied in style, shape and color. Even for a cramped bathroom, it is not difficult to choose an acrylic bathtub that is convenient and comfortable for bathing and other hygiene procedures.
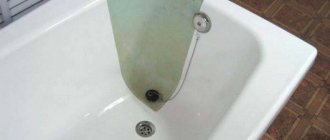
But the bathtub, like any plumbing fixture, is used intensively every day, and no matter how carefully we treat it, it does not pass without a trace. Gradually, the appearance of an acrylic bathtub deteriorates and loses its presentability. Spots and chips appear on its surface, the coating darkens, cracks form, which increase over time, and with them the risks of creating a favorable environment for the proliferation of pathogenic microorganisms that are dangerous to human health grow.
What can be done in such a situation to restore the acrylic bathtub to its former attractiveness and functionality? Here are three possible solutions to the problem:
- dismantle the old bathtub and buy a new one;
- invite specialists to eliminate defects;
- purchase a suitable repair kit and carry out the repair yourself.
Replacing plumbing fixtures entails large expenses. You need to purchase and deliver a bathtub, dismantle old equipment, and install new equipment. All this will cost you a pretty penny, and will also require time spent on all these actions. The second option - inviting professional repairmen - will require less expenses (but still considerable), and there is no guarantee that you will not run into an unscrupulous or insufficiently qualified and experienced repairman.
If you are not satisfied with the options for solving the problem by replacing the bathtub or professionally restoring the coating, then you can restore worn-out acrylic plumbing fixtures yourself, using repair kits offered on the market.
Operation of acrylic models
Acrylic is a polymer material that has high performance characteristics. It is durable, wear-resistant, lightweight. This material has low thermal conductivity and a beautiful glossy shine. Acrylic models are produced in rectangular, oval, round, corner shapes, the width of which is 70-170 cm, and the length is 120-190 cm. Operation requires compliance with special conditions, if ignored, repairs may be required:
- Acrylic melts at a temperature of 150 degrees; pouring boiling water is not allowed to avoid deformation.
- Manufacturers do not recommend placing basins in acrylic models to prevent the formation of chips and cracks.
- To prevent the bathtub from cracking, you should avoid heavy objects falling into it and other mechanical damage.
- Damage to the acrylic surface is often caused by the use of aggressive, potent household chemicals that corrode this material.
Important! As a result of improper use, scratches, cracks or chips appear on the surface of the walls and bottom of the acrylic bathtub. These defects, as a rule, only spoil the appearance of the product, but do not affect the functionality of the washing container.
Additional Information
The method for eliminating defects on the surface of acrylic bathtubs is selected taking into account the nature of the damage. To remove small scratches, no special compounds are required: just thoroughly wipe the problem area with a piece of felt. If the depth of the defect exceeds 0.5 mm, then they are eliminated using special pastes. The latter must be matched to the color of the bowl.
Scratches appear if users do not follow the instructions for using bathtubs. To avoid the formation of defects on the acrylic surface, a number of requirements must be met:
- Do not use aggressive detergents or hard bristled brushes for cleaning. It is also not recommended to use substances that contain chlorine and alkaline compounds.
- Do not use powders with large particles. Upon contact with them, fairly large defects appear that require liquid acrylic to eliminate.
- Treating acrylic with acetone leads to darkening of the surface of the bowl over time. Similar effects occur due to ammonia
- Regularly clean the bowl of dirt using liquid soap, lemon juice, and vinegar solution.
- If the tap water is too hard, the bathtub must be wiped dry after each bath.
If the bathtub is used for washing animals, you must first place a mat or other material on its bottom that protects the acrylic from claws.
Causes of defects
Despite its many advantages, the polymer has one serious drawback - a low level of resistance to mechanical and chemical stress. For example, if acrylic surfaces are washed with an acid-alkaline agent for a long time, the surface will become deformed.
Another negative factor is contact with abrasives. Long-term use of a hard brush during cleaning is enough to cause defects of varying severity.
How to remove a scratch is the most frequently asked question. If irreparable damage has been caused, it is better to seek the help of specialists. Minor damage can be easily removed with your own hands at home.
Repair features
The most common types of damage to acrylic products are:
- mechanical, appearing when carelessly hitting the surface or burning it. A crack may occur as a result of heavy load on it;
- chemical, which arise due to the use of aggressive cleaning agents that leave streaks and stains.
If the defects are not serious, then it is simply repaired and not replaced with a new one. Before updating the product, you need to choose the right shade, material, coating, otherwise the work will have to be done twice due to color mismatch.
Restore shine
Long-term use of an acrylic bathtub leads to gradual abrasion of its surface. Because of this, the bowl loses its original shine and becomes dull. In such circumstances, a wax composition can be used to eliminate the defect.
In addition to this method, special pencils are used to restore shine and eliminate minor scratches in the bathroom. Their composition includes polishing particles, which soften it upon contact with acrylic. This effect causes the polymer to spread, fill the problem area and eliminate the defect.
It is recommended to use the acrylic bathtub pencil immediately after scratches occur. It does not wash off with water.
Surface preparation
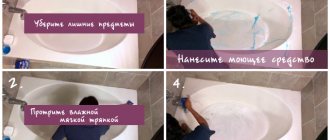
First of all, you need to thoroughly wash the surface. To do this, you can use brushes and special products, including disinfectants. Particular attention should be paid to scratches, since dirt and bacteria most often accumulate in them. Next you need to do the following:
- rinse the surface with clean warm water;
- degrease the damaged area with a special mixture;
- Dry the surface with scratches thoroughly (you can use a hairdryer).
Once the surface has been prepared, you can proceed directly to removing scratches on the coating.
Cracks
A crack is much more dangerous than a scratch, since it is a through defect. Firstly, the consequences are much more serious - leaks on the bathroom floor, flooding of the lower apartment. Secondly, they tend to spread further under the influence of loads from the user’s weight and water. Therefore, the restoration technology is somewhat different from repairing scratched areas:
- after sanding the surface, it is necessary to create zones of uniform pressure along the edges of the crack;
- To do this, two holes are drilled with the center of each of them at opposite edges of the crack;
Drilling holes along the edges of the crack. - The holes should not be through, they should not be deeper than the crack itself;
Making a through hole. - the crack is expanded, again only to the depth of the crack itself;
- degreased;
- the repair compound is applied and sanded.
Options for restoration work
Restoring acrylic is possible in three ways:
- apply two-component enamel;
- use liquid acrylic, a method called “pouring”;
- use of acrylic liner.
Restoration needs to begin with preparatory work. Incorrectly performed procedures for preparing the upper part of the bowl will ruin all restoration work. After a short time, the surface of the acrylic will become cracked again, the shine of the top layer of the sink will fade, and you will need to glue the hole on the surface. The question arises: how to restore an acrylic bathtub.
Restoration with liquid acrylic: pros, cons of the method
One of the main advantages is the long service life of the bathtub. After updating, it can be used for more than 10 years. Acrylic is evenly distributed over the surface of the cast iron product because it is poured rather than applied with a brush. The product fills microscopic cracks, leveling the surface.
Restoration enamel is harmless to health and does not emit a strong odor. It dries quickly, so work is completed in a short time. But this restoration method has a drawback: you have to wait 2 days. We need to close the room. Otherwise, dust particles settled on the drying layer of acrylic will ruin the appearance of the surface.
Most owners prefer white bathtubs, but during the restoration process you can tint them by painting the bowl in any other color.
Using enamel for restoration
Acrylic products can be restored using enamel. This surface repair option will save money. In addition, the work is not difficult.
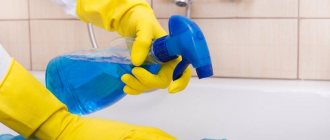
Enamel consists of substances with a very pungent and unpleasant odor. Therefore, for respiratory safety, you need to work in a respirator. Hands are protected with rubber gloves.
We begin surface repairs
Before application to the surface, the enamel is combined with a hardener, strictly following the recommendations in the instructions. Externally, the mixture will resemble paint.
Using a brush, apply the enamel in the following sequence: the first layer with horizontal strokes, after 15 minutes, without waiting for the applied layer to dry, vertical strokes as the second layer.
The enamel is especially carefully applied to the bottom, which bears the heaviest load, where chipping can most often be seen. A spray bottle can make the job easier. We do not miss a single centimeter of coverage. The restoration is complete.
The enamel will completely harden after a week. It is necessary to keep the area around the sink clean. Make sure that dust particles do not settle on the surface of the new coating.
Restoring the product eliminates large potholes and chips. A big problem will require applying several layers of material.
Using a restoration insert
The acrylic insert itself must be ordered at the factory, where it will be made in the required dimensions. The use of a liner will be relevant if the question arises of what to do when an acrylic bathtub is cracked. In this way you can revive the product or how to remove a through hole.
The work requires full compliance with step-by-step instructions.
- Work begins with the preparatory steps described earlier.
- Place marks on the new bowl for drainage and overflow. There is a simple method when the cup that is being restored is smeared with toothpaste and an insert is placed into it. It must be pressed tightly and pulled out quickly. The drain and overflow holes will be visible on the back of the liner. They are drilled out.
- The surface of the old bowl is completely covered with sealant, construction foam, without missing a single centimeter, including the sides.
- Without wasting time, the liner is inserted inside and pressed with force against the old bowl to glue them together.
- In order for the liner to lie firmly on the bottom, you need to stand with clean feet near the drain hole, you need to walk along the bottom along the entire length of the surface.
- Excess construction foam or adhesive is removed with a rag.
- The drain and overflow elements are put in place.
- To prevent the new bowl from deforming when the glue dries, you need to fill it with water for 24 hours and leave it. Later the water is poured out.
- The liner will extend the life of the product by 10 years. Repair using a liner is the answer to how to repair a hole in an acrylic bathtub and how to remove large cracks.
Installing a bathtub in a bathtub
This option is used for through-and-through damage. In this case, an acrylic liner is attached to the defect site on the other side of the bowl using glue.
Painting
This is the easiest way to fill (not polish!) scratches. To paint an acrylic bathtub, it is best to use enamel or acrylic paint. If the walls are scratched, it is easier to use an aerosol can. If there are scratches on the bottom of the bathtub, you can use liquid paint. The procedure is simple:
- Wash the bathtub with detergent, wipe it dry;
- Apply paint with a brush, roller or spray can;
- Wipe up spills if necessary.
Important
Acrylic paint dries from 30 minutes to 2 hours. Enamel paint can take up to 48 hours to dry. But it has a much longer service life (up to 20 years).
The big disadvantage of this option is the color selection. You can determine the exact shade of a bathtub using a colorimeter (spectrograph), but it is too expensive. Modern technologies will come to the rescue. To determine color, there are color matching apps for iOS and color matching apps for Android.
| Way | Cheapness | Simplicity | Efficiency | Durability |
| Toothpaste | ★★★ | ★★★ | ★★ | ★ |
| Repair kit | ★★ | ★ | ★★★ | ★★★ |
| Polishing | ★★ | ★★ | ★★ | ★ |
| Enamel painting | ★ | ★ | ★★★ | ★★★ |
| Acrylic painting | ★ | ★★ | ★★ | ★★ |
Using traditional methods
If you suddenly don’t have a special putty on hand, and the store is closed and you can’t purchase a repair kit, then you need to use improvised means. There are traditional methods that still successfully repair defects in the form of chips.
- First method: make a mixture of BF-2 glue and chalk powder. In the place where the enamel has broken off, apply glue and sprinkle with fine powder, after which the excess is removed with a spatula. The procedure is repeated until the surface of the chip is equal to the enamel. This is a fairly durable component that will last about 5-6 months. The surface restored in this way needs to dry for 4 days.
- The second method is to use a mixture of epoxy resin and porcelain chips. The application method is the same as for chalk glue. Cover the damaged area of enamel with resin and sprinkle with crumbs. This is a more durable version of the “patch” that will last about a year.
Please remember that these methods are temporary, subject to rework using factory components. But if you urgently need to restore a chip, then you should use them. But the most effective way is to seal chips with epoxy enamel.
Restoration (2 videos)
Grouting tiles
Defects in the bathroom are formed not only on the surface of acrylic. Scratches often appear on tiles. She, like acrylic, does not tolerate mechanical stress well.
It is not possible to answer the question about scratches on tiles and how to remove them. Unlike acrylic, it cannot be completely restored, regardless of the size of the defect. There are two ways to return the wall to its original appearance:
- replace damaged tiles with new ones;
- erase the defect.
The first option is less practical, as it requires complex work, during which you have to remove several tiles from the wall.
The second method involves treating the damaged area with mastic or a special pencil. The material must dry completely, after which it is sanded.
It is relatively easy to remove defects from an acrylic bathtub. Most minor damage can be repaired and does not require professional intervention.
Recommended Posts
How to remove marks from a felt-tip pen, marker, pencil, plasticine...
Wood antiseptic: which one is better to choose
Sliding wardrobe: internal contents + photo
How to correctly write an application for roof repair
How to fight fungus
Golden ratio in construction
Repairing holes
Despite the fact that repairing holes is more difficult than eliminating other damage, you can work with such defects at home.
Attention! If the hole has a small diameter (for example, left after self-tapping screws), they can be filled with liquid acrylic. In this case, work is carried out according to the scheme described above.
When the hole is large, it can be restored by reinforcement. The work is carried out according to the following scheme:
- The reverse side, where the hole is located, is washed and degreased. It is necessary to treat an area with a diameter of 15 cm.
- A fiberglass cover is glued to the hole. It can be purchased together with a set for reinforcing acrylic bathtubs. The overlay is fixed using epoxy glue. It should extend onto the bowl by at least 5 cm.
- After the glue has dried, the second overlay is fixed. It should completely cover the first one.
- At the end, the last overlay is fixed, which covers the rest by 15 cm or more.
Further work is carried out on the inside of the product. The area next to the hole is cleaned with sandpaper and degreased with alcohol. Liquid acrylic is poured into the hole, after which it is leveled. Upon completion of all work, the material is cleaned with fine-grained sandpaper and polished.
Once the composition has hardened, the bowl can be filled with water.
What to do if acrylic peels off?
Often, the acrylic layer on the sides of deep cracks moves away from the base of the bathtub body and in such a situation, regular sanding is not enough. Typically, this problem occurs when the pallet is installed incorrectly and basic installation rules are not followed. And if the pallet was skewed during operation, this could lead to the peeling of the acrylic coating after a deep crack appeared.
But even such a defect, which at first glance seems difficult to repair, can be eliminated independently. To do this, you need to purchase a special adhesive composition for acrylic coating, which is available on the shelves of most construction supermarkets. In the area where the bathtub body is damaged, the peeling coating is drilled and an adhesive composition is poured into the resulting hole. After the glue has hardened and the layers have been properly fixed, they move on to directly repairing the crack in the acrylic bathtub with their own hands.
Repair of minor defects
Small defects not only do not look aesthetically pleasing, they are also a place where germs and dirt accumulate. At the same time, repairing minor damage will not be difficult.
Small cracks can be considered those that do not exceed 3 mm. For such damage, do not use either glue or liquid acrylic. Necessary materials:
- polish (two types - abrasive, wax);
- sandpaper (fine-grained);
- putty knife;
- latex gloves;
- respirator;
- felt;
- microfiber cloth.
To seal small cracks you need to perform several steps:
- Wash and dry the shower tray thoroughly.
- Gently rub the area where there are scratches or small cracks. Rub until the surface is smooth and matte.
- Cover the sanded area with a special abrasive polish (using a spatula).
- Rub the polished area with felt until smooth.
- Apply the second type of polish - wax. Rub with a napkin until shiny.
- Wash with detergent using a soft sponge.
Not all minor defects require the use of sandpaper. If the shine is lost and there are no visible scratches, then repair may only involve wax polishing.
Fighting delamination
Sometimes the acrylic layer comes away from the fiberglass. Because of this, bubbles appear in the bowl, which eventually burst, exposing the inner surface. To eliminate such a defect, you will need a special glue with which the polymer layers are connected.
Work with damage begins with drilling a small hole in the center of the bubble. Through it, the space between acrylic and fiberglass is filled with glue. It can be administered using a regular syringe.
Next, the swollen part must be pressed down so that it comes into contact with the fiberglass. Any adhesive that appears should be removed immediately. The hole made in the acrylic is eliminated according to the scheme described above.
A little about damage prevention
Of course, knowing how to repair enamel or deal with rust, you can be somewhat careless when it comes to covering a bowl.
Tips for maintaining acrylic surfaces:
- choose a mild cleaning agent without abrasives of any fraction;
- do not allow the bowl to come into contact with hard materials (basins, hammer);
- do not pour acid or acid-containing preparations into the font;
- do not scratch the bowl with sharp objects (at the time of repair, it is better to cover the surface with a soft cloth or bubble wrap);
- do not use chlorine or other bleaches;
- do not jump (even a baby can damage the bottom);
- choose a product with walls that have an acceptable thickness threshold.
This last point especially applies to acrylic bowls. The fact is that many manufacturers allow thinning of the walls, casting fonts of exquisite shapes. Therefore, it is extremely important to choose a bowl “for light”. If you turn the font opposite a bright light source, it should be uniformly smooth, without any translucent areas. This means that the manufacturer did not skimp on the material; in the near future you will not face the threat of restoration of the coating, restoration of a chip on the wall or bottom.
In everyday life it is difficult to avoid minor troubles. We were refreshing the renovation and accidentally dripped paint onto the surface. Or your favorite cat did a fair amount of claw work while washing, which left deep scratches on the once smooth surface of the acrylic. A basin with laundry escaped from my hands and fell onto the side, causing the enamel to chip. No matter what material the bathtub is made of, it is not insured against damage. But is it possible to correct the mistake?
Removing scratches on acrylic and chips on enamel
Numerous companies offer expensive resurfacing services. They are ready to re-cover or install liners that transform an old bathtub into a new one. Meanwhile, it is quite possible to carry out repairs yourself, as well as independently restore the former luster to ceramic and enameled surfaces. This can be done by anyone who has ever used a can of paint and knows how to sand a surface. For example, the products of the German company Cramer, which allow you to make repairs yourself, enjoy a good reputation.
To remove major damage and chips on ceramic (porcelain) products, Cramer has released the Cramer Reparatur-Set repair kit, as well as the Cramer Star White barcode corrector. The first is two-component and is suitable for ceramics, enamel, acrylic, and powder-coated surfaces. The second is essentially a special one-component paint for plumbing, intended for filling small dents, scratches and defects in the coating of plumbing, ceramic tiles, radiators, sinks, and furniture. You can repair acrylic bathtubs at home or update your sink using these kits in just a couple of hours. And do not touch the repaired surface for another 4 days so that the applied solution acquires the necessary strength. In this case, you will need to perform five simple steps.
- Clean the surface, depending on the material from which it is made, either from rust or from broken fragments. Degrease.
- Mix the required amount of putty with hardener in a ratio of 30:1. The mass must be used within 4 minutes, otherwise it will harden and will be beyond repair.
- Apply the mixture to the chip or damaged area of the acrylic. When repairing porcelain or ceramics, you can use putty to glue down pieces of broken material. Allow the mixture to harden for 30 minutes.
- Sand the surfaces: for enameled and porcelain products, use the brown sandpaper included in the repair kit; for acrylic and fiberglass products, use gray sandpaper, which is intended for wet sanding, that is, using water. When the surface to be repaired is completely smooth, clean it from dust.
- Apply aerosol finishing coat to the repair area. There should be enough layers to completely hide the place where the putty mixture was applied. This process completes the repair of cracks and chips on acrylic bathtubs and repairs damage to enamel, ceramic or porcelain surfaces
Everything you need (tubes of putty and hardener, an aerosol with a finishing coat, two sheets of sandpaper for ceramics or brown enamel and one gray for acrylic, and even a spatula) is included in the repair kit.
BY THE WAY.
All components of the kit must be handled with care. It must be stored in a place out of the reach of children. When spraying the composition from a can, protect your eyes and try not to get it on your skin. It is best to use gloves when working.
Eliminating stains on enamel
What should you do if you accidentally drop paint or glue on an enamel product? How to clean metal deposits on a sink without damaging the surface? Believe it or not, an eraser will help. Not a simple one, of course, but a plumbing one. It even removes stains that cannot be removed with traditional cleaning products without damaging the surface or changing its color. Moreover, the Cramer Wannen Gummi universal plumbing eraser contains no acids at all. And they use it in the same way as the most common one, which erases pencil notes from paper. Only in the case of paper, it is undesirable to use water (everyone knows how this ends), but for a plumbing eraser, the help of water increases the cleaning efficiency.
BY THE WAY.
The eraser cannot be used on acrylic and fiberglass surfaces.
We revive acrylic products
Not all plumbing products can be cleaned with the usual means: abrasive or aggressive. Instead of putting things in order, they can cause irreparable harm. We are talking, in particular, about acrylic. We have already written about what should not be used to wash acrylic surfaces. German manufacturers offer a product that not only effectively cleans, but also removes stains, minor scratches, limescale deposits, and restores color while polishing the acrylic surface. This is Cramer Acryl Star cleaning and polishing paste. It combines specially selected cleaning and polishing components.
Using the paste, you can not only restore the whiteness of an acrylic bathtub or tray, but also sand out deep scratches. For these purposes, the Cramer Acryl Star set includes sanding paper with a grit of 1200 and 2500 granules.
Remove scratches from acrylic in this way:
- Remove damage from the wet surface by moving 1200 grit sandpaper in a straight motion along the scratch, then change the sanding direction by 90°.
- Continue wet sanding with 2500 grit paper until the surface is smooth and matte.
- Apply Acryl-Star to the cleaned surface and buff it with a soft, damp cotton cloth for 3-5 minutes until the desired shine is achieved.
BY THE WAY.
If you polish correctly, the surface of the acrylic in the place of the scratch can be brought to a mirror shine, so that even memories of the damage will not remain.
We achieve ideal cleanliness of faucets and cast marble products
In addition to acrylic, cast marble products (sinks, trays) require special care. Special means are provided for them. For example, a cleaning and care paste is intended for high-quality surfaces made of mineral casting (cast marble, quarry, polyethylene). Mineral-Star paste components specially selected for cleaning and maintenance remove lime, dirt, and other deposits without leaving scratches. Due to the high concentration of the drug, for one cleaning of products made from mineral raw materials, very little paste is required - literally the size of a hazelnut, so one tube will last for a long time. In addition, it is absolutely harmless, since it does not contain acid, so you do not have to worry about irritation on your hands. But this cleaning paste is not suitable for surfaces with Easy to Clean dirt-repellent coating, since in addition to cleansing it also has a polishing effect.
Another problem during cleaning is ruining one item while cleaning another. For example, fittings cleaning products usually contain strong acids, which are necessary to remove lime deposits. And they, in turn, negatively affect the enameled surface. As a result, the taps begin to shine, and the shower tray and bathtub gradually lose their shine. German manufacturers have a 100 ml Cramer Chrom Star cleaning and polishing paste for this case. It restores color, removes heavy dirt and traces of corrosion from matte and shiny chrome surfaces, and also brings old fittings to a shine. Its composition is harmless to enamel and ceramics.
BY THE WAY.
There are no problems in using the drugs. You just need to rub a small amount of paste the size of a hazelnut on a wet surface with a damp sponge, rinse with warm water and wipe dry. In the case of Cramer Chrom Star, you can also polish the cleaned surface using a regular damp cotton cloth.
Today, Cramer offers perhaps the widest range of products for repairing, cleaning and polishing plumbing fixtures. If you want to buy a kit for repairing acrylic bathtubs, as well as cleaning and polishing products for plumbing products, then you can get acquainted with them in more detail and order.
The video shows how to use the presented tools: