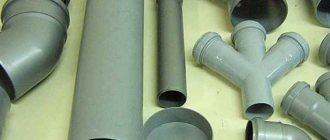
Plastic water pipes made of polypropylene are becoming more and more popular, including because the installation technology is very simple and can be done independently.
But for this you need to know how to properly solder polypropylene pipes, because this is the main operation that determines the durability of the entire system.
Installation of plastic pipes for internal wiring is a fairly simple, but quite labor-intensive process, therefore, first of all, you need to understand how to properly solder polypropylene.
Properties of polypropylene
One of the many materials from the family of plastics - polypropylene - is a product of the polymerization of two gases: ethylene and propylene, mixed in a certain proportion.
The result is granules, from which various products are produced by extrusion. Water supply products are made from PPR plastic with the following characteristics:
- operating temperature range from -10 to +90 degrees;
- plastic melting begins at 149 degrees;
- nominal pressure from 1.5 to 2.5 atmospheres.
The given parameters are suitable for cold water supply, but the need for a wider range of characteristics is obvious. Therefore, certain technological methods are being taken to strengthen them.
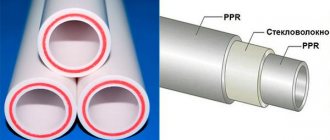
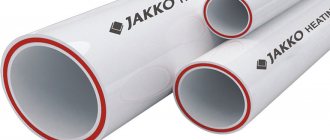
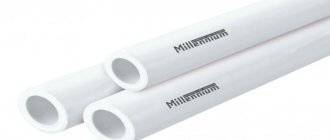
One of them is to reinforce the walls with fiberglass or aluminum. To do this, a layer of fiberglass or aluminum foil is placed on top of the finished pipe, and then another layer of polypropylene is applied.
This design makes it possible to obtain polypropylene pipes suitable even for use in heating and hot water supply systems.
The fundamental way to reinforce polypropylene products is to install a metal layer. For this, aluminum foil in the form of a strip is used.
It is wound along a helical line onto the workpiece along a layer of glue, and a second adhesive layer is applied on top of the metal foil. The outer shell is made of the same polypropylene.
Such products are suitable for use in water supply systems with high pressure up to 6 atmospheres.
Main stages of work
1. Take a pipe of the required size.
2. We clean its edges from burrs formed during cutting with a file or chamfer.
3. With a pencil, mark at the end of the pipe (see photo) which section we need to melt, that is, we mark the place where the fitting will be put on.
We mark the place of adhesion with a pencil
4. Treat the pipe and fitting with a degreasing compound.
5. Firmly fix the welding machine to the table.
6. Its kit includes nozzles of different diameters. We take the required nozzles (one for the fitting and one for the pipe) and attach them to both sides of the device.
7. Set the temperature to 260°.
8. As soon as the lights go out (this means that the device is warm enough), you can start working. The average heating time is 2-3 minutes.
9. We put a fitting and a pipe on the hot nozzles (there are two of them) up to the pencil mark. Do not put too much pressure on the parts to be welded or rotate them.
Butt welding machine. The fitting and pipe are put on the hot nozzles
10. We count down the required amount of time. The heating time is always indicated in the instructions. For example, for a 25 mm pipe it is exactly 7 seconds).
The heating time of the device depends on the diameter of the pipe
11. Quickly and carefully remove the heated parts, slightly holding the welding machine.
12. Connect them with each other. Excessive pressure on them or rotation is also unacceptable.
13. We wait a few seconds.
14. If we did everything correctly, we get a perfectly smooth, homogeneous connection.
The reinforced layer on a section of the connection must be removed, otherwise the connection will be heterogeneous and fragile;
When purchasing a device, it is not necessary to spend extra money and purchase a model with a thermostat, because we will need only one temperature setting of 260°C; using other modes may result in a poor connection;
Water must flow through the pipes freely; To prevent an obstacle in the form of frozen plastic from forming at the welding site, you should not put too much pressure on the molten parts when joining; however, weak pressure is also unacceptable - the length of the connection for reliable fastening will not be enough; this can lead to the formation of vortex and pressure drop in the system;
The basic rule for such soldering is that the fitting is put on the nozzle first, and only then the pipe; The countdown begins when both parts are on the device;
Polypropylene sets in 4-8 seconds, but you shouldn’t let it go right away - for it to completely harden, you need to wait 20-30 seconds;
When cooling, the parts must remain motionless; the slightest shift can break the tightness of the connection; therefore, before starting soldering, it is better to prepare special clamps for fixing them; they can be made from any block of wood or strong wire;
Cooling the resulting assembly with water or a stream of cold air is prohibited - the connection will be fragile;
Do not heat the pipe and fitting for more than the prescribed time - the polypropylene will be deformed; with less time for heating, the connection of parts will be difficult;
If welded correctly, part of the plastic should form a slight overhang on the coupling;
You can check the quality of your work by cutting the connected section in half; you should see an even monolithic connection without deformations or voids at the junction.
Which polypropylene products to choose
For low-pressure cold water supply networks, PN16 products are the most practical. They can easily withstand pressure up to 2 atmospheres at temperatures up to +40 degrees. This is quite enough to withstand the loads of a water supply system in a private home or a watering system in a greenhouse or garden.
Polypropylene pipes and fittings: types, markings, installation
Polypropylene products of the PN20 brand are more resistant to various influences, which are considered universal and can be used, among other things, for heating with a coolant temperature of up to 95 degrees.
But the most reliable pipes in any water supply system are PN25 pipes reinforced with aluminum or fiberglass.
Pipe welding kit
If welding of polypropylene products has to be carried out regularly, then it is advisable to purchase a special welding kit, which is immediately sold in an appropriate suitcase. Its average cost is about one hundred dollars, and it consists of:
- heating element;
- Teflon nozzles of different sizes;
- scissors for cutting polypropylene pipes;
- bolts that secure the nozzle to the heating element;
- level;
- supports for the heating element;
- hexagon for tightening bolts.
In the case when welding work is carried out occasionally, it is more rational to rent welding equipment.
Equipment for installation of polypropylene
Polypropylene water pipes have their own characteristics in terms of assembly technology, determined by the properties of the source material. Before soldering polypropylene pipes, you need to purchase a special tool for this.
Its set is not very extensive, but it contains some devices that are used only for this process:
Scissors for cutting polypropylene products. They are needed to ensure a strictly perpendicular cut. If a gap is formed at the interface during soldering, there is a possibility of a violation of the tightness of the connection.
Shaver is a device for cleaning the surface of products before soldering. Without this device, it is generally impossible to solder polypropylene pipes reinforced with any materials. The fact is that soldering polyethylene is a diffusion process in which mutual penetration of the molten material occurs.
Naturally, aluminum or fiberglass are unsuitable for this purpose. Using this tool, you can also chamfer at a 45-degree angle at the ends of the parts to be joined to facilitate joining during the soldering process.
There are many design solutions for this device, so when purchasing a tool, a wide choice is provided.
Soldering iron. The main product used for soldering polypropylene water pipes. Its basis is a plate onto which replaceable bushings of various sizes are attached. These nozzles are paired - one for the fitting, the second for the pipe.
The parts to be connected are installed on a replaceable tool. Switching on is done on the handle of the device, where the temperature regulator is also installed. The heating time of the mating parts is 6 seconds or more.
Recommendations for this parameter are given in the soldering iron passport. The parts heated to the point of melting are joined and held for up to 30 seconds. During this time, the material cools until it hardens.
Typically, the tool kit also includes a screwdriver for installing a replacement tool, a marker for marking, and a tape measure for taking measurements.
Connection of aluminum reinforced pipes
It is required to follow the rules when welding polypropylene pipes with reinforcement. The reinforced layer is made of aluminum or fiberglass.
They are used when installing systems that move water at high temperatures, because under the influence of heated liquid, linear expansion of the material and bending of the pipeline occurs.
When performing soldering, the aluminum protective material must be removed. In addition, this layer affects the quality of the connection, and the welding time depends on the heating period of the polypropylene parts.
Reinforced pipelines have a larger diameter. Therefore, it will not be possible to use standard nozzles on a heating tool without first preparing the products.
This is done by stripping parts. It is not carried out for glass fiber reinforced products. They are connected in the same way as unreinforced pipelines.
Stripping is performed using different methods, because there are many technologies for reinforcing polypropylene products. Processing is most often used when using a shaver. It is a metal device in the form of a sleeve with blades.
Shaver
The tool is placed on the end of the tubular product and rotated, allowing the aluminum protective layer to be removed. The process continues until only one piece of plastic remains.
PP pipes can be designed when the reinforced layer is in the middle of the wall thickness. In this case, a trimmer is used. This instrument is very similar to a shaver. Different arrangement and design of knives.
The tool allows you to make the ends smooth and remove 2 mm of the reinforced layer located in the middle of the pipe wall thickness. Thanks to this processing, you will be able to perform high-quality soldering.
Preparation for installation of water supply from polypropylene pipes
It is safe to say that high-quality preparation for wiring assembly largely determines its performance and durability.
Secrets of installing polypropylene pipes. Master class for beginners
In addition, one of the main tasks of these activities is to calculate the real need for water supply elements.
Selecting a connection diagram
Currently, two main schemes for installing pipework are common:
Tee - with it, each water consumer is connected to a central pipe connected to a riser. Tees are used for this.
The disadvantage of this scheme is the fact that when several taps are opened simultaneously, the pressure in the supply pipe decreases sharply and the flow of water in each of them decreases. Parsing points remote from the riser are especially affected.
The second negative point is that if the need for routine repairs arises, you have to turn off the entire water supply circuit for this time.
Tee circuits are used in apartments or small private houses. The advantages include ease of installation and relatively low consumption of materials.
Collector wiring diagram . This method of forming a water supply network is that from the riser the supply pipe is led to the topographic center of the water supply system and ends with the installation of a comb.
The comb is a short pipe with threaded elbows installed on it for a ball valve. Thus, a distribution node is formed, from which distribution to points of consumption is carried out.
As a result, it is possible to shut off any water consumption point separately. The rest of the system continues to function as usual with the same water flow.
Operating temperature conditions
Manufacturers of products for water supply systems declare a maximum coolant temperature of 95 degrees. However, the physical properties of the material differ somewhat from this indicator.
Softening of polypropylene begins to appear at a temperature of about 140 degrees, melting occurs at 175. Taking these parameters into account, we can conclude that this material is suitable for any heating water pipes, with the exception of steam.
The operating temperature in the steam lines is exactly 175 degrees.
It would seem, what could be better? But the peculiarity of the material is that at a temperature of 135 degrees it begins to soften. The wiring begins to sag, thin out, and eventually a rupture occurs.
Manufacturers of polypropylene pipes officially declare a significantly lower permissible temperature, wanting to insure their products and make them more durable.
It should be noted that in a properly equipped home with sufficient thermal protection of the walls, this operating temperature is quite sufficient.
It should be noted that in heating systems it is advisable to use reinforced polypropylene pipes, which have a number of advantages:
- Stability of linear expansion of water supply elements under the influence of thermal and mechanical loads. They can withstand pressures of up to 10 atmospheres without noticeable changes.
- The service life of a reinforced pipeline, constantly under pressure at elevated temperatures, is several times longer than that of non-reinforced products.
- The melting point in both products is the same, but under equal conditions, a pipe without reinforcement is destroyed, but a reinforced one is not.
Stage three. Pipeline installation
When laying the highway you will need:
- pipes;
- tees;
- Ball Valves;
- plugs;
- adapters;
- bends;
- couplings;
- detachable connecting elements;
- threaded fittings;
- plastic clamps.
First of all, the installation of the main elements of the system (plumbing, radiators, boilers, etc.) is carried out, after which the future highway is marked in accordance with the drawn up project. Pipeline elements are connected to each other using couplings.
When it comes to heating or hot water supply, thermal expansion is taken into account. To compensate for the latter, it is advisable to use movable connections. When installing a closed pipeline, the walls are first grooved (a groove with a width of two pipe diameters is made in appropriate places).
Filling the pipeline with liquid is permissible only after one hour from the end of installation. Hydraulic testing can be carried out only after 24 hours.
How to solder polypropylene pipes with your own hands
The process of soldering polypropylene products is simple and therefore has become widespread in the technology of installing cold and hot water supply pipelines and heating systems.
However, there are some subtleties that you need to know and take into account in your work.
How to solder using the diffusion method correctly - step by step instructions
The soldering process is based on melting the surface of a part to a certain depth. If in this state you connect two parts and cool them, the material returns to its original state and takes on its original structure.
Soldering polypropylene pipes: welding technology
During this time, the melt has time to mix, creating a monolithic material to the depth of penetration. In physics this is called diffusion welding.
Making a joint involves performing the following technological operations:
- Use special scissors to cut the pipe to the required length.
- Bevel at a 45 degree angle on both ends.
- Clean the surfaces to be welded on the outside of the workpiece and on the inside of the fitting from any dirt and degrease.
- Install the required size nozzles on the soldering iron.
- Turn on the soldering iron and heat the mating parts for the time specified in the instructions.
- Remove the parts from the soldering iron and join them in the desired position. Hold until completely cooled.
Careful attention must be paid to maintaining the heating time. To obtain a high-quality connection, it is necessary that a solid base remains under the layer of molten plastic. This will allow the parts to fit coaxially. If the parts are overheated and the plastic softens throughout its entire thickness, it will be impossible to connect them, they will simply crumple.
Therefore, tool manufacturers recommend time intervals for each size separately.
From the table below you can see how much time is needed to successfully complete each stage of assembly. As you can see, the conditions are quite harsh.
When performing soldering yourself, it is important to assemble several test joints before starting work in order to feel the durability of temporary materials.
It is also necessary to pay attention to the accuracy of installation in the axial direction when mating parts. There will only be a few seconds left for control and correction.
Soldering polypropylene pipes, technology, tools
At what temperature to solder polypropylene pipes is established in the design of the welding machine; it is important to follow the recommendations for the heating time of the parts. This indicator depends on the power of the tool, which may differ in different models.
How to solder using the coupling (socket) method
This joining method is used to connect products to lengthen straight sections. A coupling fitting is used for this.
Socket welding of polyethylene pipe
It is installed on the end of the pipe by soldering, after which the second part is soldered. Soldering is carried out in accordance with the technology described above.
End soldering
It is more often called welding.
The principle of operation remains the same - melting the material, compressing the two ends in a special mechanism, cooling. This joining method is used for products with a diameter of more than 63 millimeters. End joining using this technology can be successfully used in field conditions. How to smoothly solder polypropylene pipes end-to-end?
To do this, it is necessary to carry out preliminary mechanical processing of the ends, ensuring absolute parallelism of the joined ends.
Welding polypropylene pipes on the wall. How to securely secure a soldering iron for pipes?
How to properly solder reinforced polypropylene
Reinforcing layer, strengthening the structure of the polypropylene pipe. Creates a certain obstacle to the joining of individual parts. The reinforcing insert prevents the diffusion of the material, as a result of which the connection becomes unreliable.
Installation of centrally reinforced plastic pipes
The only way to ensure a reliable connection is to remove the reinforced layer. Removal of the outer and reinforcing layer is carried out with a special tool - a shaver.
After cleaning the top layer, you need to carefully remove burrs and clean the surface of dirt, after which you can perform soldering using the above technology.
To understand at what temperature to solder reinforced polypropylene, you need to take into account that its structure is no different from ordinary pipes and the soldering modes are the same.
"Cold welding" in polypropylene joints
A two-component epoxy composition under this name has gained some popularity due to its effectiveness.
The ease of use is attractive - just knead a lump of the composition and apply it to the surfaces to be glued. The hardening time of the mixture is about 10 minutes, complete setting is about an hour. The physical properties of the adhesive composition do not allow its use on hot water supply or heating pipelines. It is only suitable for installing water pipes.
Connecting polypropylene pipes with electrical fittings
This installation method is widely used in industry. In this case, electrical fittings are used to make joints. A heating element is installed in the body of the part during its manufacturing process.
The system is installed without soldering, but each fitting is connected to the power supply. Only after wiring is completed is voltage applied to it.
Under the influence of current, the heating elements melt the mating parts to the required state, and shutdown occurs automatically. After the parts have cooled, the entire network or its local section is ready for operation.
Kan-therm polypropylene pipes
The use of this installation method significantly increases labor productivity and eliminates the personal factor when performing work. Therefore, the quality of connections is stable for the entire water supply network.
This technology allows for high-quality assembly of pipeline elements in hard-to-reach places.
Preparing the welding machine
The pipe welding machine requires certain preparation before installation. You need to select a flat, smooth surface and install the device on it. All parts of the welding unit must be dry and clean. If necessary, wipe them with alcohol. Elements used for heating must be installed when the device is turned off.
The heating time of pipe parts is determined from the table
When the welding machine is connected to the network, the indicators on the housing light up. One indicator is designed to monitor the heating temperature. It should go out when the heating reaches the required value. It is recommended that after the light goes out, wait 5 minutes and then start welding the products. The second indicator is a control indicator; it indicates that the device is connected to the network.
A sleeve is used to heat the pipe itself; a mandrel is provided to heat the fittings.
Soldering pipes in difficult areas
When assembling a water supply or heating system with a complex configuration, problems may arise with access to the soldering area. How to solder polypropylene pipes in hard-to-reach places?
Welding (soldering) of polypropylene in inconvenient and hard-to-reach places.
During the preparation process, it is necessary to roughly break the entire network into separate nodes that can be connected on a workbench, after which the finished branches are welded into the system at two or three points. The following areas can be considered difficult to install:
- pipelines placed under the ceiling;
- in places where it is impossible to place a soldering iron.
The best way to avoid difficulties in this case is to prevent them from occurring. To do this, you need to think about the assembly order, making complex assemblies on a workbench, and not on your hands. If this is not possible, it is better to use electrical fittings.
In general, the occurrence of difficulties of this kind is a consequence of design errors. Manufacturability of installation is the main condition for the designer.
Required Tools
Fitting;
The polypropylene pipes themselves;
A special apparatus for welding such pipes;
Welding machine
A hacksaw for cutting them, a special cutter is often sold complete with a welding machine; for large volumes of work, you can use a ring cutter or special scissors;
Degreaser (ethyl or isobutyl alcohol); It is prohibited to use acetone in this case, as it can soften the plastic;
Chamfer: its internal part resembles a pencil sharpener, however, since the chamfer must be removed smoothly, the knives are located at a different angle; You can replace the bevel remover with a regular file and knife;
Beveler for plastic pipes
Shaver: a tool for removing the reinforced layer (if our pipes have a reinforcement layer).
Shaver
Advice.
Pipes that come close to the heating boiler (at a distance closer than half a meter) should be made only of metal. They are connected to polypropylene using adapters from a welded connection to a threaded one.
We install saddles in the water supply system
This pipeline element is used to create an additional outlet, and the need to install it usually arises when repairing existing distribution lines.
Instructions for welding using Wavin Ekoplastik welded saddles
A smaller fitting is soldered into a larger diameter pipe, allowing you to install a branch from the existing distribution at an angle of 90 degrees.
To do this you need:
- The craftsman needs to drill a hole of the required diameter in the wall of the existing pipe, remove burrs and make chamfers.
- The mating parts are heated with a soldering iron using traditional technology.
- The saddle (fitting) is tightly installed into the hole in the pipe.
This method of creating additional branches in the water supply system from polypropylene pipes makes it possible to continue the development of the network with the least amount of labor.
Knowing how to properly solder polypropylene will allow you to easily install pipelines of any length and degree of complexity.
Conclusion and useful video about soldering polypropylene
When soldering polypropylene communications, you need to properly prepare the material (mark it, cut it), and tools. Work is performed sequentially. For example, if you skip the degreasing step, the seam will not be reliable enough.
Video instructions for soldering polypropylene pipes:
It is important to follow the rules for heating and joining pipes, otherwise, after putting the pipeline into operation, it may be necessary to repair it. You can learn about the intricacies of soldering from the video.
Which pipes are right for you?
To choose polypropylene pipes you need to know:
- conditions under which the pipes will be operated;
- fluid pressure in the system and its temperature;
- the required throughput of the product, which determines the working diameter.
Polypropylene pipes have special markings, depending on the purpose of the product.
- PPH – ventilation, cold water supply.
- PPB – cold water supply systems, heating.
- PPR – hot and cold water supply systems, heating.
Pipes marked PPR are universal. Therefore, they are most in demand. They are highly resistant to both high and negative temperatures.
Stage one. Drafting
Installation work should begin with drawing up a project for the future highway. An important criterion in this case is ergonomics, as a result of which the number of turns and connecting elements should be minimal.
When arranging a heating system, a well-designed project is especially important, in which you should indicate the location of such elements as:
- couplings;
- adapters;
- fasteners;
- corners;
- heating equipment.
The line is connected to the radiators in a one- or two-pipe way, from the side or from the bottom.
Plumbing
Here the main line is connected to a centralized system for the purpose of water supply to the necessary plumbing fixtures - toilet, sinks, boiler, etc. There are two ways to do the wiring.
Method number 1. Open option. Horizontal pipes are installed slightly above floor level, and vertical pipes are installed exclusively in the corners. All this allows you to make the pipeline less noticeable.
Method number 2. Closed option. It is extremely difficult to implement, since it involves preliminary carrying out the most accurate calculations. Pipes (necessarily solid) are walled up in the walls, and there must be free access to each joint.
In addition, the water supply layout can be:
- sequential type (the most budget-friendly and easiest-to-implement option);
- collector type (a collector is used when supplying water);
- with pass-through sockets (not very popular).
Assembling elements without soldering
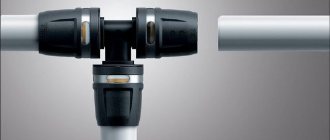
The use of compression fittings and modern adhesives makes it possible to install polypropylene pipes efficiently, quickly and with minimal material investment.
Option #1 - installing a compression fitting
To implement this connection method, you will need to purchase compression fittings and use a crimp wrench.
Compression fittings are equipped with sealing clamp rings that act as dampers when shock impulse loads occur (unlike simple union nuts)
Installation of a compression fitting includes three main steps:
- Place a blue nut on the end of the pipe, cut at a right angle and cleared of burrs. When placing a white crimp ring, it must be given a position in which the thickened part is directed towards the tail of the pipe.
- The pipe is inserted into the fitting until it stops, pushing the clamping ring to the maximum.
- Tighten the blue nut, “tightening” it first by hand, and then tightening it with a wrench.
Assembly of compression fittings does not require special knowledge or skills. Products are supplied for sale completely ready for installation. Their installation can be performed under any temperature conditions.
Option #2 - gluing elements
The adhesive method is used to assemble a water pipeline through which it is planned to transport only cold water. To apply the “cold” welding method, you will need to use an “aggressive” adhesive composition such as LN-915.
The glue is capable of dissolving the surfaces of the joined parts by one third, thereby creating conditions for cold diffusion welding
To protect the skin of your hands from accidental contact with the composition and “corrosion” by its active components, it is better to perform gluing operations while wearing protective gloves.
Sequence of actions when gluing products:
- Check the correspondence of the cut angles of the joined sections and mark the places for gluing with a pencil.
- Clean and degrease the ends of the pipes to be connected.
- An adhesive composition is applied evenly to the ends of the pipes and the area of the fitting sockets.
- The pipe sections are inserted into the fitting holes, focusing on the marks made in pencil. The structure is kept in a fixed position for three minutes, after which excess compounds are removed with a napkin.
- The combined elements are laid out on a flat surface and left for 5-6 hours until completely dry.
You can run water to check the quality of gluing only a day after completion of installation.
When implementing this technology for installing PP pipes, it is important to observe two main conditions: temperature and humidity conditions. All work must be performed at air temperatures from +5, +35 °C
When gluing in hot weather conditions, the work should be done as quickly as possible so that the glue does not have time to dry before installation is completed.
Tools for welding PP pipes
Before welding polypropylene pipes, for example for a water supply system, you need to acquire a standard list of tools.
The set should consist of:
- directly, soldering iron;
- roulette;
- scissors;
- mounting bolts for fixing the nozzles to the soldering iron;
- building level;
- template for checking holes;
- hexagon.
The welding unit can have a power of up to 1.5 kW, and it is powered from a 220 volt network. Its low weight makes it easy to carry from place to place, and thanks to the ergonomic handle, the soldering iron is easy to operate in many positions.
Immediately after switching on, the red LED on the soldering iron lights up, which goes out immediately after reaching the required temperature. This is a signal that you can start using the tool.
How to reduce the likelihood of marriage?
It is recommended that two people work together to solder elements in difficult-to-access conditions. The second specialist helps remove the second element from the nozzle and puts the soldering iron on the platform. The first master carefully joins the parts with both hands with a minimum pause. Sometimes assistance from a third party is required. His services are used when a pipe needs to be fixed in a wall in an adjacent room. Attempts to perform all operations independently in difficult areas always lead to defects and the need to perform welding again.
Planting depth marking Source files.builderclub.com
During soldering, precise movements must be observed. The correct inclination of the fitting element relative to the second part, its axial angle of rotation on the pipe, and the depth of entry into the fitting cup must be maintained. To control the depth of entry and the angle of rotation of the fitting, marks are made on the surface of both parts. In order not to measure the allowance each time on sections of the same cross-section, use a template.
The iron does not need to be turned off during the entire welding period. The technician will lose time warming up the equipment. The soldering iron is ready for use after the heating indicator goes out. A lit indicator shows that the mirror is heated to the desired temperature. If you start welding during this period, the pipe will not warm up properly. In order to comply with the technological process and holding time, it is recommended to check the parameters according to the table, which is recommended to be kept at hand.
If combined pipes are purchased, they are connected only after mandatory stripping. The chamfering depth should be 2 mm greater than the depth of the sleeve into which the element is inserted. Reinforcement reduces deformation expansion by 10 times. On products with external reinforcement, before soldering, a part of the surface is removed with a shaver to the required depth for joining. Pipes with internal reinforcement do not require stripping. Their installation is faster.
