Drainage pit - purpose and installation on the site
Drainage pit
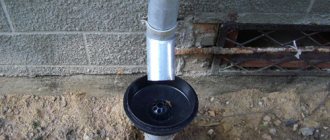
In any private house with a garden plot or a comfortable country house there is a large amount of liquid that needs to be processed, cleaned or disposed of. Sewage can come from local treatment facilities - septic tanks, form after rain and snow melt and be collected by storm drains. A drainage system around the house is used to distribute water into the ground.
Construction of drainage ditches
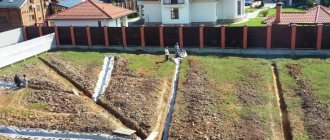
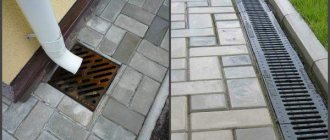
Drainage ditches are intended not only to redirect excess water into the drainage pit, but also to partially drain it into the ground. When designing the location of the drainage system, the topography of the land plot is taken into account. If there is a difference in height, it is placed perpendicular to the slope. This configuration of the ditches can significantly lower the groundwater level in the area.
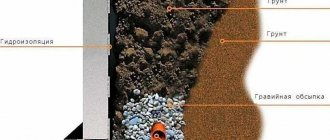
On an extended slope, at least two drainage ditches are installed; they are connected to each other by overflow pipes. The last of the ditches, located at the bottom of the site, should have an outlet into the drainage pit. Since leaves and debris enter the drainage system with rain and melt water, it must be cleaned regularly. The design of the drainage ditch (see photo) has been constantly improved and is now an effective structure, characterized by its simplicity of design.
Advantages and disadvantages. We think, we compare
Drain pits are most often made:
- From concrete rings;
- From old tires;
- Made of slate on a metal frame;
- Made of brick.
Why might a person choose brick?
Easy to install. Even a beginner in the construction business can lay brickwork. In the case of concrete rings, you will need a special one. equipment to deliver the rings to the site and lower them into the pit.
For a slate pit, you need to weld a metal frame. If you are a welder, then this is not a problem, but if not, you will have to hire someone.
The diameter of the hole for brickwork can be “butt-to-tail”; for concrete rings and slate, the hole must be made with a margin. This is an important factor if you plan to dig by hand.
The size of a brick pit can be arbitrary, unlike a tire pit, where everything depends on the diameter of the selected wheels.
The main disadvantage of a brick cesspool is its relative fragility. Service life is approximately 15 years (concrete and rubber win in this regard, and a slate pit will last about the same).
How to make ditches on the site
First they draw up a project, and then make markings on the plot.
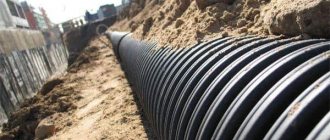
At the next stage, trenches are dug; their depth can reach one meter. Sifted sand is poured into the bottom of the ditch. You can build a drainage ditch either closed or open. In the closed version, a pipe with perforation in its lower part is laid on a sand bed. With the open method, the ditch is covered with a grate on top, and its walls are strengthened.
In order to increase the degree of filtration of wastewater passing through drainage ditches, a combined filter is installed, which has a layer of sand in its lower part, on which geotextiles are laid for drainage. Then the structure is covered with crushed stone. The presence of geotextile and crushed stone layer prevents erosion of the sand cushion.
If a drainage drainage ditch is laid in dense soil, its walls do not need to be strengthened, leaving them vertical.
If the soil crumbles, it is recommended to make the walls of the ditch flat and certainly strengthen them. As for open drainage ditches, they are laid in small areas. In addition, they can only be used in the warm season.
A closed drainage system has a more complex design; it allows you to collect water from large areas and can function year-round. It is often made in the shape of a herringbone, but it must be taken into account that the cross-section of the pipes adjacent to the drainage pit should be larger than at their far ends.
Requirements for the installation site
When choosing a place for arranging a flush barrel for a toilet in a country house, it is recommended to follow the following series of rules:
- The distance from the home is at least 10 meters. Waterlogged soil formed as a result of regular runoff can negatively affect the strength of the foundation of the structure. In addition, a sewer close to the house will lead to the formation of unpleasant odors inside the house.
- The distance to outbuildings is at least 7-8 meters. The presence of dampness can lead to the development of mold, rot, fungi and other microorganisms, the activity of which quickly destroys structures.
- The location of the drain point relative to the house is mainly on the leeward side, since even at a distance during windy conditions, unpleasant odors can penetrate into the home.
- The distance to the nearest natural source of water is at least 20-25 meters, and to the water supply system - 10 m.
- The distance to the site fence is at least 1 meter.
Construction of pit-wells with your own hands
A drainage pit is intended for draining water at a summer cottage, its partial purification and distribution in the ground. An important point when arranging a well is calculating its required volume (more details: “Construction of drainage wells on the site”). It must match the capacity of the local treatment system and have a reserve for the disposal of melt and rainwater.
If necessary, not one drainage hole can be built on the site with your own hands, but several.
Now they can be built using various ready-made structures:
- They use old steel barrels. Their bottom and lower end part are removed;
- Drainage wells, for the construction of which reinforced concrete rings are used, have been in operation for a long time;
- Plastic products are also used for the base of wells. This option is the most acceptable, since they are inexpensive, they weigh little, and the plastic is not susceptible to corrosion.
Materials for production
How long home furniture will last and how comfortable it will be to use depends on the materials from which it is made. The issue of reliability and durability is extremely important. Today, kitchen furniture manufacturers have plenty to choose from.
Traditional materials and new developments, as well as their unexpected combinations, are used for production.
Let's take a closer look at some of them:
- Tree. The natural texture of the material, different types of wood and different processing methods provide a rich and varied range of products made from this material. A round wooden table is a classic example of a design solution for a dining area. The material requires protection from mechanical damage and careful handling.
- Glass. Modern material, resistant to temperatures and moisture, does not absorb odors. Furniture with glass elements does not clutter up the space; the transparency of the glass makes the kitchen interior modern and light. The material requires protection from mechanical damage, careful handling, and careful maintenance.
- Veneered chipboard/MDF. Modern practical, lightweight and inexpensive material. A coating similar in appearance to wood, a variety of colors and relatively low cost make products made from veneered chipboard/MDF popular and in great demand. The material requires protection from mechanical damage, is afraid of moisture, and requires careful handling.
- A natural stone. A natural material characterized by beauty, fragility and high cost. It is not often used in furniture making due to its heaviness, difficulty in processing and impracticality in use. The material requires protection from mechanical damage, careful handling, and careful maintenance.
- Fake diamond. A modern artificial material, lighter than natural stone, less expensive, more practical and reliable. Easy to use, does not require careful maintenance.
- Plastic. Modern practical and inexpensive material. Plastic products are lightweight and come in a variety of colors and textures. The material is easy to use and does not require careful maintenance.
- Metal. Most often used for the manufacture of bases and additional decorative elements of the table. Reliable, adding weight and stability to the structure.
What kind of water interferes with the life of a developer and a country homeowner?
A whole book could be written about the types of surface and ground water, as well as drainage and storm sewer systems. Therefore, we will leave beyond the scope of this article a detailed listing of the types and causes of groundwater occurrence, and will concentrate on practice. But without minimal theoretical knowledge, starting to independently arrange drainage and storm sewer systems is throwing money away.
The fact is that even an incorrectly designed drainage system functions for the first few years . Then, due to clogging (siltation) of the drainage pipe, wrapped in geotextile, which was placed in clayey, loamy, etc. soil, drainage stops working. But money has already been spent on drainage construction and, most importantly, drainage construction involves a large amount of excavation work involving equipment.
Therefore, simply digging up and relaying a drainage pipe 3-5 years after it was laid is difficult and costly. The site has already been inhabited, landscaping has been done, a blind area has been arranged, a gazebo, a bathhouse, etc. have been installed.
You will have to rack your brains on how to redo the drainage so as not to ruin the entire area.
Hence, the construction of drainage should always be based on data from a geological study of the soil (which will help to find a waterproof layer in the form of clay at a depth of 1.5-2 m), hydrogeological surveys and clear knowledge of what kind of water leads to flooding of a house or waterlogging of an area.
Surface waters are seasonal in nature, associated with the period of snowmelt and abundance of rain. Groundwater is divided into three main groups:
- Capillary water.
- Ground water.
- Verkhovodka.
Moreover, if surface water is not drained in time, it turns into underground water when infiltrated (absorbed) into the ground.
Conclusion: surface runoff should be drained away by storm (rain) sewerage, and not try to create surface drainage!
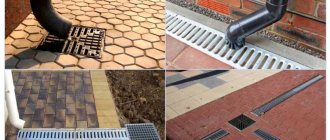
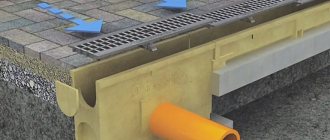
Storm drainage is a system consisting of trays, pipes or ditches dug in the ground, discharging water from drains outside the site + competent organization of the relief on the personal territory. This will allow you to avoid stagnant zones on the site (lenses, pools), where water will accumulate, which simply has nowhere to go, and further waterlogging.
The main mistakes that are made when installing drainage yourself:
- Failure to maintain the correct slope of laid drainage pipes. If we take an average, then the slope is maintained in the range from 0.005 to 0.007, i.e. 5-7 mm per 1 running meter of drainage pipe.
- Using a drainage pipe in a geotextile wrap on “wrong” soil. To avoid siltation, pipes in geotextiles are used on soils consisting of clean medium- and coarse-grained sands.
- Using cheaper crushed limestone instead of granite, which is washed away by water over time.
- Saving on high-quality geotextiles, which must have certain hydraulic properties that affect the quality of drainage. This is an effective pore size of 175 microns, i.e. 0.175 mm, as well as transverse Kf, which should be at least 300 m/day (with a single pressure gradient).
