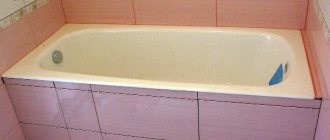
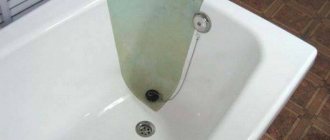
A beautiful renovation in a bathroom with snow-white fixtures indicates the impeccable taste of the owner. And it’s very disappointing when, through negligence, you drop a bottle of perfume onto the surface of an enamel bathtub. And after some time, a chip appears at this place. Visible marks remain even after constant use of the bathtub (abrasions, small scratches).
You shouldn’t fall into despair and give up, everything is fixable and an unpleasant situation can be corrected. And it is not at all necessary to replace the bathroom with a new one; you can fix the damage yourself using available means and tools.
Types of damage to bathtub coatings
The bathroom is covered with enamel in factory premises using special technologies and manufacturing conditions. The resulting coating is reliable and durable. But sooner or later, due to carelessness, the enamel will chip. If it is not corrected in time, then the following problems are quite possible, such as:
- The appearance of rusty areas when exposed to moisture will only grow incredibly quickly. The walls of the bathroom will not only deteriorate, increasing in size, but may also rust through.
- Worsening unsanitary conditions. A chip left unattended will create favorable conditions for the development of pathogenic bacteria. The more chips there are, the more often the surface will have to be serviced. The only way out is a small one-time repair of several damages at once.
- Unaesthetic appearance of the bath. The metal surface becomes black. Many such stains deteriorate the appearance of the product.
Advice. Before you begin preparing material for future bathtub repairs, you should carefully examine all the damage and determine the repairability of the bowl. Divide damage into superficial and more complex, requiring acrylic liners.
Necessary materials
Any object, even not a very heavy one, falling into the bowl from a small height can cause the enamel coating to chip. Therefore, you should handle construction tools and other materials very carefully when installing the bathtub. Many master builders work without much supervision and are not controlled by the customer, which means there is a high probability of defects in the work. They may drop a hammer or ceramic tile into a bowl without anyone noticing.
Advice. After installing the bathtub, it is better to cover it with boards, drywall, pillows, an old blanket or packaging foam to protect the product from further mechanical impact.
How to repair chipped enamel in a bathroom? If a defect is still present, it can be eliminated using a special repair kit, which can be purchased at almost any hardware store or using improvised means:
- BF adhesive mixture with the addition of filler (chalk, whitewash or tooth powder). Bulk additives will give the material porosity;
- using epoxy resin and porcelain powder. After the resin is applied, it is powdered and polished after hardening. The result is a patch that will last effectively, but not for long, since the epoxy resin can easily break off from the playing metal surface.
Surface preparation
In order for the result of applying a patch to an enamel chip in a bathroom to be of high quality and last for a long time, the damaged area must be carefully prepared. The reliability and durability of the patch, its resistance to moisture, mechanical stress and changes in ambient temperature will depend on the correctness of the preparatory work.
Preparatory activities are carried out as follows:
- The damaged area is thoroughly washed with a detergent to remove dirt.
- If there is rust around the edges, you need to go over it with a rust converter.
- The edges are treated with fine-grained sandpaper.
- After rough treatment, the damaged area must be degreased with alcohol or acetone. This is done so that the applied product adheres better to the metal surface of the bathtub.
- The last step is to rinse the entire cavity of the bathtub and leave it for 2 days to dry completely naturally. To speed up the drying process, you can use a hair dryer.
Conclusions and useful video on the topic
For reliable adhesion of materials and durability of the coating, it is necessary to follow a clear sequence of preparatory and restoration work:
High-quality repair of a cast-iron bathtub means careful restoration of the most important plumbing fixture in the apartment.
Restoration of a damaged surface is possible as a result of the “jewelry” work of a master. The result of painstaking work and many hours of waiting will be a bath without visible chips, scratches and cracks, which will last for another ten years.
Share with readers your experience of restoring damaged enamel of a cast-iron bathtub and carrying out restoration work. Please leave comments, ask questions about the topic of the article and participate in discussions - the feedback form is located below.
Removing defects using improvised means
If the damage to the enamel is fresh and detected immediately, then the cost of restoration will be minimal. The main thing is that rust does not have time to form at the site of the chip and the corrosion process does not begin, then it can be quickly and easily repaired with improvised means. There are several methods for restoring the surface of the bathtub enamel:
- The first method involves preparatory work on the damaged area by sanding. Then take the BF-2 adhesive composition and chalk, cover it with glue, the resulting chip using a spatula and sprinkle chalk powder on top. You need to wait a little time until the composition hardens. The procedure must be repeated one more time. To allow the applied mixture to dry completely, do not use the bath for 3–4 days. This method is very simple and does not require any special investment.
- The second method of getting rid of the damaged area of enamel will require epoxy resin and porcelain chips. The metal processing process completely repeats the first method. The mixture is also applied and porcelain powder is applied on top of it. All this is leveled out, there is no need to repeat the procedure. The drying time for the base is 2 days.
In both the first and second options, the applied patch is guaranteed to last a year, or even more.
Advice. If the bathroom is very old and when a chip is detected, limescale deposits are visible, then in this case the above two methods of restoring the enamel surface will not work and more radical measures must be taken.
We buy enamel to repair chips.
Bath enamels come in different volumes; naturally, to repair one or two chips, you don’t need a liter jar like “Reaflex50” or a bucket of “liquid acrylic”. So go to a technical store and ask for enamel to repair chips. They are sold in small tubes, just enough for 3-4 chips. For clarity, several such sets are shown in the photo below:
Among the presented enamels, the best is considered to be the “Tub & Tile” enamel (in the photo it is green on the right). True, the price of this set is about 900 rubles (this is in the Moscow Leroy Merlin). How to putty a chip and paint over it will be shown below.
Recovery using special tools
The most effective method of eliminating chips using specially developed products is considered to be the most effective. The effectiveness of the method increases significantly. The patch is more resistant to external influences and its service life is several years.
Set includes:
- putty with increased moisture-resistant properties;
- enamel aerosol in a can;
- spatula for leveling the product;
- sandpaper for grouting.
Procedure for using special equipment:
- First, the putty must be brought to the required thickness according to the instructions. The resulting homogeneous mixture is evenly distributed over the surface of the chip so that it covers the entire area of the damaged area.
- Next, wait until the mixture dries and begins to harden. The surface is cleaned with coarse sandpaper, only then sanded with fine-grained paper.
- After the patch becomes even and smooth, it is covered with several layers from an aerosol can.
- Complete drying will occur only after 72 hours, not earlier. During this time, it is necessary to prevent moisture from entering the treated area of the coating.
- After the drying time has passed, you can begin sanding the patch and polishing it using GOI paste.
Advice. To eliminate enamel chips, it is better to choose light-colored putty, otherwise it will be visible through layers of paint.
Removing shallow scratches
The use of multi-component cleaning products, cleaning the contaminated surface with a stiff brush, careless handling of metal objects during repairs - all this leads to the formation of shallow scratches.
Such scratches must be eliminated immediately, since the penetration of moisture and caustic chemicals into the resulting gap leads to the formation of rust, the proliferation of moisture-loving microorganisms and an increase in the size of the scratch. Which will lead to further destruction of the bathtub surface.
Shallow scratches include damage that does not expose metal. These minor damages can be repaired even without priming the surface.
The factory enamel on the bowl of a cast iron bathtub is very durable, so a screwdriver is needed to remove shallow scratches. If it has already been restored with acrylic or epoxy enamel, sanding paper will be suitable for treating micro-scratches.
In addition, to treat microdamages you will need:
- fine-grained sandpaper marked P1200, P1500 or a screwdriver with an attachment for attaching an abrasive wheel;
- fine abrasive car polish - economical polishes for one-time use are pastes from WILLSON and RUNWAY;
- wax polish without abrasive , for example, Golden Wax.
At the first stage, it is necessary to wash the surface with Pemolux, Comet, Sorti or baking soda to degrease. After removing the product, you need to dry the bath.
Next, the surface is polished with fine-grained sandpaper or a screwdriver with an abrasive wheel - zero, until leveled. When processing a scratch with a screwdriver, the minimum speed is set.
The treatment area must be constantly damp to prevent cracks from appearing when heated. Therefore, during the entire stage of primary polishing, it is necessary to pour a thin stream of water onto the damage.
After the treated surface becomes smooth and matte, it is necessary to apply a grainy polish to it. Treatment with a low-abrasive composition is carried out vertically, then horizontally, until a smooth, uniform surface is obtained.
The final stage of eliminating minor scratches is finishing the coating with car polish and wax. Wax-containing polishes are water-repellent and add a sparkling shine to any surface.
The polishing cloth should be soft and lint-free. Therefore, it is better to use flannel, calico, felt or microfiber cloths
After obtaining a shiny surface, it must be washed with soapy water or a non-aggressive liquid cleaning agent: Tersi, Oda, Sarma. Immediately after this, the bath can be used.
Small cracks
In case of scratches and shallow cracks on the enamel surface, it is better to use waterproof enamel. First of all, thoroughly clean the damaged surface from contamination with sandpaper, then degrease it with alcohol.
A layer of paint is applied to the treated surface. After it dries, the enamel area is painted again. This is repeated several times until the crack is filled with paint. Ultimately, the surface is rubbed and sanded with fine sandpaper.
Deep cracks
In this case, you need to use a specially prepared mixture, which includes BF-2 glue or epoxy resin, as well as additional bulk materials to add
More responsible work is eliminating chips more than 0.1 centimeters deep:
- holes are made (drilled) at the ends of the crack. This is done to prevent the crack from spreading further through the metal;
- the damaged area is cleaned of contaminants, washed and dried;
- putty is prepared and cracks are sealed;
- After drying is complete, the material is polished.
Fix a chip in the bathtub yourself - repair technology
Chips of the enamel on the surface of the bathtub occur even from minor mechanical impacts. The danger lies in the rapid destruction of the bathtub from corrosion (especially typical for steel bowls). If measures are not taken in time, it can lead to damage to the entire bathtub and the need to purchase new plumbing equipment, which requires a considerable investment.
Advice! Acrylic bathtubs require immediate repair if chips occur. Water getting inside the acrylic product contributes to the very rapid destruction of the bowl.
There are many options for repairing chips with your own hands. One of them is installing a standard acrylic liner . The liner can be used if there is a significant area of damage to the bathtub surface.
Installing an acrylic liner
Manufacturers produce earbuds in different configurations; choosing the required size is also not difficult. This method of repairing bathtubs does not require a large investment of time and money, and the labor intensity of the repair process is low.
Advice! Installing liners to repair damaged coatings on large bathtubs is the best way.
If the chip in the bathroom is small, you can get by with applying a porcelain patch . For restoration work, you will need fragments of porcelain dishes that match the tone of the bathtub surface. First, you should degrease the surface of the chip using gasoline. After degreasing the surface, the area should be cleaned with fine emery cloth. Porcelain shards should be thoroughly ground into powder, achieving uniformity of the porcelain powder.
Stages of applying a porcelain patch
Coat the chipped surface with epoxy adhesive. Apply a layer of porcelain powder on top of the glue, rubbing until smooth with a spatula. An ideally repaired surface using porcelain will gain strength no earlier than in 2 to 3 hours. This method is used for abrasions and minor scratches.
The second way to repair damage to bathtubs is to apply a mixture of dry whitewash with BF-2 glue. The ingredients are mixed to a paste. The degreased and sanded surface of the bath is covered with the prepared composition using a brush.
There is another repair technology using whitewash that helps restore damage to the bathroom:
- Cover the chipped area with a thin layer of BF-2 glue, which has previously been degreased with gasoline and treated with sandpaper.
- Apply white powder to the glue layer and smooth it with a spatula.
- After drying, apply a new layer of glue and whitewash, repeating the operation the required number of times until the new enamel layer is completely leveled to the level of the overall coating.
Advice! Subsequent layers of glue and white can be applied after the previous layer has completely dried. The patch gains strength in 100 hours.
Through holes
Sometimes there are specimens with damage right through the walls. This is where a lot of work is needed. In this case, it is recommended to use factory repair kits, which can be purchased at specialized construction stores.
Sequencing:
- Using a drill with a 2 mm drill, holes are made at the ends of the through hole to prevent its further enlargement.
- Clean the damaged area, being careful not to touch healthy enamel.
- Degrease the area with alcohol or acetone.
- Prepare a special composition from the repair kit, mixing liquids in accordance with the proportions specified in the instructions for use.
- Carefully lubricate the damaged hole with the prepared compound, inside which the sealant is placed, which is in the list of the repair kit.
- Wait for the mixture to dry completely, then clean the surface and degrease it.
- A paste is applied that restores the enamel coating.
- Polish the surface with a soft cloth.
Advice. If it is necessary to repair through damage on an acrylic bowl, then you should use a repair kit designed for restoring polymer coatings. In this case, it will not work for an enameled surface.
Damage Prevention
To avoid scratches, cracks and chips on the enamel coating, you should follow a few simple requirements:
- When cleaning the bathtub, do not use detergents containing abrasive particles.
- It is not recommended to place metal bowls and basins on the bottom of the bathtub.
- If it is necessary to carry out repair work near the bathtub, it is better to cover it with something to avoid damage.
- Do not scratch the surface of the coating with sharp objects.
- To clean heavy dirt, it is not recommended to use bleach; it is better to buy a special detergent. When purchasing a product, the wall thickness should not be too small.
In fact, there are not so many ways to correct defects in the surface of enamel bathtubs. All of them are not particularly difficult, and any man can do the repair of a chipped bathtub enamel with his own hands. In order for the bath to last for a fairly long time, you need to follow simple precautions.
Bottom line.
You can remove chips from enamel with your own hands. This requires time and care when carrying out the work, but is not impossible. The work is quite within the capabilities of both a man and a fragile girl. When performing activities involving chemicals, such as removing grease or eliminating mineral contamination, good ventilation must be ensured. The flow of fresh air will also help speed up drying.
Sources
https://vannayasovety.ru/kupalni/skol-na-emalirovannoj-vanne.html https://stroitelniportal.ru/remont/v-kvartire/v-vannoj/remont-emali/ https://dizain-vannoy.ru /santexnika/skol-v-vannoj-drugie-problemy-s-pokrytiem.html
