Our habit of solving small everyday problems on our own is ineradicable. And it’s not even about saving money, although they are never superfluous. There is something very attractive and understandable about living in an interior that is not only lovingly conceived, but also independently realized.
But do-it-yourself repairs of modern plumbing fixtures can be complicated by the variety of designs of the same faucets. Today we will tell you how to disassemble a ball mixer and repair it. This will help you avoid resorting to the help of specialists if the problem can be fixed on your own.
What is good about a ball valve?
Until recently, there was no alternative to a valve mixer. And so, with the advent of a single-lever mixer with a ball switch, users were faced with a choice: which faucet to prefer? It turned out that the ball design is in high demand. This is explained by the remarkable performance characteristics of this type of mixers.
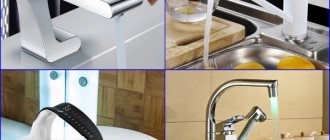
Another undoubted advantage of the ball mixer is its modern and attractive appearance: it can easily fit into any interior
The new faucet is very convenient to use. You don't have to twist anything to set the required temperature and water pressure. Simply put the lever in the desired position. This elementary procedure is performed automatically over time.
Those who have long preferred this design know roughly what position the rotary handle should be in so that both the pressure and temperature of the water are as comfortable as possible for a variety of purposes. It is useful for beginners to know that the water pressure is adjusted by moving the handle up and down, and the temperature – left and right.
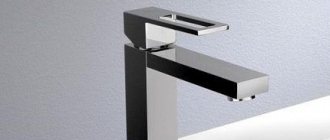
The ball mixer is very functional: it can be easily adjusted to the pressure you need and the required temperature with one movement of the hand
In addition, it is believed that a more reliable ball mixer cannot be found.
How to restore the nut yourself?
Step 1. Remove the gooseneck, upper and lower nylon rings.
Remove the gooseneck and both o-rings
Step 2. Using a thin object, pry up the rubber seals and carefully remove them from the special technological grooves. Work carefully, do not leave depressions in the grooves, as they may cause new leaks.
Next, remove the rubber seals
Now you should start replacing the worn clamping nut. It can be made from unwanted CDs.
Step 3. Using a compass or awl, carefully trace the nut onto the disk, making sure that the outer and inner diameters do not move. Using sharp small scissors, cut out the piece along the outer contour.
Cutting a blank from the disk
Step 4. Heat a piece of wire on the gas burner of the kitchen stove and make a hole in the center of the workpiece; without it it is impossible to remove the inner part of the disk.
A hole is burned in the workpiece with a hot wire.
Step 5: Using scissors, carefully remove the inner diameter. The disc consists of two parts, separate them.
Cut out the inside of the workpiece
Step 6. All components of the future nut should fit tightly onto the thread; adjust them using a small round file. You need to make 6 such blanks.
Blanks are adjusted to size
Step 7. Screw the elements onto the threads one at a time and glue them together with a special glue for polymers. This is a very effective composition; gluing is performed using the molecular welding method.
The blanks are screwed onto the thread, having previously been coated with glue.
Step 8. Press the tap in a vertical position and leave until the glue dries completely.
The crane body is turned over and pressed with a load on top
While the nut is drying, check the condition of the aerator. The device is designed to saturate water with air, thereby reducing jet splashing. Unscrew the aerator body, remove the internal parts and clean the narrow slots from dirt and oxides. Check the condition of the rubber gasket and replace it if necessary.
Check the condition of the aerator
The glue has hardened - continue assembling the mixer.
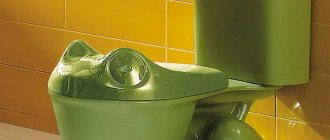
Single lever mixer with ball switch
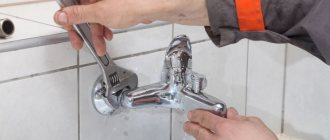
Alas, modern faucets, like their valves, fail from time to time. After all, their production uses the same materials: metal, rubber and plastic, which can wear out during operation or under the influence of external factors.
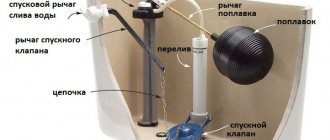
To repair a ball valve, you need to understand its structure and be able to dismantle it if necessary. The ball device includes:
- rotary handle; At its core, it is a lever, which is sometimes called a “butterfly”.
- stock; The rod seal is adjusted using a nut and washer, which are also included in the package.
- body with nut; The ball cartridge and rod are located inside this housing.
- ball cartridge; It is fixed using rubber saddles.
You can repair this faucet yourself, without resorting to the help of specialists; only if the body is mechanically damaged, you will have to buy a new faucet
A ball cartridge is a non-separable element that has three holes: for incoming cold and hot water and for removing mixed water of the required temperature and pressure from the device.
The operating algorithm for a crane of this design is quite simple:
- when the lever is lifted, the ball begins to rotate;
- the holes on the ball cartridge begin to align with similar holes in the seats;
- Depending on the area of coincidence of these holes, the jet pressure changes.
Build Specifications
The first appearance of ball valves occurred about a hundred years ago. The initial stages of development did not give high-quality results in shutting off the water due to the insufficient reliability of the materials.
With the advent of new synthetic substances, the design of the tap has improved significantly. The presence of rubber and fluoroplastic seals has increased the degree of sealing and the service life of these devices.
Important! High quality lubricant ensured more reliable operation of the ball valve.
The operating principle of any ball valve available on the construction market is quite simple. The design of such a device is not very complicated. The faucet consists of a valve, which is a movable device in the shape of a metal sphere with a hole made to allow water to pass through. Its diameter coincides with the width of the pipe.
Ball mixer malfunctions
If you handle the mixer carefully, without applying excessive force where it is not needed, products of this design can serve without fail for a long time. However, the following breakdowns can be considered typical for them:
- When the lever is in the blocking position, the flow of water from the tap does not stop.
- A faulty ball faucet provides too little water pressure, despite the fact that the pressure in your home's water supply has not dropped, which can be checked by opening other taps.
- The regulation of the water temperature in the mixers has been disrupted: it is impossible to achieve the required parameters, since the mixing of hot and cold flows occurs in a chaotic manner.
A fairly common malfunction of a ball mixer is manifested by water leakage when the device itself is in the blocking position
Before you begin repairs, you should understand the cause of the malfunction, which manifested itself in one of the ways listed above.
Prevention
It is not always possible to get rid of problems with the mixer with the help of repair work. More often you have to buy a new faucet and install it to replace the one that has become unusable. To extend the life of the crane without breakdowns, it is recommended to choose a product from manufacturers with a good reputation. In addition, it is necessary to regularly prevent damage.
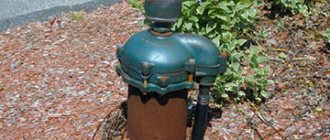
When buying a faucet, it is better to choose a brass model. They are heavier and stronger than sulimine. In addition, they are more reliable and last longer. Most faucet failures occur due to solid particles in the water supply and poor quality water. You can prevent them by installing filters.
Before disassembling the mixer yourself, you need to carefully study the instructions for it. Additionally, it is recommended to watch a video on how to do this, or consult with an experienced plumber.
When connecting parts, you need to use a sealant for greater reliability. If there is a thread, foam tape is used to strengthen it. To ensure that breakdowns are not unexpected, faucets are regularly inspected and seals are replaced.
Types of faults that occur
There is space between the ball cartridge and the rubber seats that secure this element. Its clogging is the most common cause of ball valve failure. Even a seemingly insignificant speck can lead to a violation of the tightness of the connection. As a result, the rubber seat may become deformed, causing the ball mount to become unusable.
Another frequently occurring breakdown is a clogged shutter. As such, repairs are not needed in this case. This problem can be solved by simply cleaning the plumbing fixture. True, for this the crane will have to be disassembled. But then, when you collect it, everything will be in order again.
Water may leak from the rotary knob cap. In this case, the connection should be tightened more tightly. If the flow of water stopped, then the reason for it was hidden precisely in a loose connection.
A clogged aerator leads to insufficient water pressure flowing from the faucet spout; this problem can be corrected by simply cleaning the aerator itself or replacing it.
The easiest way to solve the problem is with a clogged aerator. It is this that can become an obstacle to creating normal water pressure. If you remove the aerator and try to run water without it, then the change in pressure will make it clear whether the aerator was the cause of the malfunction. The aerator can be washed and replaced. Or you can simply replace it with a new one, as is done in the event of a complete failure of this part.
O-rings can also wear out. In this case, water may leak from underneath the faucet base. This malfunction is eliminated by replacing failed seals. Before starting work, turn off the water supply, then remove the mixer, disconnecting it from the inlets and unscrewing the nut that secures it. A worn gasket is replaced with a product of the same diameter. If the gasket is selected correctly, it will be installed in place with force. All that remains is to assemble the crane.
The only breakdown in which the mixer has to be completely replaced is a crack in its body: even if the ball switch is mechanically damaged, only this element can be replaced
The situation is worse if the ball cartridge itself is broken. It may crack, and, alas, then it cannot be repaired. You will simply have to replace it with a new one. You will have to act in exactly the same way in case of mechanical damage to the mixer body. There's no point in repairing it. It’s easier to buy and install a new faucet. If you are unable to immediately replace the faucet, you can use a sealant that will temporarily stop the leak, but remember that the device needs to be replaced. And the sooner the better.
Problems especially often arise due to increased hardness of the water circulating in your water supply system. Moreover, the type of mixer you use does not really matter. In order not to change faucets endlessly, you should install a filter that purifies the water. Even a rough cleaning device can block those particles that cause major breakdowns of plumbing fixtures.
Installation Features
The ball valve can be installed almost anywhere in the pipeline. Threaded products are easy to install yourself. At a predetermined location, the pipe is cut, a thread is screwed onto it, a seal is wound on it, and a locking element is secured.
Installation of welded or plastic taps will require the use of a welding machine or a special soldering device, respectively.
When the crane is placed horizontally, the rotary handle is located on top (deviation from the vertical is allowed no more than 45°).
It is important! The valve is installed taking into account the arrow located on the device body and showing the direction of movement of the working medium through the pipeline. If there is no arrow, the device can be mounted on either side.
After installation, the tap must be checked for functionality and tightness in all positions. It is also important to make sure that nothing prevents the free rotation of the lever or butterfly.
Let's start repair work
Let's assume that all precautions have been taken, but still repairing the ball valve of your mixer is inevitable. To repair a ball mixer, you can, of course, invite a plumber. But it is better to try to do this work yourself. There is nothing super complicated about it. Just listen to our advice.
To perform repair work, you will need tools, which you must prepare in advance so that they are at hand.
No special tools are required to carry out repair work on a faulty ball mixer: all these items are necessarily present in the arsenal of any home craftsman
This:
- adjustable wrench;
- hex wrench of suitable size;
- a screwdriver that can be used, if necessary, like a thin knitting needle;
- pliers;
- flashlight.
First, you should turn off the supply of hot and cold water, otherwise your manipulations with plumbing fixtures may lead to a flood. Do not forget that there may be residual water in the tap, which should also be drained. Before starting work, you need to cover the sink with a rag. This measure will protect it from possible damage.
Now you can begin dismantling the mixer.
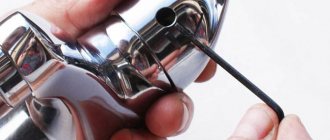
At the initial stage of repair work, the decorative plug with the image of hot and cold water should be removed; it blocks access to the screw that secures the lever
The sequence of work in this case is as follows:
- There should be a decorative plug on the mixer body that will have to be removed.
- Under the plug there is a hole through which you can get to the screw holding the faucet lever. This screw must be unscrewed.
- The lever is now free and can be removed. If the faucet has been installed for a long time and no one has unscrewed it, significant force may be required at this stage. It is important to act carefully and not damage anything.
- So, we now have access to the dome of the crane and the eccentric located underneath it, made of plastic. Both parts need to be removed. Below them is a ball cartridge. All contaminants that may be found during the dismantling process must be carefully removed.
- The ball switch is removed from the mixer. It must be examined from all sides. As mentioned earlier, if damage is detected on this one, it should be replaced with a new one. Covering cracks on the ball with sealant does not make sense.
- Inspect the rubber seals. They may lose elasticity or simply wear out. New seals must be installed in place of worn-out seals. It is also better to replace the elements that secure the ball switch. If they have worked for a long time, then this should be done even just for preventive purposes.
Plumbing gaskets are consumables: they often fail and have to be replaced; If you have to buy a new pad, take the old one with you so you don't get the wrong size
All that remains is to assemble the mixer. This must be done in reverse order.
You can get more information about repairs from this video:
If you did everything correctly, the mixer should now work properly again. However, the leak may be located under the spout, which is also called a spout or gander. Then you will have to remove the spout and replace the old o-rings with new ones.
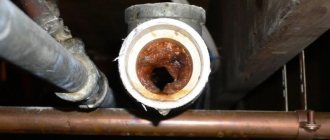
Particular attention should be paid to the mixer when you have an old water supply system in your house. In this case, particles of rust and other contaminants may clog the openings in the switch through which hot and cold water flow. These blockages can be cleaned with a cloth or your hands. This procedure should be performed periodically, even just for preventive purposes.
Another problem that may bother owners of ball valves is the annoying noise that occurs when turning on the water. It occurs due to vibration created by air and water currents. Due to its effect on rubber gaskets, they can also begin to vibrate. To avoid this effect, you can reduce the water pressure, install a filter, or achieve a tighter fit of the rubber gaskets.
Externally, a silumin mixer looks no worse than any other model, but such products rarely last more than a year; You can distinguish them by weight: silumin is very light
The service life of a ball mixer is influenced not only by external factors, but also by the material from which the tap itself is made. There are often cheap models on sale that are made from silumin, an alloy of silicon and aluminum. They are short-lived, but are great for training those who like to do everything with their own hands. And for a long and trouble-free service, it is better to choose a more expensive, but also reliable model.
Repair materials and tools
To carry out repair work, the faucet is disassembled without disconnecting it from the sink or sink. Sometimes the spout needs to be repaired. To do this, you also do not need to dismantle the plumbing equipment. To disassemble the faucet, you need to remove the handle and unscrew the nuts holding it.
To repair the mixer, prepare the following tools:
- an adjustable wrench to unscrew the nuts and remove the flexible connection;
- a flat or socket wrench, which is needed to tighten or remove bolts on studs;
- hex wrench or Phillips screwdriver needed to remove the faucet handle.
After disassembling the mixer and removing the water supply hoses, it often turns out that the equipment is heavily contaminated with lime deposits or rusted. Therefore, before work, it is recommended to clean rust and limescale deposits. This will make disassembling and subsequent installation of the mixer easier.
There are rubber gaskets in the underwater hoses and the mixer body. There is no need to use synthetic tape or linen to further seal the joints. Underwater water hoses wear out quickly. Therefore, it is better to replace them during repairs. Preference should be given to hoses with stainless steel braiding and copper or brass union nuts and fittings.