Assemble the pallet
Shot: @Alexander Kvasha / YouTube
As a rule, the lower part of the shower cabin is made of acrylic and reinforced with a metal frame on height-adjustable legs. The front of the structure is covered with a decorative screen, which is more convenient to install at the very end of installation.
Assemble the frame according to the diagram. Usually this is a cross of two steel pipes, which are screwed to the pallet with self-tapping screws in certain places with mortgages. Use only the supplied screws, otherwise there is a risk of drilling through the bottom and ruining it. To reduce squeaking, you can first apply a layer of silicone sealant to the frame.
Install studs with nuts, legs and screen brackets at each end of the cross and in the center. First, roughly adjust the height using the nuts. Then use a bubble level to check the position of the pan and make sure it is level. If necessary, raise or lower the corners by rotating the legs, and once the adjustment is complete, secure them with lock nuts.
Assembling a shower cabin with your own hands: step-by-step instructions
It would seem that quite recently most of us only saw shower stalls in movies or in advertising magazines. This plumbing “unit” was perceived, rather, not as a convenient complex for regular hygienic procedures, but as a luxury item, not accessible to everyone. But very little time passed, and the cubicle turned into a faithful assistant, sometimes even more useful than the bathroom familiar from childhood.
DIY shower cabin assembly
Yes, and think logically - do we use the bathroom so often these days? In the “era” of meters for hot and cold water, not everyone can afford to spend 100 liters for one procedure - perhaps to bathe a child. Doing laundry in bathrooms has also almost ceased - automatic washing machines, which also migrated from the “elite” category to the completely ordinary set of an ordinary family, have become responsible for this matter. But you can’t do without a shower. In addition, we must not forget about the eternal issue of insufficient space in bathrooms and toilets - and purchasing and assembling a shower cabin with your own hands in most cases immediately alleviates the severity of this problem.
Of course, if it is possible to have both, that’s great. But even in terms of ease of use, the shower stall leaves far behind a conventional bathtub with a mixer. Modern models make the process of taking a shower very pleasant, sometimes even a healing procedure. And some of them, in addition, allow owners to even “not switch off from the media space” - IP or GSM communication channels or a built-in FM radio take care of this.
The article will give brief recommendations on choosing the right model, and, most importantly, the reader should get an answer to the question - will it be feasible for him to install a shower stall with his own hands, or is it better not to risk it and turn to the help of specialists.
“Basics” of shower stall design
In order to correctly select and then correctly install a shower stall, you need to at least roughly understand its basic structure. Of course, there are a great many models of booths, but the general pattern of layout is respected for everything.
First of all, shower stalls differ in types of construction.
- Open cabins are, rather, simply a space fenced off for taking a shower - they consist of walls and a tray. Although, in some cases, a special tray may not even be used - if another method of collecting and draining water into the sewer is thought out, for example, a reliably waterproofed floor with a drain.
The simplest corner cubicle of an open type
Open shower cubicles can be wall-mounted, but most often they are produced in a corner version - in this case, the role of the two walls of the cubicle is taken over by the tiled walls of the room. If the room has some complex configuration, then, if desired, you can choose a shower stall designed to be built into a niche. In this option, it becomes even simpler - three walls are already ready, and all that remains is to install the front one, with the entrance door.
Sometimes in reviews of such products, open stalls are called shower screens or shower enclosures.
- Closed booths can also be wall-mounted or corner, but they are already a completely insulated box, with a pallet and a mandatory roof, with very tight-fitting door leaves.
A closed-type multifunctional shower cabin is often an entire health and hygiene complex.
This design opens up wide opportunities for expanding the functionality of the cabin. Hydraulic nozzles for creating massage jets, various shower heads, special instruments and devices for aromatherapy are built into the wall and ceiling panels to provide the effect of a steam bath or sauna with infrared heating. In fact, an ordinary shower stall can become a kind of universal home bath and health complex.
- By the way, for those apartment owners who would like to have a modern shower stall, but at the same time not give up having a bathroom (even in conditions where the space is cramped), we can recommend “hybrid” models. Such products, of course, are quite expensive, but they allow you to use the bathroom as needed, or turn it (entirely or a certain section of it) into a shower stall.
An interesting design - it combines both a bathtub and a shower stall.
Now - about the main components of shower stalls, starting from the bottom.
Shower tray
The pallet is the “base” on which the entire structure of the shower stall is based. Plus, it must also withstand the considerable weight of a well-built adult being washed. In a word, the requirements for its strength are special.
Pallets can be made from various materials. From time to time you still come across metal ones (enameled cast iron or stamped steel). Much more often, booths are equipped with polymer pallets or made from special composite materials. The most common are acrylic or quarryl (quaril is a more advanced composition, which is a mixture of acrylic and quartz filler. The popularity of products made of artificial stone is a special polymer composite that perfectly imitates natural marble or granite.
The shape and size of the tray, in principle, largely determines the volume and spaciousness of the shower stall itself.
Various shapes of straight pallets
In shape they can be rectangular, pentagonal, a segment of ½ or ¼ circle, or take other rather complex configurations (for example, there are booths without doors in the shape of a “snail”). When choosing the right size, it is necessary to take into account that the space of the booth should not greatly restrict the movements of the person washing in it. This is especially important if there are very large or obese people in the family.
The minimum size of corner pallets is 800 × 800 mm, but this seems like too tight a space. Of course, one must always proceed from “territorial possibilities,” but if the area allows, then the best option would still be 900 × 900 mm or even 1000 × 1000. By the way, this is also important if, for some reason, someone family members will need to take water procedures in a sitting position.
It would seem that only 10 - 20 centimeters, but how radically different the cabins are in spaciousness
Now – the depth of the tray. According to this parameter, it can be flat, more than 30 ÷ 40 mm deep, medium or deep (with a bowl up to 180 mm). When choosing, again, you need to take into account the fact that sometimes not all family members will be comfortable climbing into the booth over the high side (the bowl itself is quite deep, plus the tray is located at a certain elevation from the floor level). But on the other hand, the function of reliable collection of water and its timely disposal to the sewer system must be fully respected.
Homemade pallet lined with mosaic tiles
Often home craftsmen refuse the “standard” cabin tray and lay out their own - made of cement, with careful waterproofing, reliable drainage and lining with non-slip ceramic tiles. Then the walls of the booth are mounted on this ready-made homemade pallet.
Vertical shower enclosures
These elements include the frame, fixed walls, conventional or functional, and entrance doors of one design or another.
The frame, which is attached to the pallet and will serve as the basis for the walls of the booth, is usually made of lightweight and corrosion-resistant metal (aluminum) or plastic. Plastic frames, of course, are less durable, and they are often “disguised” as metal using surface painting - you need to be careful when choosing.
The enclosing walls themselves are made of either fiberglass or natural tempered glass. Fiberglass is lighter and cheaper, but its inexpensive varieties tend to gradually, under the influence of time, temperature and humidity, lose transparency and color saturation, become cloudy, and become covered with a network of microcracks. If you choose a plastic option, then it is better to immediately purchase a translucent one - on it the indicated shortcomings will be less significant and will remain invisible longer.
Glass walls are made of a very durable material, and you should not be afraid of breaking it - this is almost impossible, unless, of course, you set such a goal and use a heavy tool. And even in this case, the glass will shatter into small fragments of the correct shape, which should not pose a risk of injury.
The main equipment of the shower stall is located on the fixed side walls and the rear panel.
The back and side walls of some models are not just a fence, but perform many functions. It is on them that all plumbing fixtures are mounted, including various faucets, shower heads, massage hydraulic nozzles, steam generators, lighting systems and other “bells and whistles” with all the necessary mechanical or electronic control elements. On the back side of these walls there are all the necessary hydraulic and electrical wiring with connections to the water supply, electrical network and, if necessary, to other communications.
The doors to the shower stall can be hinged, sliding (folding or sliding) or rotary-sliding, rotating around a vertical axis.
Shower stall with hinged door
From the point of view of ease of installation and practicality of operation, the usual swing doors, single or double leaf, are undoubtedly the leaders. But they also have a drawback - they require a certain space to open relative to the suspension axis. Large booths sometimes have doors that open inward. Well, in small models, during installation you will have to provide space for the sash so as not to accidentally injure yourself on it or break the door.
Top and bottom rollers for sliding doors
Sliding ones do not have this drawback - they move along guide “rails” using a system of suspended and thrust rollers. This adds some complexity to installation and adjustment work, but is quite convenient during use.
Typically, all vertical shower enclosures, regardless of the material of manufacture, are covered with a special hydrophobic material. This measure prevents drops of water from remaining on the walls - they simply flow down, without leaving characteristic whitish spots after drying.
Shower stall roof
This structural element, as already mentioned, is not found in all models, but where there is a cover, it performs several important functions:
A shower stall cover is typically a very multi-functional area.
- Firstly, it is the sealing of the cabin space, especially if it has the possibility of a “steam bath” or “aromatherapy”.
- Secondly, usually several plumbing devices are attached to the lid - a shower head, massage nozzles, etc.
- Thirdly, it is on the roof that the ventilation system is assembled with steam exhaust into the ventilation ducts of the house.
- And fourthly, various electrical devices, for example, speaker systems or lighting points, can be mounted on the cover.
Additional equipment for shower stall
Sometimes it seems that when it comes to additional equipment for shower stalls, some manufacturers are simply trying to “outdo” each other. So, in addition to conventional mixers and showers, as already mentioned, various massage jets and “tropical rain” effects are used. Models with steam generators are in demand, especially with the ability to regulate the temperature of the steam and saturate it with aromatic or cosmetic compositions. There is a possibility of ionization (ozonation) of air. Mobile communications, radio, and other media capabilities are built into the booth, original types of lighting are installed, and voice control of all built-in functions is installed. Is it worth paying a lot of money for such “bells and whistles”? This is a purely individual question.
But from the point of view of operational capabilities, one of the features should definitely be paid attention to. The fact is that shower cabins equipped with massage nozzles require a certain pressure at the water inlet. Very often there are situations when, after installation, the owner of the cabin is suddenly faced with the fact that the shower is barely flowing, and there is no question of hydromassage. And the reason is that it was necessary to compare the parameters of the model and the pressure in the water supply network. Thus, in high-rise buildings, usually the pressure rarely exceeds 1.5 ÷ 2 atmospheres (and on high floors it can even drop to critically low levels), and according to the equipment parameters, all 3 ÷ 4 atm may be required. This means that you will have to fork out more for an electric pump and a water receiver (hydraulic accumulator), from where water will be supplied to all hydraulic devices of the cabin at the required pressure.
Prices for popular models of shower cabins and corners
Shower cabins and corners
DIY shower cabin assembly
Shower stalls are produced by many manufacturers, both European and Asian, mainly from China. To the credit of our eastern friends, we can say that the quality of their products is becoming higher every year, and taking into account the relatively low price, their products pose quite serious competition to established brands. Moreover, many Chinese companies began to introduce European models in their own licensed version.
But almost all products from China have one big “sin”. If Europeans accompany their goods with carefully thought-out instructions (even if not in Russian, then they are not difficult to translate), then our eastern neighbors approach this issue somewhat differently. Perhaps the problem lies in the “difficulty of translation”, but, as a rule, “manuals” are incomprehensible, difficult to read text with a lot of errors, accompanied by rather carelessly executed illegible pictures. In a word, deal with it as you wish.
To help you assemble a standard insulated corner shower stall yourself, we suggest looking at this process in more detail with a step-by-step presentation. Of course, each of the models has its own characteristics, but the general principle will still be the same.
Inexpensive Chinese-assembled shower cabin “RANCHO S-406”
As an example, we take a Chinese-assembled shower stall of the “RANCHOS-406” type. It belongs to the category of corner cabins, with a quarter-circle tray, with a minimum number of options - in addition to a hand shower, there are six hydromassage nozzles on the rear panel, and a “tropical shower” on top. The size of the pallet (in radial calculation, from the corner to the circle line) is 900 mm.
The price for such shower stalls is quite “democratic”, about 14 ÷ 20 thousand rubles, and therefore it will probably be a little disappointing to pay another 5 ÷ 7 thousand for installation. Moreover, it is not particularly difficult.
- First of all, you need to prepare in advance the place where the booth will be installed. Its total weight, excluding the person washing it, is 83 kilograms, that is, the base must be strong and not have unstable areas.
Homemade podium for a shower stall
- It is very important to ensure the required slope of water drainage, that is, the height of the drain hole of the pan above the inlet pipe to the sewer. In order for the water to flow confidently without stopping, an excess of 70 mm or a slope angle of at least 5 degrees is required. If this is not observed, then you will probably have to take action right away - either deepen the sewer pipes, or raise the cabin, constructing a solid podium under it.
Prices for components for shower cabins
Accessories for shower cabins
Video: podium option for a shower stall
- It is clear that at the installation site it is necessary to provide for the supply of cold and hot water supply pipes, a power supply line equipped with a safety device on the panel - an RCD.
- To work, you need to prepare a free area near the site of the future permanent installation - initially all actions will be carried out there. You should have the necessary tools on hand - wrenches (adjustable ones are better), screwdrivers or a screwdriver with a set of bits, a sharp construction knife, a syringe and tubes with silicone or acrylic sealant, a measuring tool - a tape measure and, of course, a construction level. There should be a little paint, about 50 g, for metal surfaces (it is best to use AkzoNobel “Hammerite”, which can be applied to rust), and, accordingly, a brush. The acrylic tray on the back side is quite dangerous from the point of view of getting cut wounds on the hands or driving deep splinters, so all work must be carried out with mittens (thick fabric gloves).
We open the package, once again check the integrity of the parts and the completeness of the set
- Work begins with unpacking the set of the future cabin. You need to immediately make sure that all large parts are present and intact - first of all, of course, the glass. They are put aside for now so as not to be accidentally damaged.
The spare parts and accessories are immediately checked - very often there are some minor shortcomings
- The presence of all spare parts and accessories is immediately checked. If in terms of large components or accessories there have been no precedents for understaffing, then in terms of fasteners, with a probability close to 100%, there will be some kind of shortage - either there will not be enough screws, or nuts, or M16 washers. Therefore, it is better to immediately check and create the necessary reserve - it will be a shame to be distracted in the midst of work because of such trifles.
Pay attention to the drain siphon (shown with a green arrow in the picture). As a rule, the one that comes with the kit does not stand up to criticism, and it is better to purchase a decent one in advance that you can rely on.
- The tray is turned upside down. The surface on which you will work with it should not scratch its front surface - you may have to lay some soft material underneath. Once again, warnings - all work is carried out only with mittens on your hands!
Screwing in the studs and pre-positioning the support nuts
- Four pins are inserted into the mounting holes until they stop: three in the corners and one in the center of the arc. Under no circumstances should you tighten them with a key. The studs will not take a perfectly vertical position - don’t let this bother you, at the moment it doesn’t matter.
Nuts are screwed onto the studs approximately to the level of the bottom surface of the pan, and washers are installed on top of them (shown in the figure with green arrows).
- The metal racks of the pallet support are put on the studs. First, a solid, shorter beam is put on - it goes from the pin in the back corner to the arched front side. Then a second one is put on top of it, consisting of two halves welded on top with a metal plate.
The place where the central support leg is screwed in is controlled.
When installing the first, short beam, you need to make sure that the threaded hole (nut) for installing the central support leg is on the outside, and from the crosshairs of the beams - closer to the front of the booth (shown by the green arrow).
Correct placement of support beams
Once again, for control purposes, the prefabricated beam must be installed from above (shown by the white arrow), otherwise uniform pressure of the pallet to the supports will not be ensured, and its deformation may begin.
- After the beams are put on, the studs will take the required vertical position. The lower nuts can be adjusted so that the beams lie freely on the surface of the pallet. One more washer is put on top and the fixing nuts are tightened (shown with a green arrow). However, you should not tighten them yet.
Fixing beams on a pallet with self-tapping screws
- Now it’s the turn to fix the beams to the pallet using self-tapping screws. To do this, wooden inserts are poured into the thickness of the acrylic in the right places. Their location exactly matches the holes made in the metal profile. All that remains is to use a figured screwdriver to screw in the screws, after putting the washers included in the kit on them.
Final fixation of beams on studs
- After all the screws are completely screwed in, you can finally fix the beams on the vertically standing stud legs. This is done very carefully, with even forces from above and below, so as not to disturb the position of the squirrels and thereby not accidentally pull out the screw.
Steps should be taken to prevent corrosion of metal beams
- Now here is an important point that is never mentioned in any Chinese factory instructions. The support beams are made of the most ordinary steel, which in conditions of high humidity will very quickly begin to rust and will not last long. This means that you need to take the time to paint over all suspicious areas with Hammerite paint (its color is absolutely not important). This precaution will create reliable protection against corrosion - the main thing is not to leave “bare” areas. By the way, the ends of the beams are plugged with plastic rectangular plugs, and underneath them, as a rule, there is metal already touched by corrosion. Be sure to remove the plugs, paint the cavity to the maximum available depth, and then put the plugs in place.
Preliminary fixation of support legs
- The next step is to screw on the studs and pre-fix the legs with a locknut. You should not lock it too much, since the main alignment will still be done later, after installing the booth in its regular place. (In the picture, the arrow additionally shows a painted over and plugged hole in the metal beam).
Don’t forget to put on the brackets for attaching the decorative “apron”!
When installing the legs, you must remember to first put special brackets on the studs, which are necessary for installing a decorative “skirt” - a screen covering the space under the pallet. True, it would be better to postpone this operation - mounting the screen - until the very end of the work.
The legs must be aligned to the same level in all directions
- You can and should immediately pre-set the legs to the same height. In this case, a long building level (or a long rule with a level) is used in such a way that control measurements can be taken both between adjacent legs and diagonally. In addition, the level of the central support leg must be checked. After this, the legs are pre-fixed with locknuts.
The pallet should fit tightly on all five points, without any play
- You can turn the tray over and check its position on the floor. It must stand steadily, on five points of support at once. It is especially important to prevent the central leg from sagging - this could result in the surface of the pallet being pressed through.
Installing the sump outlet valve
- Now you can screw in the outlet valve with the plug for the pan (if, of course, you feel the need for this). This option, however, makes it possible to take foot baths and can be useful.
As already mentioned, it is better to change the siphon, although the picture shows a “Chinese”
- After this, the outlet siphon is installed in place. The picture shows the installation of the siphon included in the kit. However, as already noted, it is not of the best quality, and you should not skimp on a good one, elbow or bottle type, depending on the clearance from the floor below.
- The next difficult operation is assembling the block of front arc-shaped shower enclosures with side glass inserts.
The difficulty is that first you need to understand the purpose of the parts - they are not symmetrical at all. The upper curved guide is always wider, the lower one is much smaller in height, but has noticeable shaped cutouts at the edges.
Glass also has a different top and bottom. The difference is noticeable in the number of holes - there are more of them in the upper part.
An operation that requires special care is assembling the frame and fixed glass of the front fence
- To begin with, we assemble the structure, as they say, “by weight.” The glass has visible edges with grooves - they should fit well with the upper and lower guides.
The top and bottom of the glass are sealed with sealant
- After this, the glass needs to be gradually pulled out slightly from the groove - only in order to apply a small amount of silicone sealant there with a syringe (it is better to use transparent). Then the glass is inserted all the way into place, and the excess sealant that appears is immediately removed. This is very easy to do “fresh” with your finger dipped in a thick soap solution. There is a clamping clamp on the guide (shown by a green arrow). It is tightened with a screwdriver, and the glass will be securely installed.
Fastening the vertical stand with a self-tapping screw
- Next, you need to install vertical posts along the outer contours of both glasses. There is a standard seal there, and there is no need to lubricate it with silicone. The stand is simply placed on the glass until it stops, and is fixed with arched guide screws at the top and bottom.
Installing a seal along the edge of the glass
- All that remains is to put the included silicone seals on the inner edges of the installed glasses. At the same time, we make sure that the wider side, the “petal,” remains inside the booth. The seal is put on all the way, no special fixation or additional use of silicone is required in this case.
Mounted front frame after installation on pallet
- The assembled unit should be immediately installed on the pallet. The pallet is not yet in its normal place, but it should be completely stable and strictly horizontal - it would be a good idea to check this.
This is especially important because the front arc-shaped guard with side windows is installed exclusively on the sealant, and, at first, before being fixed with the side walls, it stands only under the force of its own gravity. The designers do not provide any fastenings to the pallet with self-tapping screws. When applying sealant to the installation site, you must ensure that the water drainage grooves do not close.
Preparation for installation of side panels - the joint is coated with sealant
- It's time to install the side opaque panels. The places where they meet with the vertical posts of the front fence are generously coated with silicone sealant - gaps cannot be left here.
Similarly, at the place where the panels are attached to the pallet.
Similarly, the sealant is applied to the pallet, in the area where the side wall will stand. And again, never fill water drains with sealant.
In the designated places, the parts are connected using self-tapping screws
- Then, using self-tapping screws with washers on them, the vertical wall profile with the vertical guide of the front fence, as well as the lower wall profile with the pallet, are fastened together. In both cases, special holes are provided for this. The screws are tightened tightly until they stop. Excess sealant that appears is immediately and carefully removed.
Both side panels installed
After installing both side walls, you should end up with a design like this. You can proceed to installing the back panel with controls and plumbing fixtures.
Preparing to install the rear panel
- To do this, in the same way as before, strips of silicone are applied to the joints of the vertical and horizontal parts - along the side wall posts and along the contact line on the pallet.
It is important to first attach everything, and only then tighten the connecting screws tightly
- Now you can carefully install the back panel and secure it at the fastening points with self-tapping screws. To begin with, just grab it in order to attach all the fasteners, since a small amount of play may be required. After this, all screws are tightened completely, excess sealant is removed, just as before.
The back panel is installed.
It is recommended to leave the structure for a day - let the sealant dry. In this position, it is recommended to leave the structure for a day - during this time the sealant will completely vulcanize, harden, and the assembled cabin will gain the required strength. Only after this should you move on to hanging the doors.
Preparing glass sliding sashes for hanging
- And during this time you can prepare the doors for hanging. Silicone sealing inserts are installed along the vertical edges of the curved glass sheet. The one that is placed on the outer edge of the glass should be oriented with the “petal” outward, and the one going along the inner edge - vice versa.
- The rollers, upper and lower, are inserted and secured into the standard sockets. The upper ones are adjustable and are temporarily fixed in the uppermost position for initial installation. The lower ones are simply spring-loaded, push-on - they will allow you to pull them back when installing the door.
Adjusting the rollers will require special care and attention.
- After the time required for the sealant to harden has elapsed, the doors are suspended by the upper rollers on the upper guide; the lower rollers, after temporary pressing, should stand on their “rail”. Now, by tightening the adjustment screws of the upper rollers, it is necessary to achieve, firstly, reliable suspension, without play, secondly, smooth closing and opening, without wedging, and thirdly, uniform convergence of the sashes along the entire vertical line, so that There were gaps left for splashes of water to penetrate.
Doors are hung and checked
- All adjustment screws must subsequently be closed with plastic plugs. The door is checked for “operability”. After this, you can proceed to installing the upper part of the cabin - its roof.
The main part is the roof cap, on which several elements are mounted
- At its core, the roof is a ready-made shaped part, but several additional elements must be mounted into it. These are a “tropical rain” shower, exhaust fans and an acoustic head - a speaker for connecting to a radio or telephone.
Fans are attached to self-tapping screws...
- The fans are fastened with self-tapping screws to the places prepared for them. You can often hear complaints that the alignment of the holes does not match. Well, you will have to work with a drill or screw a self-tapping screw into the plastic “live”. It’s not scary - this place will still be covered from below with a decorative cap.
...and a speaker. It is advisable to coat the contact area with sealant
- The speaker mounting is not much different - the same screws. By the way, both when installing the speaker and when installing fans, it would be useful to coat the seat with silicone sealant - this will become a kind of gasket and will reduce noise - the fan will not resonate much.
Installing a tropical shower nozzle with a water supply hose
- The shower head for a “tropical shower” is first secured in its socket with a special nut, and then a flexible hose is connected to it, which will subsequently go to the hydraulic unit of the rear panel of the cabin. The connection is very simple - with a clamp, and should not cause any problems.
From below, the roof looks much nicer...
That's it, the roof can be lifted and installed on the cabin using the same sealant and standard metal fasteners.
Don’t forget to then install the shower mixer, handles, shelves and other little things
- There are still a bunch of small parts left in the kit - shiny door handles, shelves, mirrors, shower holders - all of this is neatly installed on standard fasteners.
- Next, you need to very carefully move the booth to its place, where it will already be located permanently. This installation must be preceded by connecting the cabin to the sewerage system, to water mains and to electrical communications. All connection points are located on the back side of the rear panel, and later there will be no access here. The connection is made with special flexible hoses, and a terminal cable connector is provided for electrical switching. To connect the booth, if you lack plumbing and electrical experience, it is better to contact the appropriate specialists or friends who are knowledgeable in these matters.
- After the booth is connected, be sure to once again carefully check the horizontal position of its position and the uniform fit of the support legs to the surface of the floor or podium. If something happens, it’s not too late to make adjustments. It is also recommended to securely fix the legs, for example, by “placing” them on a layer of silicone sealant.
After connecting to all communications and a thorough practical check, you can consider the booth installed and complete the installation with a decorative “apron”
- Next, it is necessary to carry out “sea trials” - arrange a full washing cycle using all modes. The main goal is to make sure that the booth is stable, the tray does not creak or “walk,” the doors and walls do not warp and do not allow water splashes or drips to pass through.
- Now you can take the final step - install a decorative “skirt” on the brackets, which will close the gap between the floor and the pallet and give the entire booth a finished look.
And finally, another video about the installation of a simpler corner open-type booth.
Video: DIY installation of a corner shower screen
Install a siphon
Shot: @Alexander Kvasha / YouTube
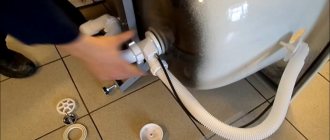
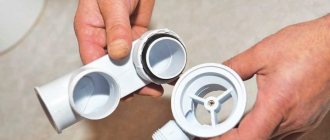
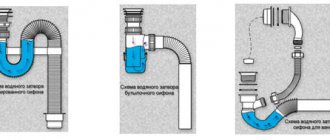
Find the parts of the drainage system and assemble it according to the included instructions. Turn the pan on its side and install the siphon. To do this, remove part of the protective film around the drain hole, insert the siphon socket into it, after installing the gaskets. Screw the union nut onto the reverse side and tighten it by hand.
If you are not sure about the quality of the seals, coat all joints with sealant, but keep in mind that disassembling the joint will be problematic later. Typically no additional sealing is required.
Try the drain onto the sewer socket, but do not connect it yet. It’s more convenient to do this at the very end, after assembling the booth (when you slide it into place).
Malfunctions. Prevention and repair
Over time, any shower stall can begin to leak. It depends on how well all the seams were sealed. A common cause of leakage can be the formation of water deposits, damage to the sealant and improper care of the shower box. To avoid this, it is necessary to keep the box clean and also timely service the operation of all elements.
To prevent the formation of plaque and damage to shower stall parts, it is necessary to install water purification filters and change them in a timely manner.
The shower box should be maintained regularly. Surface treatment with abrasive agents is not allowed. Consultants at plumbing stores recommend cleaning glass and metal surfaces with special cleaning products for shower enclosures.
_ _ _ _ _ _ _ _ _ _ _ _ _ _ _ _ _ _ _ _ _ _ _ _ _ _ _ _ _ _ _ _ _ _ _ _ _ _ _ _ _ _ _ _ _ _ _ _ _ _ _ _ _ _ _ _ _ _ _ _ _ _ _ _ _ _ _ _ _ _ _ _ _ _
Mount the center panel fittings
Shot: @Alexander Kvasha / YouTube
While the back wall panel is disassembled, it is convenient to install the shower switch, foot massager, as well as a shelf, mirror, towel holder and other accessories that come with the kit. For details of what is attached and where, look in the instructions.
Some budget models do not have a central panel; all accessories and control units are located on one of the side walls.
Materials and tools
In order for you to enjoy the work of assembling the hydrobox, you need to prepare all the necessary tools and materials in advance. Usually the necessary fasteners are supplied with the shower box, but sometimes, especially when assembling Chinese models, it becomes necessary to drill holes and use self-tapping screws.
What to prepare:
- Good quality sealant marked “sanitary” on the tube.
- Construction knife.
- Screwdriver.
- Wrenches of different sizes.
- A rag.
- A pair of cloth gloves.
Cheap boxes made in China are usually delivered incompletely, so you should additionally purchase a high-quality siphon, as well as washers (M16 hole). A distinctive feature of the Chinese hydrobox from the European version is that the marking of all parts for ease of assembly is indicated by explanatory inscriptions - “bottom”, “top”.
Based on numerous reviews from people who assembled the shower box themselves, you can immediately outline an assembly plan. In the first case, the pallet is delivered assembled and all that remains is to install it and assemble the side panels, and in the second case, there is a need to assemble the pallet, which takes more time and effort.
Assemble the side walls
Frame: @Alexander Kvasha / YouTube
Typically, the design of a shower stall is a frame made of an aluminum profile, into which the side walls are inserted and sliding glass doors are hung. Therefore, it is better to act with an assistant who will hold the walls.
First the frame is assembled. To do this, remove the film from the top of the pallet along its perimeter. Connect the profiles together with screws, but do not tighten them completely, in order to correct the position of the frame if necessary.
Place the resulting structure on the pallet and secure with bolts. Place silicone sealant inside the profiles and trim off the excess with a knife. Carefully insert the glass into place and secure it in the frame with special stops.
What is a shower box
A shower box is a simultaneous combination of a shower stall and a bathtub. For small bathrooms, a shower box will be the most profitable solution. The box cabin is equipped with a deep tray, which allows you to both take a shower and soak in the bath.
The plumbing market offers a large selection of different models of shower boxes. On sale you can find shower boxes of different sizes, corner and rectangular models, with a flat or deep tray, which can accommodate two adults at the same time. Such rectangular hydroboxes require space in the bathroom. In addition, most models have an expanded set of functions.
The hydromassage box simultaneously combines several possibilities - taking a bath (you can fill the tray with water) and a shower, as well as additional ones - a built-in water massage system and even a steam function.
Regardless of the cost, each shower box model is equipped with a panel that allows you to independently regulate the water temperature and the intensity of its flow. Built-in nozzles allow you to get a jet of water of different intensity and even get the effect of being in a sauna, since steam can be released from the nozzle.
If you decide to purchase a shower box and enjoy plenty of water treatments, do not deny yourself such pleasure. It is better to entrust the installation of such serious equipment to specialists. But if you are confident that you can handle assembling the box yourself, it’s worth a try.
Install curtains
Frame: @Alexander Kvasha / YouTube
Sliding doors move along special grooves inside the upper and lower frame profiles. First of all, install elastic stops for the rollers there. To protect against splashes, place seals on the ends of the side walls that will be in contact with the doors.
For convenience, immediately screw the handles to the curtains. According to the instructions, attach the rollers to the doors in the right places and hang the assembled structure on the frame. Check how the doors close and, if necessary, adjust the position of the rollers.
Door installation
From the inside we screw rubber stops for the doors onto 12 mm self-tapping screws.
We screw the handles to the doors. On the outside, the cap on the handles should be on the bottom. If the screw turns, insert a plastic insert into the hole. A cut cross for tiles will do.
From the handle side we put magnetic moldings on the doors. On the other sides there are L-shaped moldings with the shelf facing outwards.
We put the rollers on the doors with the wheels facing out. Rollers with a button are attached to the bottom of the doors (the button should face up). The adjustment screws on the top rollers should face down.
We hang the doors on the upper rollers. To start the lower ones, press the buttons.
We check the smooth movement of the doors and the tightness of the connection. Doors must not open independently from any position. The connection is adjusted using screws on the upper rollers.
Mount the ceiling panel
Shot: @Alexander Kvasha / YouTube
Remove the protective film from the top of the cabin and install a rain shower head, lighting, fan and other components. Connect all elements in the sequence described in the instructions.
Attach the panel to the frame using clamps or screws. If there is no factory seal around the perimeter of the roof, it is advisable to treat the joint with silicone before installation for better tightness.
Conclusion
A shower box with a bathtub 150x70 will provide you with a wide range of different water treatments. They will not only allow you to have a pleasant time in the bathroom, but also improve your health. Installing such a structure is quite feasible on your own.
Ready-to-use equipment
The video in this article will provide you with additional resources. Take care of your comfort!
Did you like the article? Subscribe to our Yandex.Zen channel
Connect communications
Shot: @Alexander Kvasha / YouTube
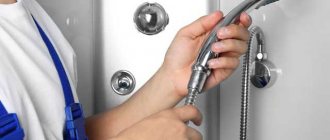
Connect the internal wiring of the shower cabin hoses according to the diagram in the instructions and secure all joints with clamps. Using flexible hoses, connect the cold and hot water fittings to the corresponding terminals in the wall. Tighten the union nuts with a wrench, not forgetting to install the gaskets.
Make sure the system pressure meets the manufacturer's recommendations. If the water quality is poor, install fine filters at the inlet to extend the life of the steam generator and hydromassage system.
To connect to the mains, use a waterproof, grounded outlet. It is desirable that a separate line with a two-pole circuit breaker and a residual current device be laid to it.
Push the shower stall into place and connect the siphon outlet to the sewer outlet. If the diameters do not match, use a transition collar, treating the edges with plumber's grease or liquid soap. When connecting the siphon with a flexible hose, shape it so that the middle part is raised and forms a water seal.
Basic nuances when installing a shower stall
The main thing when installing a shower stall is to choose the right place for installation. It should be next to the hood and, if the model has many additional functions, connected to the electrical network with mandatory grounding. When assembling the pallet, you need to use a building level, since the pallet must be installed strictly horizontally. When installing a pipeline, be sure to use sealants, otherwise water leakage will force you to redo the entire job. When connecting the cabin to the water supply, you must install at least one filter. All pipes are run along the baseboards or hidden in a box or wall.
Let's look at a detailed example of installing a shower stall using Massimo as an example. This is a corner booth made in China with a high tray. Size - 100x100 cm. Bought for 30 thousand rubles. For other models and manufacturers, assembly may vary.
Purpose of the product
A shower cabin or hydromassage box is designed for a person to receive water procedures in the form of a shower (manual and tropical), as well as hydromassage of the back and/or lower back.
This product must be used in rooms with an ambient temperature of at least +5 degrees and no more than +40 degrees Celsius, and equipped with water supply and sewerage.
Water should be supplied under pressure of 0.5-2.5 atm. through a coarse filter (particle size more than 0.1 mm). If the water pressure is insufficient, it is necessary to install a pump; if it is excessive, a reducer must be installed.
Shower in the room's recess
A shower of this type does not need a tray , because...
water flows into the drain due to the slope of the floor. An alternative option is a drainage system. Convenient in cases where even the smallest pallet is too high for some family members (for example, for the disabled and the elderly). A special feature of the installation is the installation of a water collection system (stairway or channel). The pipe and siphon are placed inside the screed. According to the rules, the sewerage system is located with a slope towards the riser.
Waterproofing of walls and floors near the shower stall in this case should be of particularly high quality and use antifungal agents . A special cuff is laid on the floor, which surrounds the drainage ladder. The cuff covers the main waterproofing layer to eliminate the possibility of leaks.
The sound of water transmitted to the rooms on the lower floor can be muffled by soundproofing . Some drainage drains are initially designed to absorb unnecessary sounds.
Stage 6. Connecting the electrical part
6.1. Connect the wires with terminals from the remote control to the light, exhaust fan and speaker, according to the indicators on the wires or the color of the terminals.
6.2. Place the power supply on the roof and connect it to the remote control using terminals.
6.3. Secure the radio antenna wire to the roof using tape.
6.4. Plug the plug into a 220V socket and check the functionality of all electrical components of the cabin.
