We bring to your attention a series of video instructions for installing Grohe products:
Installing a sink faucet -
Installing a bath/shower faucet -
Installing a kitchen faucet -
Installing a GROHE Blue® Chilled & Sparkling tap -
Installation of a shower set -
Installation of a shower system with a thermostat -
Installation installation
Installation GROHE Blue Home starter kit -
Replacing the Grohe Blue filter head -
Installation of the Grohe installation is described in detail in the instructions included with each kit. However, there are nuances of surface preparation and tool selection. During the installation process, problems discussed in this manual often arise.
Range of Grohe installations
With the advent of the wall-hung toilet, the problem of hidden communication wiring and installation of a flush cistern became urgent. First, frame construction installations were developed for this type of plumbing fixtures, then for other fixtures:
- two vertical racks made of a profile pipe - take the load from the weight of the plumbing fixture and the user, transfer it to the ceiling;
- horizontal jumper – used for fastening a toilet, bidet, and other plumbing fixtures, rigidly attached to vertical posts, and has studs for fixing plumbing fixtures;
- lower and upper jumpers – provide structural rigidity.
It is standard for installation systems to fasten the upper part of the frame to the wall with stops or studs, and the lower legs to the floor/ceiling. However, the toilet can be mounted near a light partition, to which there is no point in attaching the upper part of the frame. In this case, the installation is mounted only to the lower enclosing structure; the support legs have an increased size.
Enhanced installation option.
Due to the unequal thickness of further finishing, the manufacturer provides the ability to adjust the height of the plumbing fixture. For this purpose, in the lower part of the racks there are legs welded to a smaller profile pipe using a telescopic extension principle with clamps. After adjusting the height and horizontal level, the legs of the frame are tightened with bolts.
The metal frame of the manufacturer Grohe is installed in several ways:
- false panel - the frame is built inside the gypsum fiber board system;
- box - the installation is mounted in front of the wall, covered with plasterboard;
Wall mounting of the installation.
- in the corner - this option is only suitable for combined bathrooms;
- free-standing structure - this method is used very rarely, in bathrooms with complex layouts.
- structure height 0.82 m, 1 m, 1.13 m;
- standard width, narrow for small-sized toilets, wide with handrail fastenings for the disabled;
- with Skate Air panels and flush cisterns of various designs;
- with soundproofing elements, soundproofing inserts;
- For installation in free-standing mode, in front of a wall or in a corner.
Installation of an island-type frame structure.
Complete frame structure Grohe. Manufacturer Grohe produces installation systems for sinks, urinals, bidets, toilets, handrails for the disabled. Frame structures for wall-hung toilets and toilets with a bidet function are considered the most difficult to install and the most complete:
The installation distance between the studs is 18 or 23 cm, these are two standards for fastening toilets. The Grohe Solido version has an installation height of 1.2 m. Some third-party plumbing manufacturers equip it with Grohe installations by default. For example, Della wall-hung toilets are mounted on Rapid SL frame systems from the manufacturer.
Dimensions
The convenience and service life of this type of plumbing depends on proper installation, so you need to approach installation wisely and take into account the specifics of the device.
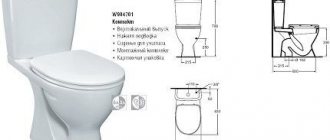
The manufacturer offers standard sizes for a wall-hung toilet with installation. The height of the cistern bowl is 30–40 cm, its width is equal to the same indicators. But the length of the bowl is calculated from the front edge to the wall; it is equal to 50–60 centimeters.
Do not forget about the internal parameters of the walls into which installation is planned. The depth of the wall opening for a block structure should be at least 15 centimeters, and the width and height should not exceed 60 and 100 centimeters, respectively.
The length of the frame may vary slightly up or down, but in general it remains within 60 cm.
The standard dimensions of frame installations are somewhat different from the parameters of block structures. The depth increases to 30 centimeters, the height to 140. The width remains unchanged, 60 centimeters.
If you are installing a toilet on a sloping wall or attic, you need to take into account the nature of the surface and reduce the height to 80–82 cm.
Both of the above types of installations have important similarities: they are very durable and can withstand, according to the manufacturer, up to 400 kg, which includes the own weight of the structure and a person.
Installation of a Grohe installation using the Rapid SL as an example
During installation with your own hands, you must perform the following sequence of actions:
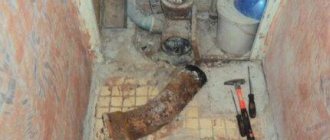
- dismantle the existing toilet;
- prepare enclosing structures and communications;
- secure the upper part of the frame to the wall, the lower part to the floor;
- align the structure horizontally and vertically;
- cover the installation with gypsum plasterboard sheets, cover the wall in accordance with the design project.
Then you can install the plumbing, configure the flush cistern mechanism and the 3/6 liter flush keys.
Tools
The toilet is installed using a fairly small arsenal of electric and hand tools:
- installation of fasteners - hammer drill or impact drill, screwdriver, wrenches, sockets;
- markings – laser/bubble level, marker, tape measure, square;
- adjustments - screwdrivers “-” and “+”.
Installation Features
Bathrooms and toilet rooms can be finished, as they say, “from scratch” using Grohe brand products. Rooms can even be modernized thanks to the installation of existing sanitaryware models.
You can install the installation yourself, however, this requires some experience in plumbing work and eye precision.
You can carry out repairs without any hassle, since the work is simple, but requires care.
If, however, the home craftsman decides to independently install the toilet with the installation, he must strictly adhere to the instructions, which describe in detail all the tools necessary for the work.
It is important to remember that the main devices are:
- roulette;
- perforator;
- keys;
- building level;
- drill;
- marker.
These tools can be found in any home, as they are used not only for toilet and plumbing repairs, but also for other types of construction work.
- To independently fasten the installation structure, you must first take measurements and draw a diagram.
- The basis of the marking is the central axis of the device, it is indicated by a line.
- After this, it is necessary to calculate the distance from the structure to the wall: usually it does not exceed 13-15 millimeters.
- After this, you need to determine the height of the drain tank and measure it. Often it reaches up to 1 meter.
- Based on the calculated height, it is necessary to make marks on the surface of the wall - it is at these points that holes will be created for installing fasteners.
- As mentioned above, holes must be made at the marks in order to insert so-called dowels and anchors into them. They act as fastening elements.
- Now you can proceed to the installation of the installation structure itself. To do this, this system is installed in a prepared place and adjusted. It is attached using special screws, nuts and screws.
- Installation is carried out both horizontally and vertically, which are subsequently secured with plugs. It is they who will ensure the reliability of the entire structure, so this stage must be treated very carefully.
- In some models, the frame is designed so that it can be mounted close to the surface of a main wall, partition, or even an attic. It is attached during construction and subsequently covered with a wall. Since the bathroom must be connected to the water supply, pipes must be connected to the device. This is done using plastic cuffs that connect the sewer pipes and the cistern.
- One of the last stages is the installation of the toilet bowl itself; it is carried out 10 days or two weeks after finishing work. To complete this step, you need to use special pipes and corrugation for the toilet. They can become a connecting link between the toilet itself and the installation. It is important to understand that there are two types of pipes: the first is designed to carry clean water, while the second is used for flushing and sewage water. These parts are unique for each model, so they are always included with the bathroom.
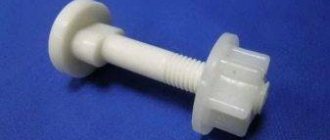
However, you first need to install a special shock-absorbing pad, and special couplings must be put on the prepared studs. The toilet must be placed on the studs and secured tightly.
Source: https://stroy-podskazka.ru/tualet/installyaciya-grohe/
Possible problems
The main problem when installing Grohe installations is the level of sewage system that the builders have overestimated. This is especially true for new buildings; instead of 23 cm from the floor covering to the axis of the sewer pipe, which is included in the kit of the frame structure manufacturer, here it turns out to be 27 - 30 cm.
In this case, an additional fitting is used - a 45° tee:
- it is mounted in a horizontal line of the drainage system;
- By rotating clockwise or in the opposite direction, the height of the hole for connecting the standard installation pipe can be adjusted in a wide range.
However, it must be taken into account that when rotating from the wall, the distance between the enclosing structure and the toilet increases. That is, the installation will move away from the wall further than the design value.
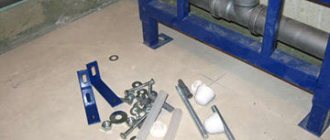
The problem of short studs from the standard Grohe kit for fixing the frame to the wall with stops is solved by extending them with threaded hex couplings, as in the bottom photo.
Thus, Grohe produces hanging plumbing fastening systems of extremely simple design. This makes it easier for the home craftsman to install them independently. A minimum amount of tools is required; basic qualifications in performing home repairs are sufficient.
Follow this installation guide steps by steps or play the video to watch the installation.
Advantages and disadvantages
The advantages of installation systems delight consumers:
- installation is carried out anywhere on a monolithic wall and can withstand heavy loads;
- hidden installation improves the design of the bathroom and saves space;
- there is no need to regularly clean the water tank from dust and condensation;
- the system operates with reduced noise;
- thanks to the variety of flush panel designs, the installation can be matched to any interior;
- the bowl is not mounted to the floor, which makes it easier to access the most inaccessible places when cleaning;
- quick access to the tank when opening the outer panel;
- have protection against leakage;
- wide range of sizes and designs.
The disadvantages include some installation nuances:
- when installing the system under a screed, the module is installed at the initial stage of construction;
- labor-intensive installation process;
- the height of the screed is calculated in advance in order to set the toilet at the desired level;
- high price;
- impossibility of self-installation without the involvement of a specialist;
- closed communications, which in the event of a leak at the pipe connection will require complete dismantling of the false panel;
- Some utilities require approval to hide a common riser.
Source: https://vplate.ru/tualet/santehnika/unitazy/installyacii-grohe/
Setting up the frame
1 — Assemble the vertical upright bars and horizontal support bars on to the frame and tighten them together.
2 — Slide the 2 fixing mounts onto the sides of the cistern making sure they are fitted securely.
3 — Place the vertical flush pipe on to the underside of the cistern
4 - Secure the cistern in to the frame. First place the elbow of the flush pipe on the frame, and then press down on the cistern to clip it into place.
5 - Use a 10 mm ratchet wrench to attach the fixing mounts on the frame.
6 - Insert and clip the feet onto the lower part of the frame.
7 — Install the clamp for the 90 degree waste pipe elbow onto the frame.
What should you consider before purchasing?
Even before going to the store to make a purchase, think about the points on which your choice will depend:
- Location of the structure.
- View of the wall. The installation method depends on this - in a recess or false wall.
- Are additional communications materials needed?
- Key material.
- Type of construction: suspended or floor-mounted with a hidden tank.
Important! Respectable manufacturing companies provide a warranty on their products. Therefore, the availability of warranty documents is mandatory.
Positioning the unit and marking
1 - Using your Spirit level, draw a vertical line that crosses the center of your waste pipe. Measuring from the floor, for a standard bowl placement at 400 mm from the floor, draw a mark A at 1 m and a mark B at 1.08 m. If necessary, adjust your measurements to match your own desired bowl placement.
2 - On your mark B, draw the holes for the wall brackets 235 mm to the left and to the right of the center of your evacuation.
3 — Complete the assembly by fitting the 90 degree waste pipe elbow in to the clamp.
4 — Put the unit into place and check the position with respect to the water supply and waste pipe. Maneuver the 90 degree waste pipe elbow according to your installation (horizontally or vertically). If necessary, adapt the connection using PVC piping.
5 - Make sure that the unit is at least 230 mm from the wall, then mark the locations of the holes for the unit's foot brackets.
Abnormal operation of the tank
European companies provide a 3-5 year warranty on valves and tanks, and 10 years on load-bearing elements of wall-mounted plumbing fixtures. The practical reliability of the system directly depends on the water treatment.
Often, products of well-known brands produced by Chinese factories are of mediocre quality; failures occur after months of service. We list the typical problems:
- The container does not fill or takes longer to fill than usual.
- Constant leakage into the bowl.
- The tank does not stop filling.
- The key does not work.
- Leaking in the body and/or inlet fittings.
Let us describe the probable causes of these situations.
Slow water flow
This may be due to clogging of the supply line filter or the built-in safety mesh of the filling mechanism (if equipped). Salt deposits, rust, and dirt prevent the filler valve from fully opening, even to the point of blocking.
Filling membrane yellowed from calcium deposits.
Turn off the cold water valve in the bathroom. Unscrew the cap of the brass filter, remove the mesh element, and clean with an old toothbrush. Rinse under running water and reassemble. If, after opening the tap, the filling time has not changed, you will have to remove the filling mechanism; we will analyze the procedure in detail below.
Important! Typical brass filters are equipped with a mesh with a mesh size of 500 microns. At the same time, solid particles already 50 microns in size, getting under the cuff, violate the tightness of the valve seat. Increased water hardness over a couple of months leads to identical results.
Sufficient protection for the filling and draining mechanism is provided by a two-stage battery with polypropylene cartridges with a filtration rating of 40, 10 microns. A softening module with a replaceable cassette or filled with polyphosphate salt is suitable against scale. A coarse filter with a stainless mesh 100 - 500 microns is required.
Continuously little water flows into the bowl
As a rule, the bottom valve is “sick”, the cuff of which has lost elasticity, has defects, and does not fit tightly on the seat due to contamination. Try draining the tank several times in a row; sometimes it is possible to wash away the particles that interfered with the closure, otherwise “surgical intervention” is necessary to disassemble the unit.
It may leak due to a lowered emergency overflow tube, lifting which eliminates the problem. If the tube is at the top, move the float lower, thereby slightly reducing the filling level. More often than not, the tank overflows due to the “fault” of the fill valve not closing the supply; it requires dismantling and inspection.
Water flows continuously into the tank
The flow is not blocked even with the float in the uppermost position. The reason is that the inlet valve is clogged. At a minimum, you will have to remove the control key, mounting box, partition to get to the fittings. It is recommended to remove the entire filling mechanism for inspection, washing, and possible replacement of the gasket.
The button doesn't work
A failure of a mechanical key occurs when the connection with the drain valve is broken, for example, one of the links has become disengaged, broken off, or jammed: a pusher, a rocker arm, or drain rods. Having restored the interaction of the parts, they check the work; the stuck parts will have to be replaced. We will discuss how to remove the control button below.
Check the opening of the bottom valve by pulling up the rods.
Sometimes the pneumatic key comes off, the impulse tube is not seated tightly or is torn. If the adjusted tube dangles, cut off the stretched end section, first making sure that there is enough length, otherwise replace the hose. A faulty pneumatic unit cannot be repaired by amateurs.
Leaking housing, liners
The most dangerous phenomenon, given its hidden nature, is that flooded neighbors can report trouble. Unfortunately, the crack permanently disables the tank. Craftsmen are trying to repair the container by gluing a strip of reinforced fiber and applying an epoxy compound, but the reliability of the method is questionable.
The main guarantee of “long life” is careful installation of the frame with level control and fastening according to markings according to company drawings. The absence of distortions will protect the plastic from increased stress. Handle the hammer drill carefully so as not to inadvertently snag the housing.
Fittings begin to leak through old gaskets and loose connections. Tightening by hand is generally accepted; the wrench is used only for metal hexagons. Hardened, wrinkled O-rings are replaced with new ones. Connections with gaskets are assembled without the use of silicone!
Useful tips
When installing the installation yourself, you should take into account some nuances.
Experts advise:
- if the toilet is planned to be installed away from the main wall, only frame installation is suitable for installation;
- It is necessary to leave a hole under the drain mechanism button for possible repair work;
- the location of the drain button can be placed between the tiles;
- You should know that the flush control panel of one brand is only suitable for models of this company, and will not fit installations of other brands;
- To ensure the stability of the toilet, you should carefully tighten the bolts so as not to break the thin threads;
- It is better to install a module with a saving system that can reduce the water level. Such a device provides two buttons: for complete and limited drainage;
- To prevent water from stagnating in the toilet, flushing is carried out at an angle of 45 degrees.
See the following video for the installation process for a Grohe wall-hung toilet.
Installation of the Grohe installation is described in detail in the instructions included with each kit. However, there are nuances of surface preparation and tool selection. During the installation process, problems discussed in this manual often arise.
Selection rules
The Russian plumbing market is represented by a large selection of European and American products. The most popular companies include Grohe, TECE, Viega (Germany), Ideal Standard (USA) and Geberit (Switzerland). The advantages of their products lie in the strength, longevity of the models, ease of installation and virtually no breakdowns. It is worth stopping at the German company Grohe, which is the leader in sales of plumbing equipment.
Having decided on the brand, the choice of installation is just beginning. It is influenced by many factors, so as not to make mistakes, you should deal with each of them step by step.
Selecting a location
If you plan to mount the installation on a permanent wall, you can choose a standard block type of construction. In terms of strength and reliability, the module is not inferior to the frame type, but costs less. If the toilet needs to be installed against a thin partition or without a wall at all, this can be done using a standard frame installation that is attached to the floor.
There are non-standard models for special cases. A corner module is installed in the corner reserved for the toilet. There is also a shortened block if you plan to install the installation under a window sill or hanging furniture. Its height does not exceed 82 cm. A two-sided installation system is necessary for installing plumbing fixtures on both sides of the wall.
Flush button
This element of plumbing has several varieties, knowing the functional features of each, you can make a choice according to your taste. Dual-mode buttons and a “flush-stop” option are simpler and easier to maintain. They don't require electricity and are too simple to break. The contactless button reacts to the presence of a person using a sensor, and flushing occurs without his participation. Such a flushing system is more expensive, more difficult to install and repairs are more sensitive, but comfort and hygiene are built into its maintenance.
Once you have made your choice, you should carefully check the components. The installation consists of a supporting frame, a tank, fasteners, and sound insulation.
Installation of a wall-hung toilet
Today, many people prefer wall-hung toilets and decide to install them themselves. After studying the diagram and description, you can understand how the module works.
Example of a suspended installation diagram
The basis of the structure is a durable steel frame with height adjustment. It is mounted on a wall or floor, contains all engineering elements, communication connections, and suspended plumbing is mounted on it. On top of the metal frame there is a flat plastic drain tank, insulated with a special anti-condensation material - styrofoam. The push-button device is attached through a special cutout on the facade of the tank. Subsequently, using this hole it will be possible to repair equipment.
The flushing system is designed so that water enters the toilet in a volume of three or six liters, depending on the desire of the consumer. This makes it possible to save water resources. Whisper's technological innovation makes the drain silent by using a method of splitting the support pipes, which helps prevent vibration of the entire structure. The valve on the tank is used to shut off access to water. The drain is connected through a hole on the side of the tank. The design has a dosage system that protects against water overflow. The installation will be hidden in the wall, only hanging plumbing fixtures will remain visible.
