Shower cabins are popular. They are placed in the bathroom, toilet or any room where you can connect to the water supply and sewer. Ready-made designs available for sale, in addition to a regular shower, are equipped with additional functions: hydromassage, steam bath, air aromatization. You can build a cozy cabin for water procedures, equipped with plumbing if desired, by yourself if you build a shower tray with your own hands. Read a detailed article about choosing and installing a shower cabin with your own hands in our separate article, all processes are analyzed in detail, read and write your comments.
Types and features of pallets
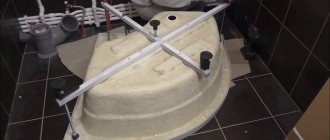
The main purpose of the design at the bottom of the shower stall is to protect against water getting onto the bathroom floor. Among the standard options are the following types of pallets:
- acrylic - inexpensive and lightweight, but scratchy and quickly turn yellow;
- steel structures are durable, affordable, but noisy and slippery, and sometimes even covered with rust;
- ceramic or made from natural stone - durable and beautiful, but heavy, expensive and practically impossible to repair.
Metal shower tray Source gidroguru.com
Ready-made kits are chosen for their high level of tightness, short installation time, and minimum “wet” work.
But a homemade shower cabin without a tray is becoming increasingly popular. The reasons for choosing a tiled floor over an acrylic, ceramic or metal structure are the many advantages of the latter option.
Insulation
To insulate the shower tray, a layer of polystyrene foam insulation, 50 mm (5 cm) thick, is placed on its bottom.
Generally speaking, a brick shower tray is made to save money, and laying insulation significantly complicates the work. And it's not about laying insulation. To lay tiles on the insulation, it must be covered with a screed. To make a screed over the insulation, you need to lay rolled waterproofing, and the screed itself may need to be reinforced with mesh if you use a simple “wet” DSP mixture. It makes more sense to insulate the shower floor by making a concrete tray rather than a brick one.
Therefore, they often do not do insulation, but simply raise the bottom of the brick pan with two layers of laid brick, with channels for sewerage.
Advantages of tiles
Shower stalls with tiled floors provide homeowners with the following options:
- creating pallets of any size and shape - large and compact, square, rectangular and corner;
- reducing costs and saving time on installation;
- choosing tiles in accordance with other details of the bathroom interior - including tiles on the walls;
- increasing the service life of the structure, the strength of which is higher than that of acrylic and ceramic sanitary ware;
- changing the height of the shower fence in accordance with the preferences of homeowners - or eliminating the sides;
Tile tray without threshold Source stroypomochnik.ru
- manufacturing not only a tray, but also a shower cabin from tiles, characterized by the same durability and aesthetics;
- easy maintenance - ceramics are easy to clean using ordinary household chemicals.
One of the disadvantages is that it is very labor intensive. When taking into account the time required to complete the work, it is worth taking into account several tens of hours for the drying of first the screed, and then the glue on which the tile is installed. And when installing a shower tray, you should take a responsible approach to the choice of materials, the quality of which determines the service life and ease of use of the shower stall.
Waterproofing
Waterproofing work is one of the most important operations during the construction of a shower cabin with your own hands. High-quality waterproofing allows you to avoid leaks, the development of pathogenic microflora, mold and other harmful microorganisms. It is better to use compositions based on bitumen mastic as a waterproofing material. This product treats the entire surface of the cabin - walls, floors, partitions. Application takes place in 2 layers, with an interval of two hours between them. We will not describe in detail here how to do everything correctly; we have a detailed, complete article on waterproofing with examples, tips and photos.
Dimensions and shape
Tile pallets can have almost any shape - in the form of a circle, oval, square, rectangle, sector or complex figure. The length and width of the structure are usually selected according to the size of the bathroom and start from 70 cm. When choosing, you can focus on a ready-made booth - or vice versa, buy or order plumbing fixtures that are suitable for a tiled tray.
One of the popular options for a small bathroom is a corner shape and large tiles. The tiles are selected in the same color scheme as those used for finishing the walls and floors. The color of the pallet makes the interior of the room more harmonious, and the design allows you to save space.
Corner design with tile trim Source ligastroygroup.ru
The depth of the pan can be small - only sufficient to drain liquid with a slope of 0.03-0.05. If there is a side around it, the design performs almost the same functions as a shallow bathtub. The pallet is laid out with small tiles (mosaics), and the walls with large tiles, preferably made in a similar color scheme. The same material can be used to decorate shower partitions.
Material
To build a brick pallet you will need the following material:
- Single brick M-125 solid (!) red moisture resistant. For walls 15-20 pieces. For the bottom (if used) 60 pieces, for both layers.
- Assembly and masonry mixture M-200;
- Waterproofing (latex, rubber or bitumen-rubber);
- Insulation in polystyrene foam boards (if needed);
- Mesh for reinforcement, optional (cell 10 by 10 cm);
- Sewerage set for drainage (pipes, shower drain, possibly a siphon instead of a drain).
Pallet design
Before you make a shower without a tray with a drain in the floor, you should decide on the appearance of its base. The easiest way is to plaster and prime the surface, painting it with moisture-resistant paint. But the best option would still be a tile shower tray. The choice of tiles is so large that you can choose it to suit any interior - or, if the walls are also decorated with ceramics, you can decorate the floor of the booth in a similar style.
Different types of shower tray designs Source gidpoplitke.ru
The tiles can be matte or glossy, plain or patterned. Design with a combination of different colors is allowed. Mosaic could be an interesting option - especially if it is already present in the decoration of other interior elements. Small details allow you to lay out a complex-shaped pallet - round, oval or in the form of a sector.
Construction of a wastewater disposal system
The drain includes a drain and a sewer outlet pipe. In order for wastewater drainage to function efficiently, it is necessary to ensure an inclination angle of approximately 3 degrees. For this purpose, special wooden stands are used for the outlet pipe. They are made in different heights and thereby provide the required angle of inclination.
Liquid from a homemade shower tray should move by gravity, without accumulating in one place and ultimately forming a blockage. It is advisable to install a removable siphon for the drain so that it can be cleaned. The grate for the drain hole is chosen to be metal - then it will support the weight of a person.
Other Features
When choosing a shower without a tray with a tiled base, you should pay attention to the degree of wear resistance of the materials. It determines how long such a tile will last and what it will look like some time after use. Therefore, even in a shower in a country house, for which a small budget is usually allocated, it is not recommended to skimp on finishing. The cost of tiles will be recouped due to the increased service life. Water absorption of tiles for the cabin should be minimal - class BI or BII (up to 3% or 3-6% of weight gain due to water absorption, respectively).
The “warm floor” system allows you to increase the comfort of using the shower. When choosing this option, pay special attention to safety. For heating, you should choose not a water floor, but a cable floor with good insulation and a protective screen. The moisture resistance class of the heating element must be at least IP44. The system controls are placed outside the room to avoid the influence of water and humid air.
“Warm” floors under the base of a tile shower stall Source moydomik.net
See also: Construction companies that specialize in heating, water supply, sewerage and gasification
Calculation, planning
Planning and preliminary calculations are perhaps the most important stages of renovation. Accuracy and compliance with all standards are very important here, neglect of which can lead to wasted money and time. When creating a floor plan, it is very important to mark the installation locations of the shower, sink, technical appliances, cabinets, niches, etc.
For the shower stall, it is worth making a separate diagram in which to indicate the type of sewerage system, location of the drain, fixation of the shower stand, doors (if their presence is assumed in the design).
In addition, the layout of water supply, sewerage, and electrical wiring systems is schematically depicted. Be sure to provide for the wiring of water supply pipes and electricity, if necessary, in advance.
You can make such a booth both in a private house (if not a wooden one) or in an apartment.
By the way, we have another great project on our website that might interest you. This is a house bed for a child that you can make with your own hands in a few evenings from ordinary pine bars.
Stages of work
If you have a concrete covering, which is usually found in modern apartment buildings, or a ready-made concrete screed, the work is simplified. In this case, you can immediately erect the sides of the pallet and waterproof the previously cleaned surface. But, if the base is uneven or wooden, you should screed before making a shower stall.
Preparatory work
A rough screed is often made using a regular mortar made from M400 cement and mixed with sand in a 2:1 ratio. You can immediately buy a ready-made building mixture such as M200 or M150, which will take several times less time to dry.
The process looks like this:
- A diversion is made for drainage into the sewerage system. It is recommended to complete the work in advance to avoid crumbling the concrete due to installation errors.
- The formwork is placed in the form of a pallet. When marking, take into account the height of the side, the width of the brick, the thickness of the tile and the adhesive. You can do without formwork if the screed is poured for the entire bathroom (for example, when installing a “warm floor” or major renovation).
- When the base height is up to 70 mm, the structure is reinforced using a metal mesh installed at a height of 30 mm above the floor level. If the height is more than 100 mm, it is not necessary to strengthen the structure.
Reinforcement of the shower tray screed Source userapi.com
- The solution is mixed using a drill with a special attachment. To reduce the weight of the structure, it is worth diluting the screed with expanded clay.
- Marks are placed on the walls of the formwork according to the height of the screed.
- The solution is poured and leveled using a rule or trowel.
The main part of the work on preparing the floor for installation of the pallet takes no more than one working day. It will take a few more days for the screed to dry. You can proceed to the next stage of work only after the solution has completely hardened.
Waterproofing and drain installation
To waterproof a shower cabin without a tray, two types of materials are usually used - polyethylene film and roofing felt. Bitumen or special fill is used less often. All options provide fairly effective protection, so you can choose any one.
. Waterproofing of rough screed Source izoler.ru
The process of installing a ladder requires the following steps:
- Drain installation . The drain funnel should be located high enough to ensure a pipe slope of 0.03 to 0.05.
- Insulation of the base for the pallet . The recommended option is rigid polystyrene foam, laid on top of the rough screed along the perimeter of the side.
- Assembly and installation of the ladder . When using insulation, the drainage device can be immersed in polystyrene foam.
- Adjusting the edges of the ladder funnel according to the level and securing it to the alabaster to avoid accidental movement in the future.
Leveling the ladder Source ytimg.com
The ladder should be assembled carefully, without making mistakes. After completing the installation of a floor shower drain without a tray, the problem can only be solved by disassembling the entire structure. A damaged drain device usually has to be replaced with a new one.
Creating sides
Tiled shower thresholds, which protect bathroom floors from flooding and limit heat and waterproofing, are made immediately after installing the screed and drain. Before installation, it is worth determining the height above the top of the pallet. For one brick it will be approximately 5 cm - taking into account the immersion of 8 cm, the thickness of the glue, mortar and tiles. The threshold can be increased by adding a new layer of the desired height. These can be whole bricks or parts cut with a grinder.
Brick thresholds for shower tray Source stroy-okey.ru
Shower drains
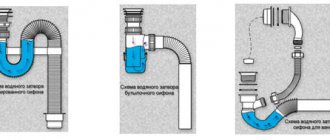
The drains ensure the collection and removal of wastewater and prevent the penetration of odors from the sewer into the premises. They differ from a siphon in the ability to disassemble and clean without dismantling the device. Some designs are equipped with a check valve that prevents waste from returning when the collector pipe becomes clogged.
The design of a plumbing device is more complex than that of a siphon. Consists of several parts:
- housings;
- neck;
- water seal;
- insulating collar;
- clamping flange;
- grilles that protect against large debris.
Water flows through the drain at a speed of 40-90 l/min, clearing large particles or hair. The removable glass can be easily pulled out and dirt removed.
Types of ladders
The water seal is made in two versions - “dry” without water or “wet” with liquid. Some ladders are equipped with two barriers at once. For connection to the sewer network, the device is equipped with a drain pipe.
To equip a shower tray with your own hands, the drain is selected according to the following characteristics:
- Device height. When connected to a pipe, this parameter is used to calculate the required slope of the drain to the sewer.
- Number of pins. If the shower is the last in a row of plumbing fixtures, it is connected to the line with one outlet pipe. With an intermediate arrangement - two.
- Presence of a check valve. It is desirable that the ladder be protected from flooding by sewer water in emergency situations. Especially if the tray is located below floor level, or the shower room is in the basement.
- Decorative. The visible part of the ladder is the grate. Its function is to protect the device from clogging. However, it can decorate the shower tray. There are many options. Manufacturers even produce completely invisible designs that create the effect of water that has disappeared “to nowhere.”
To equip showers, standard drains are used that collect water at one point, or trays extended along the tray. Such devices are characterized by high throughput.
Video description
Watch the video on how to make a shower tray in a bathroom from tiles:
To increase the accuracy of constructing the side, it is worth making preliminary markings by drawing vertical and horizontal lines on the floor and walls. Bricks must be moisture resistant - for example, M-125. For installation, a mixture of water, cement and sand with a ratio of 1 to 1 to 3 is used; a special mesh is needed to reinforce the structure.
When constructing a reinforced concrete threshold in a shower room without a tray, it is advisable to follow these recommendations:
- it is worthwhile to provide for the installation of the side at the stage of pouring the rough screed - the formwork for the mortar is immediately made high so that it can also be used for the threshold;
- a round-shaped reinforced concrete threshold increases the safety of using the booth, makes it more compact and more aesthetically pleasing;
Semicircular reinforced concrete side Source sovety-vannoy.ru
- Along the perimeter of the sides it is worth laying 4-5 pieces of reinforcement with a cross-section of 10 square meters. mm, which will act as stiffening ribs - it is recommended to immediately cut them below the side;
- after the screed has hardened, new rods with a cross-section of 8 square meters are attached to the already installed reinforcement with knitting wire. mm, curved around the circumference;
- The formwork material for a reinforced concrete threshold can be fiberboard, which bends well, and when reinforced with spacers (corners made of bars), it is no less durable than boards.
After installing the formwork and pouring the cement-sand mixture, you will have to wait for it to completely harden for at least 2 days. After this, you can proceed to the installation of the top layer - the screed on which the tiles will be glued.
Filling the screed
When installing a shower from tiles, it is worth considering that the funnel of the drainage device should be higher than the tray by the thickness of the layer of glue and tiles. The result of leaving such a reserve is that the top of the drain coincides with the floor of the shower stall. The top of the drain grate may be slightly lower than the tiles after finishing the pallet, but it will still rise above the screed.
Finishing screed Source izhevsk.ru
Markings on the sides will help to fill the solution correctly, ensuring the required slope. The beacons along which the finishing screed will be aligned should tilt towards the drain. No formwork is required - its role is played by the already installed sides of the pallet. The average drying time, depending on the chosen material, is from 2 to 3-4 days.
Re-waterproofing
The hardened finishing screed should be re-waterproofed and leveled. To do this you need to do the following:
- Treat the surface of the screed with a waterproofing compound - a polymer-cement composition, bitumen-rubber or bitumen-polymer mastic.
- Lubricate the inside of the thresholds with the same waterproofing material.
- Wait for the coating insulation to dry.
- Apply self-leveling mixture to the dry surface.
- Round off the drainage area by increasing the flow rate of water.
Re-waterproofing a tile shower stall with a floor drain will increase the time it takes to complete the job. But due to its design, the risk of leaks is reduced - an important advantage for bathrooms that are not on the ground floor. Properly performed waterproofing allows you to avoid the accumulation of moisture, which causes fungus and mold to appear in the bathroom.
Pouring concrete
When the sides are ready, you need to fill. To do this, the concrete mixture is poured inside the concrete masonry. To do this, you need to ensure that a slight slope is made closer to the neck. This will ensure that water flows into it from any point in the pan.
Pallet after filling the sides
When the mixture dries, the surface is primed and covered with waterproofing. It is advisable to make 2 layers of insulation. After drying, the final pouring of concrete is performed. For the last stage, tile adhesive and cement mortar are used. The diluted mixture is laid out inside and outside the sides. We must not forget that we need to withstand funnel-shaped necks. There should be no sharp transition lines.
When the mixture dries, it must be rubbed with sandpaper. To form a smooth surface, coarse grain is used first. And then fine-grained material. Then excess dust is removed with a brush.
Video description
In this video you will see how to make a drainage channel for a pallet:
The adhesive can be applied to the inner surface of the tile or to the pallet. The first method allows you to reduce the number of possible errors, the second increases productivity. There should be enough glue so that there is no empty space left under the tile.
Many designers choose mosaic for finishing cheap pallets, which improves the decorative properties of the booth and is quite simple to install due to its increased flexibility. The standard size of elements is 5x5 cm, sheets are 30x30 cm. Installation is almost no different from finishing with ordinary tiles, however, glue is applied only to the surface of the material, and not to the pallet. After installing the mosaic, smooth it out, leveling it in one plane, and after 24-48 hours, grout the joints.
Shower tray finished with mosaic tiles Source remontspravka.com
Final stage
The shower enclosure is installed after all work is completed and the finish has completely hardened. This process can be accelerated by ensuring the room temperature is 25-30 degrees, effective ventilation and acceptable humidity (about 60%). Bathroom doors must remain open throughout the drying period.
If these conditions are met, the fence can be installed just 2 days after installing the pallet. The cabin frame can be assembled from metal profiles and moisture-resistant plywood, and finished with tiles or mosaics. The last step is the installation of swing doors, instead of which it is possible to install a plastic screen or curtain.
Shower, completely decorated with tiles Source stroyka-ug.ru
Gutter installation
In the answer to the question “how to make a shower tray with your own hands,” the installation of a drain (or drain) occupies a special place. It will be extremely difficult to correct problems once the pallet and cladding are completed, so it is very important to ensure high quality.
Installation of a ladder in a screed
To do this, you must use the following rules and recommendations:
- The connection between the drainage point and the sewer system is made with a slope of about 3°. This ensures optimal flow rate and prevents blockages and stagnation of water in the shower pan.
- The joints of all elements must be sealed.
- For installation, it is recommended to choose plastic pipes and fittings of the highest quality. They can serve for a very long time because they are not subject to corrosion and destruction from other types of external influences.
- The drain ladder must be firmly fixed. The foundation is poured only after making sure that the structure will not move either at the time of pouring or during the process of strengthening the mortar.
Shower drain installation diagram
Read about how to choose and install a siphon for a sink with overflow in another article.
Recently, a hygienic shower in the toilet has become increasingly popular. Find out more about this on our website.
And there is information about the types of water meters at this address https://okanalizacii.ru/santeh_vodoprov/schetchiki/kak-vybrat-schyotchiki-vody.html
Tiling
Regarding tiling a shower stall, we will also not describe the process in detail in this article, because... There is a separate article on this topic, and the only difference here is that there are more cut tiles.
First we finish the shower walls, then the floor. After all surfaces are tiled, you need to make a small side of the same at the location of the door. This will prevent water from leaking out. This is done simply by applying a slightly larger layer of tile adhesive.
Layout options
Finishing a shower with tiles can be done in different ways. Most often, horizontal placement of tiles with an offset is chosen for this. If you need to create an unusual design, then you should use a more complex layout, giving preference to herringbone or vertical rows. In addition, the following types of layouts are very popular.
- Standard. Suitable for covering all shower surfaces. To give the decorative finish an original and stylish look, it is advisable to choose large tiles.
- Diamond (diagonal). The most common installation option, with which you can create interesting visual effects. This type of cladding gives the cabin depth and a certain edge to the design. But it is difficult to cope with the installation of tiles on your own; you will need the help of a specialist.
- Wall panel. This is a classic masonry, which is characterized by the following features: the lower part of the shower walls is laid with dark tiles, and the upper part with lighter tiles. The partition between the shower and toilet can also be designed in this way.
- With a border. In this version of laying tiles, you need to take into account that the tiles laid on the floor should be a continuation of the decoration on the walls. Thanks to this design idea, the shower room becomes visually wider and higher. You can also complement the cladding with accent fragments; they will help create a harmonious composition. This display is often used when you need to decorate a tray in the cabin intended for storing personal hygiene products, a seat or a niche.
- Kaleidoscope. This pattern is also called “patchwork” or “patchwork”. To cover surfaces, it is necessary to use tiles of different colors, which can be arranged either in a certain order or chaotically. This design of cabins is usually chosen by creative people.
- Spray. This layout looks incredibly beautiful. First, they create a basic base, then complement it with individual bright splashes of a different shade. Areas where a contrasting color is used should consist exclusively of single tiles. They are “scattered” chaotically and create so-called “splashes”. To make this design a reality, you need a spacious room that can accommodate a large booth.
Grouting and cleaning
The seams between the parts of the tile are filled with a moisture-resistant grout mixture, pushing it into the gaps. While the grout has not dried, it is wiped off the surface of the tile with a damp sponge, simultaneously leveling the surface.
Grouting joints.
If finishing was done with mosaic on a mesh, after gluing it to the base and drying, the entire surface is covered with a layer of grout, filling the voids between the squares. The grout is applied with a rubber spatula. When rubbing, the tool removes part of the mixture from the surface of the cladding. The remaining grout should be wiped with a rag until dry.
When the grout layer dries, the tile is brought to a shine by washing off the remaining glue and grout with a sponge and a weak vinegar solution. You can protect seams from mold with moisture-proof tile care products (for example, the German drug Emsal).
Installing cabin doors
Installation of shower doors.
If the dimensions and shape of the shower box are close to the standard dimensions of the cubicles, then it is most convenient to use ready-made glass or polycarbonate cast walls and doors. Most models are mounted as sliding doors. The shower will take up minimal space and can even be located next to the toilet or sink in a cramped combined bathroom.
If there is a lot of space, you can fence off the shower with homemade structures made of colored, translucent glass or polycarbonate. The door is made hinged, with 1 leaf, or you can purchase fittings for making sliding doors (at a furniture store).
A budget option is to install a rod with curtains. You can also use the fence in island types of boxing: by moving the curtains to one side, you can easily free up bathroom space. It is convenient to install a spacer rod between 2 parallel walls, without drilling or labor-intensive fastening work. The advantages of such a shower are the ability to change the design and the absence of partitions, even transparent ones.
