The interior of a bathroom is not complete without such an element as a washbasin. Due to the fact that this attribute is in plain sight, it is subject to a certain set of requirements regarding ease of use and aesthetic appearance, and along with them, practicality.
If we talk about the most practical solution for a washbasin in this room, then it is a sink built into the countertop. Its installation is an opportunity to give the room a modern look and make hygiene procedures more comfortable.
This product appeared on the market in our country relatively recently and is a hybrid that combines the functionality and attractive appearance characteristic of a countertop surface. The combination of these two elements turned out to be quite successful, because in addition to a good decorative component, such products also have excellent performance characteristics.
Why do you need undermount sinks?
When a home owner is developing the design of his bathroom, the first thing he does is allocate locations for plumbing fixtures and household appliances. Quite often it turns out that all the devices are placed along one wall. In such cases, interior experts recommend using a tabletop for decoration . This solution provides an opportunity for different things to acquire a common appearance and form a general direction in this room. By taking a non-standard approach to creating a washbasin with a countertop, you can get a bright detail in the interior of the bathroom.
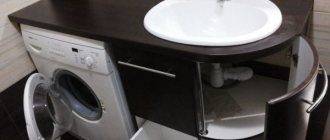
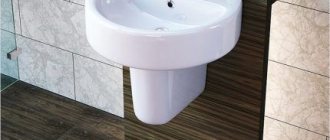
Indeed, only a countertop can combine both a sink and a washing machine in one place. However, we note that not all sinks are suitable for carrying out such a modification. The most appropriate sinks are wall-mounted sinks and models that have a tulip leg as part of their design. For such purposes, the best solution is to use overhead sinks or built-in models. They are best suited for tabletop decoration.
What you need for work
You should choose a convenient and practical pistol. Skeletal type or models with a semi-closed cylinder are suitable. Such devices are used for tubes with a built-in nozzle.
When installing a sink in the kitchen, it is recommended to stock up on the following tools and equipment:
- electric drill, a set of drills of various diameters;
- jigsaw;
- several screwdrivers or drill attachments with a screwdriver function;
- building level;
- marker;
- metal measuring angle;
- stationery/construction knife.
The mixer is connected to the water supply using flexible hoses. The nuts and couplings must be tightened with a wrench/adjustable wrench. The thread is sealed with FUM tape.
If the basic sink brackets are too flimsy or do not fit properly, you will need to purchase additional hardware. This will ensure stability and extend the service life of the sink, and the absence of backlash will prevent premature destruction of the sealing seam.
Design features with built-in sink
Such products owe their name to the method used during installation. That is, when installing them, the washbasin crashes into the countertop. The tabletop is installed on legs fixed to the wall, using corners and special brackets. The entire structure of the console and bedside tables is built under the tabletop. Methods for embedding products can be very different:
- plumbing fixtures can be recessed below the level of the countertop;
- the product may protrude above the tabletop level.
Currently, cut-in washbasins, based on the criterion of design form, are divided into the following types:
- oval;
- square;
- rectangular;
- round;
- asymmetrical.
Overhead washbasins: description and varieties
A classic countertop sink in the form of a bowl is installed on a specific base in the form of a countertop. As a result, the effect is created that this is not a washbasin, but just a beautiful bowl that can be removed without any difficulty. This installation method is very convenient.
- Space is freed up under the countertop.
- You can approach the sink from all sides, so it is convenient to use.
- If the base of the bowl is narrowed, then the surface around it can be used as a dressing table.
- When purchasing a countertop bathroom sink, you don’t have to buy a bulky cabinet to go with it. Devices that appear to be floating in the air with an unnoticeable drain look original and very beautiful. By making the necessary accents, they emphasize the dignity of the room. Such designs are very convenient for small areas.
- With the help of overhead washbasins, you can perfectly disguise all kinds of communications.
Materials for making bathroom sinks
For sinks installed in the bathroom, the material is of great importance, since it provides such important product qualities as reliability and durability.
Most often, when making sinks, manufacturers use the following materials:
- ceramics;
- natural and artificial stone;
- glass;
- metal.
When choosing a material for making a bathroom sink, the home owner proceeds from his taste and idea of comfort. However, everyone understands that companies produce mainly those that are most suitable for use in bathrooms.
A sink installed in such a room must be durable and hygienic. All of the materials listed have these characteristics. But the most important are not these, but such qualities as the cost of the product and its appearance. To make the right choice of sink material, you must first become familiar with the characteristics of each of them. This will help you avoid mistakes when buying a sink.
Ceramics
Bathroom washbasins are most often made from this material. The material itself is baked clay. Depending on the technologies used in its manufacture, the output can be porcelain, earthenware or majolica. Most stores offer sinks made from porcelain and earthenware. Moreover, we note that porcelain products are more expensive.
In addition to their high price, their peculiarity is that they are more fragile, so when using such products you should treat them especially delicately. Porcelain has a high density , its structure is more uniform. To distinguish a porcelain sink from an earthenware one, just tap its surface. A high-pitched sound can be heard. The earthenware sounds duller. It is characterized by a porous structure. Unlike porcelain, it shines through in the sun.
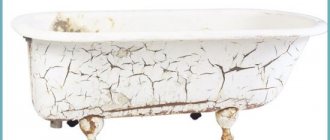
If you want to have a product in your bathroom that smells of antiquity, then you should choose a faience sink. During use, such a product becomes covered with a web of cracks , which add a special charm to it. If sophistication is more important to you in the design of your bathroom, then it is better to opt for a porcelain sink. They are the most popular. Most of the products presented in stores are made from this material.
A natural stone
He has a rather noble appearance. The most common materials used to make sinks are marble, travertine and granite. This sink will give any bathroom a luxurious look. The advantage of such products is hygiene. In addition, such shells are characterized by high strength. There are also disadvantages. The main one is the large weight of such products. When using a sink made of natural stone, you should forget about cleaning it with modern detergents , because they contain acids and abrasives, so after such treatment, scratches may appear on the surface of the sink.
Fake diamond
This material has all the advantages inherent in its natural counterpart. It is durable, hygienic, and heavy in weight. However, it does not cause problems in care. This material consists of 80% stone chips, the remaining 20% is a binder polymer, which is often used as acrylic. Thanks to this composition, artificial stone has high strength , in which it is superior to its natural counterpart.
Glass
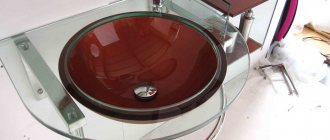
In stores you can also find sinks made of glass. Everyone knows that this material is quite fragile. However, these products are not made of ordinary glass, but tempered glass, which is an impact-resistant material. Diversity is the main advantage of this material. To make sinks, different types of glass are used : frosted, transparent, smooth. There may be a bas-relief and a colored pattern on its surface. An absolutely winning option is to install a glass sink in the bathroom. It will look especially good in a room decorated in high-tech and modern style.
Metal
For the manufacture of built-in sinks, two types of this material can be used : stainless steel and non-ferrous metals, such as copper and bronze. An unsuitable option for a bathroom sink is a stainless steel product. It is best suited for making kitchen sinks.
In stores, washbasins made of non-ferrous metals are most represented. External attractiveness is the main reason for their prevalence. They are the ones most often chosen by many apartment owners. Such products fit especially well into rustic and Mediterranean styles. However, when using built-in sinks made of such material, one problem arises - caring for them is extremely difficult , since scratches easily appear on them during use.
Mounting a mortise sink
Inserting a sink into a countertop involves a number of successive steps.
Preparing materials and tools
Before proceeding with the installation of the sink, check the complete set of the sanitary ware. The kit must contain all the necessary fasteners and seals. You should have on hand: silicone sealant, tape measure, level, Phillips screwdriver, screwdriver, electric jigsaw, drill.
Carrying out markings
The method of applying markings on the tabletop depends on whether the kit includes a cardboard template. Its presence greatly simplifies the work. The outer and inner contours of the sink are cut out using the template. Then it is placed on the tabletop, secured with tape and outlined with a pencil.
The template is applied to the upper surface of the tabletop Source remontu.com.ua
If the template is not included, marking the hole is a little more difficult. First, trace the edges of the sink, positioning the sink so that its bowl faces down. Then the sink is turned over and placed on top of the countertop in the same way as it will be installed when finished. Secure with tape. Align and trace the outline. The correct installation of the product and the ease of its operation depend on how accurately the markings are made. A cutting line is drawn inside the contour.
To make markings, it is better to use a pencil Source berkem.ru
Cutting a hole
Before cutting a hole for the sink in the countertop, take an electric drill and make 2-3 holes one after another on the cutting line to create a single gap. Its length should be such that an electric jigsaw can easily fit inside. With its help, slowly and very carefully cut out a hole.
If the jigsaw deviates a little from the marking line, it’s okay. A discrepancy of 2-3 mm is allowed. The cut site is cleaned of dust and the product is “tried on”. It should fit freely into the hole, but not cling or “walk around”. If the shell does not fit completely into the hole, it is slightly widened using a jigsaw.
The tabletop should not be turned over from the front side during cutting, otherwise chips may form. Source stopdacha.ru
Advantages of built-in sinks
These sinks have several advantages.
- They look attractive.
- Compared to overhead products, they are cheaper.
- The installation process does not pose any big problems.
- In small spaces, using built-in sinks is the most profitable option.
- Built-in sinks eliminate the need for wall mounting. Therefore, the owner can keep the newly created wall cladding intact.
- By installing a washbasin built into the countertop, you can hide under it such unsightly elements as a drain, shut-off valves, and pipes.
Professional advice on installing sinks: what to look for
Experienced installers share the following secrets of their work:
- When installing a mortise sink yourself, you need to check the dimensions of the hole several times. It should not be too large, otherwise the sink will “walk” in the groove and the fastenings will not provide the required strength.
- When installing a stainless steel sink, do not overtighten the screws. This may cause damage.
- Instead of the seals that come with the sink, you can use sealant. You shouldn't save it. It’s easier to carefully remove excess than to deal with leaks later.
- When using a screwdriver, it is important to be careful not to bend the hardware. If you don’t have much experience with this tool, you should give preference to a Phillips screwdriver.
Silicone sealant should be checked for hardening speed before use. Source mtdata.ru
How to install a sink in a bathroom with a countertop?
The process of installing such a sink does not have any difficult aspects. You can install a built-in sink with a countertop with your own hands without any problems. The main thing to remember is the following important points:
- the installed plumbing must provide ease of use;
- it should not be located close to the wall;
- the built-in sink should not be located at the very edge;
- The sink should not fall inside.
First you need to decide on the location of the sink with the countertop , then you can proceed directly to the installation work.
Tools
During work, you cannot do without using special tools.
- ruler;
- pencil;
- hacksaw;
- drill;
- sealant;
- pliers.
The work begins by taking the sink, turning it upside down and laying it on the surface of the countertop, after which a contour is drawn along it. Next, we move on to measuring the distance from the fasteners to the edge of the tabletop. Focusing on the drawn contour, it is necessary to mark the second one, which should be smaller by a distance equal to the one from the fastening to the edge.
Next, along the second contour, a hole is cut in the sink. A hacksaw is used for this. But it is best to work with a jigsaw.
Once the hole is made, you need to sand it well. Particular attention should be paid to the inner edge of the cut , which must be treated with silicone sealant.
After this, the sink is inserted. If during the installation process excess sealant comes out on the surface of the countertop, it must be removed immediately. After this, the fasteners are inserted and tightened well. When this work is completed, you need to leave the sink for a while to dry completely. When the sealant has completely dried, you can proceed to connecting the siphon and mixer.
Dismantling of old equipment
To remove an old sink, follow these steps:
- The water supply to the apartment is stopped. Unscrew the fastening elements of the mixer. The device is disconnected from the water supply. Make sure that the shut-off valve is not leaking.
- They are dismantling the drain. The lower part of the siphon is removed from the fixing nuts. Disconnect the flask from the outlet, pour out the water, and remove contaminants. Unscrew the fastening nut by turning it to the left.
- If the drainage device needs to be replaced, it is disconnected from the sewer pipe. At the junction of the flexible tube and the common line, unscrew the nut, lift and move the siphon. Before removing the device, you need to move the spacer washer and remove the outlet with the water seal from the sewer pipe. During work, a basin is placed under the sink, which prevents flooding of the room.
- The sewer socket is closed with a plug or rag.
To remove a sink attached to the wall, you need to loosen the fastenings located on the sides. If the washbasin does not have a pedestal, one hand of the master should hold the device so that it does not fall.
Removing an old sink.
Nuances when installing built-in sinks
If you have chosen a sink built into a countertop that will protrude above the surface, then you should know that such a product is supported by its own weight thanks to the protruding outer sides. When installing it, great attention must be paid to sealing the gaps between the plumbing fixtures and the countertop. This will prevent water from getting under the bowl. Compositions based on epoxy resin or silicone are used as sealing materials.
If the sink does not have external sides, then those that are recessed under the surface of the countertop are secured using holders. A characteristic feature of such sinks is the asymmetry in the arrangement of mixers and compact size.
You can make your bathroom space both beautiful and functional by installing a sink built into the countertop. This interior element will allow you to hide a washing machine under the countertop, which will save free space in the bathroom , and in addition will hide such unsightly elements as pipes, drains, shut-off valves.
You can make a sink built into the countertop yourself. For this job you will need a simple tool. All you need is a little free time and desire and you can create a beautiful built-in sink that will become the highlight of your bathroom.
Recommendations from experienced plumbers
And in conclusion, a few recommendations from professionals on how to properly attach a sink to a countertop. The first concerns cutting out a hole in the base. At this stage, it is important not to damage the base and make the seat of the required size.
When cutting a hole for the sink in the countertop, do not press the tool too hard, otherwise you may damage the decorative coating of the base. It's better to do everything slowly and carefully
If there is no sealant, then you can use regular PVA glue to treat the cut of the base. It will give the same effect. You can cut out the required hole in an artificial stone countertop using a grinder with a diamond-coated disk installed in it.
After installing the equipment, it is worth checking the horizontal position using a building level. A mistake will lead to unpleasant consequences.
The following article, which provides selection guidelines and installation instructions, will introduce you to the rules and technology for installing an overhead sink on a countertop.
Preparing for sealing
Make sure the sink/countertop surface is dry before applying sealant. There should be no greasy or oily traces on it. They can be removed with household solvents and detergents.
The surface should be wiped with a soft cloth, removing dust and small debris. This will increase adhesion with the sealant and ensure a high-quality, dense and elastic seam without cracks or defects.
Installation of the mixer and connection to communications
This procedure is practically no different from the standard technology for installing a mixer, drain-overflow system and siphon. Here it is necessary to take into account the type and method of connecting the plumbing fixtures themselves.
There are several useful tips that will come in handy during your work:
- You should not save on FUM tape, because it allows you to avoid even the slightest leaks;
- there is no need to overtighten bolted connections, as this can lead to thread breakage;
- Before operating the sink, you should make sure that all connections are secure and that there are no leaks;
- there should be no backlash between plumbing fixtures;
- metal washers should be secured with a wrench, and not with the plastic attachment that comes with the flexible hose.

