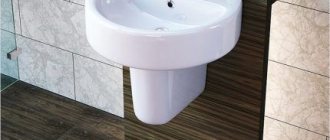
Arranging a bathroom is a responsible undertaking that raises a lot of questions among owners who install the equipment on their own. A wide selection of sinks provides consumers with the opportunity to select equipment to suit any interior.
We will talk about how to install a bathroom sink in accordance with building codes and sanitary requirements. The article we presented discusses examples of installation of built-in and console versions. Taking into account our recommendations, you can handle the work yourself without any problems.
Main types of washbasins
The technology for installing a plumbing fixture depends on the type of sink, which can be wall-hung or overhead, and the rest of the products belong to their varieties.
Domestic and foreign manufacturers produce different models of washbasins, but the most in demand are the following:
- Built-in
. They are placed on the top of a table, cabinet or other flat surface. They are convenient because furniture doors make utility lines completely invisible. - Console
. The suspended design of the washbasin allows you to fix it on the wall using a ready-made installation system. - With a pedestal
. The “tulip” type product has a decorative element in the form of a pedestal, on which a massive bowl is placed. The drain fittings are located inside the support. - With half pedestal
. Such models also have a pedestal, but it rests not on the floor, but on the wall. This makes wall-mounted washbasins look more elegant. Installing a sink makes it difficult to raise the drain to a certain height.
Built-in products can also be installed on top of the table top, fixed with edges around the perimeter of the base, or built into the structure from below. In bathrooms where it is not possible to place a countertop of a standard width, it is more convenient to use semi-built-in models.
When installing this plumbing equipment, you will need to use an improvised cabinet to hide pipes and other communications behind its walls.
Typically, console and built-in structures are preferred by owners of properties with small bathrooms, in which every centimeter is important.
In addition, all commercially available sinks for installation in bathrooms have a variety of shapes and configurations, so there are models:
- round;
- oval;
- cubic.
Choosing a siphon for the sink
One of the significant points when choosing a design is the material it is made of. As a rule, manufacturers offer 2 options: plastic and metal. A plastic siphon is the most economical model, which costs much less than a metal one. In addition, its advantages include durability, as it is not subject to corrosion, and quick installation and dismantling.
Plastic siphon
Metal siphons are made from cast iron, as well as non-ferrous alloys of bronze or brass. They cost significantly more, take longer to install, and require a certain amount of space. However, they create fewer problems with blockages and have an elegant appearance.
Metal siphon
The hydraulic valve is an essential element of the siphon, the selection of which should be given additional attention.
- First, you need to decide on its volume. It is best to choose a large hydraulic valve, in which case there will be no problems with its clogging and draining of water. However, in some cases it is impossible to install a large valve - there is no space. A small hydraulic valve is not only a problem when draining water, but also one of the reasons for apartment flooding. The water simply will not be able to quickly go down the drain.
- The second point when choosing is its installation. You can mount the hydraulic valve in a special bedside table, in the base of a sink, or by leaving it in plain sight. In the latter case, you need to worry about decorating it, otherwise it will look ugly and lonely in the bathroom.
In addition, it is worth taking a closer look at the rubber gaskets that are installed in place of the threads in the siphon. Their thickness must be at least 3 mm. If the gaskets are thinner, they will soon become loose and begin to let water through easily.
Dismantling of previous equipment
To install a bathroom sink yourself, you will need to dismantle a plumbing fixture that has expired. First, turn off the water, after which you need to loosen the mixer by unscrewing the nut that secures it. The product is disconnected from the supply pipelines, carefully removed and then put away.
Next, proceed to dismantling the drain elements:
- At the bottom of the outer part of the plumbing fixture, unscrew the nuts.
- The siphon glass is disconnected from the drain outlet, water is poured out of it and cleaned from the accumulated dirt.
- The drain is cleared of waste and the locking nut is unscrewed by hand, turning it counterclockwise.
If the siphon must be replaced during dismantling, it is separated from the drain pipe by unscrewing the locking nut, which is located at the point where the drain connects to the water seal. Next, lift the drain and then remove the siphon.
Before removing the drain with the gasket, it is necessary to move the wedge-shaped spacer washer to the side. Then all that remains is to remove the drain pipe with the attached siphon from the sewer socket.
At the end of the stage of dismantling the old equipment, to prevent the spread of a very unpleasant odor, you need to tightly close the hole in the sewer pipe with a stopper or a rag folded several times.
When you need to remove an old sink mounted on the wall with combined stands, its fixation points should be looked for on the side, closer to the bottom of the appliance. If the bowl does not have a floor support, the sink must be held while unscrewing the nuts, otherwise it may collapse to the floor under its own considerable weight.
To prevent accumulated water from spilling onto the flooring when dismantling elements of old plumbing equipment, place a bucket or any other container under the siphon.
Basins on a pedestal
One of the most common types of sinks, installed not only in Khrushchev-era buildings, but also in modern new buildings. The classic type of such washbasin is often called “tulip”. More modern models can have a pedestal of various configurations, for example, in the form of a column or a vase. The main advantages of this type of sink are that the pedestal supports the bowl, taking on the main load, and also hides communications - a siphon and plumbing. The disadvantages include the need to install the bowl at a fixed height, which is determined by the height of the supporting leg.
Installation technology
Since this type of sink is installed most often, using the example of its installation, we will look at how to replace a sink in a bathroom.
Required Tools
To work you will need the following tools:
- Hammer or impact drill;
- Set of keys and screwdrivers;
- Sealant;
- Roulette and level;
You will also need a set of fasteners and a siphon (most often included with the sink), as well as a mixer, which must be purchased separately.
Standard set of fastenings.
Removing an old sink
Dismantling of old equipment is carried out in the following sequence:
- Hot and cold water is shut off.
- Unscrew the nuts of the mixer connecting hoses from the underwater water pipes.
- Next you need to remove the siphon: to do this, unscrew the nuts, after which it is easily disconnected from the washbasin and the sewerage supply.
- The sink, freed from communications, is removed. The dismantling procedure depends on how the bowl is secured. If it is held on by bolts, they need to be unscrewed. There are situations when the bowl is installed on a welded metal frame, which is embedded in the wall. In this case, the frame will need to be cut with a grinder.
Advice! Despite the fact that the water supply is blocked by shut-off valves, its remains still flow out of the pipes and siphon. It is recommended to lay out a rag or place a basin in advance.
Marking the wall before installing new plumbing
The next stage is to apply markings to indicate the level of the bowl and attachment points. The easiest way to do this is to place the pedestal against the wall, place the bowl on it, level it and mark the mounting points through the mounting holes with a pencil.
The sink is installed according to the level
Sink assembly
Now you can assemble the sink - install a mixer and siphon on it, since doing this on an already attached bowl is quite difficult and inconvenient.
The mixer is installed in the following sequence:
- The flexible hoses included in the kit are connected. If their length is not enough to connect to the water supply system, you will need to buy connecting hoses of longer length.
Connecting hoses to the mixer. - Also included with the faucet is a rubber ring that needs to be inserted into the groove located on the back of the faucet. After this, the tap is installed in the hole of the washbasin.
Insert the O-ring into the appropriate groove.
Install the faucet into the sink hole. - A sealing rubber band and a metal washer are also installed on the back side of the hole for installing the mixer, after which the tap is secured with a pin and nut.
The faucet is secured with a pin on the back side of the sink.
After the mixer is installed, you can begin assembling and installing the siphon. Most often, the sink is equipped with a bottle siphon; if it is not there, you need to purchase it in advance.
Advice! When purchasing a siphon, check the package according to the attached assembly diagram. There are situations when the kit is missing or there are unnecessary parts.
Assembly and installation of the bottle siphon is carried out as follows:
- An upper pipe is installed in the drain hole, which must have jumpers to prevent large objects from getting inside.
- The neck of the siphon is connected to the bottom of the pipe using a long bolt made of stainless steel. At the same time, we should not forget about installing gaskets, which for better sealing are recommended to be lubricated with silicone sealant.
- Then the siphon glass is connected to the pipe. Fixation is carried out using a conical plastic seal and tightening the nut.
The siphon is connected to the sewer outlet using a corrugated pipe after the installation of the sink is completed.
Note! If the sink is equipped with an overflow hole, then all modern models have a drain arrangement directly into the drain hole. That is, additional connection of pipes to the overflow hole is not required.
The overflow hole acts as a fuse that prevents water from overflowing over the edge of the bowl when the drain hole is closed with a plug.
Mounting the bowl on the wall
The next step is to mount the bowl on the wall. To do this, holes are drilled in the wall along the previously marked marks, the diameter of which should be such as to ensure a tight fit of the plastic dowels. However, remember that different types of drills are used for drilling tiles and concrete.
When the holes are ready, dowels are driven into them and special self-tapping screws are screwed in, which have a screw thread at the free end for screwing on the nut.
Special plumbing screws are used to secure the sink.
Then the bowl is put on the studs with the mounting holes and secured with nuts with the obligatory use of plastic washers, which prevent damage to the earthenware.
When attaching a sink, be sure to place plastic washers under the metal nuts so as not to damage the earthenware bowl.
When the sink hangs steadily, the flexible hoses are connected to the water supply system, and the siphon is connected to the sewer. After this, a pedestal is placed under the bowl. Most often, additional fastening of the pedestal to the floor is not required - it stands steadily and reliably supports the bowl.
Advice! The fastening nuts should not be tightened too much so that the bowl does not burst. It is enough to tighten the nuts so that the bowl does not wobble, because it will rest on the pedestal.
Installation of a console sink
The work involved in installing a sink yourself is not particularly difficult. It can be done without the help of professionals. The peculiarity of the process is that you must strictly follow the installation technology, which consists of several stages.
Required tools and materials:
- building level;
- pencil and tape measure;
- spanners;
- electric drill plus concrete drills;
- self-tapping screws;
- expansion dowels;
- FUM tape;
- construction glue.
Proper installation of a sink in the bathroom will guarantee the trouble-free functioning of the plumbing and ease of use by family members without regular repairs.
Washbasin brackets can have an L- or T-shape and be made of welded elements or in the form of frames that surround the installed plumbing fixtures. The second option is more preferable, since it eliminates the possibility of the bowl moving to one side.
Everything you need to install a sink, including fasteners, is usually included with exclusive designer sanitary fittings. To give it a more presentable appearance, parts are coated with compounds that imitate metal or ceramic coatings.
Before you begin installation work, you should find out whether the wall adjacent to the plumbing fixture can withstand the increased load. The length of the fastening and the amount of its immersion into the brick or concrete base must be at least 30 millimeters.
Since the bracket is connected to the sink as tightly as possible, the anchors are selected individually, taking into account, in addition to the strength of the walls, the weight of the specific model.
Surface marking
Before installing a sink in the bathroom, you need to determine its location in the bathroom and the height of its placement (read: “The installation height of the sink - at what height to install it correctly”). This parameter is calculated so that it is convenient for all family members to use the device. The generally accepted height of a washbasin for an adult user is 85 centimeters, taking into account the fact that his height is 165 - 180 centimeters.
After the level of placement of the bowl is determined, a horizontal line is drawn on the wall, marking the location of its upper edge. Then two lines are drawn perpendicular to the floor, and the gap between them should correspond to the width of the sink plus the thickness of its walls.
When making markings, it is important to check using a level. When the wall is lined with ceramic tiles, to make the hanging option look more attractive, when determining the location of the mounting holes for fixing the device, the location of the seams between the tiles should be taken into account.
Installation process in detail
To install a wall-mounted sink, you need to perform a number of fairly simple operations:
- Make a marking by marking the position of the washbasin on the wall with a horizontal line.
- Use vertical lines to indicate the width of the bathtub.
- Check the correctness of the markings using a building level.
- Attach the brackets to the lines one by one and mark the locations of the holes for fastening.
- Drill holes.
- Drive in the dowels (plugs).
- Install and secure the brackets.
- Place the sink on the brackets according to the manufacturer's recommendations.
- Check the stability of the sink (it should not wobble).
- Install the mixer, connect the siphon and sewerage.
- Seal all connections that may leak.
When making holes for fasteners, you should remember that the dimensions of the holes for fasteners should be slightly smaller than the diameter of the fastening screws or dowel screws.
After installing the sink, to secure its position, insert the pins into the holes provided for this purpose and tighten the fixing nuts until they stop. It is necessary to handle plastic nuts with care, as they may simply burst if too much force is applied.
The process of installing a wall-hung sink is clearly presented in the following video:
Sometimes sinks are mounted not on brackets, but on a special solid frame equipped with some additional elements: shelves, holders, etc. Such a frame is installed in approximately the same order: marking, fastening, frame, sink.
Such models of wall-mounted sinks are not installed on brackets, but on a special frame, which is also attached to the wall. The frame looks stylish and is practical to use, as it is usually equipped with additional useful elements
Be sure to check the position of the frame using a level to ensure there are no distortions. To install the sink correctly and quickly, it is recommended to enlist the help of a friend or family member, especially if you choose a heavy sink made of heavy ceramic, glass or artificial stone.
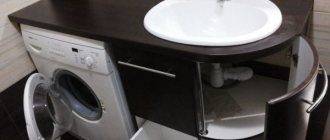
The sink installed above the washing machine usually has a shallow depth, which causes a lot of water splashing. This disadvantage should be taken into account when choosing a suitable model
To understand how to fix a bathroom sink above a washing machine to the wall, you should remember that this will require a specially designed device. In it, the sink grate is located behind the bowl or in its far corner. There are special models of such washbasins, designed specifically for installation above an automatic washing machine.
They are equipped with a bottle-type siphon, which has an additional pipe designed to connect the washing machine to the sewer.
The diagram clearly shows the option of installing a wall-mounted sink, which is located above an automatic washing machine, which allows you to save space in a small bathroom
The cost of such washbasins is quite high. Some craftsmen make the sink of the desired shape themselves, from plastic. A mixer and a suitable siphon with other elements are purchased separately.
Creating holes for fasteners
Before installing the sink, brackets should be installed on the back of the outer supporting walls of the bowl. To do this, turn it upside down. Then the product, together with the attached brackets, is moved to a horizontally drawn line. Along the drawn line, the installation locations for fasteners are marked.
At the marked points, using an electric drill and a concrete drill, create holes whose diameter is a couple of millimeters smaller than the size of the dowels used.
The mounting screws should not easily fit into the created fixation points. Plastic or nylon dowels are driven into the prepared holes, after which self-tapping screws having the appropriate diameter are screwed into them. Then they start screwing in the brackets.
Experts advise: to prevent the drill from sliding on the surface of the tiles when making holes, you need to stick masking tape to a specific area.
Installing a washbasin bowl
There is a certain sequence of actions in how to install a washbasin. After the self-tapping screws have been screwed in, you need to make sure that the fastenings are secure. When tightening them, you should not use much force, since the surface of the device may become cracked and sometimes split.
The sink is placed on top of the mounting studs. They put sealing inserts and washers on the self-tapping screws, and then slowly tighten everything. The device is additionally secured with clips or sealant. When installing a washbasin, a home craftsman needs to ensure that the bowl does not wobble when tightening the washers.
Places where there are fasteners need to be decorated by putting plugs on them. To prevent the formation of mold if moisture gets into the gap between the wall and the washbasin, this place is additionally treated with silicone sealant intended for plumbing work.
Connecting the siphon to utilities
When installing a sink, special attention is paid to installing the siphon. First you need to secure the outlet, for which a mesh, a silicone or rubber gasket, and a clamping screw are placed in the drain hole. The use of a gasket is an indispensable condition, since its presence creates a tight connection.
During its installation, you need to make sure that it fits as tightly as possible and fits the drain of the plumbing fixture without the slightest displacement or gaps. First, you should make sure that the gasket is installed correctly, and only then tighten the clamping screw, thereby connecting the siphon and the outlet.
Next, the end of the outlet pipe, made of corrugated tube or hard plastic, is connected to the sewer socket. When connecting to a sewer pipeline, seals must be used, the function of which is performed by rubber gaskets or cuffs for corrugated pipes.
Bottle siphons
These siphons with overflow for sinks have a characteristic shape that looks like a bottle. This is especially true for the sump. Two tubes are connected to its middle part. One leads to the sewer, and the second leads to a place for drainage in the plumbing. If you plan to install a siphon for a washbasin, then, perhaps, there is no better design for it.
- The advantages of this system are ease of installation and dismantling.
Bottle siphon - In addition, the hydraulic valve of the structure can be removed and installed very simply. To do this, you do not need to disassemble the entire structure.
- The bottle siphon provides for the connection of other tubes to it. In particular, the drain from the washing machine.
- A well-known feature of this design is the ability to easily reach missed small items above the sink. They will all be at the bottom of the “bottle”, which is easily detached and replaced.
Among the disadvantages of this system, it is necessary to highlight a large number of connections. As a result, this can cause a leak.
Mixer installation sequence
It is advisable to install the faucet before fixing the sink to the wall. The fact is that after the installation of the sink in the bathroom is completed, this work will be more difficult to do. First of all, the mounting pins and flexible hoses for connecting it to the water supply system, which are included with the product, are screwed into the mixer.
FUM tape is used to seal joints and prevent water leakage. One end of the hose, equipped with fastening units or fittings, is connected to the mixer, and the other to the water pipes.
If their diameter does not match the outlet, a sealing collar is used. At the final stage of connection, you need to make sure that the created system is working and that there are no leaks at the junction of the pipes and the cuffs.
System health check
Before you start using the washbasin, you need to check the quality of the connections and how firmly the bowl is installed. To do this, check the quality of all fasteners again. After this, open the hot and cold water tap and check the tightness of the water hoses. If there are water leaks, then the connections must be tightened, and when this does not help, unscrew the hose and rewind the FUM tape.
To check the tightness of the siphon, it is recommended to fill the sink with water by closing the drain hole . Then drain all the water - if there are no leaks in the siphon or hoses, then you can start using the sink.
When draining the water, check the tightness of the connections.
Do not over-tighten the connections, as you may damage the gaskets or strip the threads.
Assembly and installation of a tulip sink
In most cases, the main weight of a sink with a pedestal falls on the decorative support leg, but the bowl is also fixed to the wall (for more details: “Attaching a sink to a wall in a bathroom - step-by-step instructions”).
The list of work on how to assemble a “tulip” design washbasin and connect it to communications consists of the following steps:
- Arrangement of connection points for plumbing fixtures.
- Purchasing a specific model and studying its configuration.
- Installation of brackets for fixing the bowl.
- Hanging the sink and subsequent sealing of the joints.
- Mixer installation.
- Connecting the tap to the water supply lines.
- Connection to the sewer system via a siphon.
- Installing a pedestal for a sink.
Types of sinks by mounting method ↑
According to the method of fastening the sink, there are the following types:
- Suspended (cantilever). They are attached to the wall using brackets or other fasteners. The main disadvantage is that the plumbing fittings and siphon remain visible. The advantage is space saving. There are also wall-hung flat sinks under which you can install a washing machine.
- Sinks on a pedestal (tulip). They differ from hanging ones in that they include a special stand, which serves as additional support and also hides the siphon and other communications.
- Invoices. Placed on a flat tabletop. Such sinks often do not have holes for the faucet.
- Built-in. Built into furniture (bedside table, cabinet or separate tabletop).
Wall-hung sink with brackets
The nuances of installing a built-in washbasin
There are two options for how to properly install a built-in sink in a countertop in a bathroom - lower and upper.
Each installation method has certain nuances:
- When placing the bowl on top, it will be one to three centimeters higher above the surface.
- The lower insert is preferable because during operation, splashes can be collected in one movement.
The drain fittings, regardless of whether the sink is completely recessed into the cabinet or slightly raised above its surface, are placed inside the furniture. To make the lower insert, L-shaped fasteners are used, and fixation is carried out to the base of the support.
How to install a washbasin with a cabinet ↑
First, try the cabinet to the installation site and make sure that the elements of its body will not interfere with the smooth connection of the water supply and sewerage. Then place the sink on the cabinet and give it a strictly horizontal position. In cabinets equipped with adjustable legs, this will not be difficult.
Next, attach the washbasin to the wall. There are two options here:
- screwing with special anchor screws;
- gluing with silicone.
The second option is much more convenient and faster, and in terms of strength it is not much inferior to the first.
After the installation of the washbasin with the cabinet is completed, it is necessary to connect all communications.
Sometimes you have to cut additional holes in the bedside table for connecting communications
Marking the installation site
To simplify the marking of the countertop under a recessed sink, use a template. Most manufacturers include it in the kit for built-in products.
When determining the location of the washbasin, you need to pay attention to the following:
- the sink cannot be located at the very edge and close to the wall;
- there should be free access to the device and its convenient use.
Correct marking is required to ensure that the washbasin is firmly fixed in the countertop and does not fall into the hole. If there is no template, the bowl is placed upside down, after which it is applied to the surface and traced along the contour with a pencil.
To find out the distance from the edge of the product to the eyes of the fasteners, take measurements and move them to the created outline of the product. The resulting value means the distance by which one should retreat from the line to form an internal contour, which is a support for the sides of the bowl.
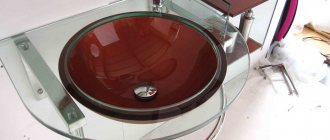
Creative bathroom sinks. Photo selection
In conclusion, we offer interesting design options for washbasins. Perhaps they will inspire someone to create something similar in their home.
Creating a hole for a sink
In order to arrange a place under the sink, use a jigsaw. By using it, the desired hole is made. If you use a hacksaw, then the edges will need to be trimmed. In this case, to obtain a neat cut, first drill a small hole inside the contour. Its diameter should allow the hacksaw blade to move freely.
To minimize the risk of chipping on the surface of the countertop, it is advisable to cut slowly, without applying excessive force. The end surfaces of the hole being created are processed using fine-grained sandpaper or sanded with a file.
When choosing a sealant, they are guided by the characteristics of the material that was used in the manufacture of the countertop. For example, alcohol-based compounds are used for wooden or plastic surfaces.
Installing a bowl and connecting a washbasin
The bowl is placed on the countertop and buried. To ensure a tight fit, rotate it slightly back and forth. Next, tighten the installed fasteners and remove with a napkin the silicone that was squeezed out when installing the product in place.
Before placing the washbasin in the bathroom and connecting the plumbing equipment, the assembled structure must be left for 24 hours until the glue has completely dried. Then the mixer is placed in the hole, connected to the hoses and secured with fasteners.
The siphon outlet is placed in the sink and a pipe is connected to it, which is led into the sewer socket. In general, the installation method for a built-in sink faucet and siphon is similar to the installation technology for console models.
Possible errors and methods for eliminating them
Although installing a sink is not a difficult task, doing it yourself can make certain mistakes. Improper installation not only leads to leaks, but a poorly secured sink can fall and cause injury to household members.
Main errors and ways to eliminate them:
- installing a new sink on the mounts from the old one. Often people don't want to make new holes and install a new bowl in the old holes. In this case, the sink is not fixed very securely and may fall;
- strong tightening of fasteners. If you do not calculate the force when tightening the sink fasteners, you can split the bowl . Over-tightening the nuts of the water hoses and siphon will damage the rubber gaskets, which will lead to leaks;
- thread failure. By applying a lot of force, you can break the threads on the fasteners and they will have to be replaced;
- selection errors. You need to choose the right size of the sink, otherwise it will interfere with free movement around the room;
- the gap between the bowl and the wall. Its presence leads to the appearance of smudges on the wall, so it is necessary to lubricate the joint with sealant;
To seal the joint between the wall and the sink, sealant is used
- uneven installation. During installation, you do not need to focus on the tile joints . The horizontal installation should be checked using a building level. To install the pedestal, the floor must be level, otherwise you will have to use plastic spacers.
Installation diagrams for household sinks
Modern industrial enterprises produce plumbing fixtures of various configurations. To understand this huge assortment, the product manufacturer provides a washbasin installation diagram for a specific model. If it is a simple sink, then its installation will require two brackets on the wall. Then the device is placed on them, the inlet/outlet lines are connected, and the process is completed.
Earthenware sanitary ware is heavy and large in size. These nuances must be taken into account during installation. For this reason, the installation scheme for sinks in bathrooms is usually drawn up taking into account all expected loads.
Mounting brackets for washbasins are secured with screws that are designed to support at least twice the weight of the equipment.
Reliable mounting locations should be provided for fastening elements. The diagrams always indicate the methods of fastening the plumbing fixture and the parameters of the fittings used during installation. For example, support brackets for a conventional sink should be fixed with screws or screws, dowels, bolts of a certain size and specific load capacity.
Bathroom Sink Dimensions
The dimensions of the washbasin are selected depending on the area of the room and specific needs. A spacious bathroom does not necessarily need a large sink; you can install two smaller bowls if, for example, several people use the bathroom at the same time in the morning.
The optimal width of a standard sink is 50 – 65 cm. The depth should be approximately the same. The height of the device is usually 80 – 85 cm.
The maximum width of the sink is 90 cm. To increase its dimensions, it is recommended to use double models.
