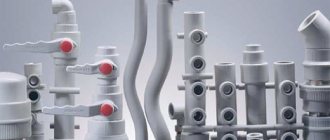
Advantages and disadvantages
Advantages:
- Resistant to long-term gas exposure.
- The service life is about 100 years, if the pipeline is not overloaded.
- High level of flexibility. Thanks to this, it is possible to manufacture highways of complex configurations.
- Low weight of individual elements.
- No sediment accumulates on the smooth walls of the product.
- The material is not susceptible to rust.
Flaws:
- Not resistant to high temperatures.
- Plastic pipelines cannot be installed outdoors, as the material loses its technical characteristics in the cold.
- When heated strongly, the material expands. Because of this, to increase the strength of connections, individual sections of the pipeline need to install compensators.
- Low resistance to ultraviolet rays.
If you do not overload the pipeline, it will not break down and will withstand decades of active use.
Sewer outlet
Instructions on how to properly install a sewer system in a private house are not limited to a description of internal and external installation. She also describes how to properly remove pipes from your home.
You need to provide an outlet location in advance, and you also need to install several bends to connect the two parts of the pipeline.
Do not forget that you must install a metal sleeve to pass the pipes through the foundation, and insulate the space remaining between the walls of this device.
Source: kanalizaciyasam.ru
Regulatory documents conditions and requirements for pipeline construction
The standards determine the laying of any pipeline, regardless of what material it is made of. Many technical issues are regulated in the so-called SNiPs.
Watch the video
They ensure safety and allow any work to be carried out efficiently. Here are a number of requirements that must be met for installation in the ground.
- Accounting is required for the point at which the soil freezes. Its level is often 1.4 meters. In winter, the water inside the water supply will simply freeze if it is located lower. The operation of the water supply will become impossible.
- The laying and its method may vary depending on what structures and structures are already present on the territory. And from the presence of highways, communication networks, highways. It is better to contact specialized companies if you are not completely sure about where to carry out the installation.
- The characteristics of the soil and topography are important for those who lay underground water pipes.
Types of sewer pipes and their features
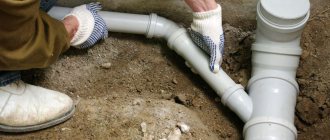
The process of laying external sewerage looks quite simple. The pipes are laid in a dug trench, connected to the system located inside the house, as well as to the collector, and then covered with earth.
Before drawing up an external sewerage project, you need to decide on the type of pipes. The dimensions of the trench, slope, etc. depend on the diameter, cross-section and material of these elements.
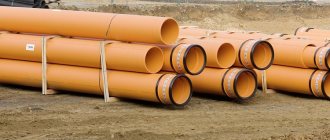
Pipes that are used to create external sewage systems are distinguished by many parameters, such as diameter and cross-sectional configuration, as well as material. Today, sewer systems are made of:
- cast iron;
- ceramics;
- concrete;
- asbestos cement;
- plastic;
- fiberglass.
Cast iron pipes weigh quite a lot, their internal surface is not very smooth, and installation is very complicated, so this type of sewage system is used extremely rarely in private plots.
Ceramic elements are easier to install, but they can be easily damaged if handled carelessly. Concrete structures of large weight are also difficult to install, so they are rarely used for external sewerage in a private house.
Inexpensive and lightweight asbestos cement structures have been popular in the past, but they are somewhat fragile, and the smoothness of their internal surface leaves much to be desired.
The undisputed leader in the sewer systems market is plastic. Pipes made of PVC, PP, PVP have all the characteristics necessary for external sewerage:
- light weight;
- significant strength;
- resistance to chemicals;
- ease of installation;
- smooth inner surface;
- ability to withstand very low temperatures, etc.
Fiberglass, which is a composition of polyester resins reinforced with special fiberglass, is also very good for sewerage. However, such structures weigh significantly more and are much more expensive.
To create a sewer system on a personal plot, round plastic pipes are most often used, the diameter of which is usually 110 mm.
When laying pipes using the puncture method, for example, under the road surface, as well as in other places with high loads, it is recommended to use double-layer pipes with a corrugated outer surface.
Note! Pipes made of polyvinyl chloride (PVP) can withstand heating only up to 40 degrees, while polypropylene (PP) structures can withstand temperatures up to 80 degrees. High-strength polyethylene (HDP), which is used in the production of sewer pipes, occupies an average position in terms of heat resistance.
Rules for laying in the ground with your own hands
GOST says that for laying in the ground, pipes must have a diameter of at least 32 millimeters. For convenient and quick installation, a set of fittings is purchased.
Watch the video
- First, a trench is dug in the ground. Standards indicate that the depth of the trenches must exceed the freezing level of the soil. It is better to use special tables to determine the freezing level specifically for your region. 0.5 meters is the optimal width for the seam.
- We compact the trench - the bottom and also the walls.
- They create a cushion that provides shock absorption. For it, it is enough to pour a layer of, for example, sand gravel or sand of approximately 10 - 15 cm.
- It is mandatory to wrap the water supply pipe with a heat-insulating layer. Then the products are laid in a ditch and connected using fittings.
- We fill the pipeline with sand. The main thing is that the highest point is 5 centimeters higher than the pipeline itself.
- We cover the place where the water supply is located with tiles. In this case, broken bricks and tiles will become indispensable assistants.
- We fill the trench with earth. It is easy to understand that installing polypropylene pipes in the ground is not such a complicated process.
Rules for installation work
Before starting the installation of a pressure water pipeline made of polyethylene pipes, a project for laying the future network is prepared and calculations are carried out. These actions cannot be neglected, otherwise there is a high risk that the water supply system will have to be redone. To prevent this from happening, follow these rules:
- The depth of the trench depends on the freezing of the soil. It is calculated using the formula from the normative collection SNiP 2.02.01-82. A hole is dug in the ground 0.5 m below the freezing depth.
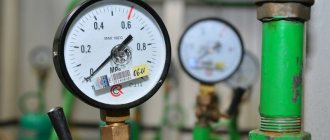
- The water supply network is assembled on the surface of the earth, filled with water under pressure, that is, pressure testing is done to prevent leakage at the joints.
A reliable design is considered to be a water supply system with fewer connections. But it is not always possible to lay HDPE pipes from the well directly to the house. The trench is dug at right angles at turning points.
Advantages of using polypropylene pipes
Polypropylene pipes are optimal for laying sewer systems for summer cottages, supplying water for domestic needs, watering gardens, and greenhouses.
The use of polypropylene pipes today is justified in many areas, from water supply to sewerage. Among the advantages of using such pipes are:
- resistance to corrosion and various mechanical influences;
- ease of installation (trench method), which does not take much time;
- the possibility of using polypropylene pipes for supplying drinking water;
- reliability and strength.
Such pipes are optimal for laying sewer systems for summer cottages, supplying water for domestic needs, watering gardens, and greenhouses. In this case, all work is completed quickly, and the pipes themselves do not require complex and expensive maintenance.
Stages of internal sewerage installation in a private house
You don’t know how to lay sewer pipes in a private house and where to start, but if you figure it out, everything is very simple. The installation starts from the plumbing fixtures and goes to the location of the external pipe. It is better to lay it under the floor. So let's get started:
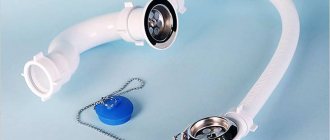
- First you need to connect the S-shaped pipe or water seal to the plumbing fixtures.
- Then the first sewage pipeline is connected.
- The horizontal pipe structure is connected to the pipe through two elbows, the angle of which is at least 90 degrees.
- Do not forget about the importance of observing the slopes of the structure, for which you need to use clamps that are attached to the walls. Thanks to them, the structure is always in its normal position.
- The pipes coming from the toilet are connected to the main elements of the sewer system, connected by a perpendicular tee.
- To ensure the passage of the pipeline through the ceiling, you need to install a metal sleeve in the insulated pipe.
- And to go from a pipe with a diameter of 5 cm to 10 cm, you will need a special adapter.
- You can equalize the external and internal sewerage using an elbow.
It will be better if you observe the slopes of the pipes; with a diameter of 5 cm it should be 3 cm, and with a diameter of 10 cm - 2 cm. In order to seal the existing pipe joints, you need to use special hermetic mixtures.
Characteristics
The technical characteristics of the material determine the scope of its application. When making a gas pipeline, you can use different types of plastic pipes. Each of them has its own technical characteristics.
Metal-plastic parameters:
- High chemical resistance.
- The material is not subject to oxidation.
- The maximum coolant temperature is up to 95 degrees.
- The maximum permissible pressure is up to 25 bar. If the temperature is high, the permissible pressure is reduced to 10 bar.
- The thickness of the metal layer between the plastic is up to 0.3 mm.
Characteristics of polyethylene:
- outer diameter of tubes - 10–110 mm;
- maximum coolant temperature - up to 95 degrees;
- at high temperatures the maximum pressure is up to 10 bar.
Polypropylene parameters:
- maximum coolant temperature - 90 degrees;
- permissible pressure at maximum temperature - up to 10 bar.
Polypropylene pipes can withstand short-term overheating up to 110 degrees.
Diameter of plastic pipes
Advantages of HDPE compared to metal pipes, affecting the depth of their installation
Water pipes are made of metal and plastic. The first group includes steel products - they were installed in buildings of the last century, and galvanized ones, which are not used for drinking systems: the quality of the water is lost. Plastic pipes include thick-walled hoses made of low-density polyethylene - HDPE.
When installing water supply for individual houses, HDPE pipes are mainly used.
Polyethylene sleeve 350 mm coil.
They have advantages in terms of installation depth compared to metal lines:
- The thermal conductivity of plastic is 0.3 W/mºC, for steel it is 47. The ability to retain heat in HDPE is 150 times higher, which makes it possible to reduce the depth of laying the water supply. The amount of proximity of the hose to the surface is calculated according to the methodology set out in SNiP.
- Plasticity of HDPE pipes with high strength. The permitted pressure for the shell is 1 MPa (10 atm). In the event of an abnormally frosty winter, the ice plug will stretch the polyethylene without compromising the integrity of the water supply. Freezing water will break a steel pipe.
HDPE pipes are supplied in coils that can accommodate 100, 150, 200 m of hose. This allows for the installation of long sections of water pipelines without joints in the underground part. You will need 2 connections: to the well pump hose and to the water supply system distributor installed in the house. Other advantages include the corrosion resistance and flexibility of HDPE. The latter quality allows you to change the direction of the line without the use of fittings.
Independent search for underground pipes
The material from which the required elements are made is of great importance. This determines not only how to find water pipes in the ground, but also what to look for and what to do.
Technologies vary, and a modern method of independently searching for underground utilities can be aimed at determining the location of:
- Metal water pipes for hot and cold water.
- Steel heating “T” in collectors.
- Power cables and wires of communication systems.
- Cast iron sewer lines.
- Plastic, polyethylene, polypropylene pipelines;
- Metal-plastic and ceramic technical means of supply and drainage.
To fully probe an unfamiliar area for the presence of underground routes, all methods are used. In this case, the choice of technique depends on the installation depth and the actual operating pressure of the liquid inside the pipeline.
Application of a metal detector
If the pipe was laid at a depth of up to one and a half meters, it can be detected using metal detectors (professional, semi-professional or amateur). At the same time, the presence of insulation and waterproofing on the “T” does not interfere with the procedure.
The price of equipment can reach up to 130 thousand rubles. This means that for one-time use, its purchase is impractical. Cheap models cost up to 6 thousand, but they are less effective.
How to lay sewer pipes in a private house: step-by-step instructions
A person feels good where there are comfortable living conditions. And in order to create them, you need to think about how to lay a sewer system in a private house. Firstly, you should familiarize yourself with the features of this process, and secondly, decide on the material used.
It is worth noting that now, plastic pipes, albeit slowly, are still replacing metal pipelines. As for cast iron, they are used very rarely due to their weight and high cost. In contrast, polymer products are much lighter in weight, easier to install and durable.
Is it possible to use polypropylene pipes for gas?
In Western countries, metal pipes are used only for the assembly of industrial pipelines. In the manufacture of water and gas supply systems, plastic elements are used. This is due to the performance characteristics of the material. Gas flows through a plastic pipe without any difficulty. Before putting the gas pipeline into operation, it is necessary to check the tightness of the connections of individual elements in order to prevent violation of the integrity of the system.
You can figure out which is better – a pipeline made of metal or plastic – by comparing these two materials. Differences:
- Weight - plastic pipes weigh less than metal parts. Thanks to this, they are easier to install; they do not require additional fastenings on vertical surfaces.
- Versatility - There are more factors to consider when choosing metal pipes than when using plastic parts.
- Price - tubes made from polymers are cheaper than metal ones.
Metal tubes are superior to plastic ones in terms of strength, durability, and resistance to mechanical stress.
Briefly about the main thing
Since the metal pipe is inevitably becoming a thing of the past, when choosing, you need to focus on plastic products. For shallow pipeline depths in the ground, HDPE pipes are ideal. They can withstand quite a lot of internal pressure. And they are easy to install due to their flexibility.
For a deep trench, it is better to choose between products made of polypropylene or metal-plastic. They are more durable and yet light enough in weight that even one person can handle them. Moreover, they are excellent for hot water supply. And to avoid heat loss, the pipeline must be reliably insulated.
Ratings 0
Trenchless installation methods
One of the promising methods for laying polypropylene pipes is trenchless installation, which has the following advantages:
- reduction of time and financial costs;
- minimizing harm to the environment;
- When laying, there is no need to dig trenches, destroy green spaces, or destroy asphalt pavement.
Today the following methods are used:
Renovation is a technology in which the old pipe is destroyed simultaneously with the laying of a new one. Only used when there is no longer enough bandwidth.
- Sanitation, that is, replacing old pipes with new ones. There are two ways to do the work:
- relining, which involves pulling a new polypropylene pipe into the old ones, but this will require a preliminary inspection of the condition of the existing pipe. It is necessary to make sure that there are no foreign objects or debris in it; the diameter of the old pipeline must be sufficient for laying a new one;
- renovation is a technology in which the old pipe is destroyed simultaneously with the laying of a new one. Only used when there is no longer enough bandwidth.
- Piercing is used when laying polypropylene pipes with a diameter of up to 150 mm. This work is carried out in several stages:
- first, two pits are dug along both parts of the route;
- then a hydraulic jack is placed in one of them, pushing a small steel pipe with a steel tip;
- when pushing, the pipe is expanded, a polypropylene pipe is inserted into its cavity;
- After the puncture, the pipeline is connected to the necessary systems.
Using this method, you can lay polypropylene pipes only in small sections; the method works great when it is necessary to lay them under a house, highway, garden, etc.
Polypropylene pipes for pipeline installation are used in many areas, from simple communications for country houses to sewer or water supply networks. Today, two methods of laying pipelines are used, but the most optimal is considered to be underground, which allows you not to touch above-ground structures and not spoil the landscape.
Laying in the ground has many advantages, despite the need to dig a pit. This allows you to keep them intact, out of reach of ultraviolet rays, and mechanical damage is also minimized.
Because You are not logged in. To come in.
Because The topic is archived.
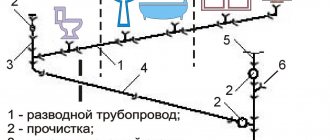
The main stages of laying sewerage in a private house
In order for the system to function properly and no unforeseen situations arise, before laying sewer pipes in a private house , you need to competently draw up a detailed project.
It is desirable that the design of engineering systems be carried out at the time of drawing up the house project, but this is only relevant if new construction is planned.
First of all, you need to take care of the compact arrangement of water intake points, which allows you to organize the reception of wastewater into a common riser. If the kitchen and bath are located at different ends of the house, then you will have to plan to build two risers and septic tanks, which entails additional costs.
Many experts recommend that at the stage of developing a scheme for laying external and internal pipelines, one should focus on some features of the movement of wastewater through pipes. The following rules must be followed:
- The toilet must be connected to the riser separately; in addition, other devices cannot be added to the connecting pipe;
- the connection of other devices should not be at a level lower than the toilet connection;
- all plumbing, except the toilet, may have a common connection to the riser;
- the diameter of the supply pipe must be no less than the size of the drain pipe.
Once the project has been drawn up, you can proceed to such stages of system installation as choosing a location for installing a treatment plant, arranging an internal sewer network, removing it from the house and installing an external sewer system.
If you are encountering this for the first time and do not know how to lay sewer pipes in a private house, but want to do it yourself, then it is advisable not only to read the installation instructions, but also to watch the video.
What to do with insulation
For this, for example, special cases are used. The existing water supply is laid inside another pipe with a small diameter. This contributes to the formation of an air cushion between the walls of different products. Thanks to this, the heat of the water is retained.
Or the pipeline is simply poured using polystyrene concrete or foam concrete. This is a monolithic layer, with a base in the form of concrete with low weight and a porous structure.
The water supply is sometimes wrapped with insulation. Or a heating cable. The latter is laid both inside and outside the structure. It is recommended to carry out the gasket in two available ways:
- Two lines parallel to each other.
- In a spiral shape, around the water pipe.
Not every system is designed so that pressure increases without problems. But this method of protection can boast of effectiveness.
When high pressure remains inside, the liquid does not freeze. Even if there is no physical thermal insulation.
When installing external non-pressure types of sewerage, the so-called socket connection is used. The main thing is that there is no contamination on the plastic, then the connections will become highly sealed. Silicone or liquid soap is used to lubricate the parts that require connection.
Treatment with a sealant will provide additional protection during work such as laying water pipes from polypropylene pipes in the ground.
Only compliance with all requirements and technologies will allow you to obtain a water supply system that will function for a long time. And it will help reduce operating costs.
We are installing filters
If there is no scale or sand in the water, then elements such as fittings on toilet tanks, automatic washing machines, and ceramic faucets will last much longer.
It is enough to install the simplest filters, with rough cleaning. Without water purification filters, it is not advisable to lay polypropylene pipes yourself.
You should not give preference to filters that are disassembled manually. Inside such structures there are rubber seals, whose durability leaves much to be desired.
The preparation process depends on what type of pipes you have chosen. If it is galvanized, then we use a grinder to cut blanks of the sizes we need with our own hands. This can also be done using a hacksaw.
It is more convenient to cut metal-plastic or polypropylene products right on the spot. Even small errors in size will not be terrible.
When connecting, preference is given to two methods. For example, through a collector, which plays the role of wiring for individual devices, when each of them has its own fittings. Or through a simple tee.
We work with steel products
If you have the appropriate tools at hand, for example, such as welding, it is used to connect a metal structure.
It is easy to use to weld threads. Or bends that were bent on a special machine, the so-called pipe bender.
You can use dies or holders and do the work manually. Threaded connections are made in the same way as in the case of valves.
About metal-plastic pipes
In this case, the connection is made using fittings, which are equipped with union nuts. After cutting off the pipe section, proceed to chamfering from the inside using a knife. The union nut is put on the pipe along with a split ring.
Watch the video
We place the fitting from the fitting inside the pipe
The main thing is to act carefully, otherwise the rings with sealing characteristics will move. The nut is tightened just as carefully, without sudden movements.
Products with a polypropylene base
To get the job done, it will be enough to purchase an inexpensive soldering iron. We apply heat to the inner fitting surface by selecting the desired nozzle.
We do the same with the end where the polypropylene pipe is located. We insert one part into another, wait until everything cools down.
Methods for connecting HDPE pipes
The finished project presents a plan for the backbone network: length, turns, connections. At the design stage, even before purchasing materials, they determine the method of fastening the sections together and form a final list of equipment and materials, and calculate the estimated cost of laying.
Butt welding
For a strong, reliable connection of HDPE, butt welding is used. The method is convenient and inexpensive, except for the cost of the welding machine. On average, the price of such equipment is from 180 thousand to 2 million rubles. If you do not have a goal to purchase a machine for welding HDPE pipes, it is better to entrust the joining of sections to a specialized team.
If you are planning to lay the water supply yourself, I will tell you how to do it. The welding machine consists of the following elements:
- centralizer;
- hydraulic unit;
- welding mirror;
- trimmer
Assembly consists of the following steps:
- Secure HDPE pipes in the centralizer on both sides with fastening nuts.
- A manual with a formula is supplied with the welding machine, through which the pressure is calculated for a specific pipe diameter. Having found out the necessary parameters, install them in the hydraulic unit.
- Degrease the edges of the HDPE pipe with alcohol wipes.
- Using a trimmer, smooth out the joints so that there are no burrs.
- After heating the welding mirror, install it between the pipes. Apply pressure to the centralizer until the ends melt 1 centimeter. Reduce the pressure to zero and wait the time specified in the instructions.
- Remove the heating element and connect the pipes.
Within 7–10 minutes the joint hardens, forming a strong connection.
Electrofusion
The electrofusion connection method is suitable for repairing an existing HDPE water supply system. But it can also be used to weld a new system in hard-to-reach places. You will need a welding machine for electrofusion welding and couplings. The cost of couplings depends on the diameter, starting from 200 rubles.
Before starting work, try the coupling on the pipe sections and make marks with a white marker. From the point of cut to the notch, the pipe is cleaned with a scraper to remove the protective oxidative coating and degreased.
An electric coupling is a sleeve with grooves for the contacts of a welding machine. A barcode is pasted on the coupling body, which can be read with a laser pointer included with the device. If for some reason the reading did not occur, then the data can be taken from the coupling passport. The barcode is needed for the machine to automatically select the welding mode.
Having connected the pipes in the coupling, connect the contacts. The device is given the “start” command. The current is supplied to the electrical network located on the inside of the coupling. The pipe begins to melt. The process is considered complete when beacons appear on the surface of the sleeve and the device gives a signal.
Connection with compression fittings
Less reliable methods include connecting with fittings. Leaks may form at the joints, so it is better to use this method for external water supply systems of small diameters.
A fitting is a fastening element. Its components:
- blue clamp cap;
- rubber seal;
- white ferrule;
- sleeve.
To connect a water supply system from HDPE pipes with compression fittings, no additional equipment is required. By welding and electrofusion it is allowed to connect only HDPE pipes of the same diameter, grade and wall thickness, and the variety in fitting models allows you to assemble elements of different sections.
Unscrew the blue clamping nut from the fitting and put it on the pipe. A white ring is attached next. The cleaned and degreased pipe is inserted into the fitting, the ring and nut are tightened, and tightened tightly.
Socket connection
Before couplings and fittings became available in the construction markets, the socket connection method was widely used in pipeline laying. The technology consists of assembling pipes of different diameters: one pipe is inserted into another and the joint is sealed. For sealing, a rubberized coupling is used, previously placed on a wide section of the pipe.
Which way is better
For underground water supply it is better to use the butt welding method. This connection guarantees long-term operation of the system without leaks. The pipe welding process is quick and one person can handle the job.
Conditions of conduct according to regulatory documents
The laying of any pipeline, be it polypropylene or steel, is determined by standards. It is SNiP that regulates many technical issues that allow all work to be completed efficiently, ensuring safety. To lay polypropylene pipes, the following requirements must be met:
Diagram of the advantages of polypropylene pipes over other materials
- It is imperative to take into account the freezing point of the soil. Usually it is at a level of 1.4 meters, so if the pipeline is at a lower level, then in winter the water in it will simply freeze and it will be impossible to use the pipe. Therefore, during installation it is necessary to accurately calculate such moments; in the future this will only be beneficial.
- The laying of pipes largely depends on what buildings are located on the site, whether there are nearby roads and highways, communication and other utility networks. If you are not sure where exactly the pipeline can be laid, it is better to contact specialized construction companies.
- When laying underground, we also take into account the characteristics of the relief and soil; in some cases it is necessary to protect the pipe with the help of special casings.
The polypropylene pipeline is laid subject to the following steps:
- First you will have to prepare a trench for laying, which should be larger than the diameter of the pipe. So, for 110 mm pipes you will need a trench with a width of 600 mm. The minimum distance between the pipe wall and the trench should be 20 cm. The burial depth should be 50 cm greater.
- The bottom is sprinkled with sand with a cushion thickness of approximately 50-100 mm, after which the sand is compacted.
- The laying starts from the building; when installing sewer pipes, the socket should face the end of the pipe going outside;
- A special lubricant is used to connect individual elements.
- When laying sewerage, you must remember that a slope of 2 cm must be maintained for every meter of the route.
- After installation, the pipeline is covered with sand and compacted only from the sides. If necessary, before this the pipe is wrapped with a heat-insulating layer;
- At the very end, polypropylene pipes are connected to a common highway, treatment plant, etc. This must be done using polypropylene solder.
What problems may arise during installation?
When laying polypropylene pipes underground, some problems may arise:
- the structure of the soil does not allow digging to the required depth;
- in winter, the soil freezes strongly, which can cause damage to pipes;
- There is a building on the site that is not possible to get around.
In this case, there are several ways to solve these problems:
- If the soil is too loose or hard, it is recommended to make a puncture, in which a steel pipe is first laid, and a polypropylene pipeline is inserted into its cavity.
- When the ground freezes, it is recommended to lay a heating cable along the entire route. This requires significant costs, and expenses in winter may exceed those planned, but in any case, this option is cheaper than constantly repairing burst pipes.
- If there is any structure or object along the route that cannot be damaged, it is recommended to use trenchless construction methods, that is, puncture. In this case, you can not only lay the pipeline, but also protect it with a steel casing. When laying such networks, it is necessary to carefully look at the layout of communications on the site so as not to damage existing ones.
Possible errors and difficulties
Map of soil freezing depth
The main points that can cause problems, experts include:
- incorrectly selected pipes;
- lack of sand and gravel cushion under the highway;
- neglect to assess the composition of the soil and the temperature characteristics of the climate;
- weak screwing of crimp nuts and fittings.
Do not leave the ends of the pipes open, otherwise debris and sand will get into them.
Even in the southern regions, pipes must be buried no less than one and a half meters and insulating material must be used. Otherwise, even a short-term decrease in temperature will lead to their deformation. If frost hits, the water in them will simply freeze.
When connecting the water supply to the house, do not rush to fill the trench. First, you need to do a test run to identify possible problems and correct errors in a timely manner. Immediately before backfilling, thoroughly inspect all connections again to make sure that the system is functioning correctly.
A few words about insulation
Insulation of sewer pipes is used quite often. For this purpose, special rolled or shaped insulation is used.
The first ones must be wound onto the pipe during the installation of the sewer system, the second ones are made for a pipe of a specific diameter and are simply put on it.
Since heat-insulating materials can lose a significant part of their useful properties when in contact with water, it is important to cover them with a reliable layer of waterproofing.
As an alternative or additional method of thermal insulation, a special heating cable is used, which is installed along the entire length of the pipe.
You can save time and effort if you buy pipes with a thermal insulation layer already installed. Elements are produced equipped not only with conventional insulation, but also with a heating cable.
When using such structures, it is necessary to carefully seal the joints so that moisture does not get on the insulation.
Source: aqua-rmnt.com
Sequence of actions when installing a sewer system
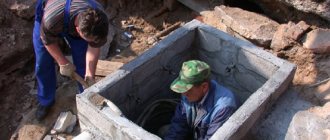
First of all, before laying the pipes, they dig a trench. The easiest way to do this is to use special equipment, such as an excavator, or manually.
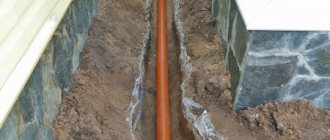
According to generally accepted technology, laying sewer pipes involves the use of pipes with a diameter of 110 millimeters. In this case, the width of the ditch should be at least 60 centimeters.
Simultaneously with increasing the cross-section of the pipe being laid, it is also necessary to expand the trench. After selecting the material, the pipe is directly laid in the trench, which has its own nuances.
Those who are interested in how to lay sewer pipes in the ground correctly should keep in mind that work must begin from the foundation of the building. If there is no pipeline for drainage from the house, a hole is cut under the base of the building and the network is supplied under it.
When there is an outlet, a socket is put on the end of the pipe leaving the building. In this case, special attention is paid to the alignment of the joined elements.
As a rule, along the entire length of the sewage and wastewater drainage pipeline there are bends and turns - they are the ones that most often cause failure of the sewer network and cause serious trouble to the owners of private houses.
It is in places where the pipeline changes its direction that various deposits begin to accumulate. Over time, they completely block the path of movement of wastewater.
Experts know how to install a sewer pipeline in a private household to prevent such troubles.
Therefore, they do not include advice from professionals, which are as follows:
- The laying of sewer pipes must be carried out using bends that have different bending angles - from 15 to 90 degrees. To provide convenient access to places where blockages form, revisions are installed above each elbow.
- After completing the formation of the outlet from the house, the pipes are placed in the trench with the sockets down and then they begin to join the products. The joining process is as follows: the edges of the products are lubricated with a special compound and they are inserted into the socket until it stops.
To correctly connect the elements of engineering communications in a private household or apartment, a simple technique is used. It consists of marking the pipes before starting work to determine the depth of their insertion into the socket. Based on them, the connection is finally made.
Required Tools
After drawing up the diagram, you can begin to dig a trench. The work area must be cleared of any vegetation and debris. The soil is prepared in advance.
When working with power tools, you need to think about connecting to the network. This way it will be possible to eliminate work difficulties. You need to set aside a place to collect soil. At the edge of the trench it may not be enough. For convenience when moving from one edge of the trench to the other, bridges made of boards are provided.
Necessary tools for work:
- Rope;
- Level;
- Bayonet and shovel;
- Hammer and axe;
- A pickaxe may be needed;
- Protective clothing, gloves, glasses;
- Hacksaw.
Tools for laying pipes are sold in hardware stores.
Next, marking is done. To do this, the diagram on paper is transferred to the site. All lines are created using rope and stakes. A tape measure will also come in handy. The procedure does not require maximum clarity, so everything is done quickly.