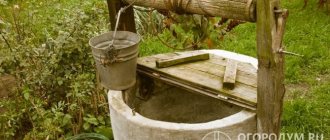
Buying a summer house is usually accompanied by a lot of additional hassle. One of them is solving the issue of water supply to the site. Water is required both for personal use and for watering the garden plot. In most cases, in new holiday villages there is no centralized water supply, and new owners need to choose an underground water source - a well or an artesian well.
A water supply system is installed on the basis of the hydraulic structure, which can provide both seasonal and year-round fresh water needs for the inhabitants of the dacha.
Installation of water supply at the dacha
Installing a water supply system in a dacha based on your own well is the best way to supply water.
The first stage of work includes drilling a well, strengthening it and installing a pipeline.
Most owners prefer to use the services of companies to develop soil down to the aquifer - drilling turnkey wells. Experts must determine the depth of groundwater and calculate the approximate flow rate (available volume of water) of the source.
The feasibility of constructing a full-fledged water supply system at home depends on it. In some areas, there is only enough water from the ground to irrigate the plot, but usually the well’s flow rate allows a family of 2-3 people to live in a dacha.
Depending on the mode of water use, you can choose one of two types of water supply: seasonal (collapsible) and off-season (capital).
Seasonal water supply
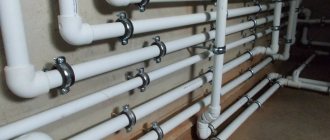
The first type is a simplified version, which is used to irrigate the site. It is mounted on the basis of a system of plastic pipes and hoses connected to each other along the perimeter of the garden plot. In the fall, at the end of field work, the water is drained and the water supply system is dismantled before the onset of warm weather.
Capital water supply system
Installed for year-round use. Often - on the same principle as the usual water supply to a private home.
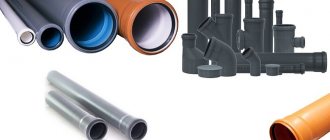
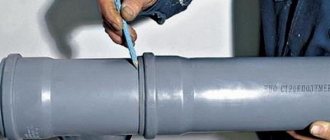
We recommend that you familiarize yourself with: Sewer pipes, their types and installation rules
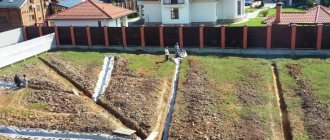
Pipes from the well are led to the house underground; they are laid in trenches below the freezing depth of the soil.
Equipment of a capital pipeline is a labor-intensive and resource-consuming process. To install it, several types of equipment are required:
- well pump;
- pipes;
- control and measuring equipment (pressure switch, pressure gauge);
- filters for water;
- hydraulic accumulator
Important! For the operation of the capital pipeline, electricity is needed to ensure the operation of the pumping equipment. Before starting design, it is necessary to take into account the power supply available on the site, which should be sufficient for uninterrupted operation of the pump.
Instruments and devices used in summer water supply systems
To make the water supply system more practical, the following devices are used:
- A fitting for quickly connecting the hose to the tap. On one side it has a spring grip, on the other there is a “ruff” that is inserted into the hose.
- Corrugated hoses that take up very little space when folded.
- Hoses and special components for drip irrigation.
- Sprayers and watering guns with special couplings (aquastop), which automatically shut off the water when replacing the watering device (there is no need to close the tap).
- Sprinkler and watering heads.
- Devices for organizing automatic watering - timer or soil moisture sensors.
If there is no centralized water supply near the site, and a well or borehole is supposed to be used as a water source, you will need a pump.
Plumbing diagram
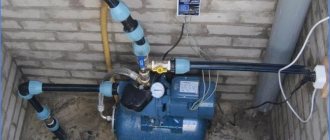
Let us give an example of a capital (stationary) pipeline running from a well to a house. The diagram includes the following elements:
- The intake pipe through which water is supplied from the well to the system.
- Coarse filter, iron remover, softener - the type depends on the chemical composition of groundwater.
- Check valve to prevent water from flowing in the opposite direction.
- Pump - diaphragm or centrifugal, submersible or surface.
- Measuring equipment – pressure switch, pressure gauge, water meter.
- Drain valve.
- Hydraulic accumulator.
- Pipes with triple adapters for sequential connection of the pipeline to the house, to the site, to the bathhouse - depending on the flow rate of the well and the personal needs of the user.
- Valves for each water supply branch that shut off the water.
It is necessary to take care of high-quality fittings and couplings for connecting pipes, especially in areas where plastic pipes enter metal threaded adapters. The operation of the system depends on their quality.
Important! A separate trench is made for the electrical cable for the pump. The socket for connecting the pump must be grounded. It is forbidden to lay cables near pipes underground.
Possible difficulties and problems during installation
Before digging a trench, find the underlying communication networks on the technical documentation drawings of the land plot: gas pipeline, telephone, heating, electrical cables. If there is no such documentation, please contact the administration. They have equipment at their disposal that can find an existing utility network at any depth. This will allow you to avoid damaging another network during the process of digging a trench for the water supply.
If the water supply is from a well on the site, no permitting documents are required. But if you are connecting to an existing network or laying a pipe through a neighbor's property, you will need official permission from the local authorities in writing. Otherwise, you may create an emergency situation, which could lead to legal action. It is necessary to agree with neighbors in advance and obtain approval for excavation work.
The problem may be the soil: hard, soft, waterlogged, rocky or unstable. Laying a water pipeline in such conditions will be more expensive, since additional protection and fastening of the entire system will be required.
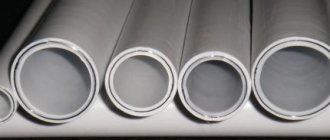
HDPE pipes - technical characteristics
HDPE pipes – products made from low-density polyethylene – are the main alternative to polypropylene (PP) pipes. They have similar physical, mechanical and operational properties. In terms of price, HDPE pipes are more profitable compared to polypropylene pipes: the cost of one linear meter starts from 20 rubles.
When choosing pipes for the construction of a capital water supply system in a country house, most often the choice is made of HDPE pipes. They show their best performance in year-round use, not inferior in reliability and durability to their polypropylene counterparts.
We recommend that you read: How to prevent clogging of storm drains - routine cleaning and prevention
Pros and cons of HDPE pipes
The advantages of HDPE pipes are almost the same as those of PP pipes:
- long service life - up to 40 years;
- invulnerability to corrosion;
- absence of limescale on the internal walls even during long-term use;
- low thermal conductivity and lack of condensation effect;
- light weight - HDPE is 6 times lighter than metal pipes;
- minimal toxicity;
- easy installation by welding or coupling method.
The disadvantages of HDPE pipes should also be taken into account:
- limited operating temperature range;
- vulnerability to ultraviolet radiation.
Important! Most shaped products made of low-density polyethylene have restrictions on the temperature of the working environment. They are not used for heating installations.
To install the pipeline using the underground trench method, two types of HDPE pressure pipes are used:
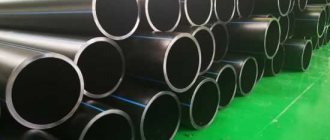
- HDPE PE 100 – diameter from 20 to 1200 mm, regulatory document - GOST 18599-2001. These are black pipes with a thin blue stripe along the entire length, which means they can be used for drinking water.
- HDPE PE PROSAFE - pipes made of polyethylene with a protective sheath, corresponding to GOST 18599-2001, TU 2248-012-54432486-2013 and PAS 1075. The protective sheath is made of mineral-filled polypropylene with a thickness of 2 mm. Thanks to additional insulation, this type of pipe can be laid using both trench and trenchless methods.
The diameter of the pipes must be selected in such a way as to ensure the required throughput and good water pressure in the system. Depending on the volume of water consumption, you can choose pipes from 20 to 100 mm or more.
Important! It is advisable to insulate pipes that run fairly close to the freezing depth of the soil using covers made of foamed polypropylene (sold in hardware stores). This will protect the entire system from freezing in winter and leaks due to burst HDPE pipes.
How to install a water pipeline yourself
The work algorithm depends on the water supply project. If you have the skills and technical capabilities, the installation of a capital pipeline takes place on a turnkey basis: from digging a well to connecting pipes to taps in the house.
We recommend that you read: HDPE pressure pipes: main advantages and characteristics
Installation tools
To install the pipeline, provided the well is ready, the following is required:
- shovel for digging trenches;
- adjustable and gas wrench;
- apparatus for welding pipes (“iron”);
- pipe cutter or scissors;
- tape measure (centimeter).
For electrical installation work, you will need instrumentation (testers, voltmeters), pliers, screwdrivers, wire cutters and other tools depending on the scope of work.
Work algorithm
If the well was dug by other specialists, then the work plan may be as follows:
- Digging trenches for pipelines and electrical cables according to a pre-developed diagram.
- Installing a filter in a well.
- Connecting a pump (external or submersible type - depending on the flow rate of the well) to a pressure switch, pressure gauge and hydraulic accumulator, connecting to a filter.
- Installation of plastic pipes using a soldering tool.
- Connecting the pipeline to the house.
Installation of HDPE pipes is the most critical stage of work. First, a water intake point is established from the well to the intake pipeline. On extended sections of the system, as well as in places where pipes turn, you must first connect them using a welding machine. Connecting the pump to the supply pipe, installing check valves, valves, plugs, drain valves is carried out during the installation work from the well to the house.
Attention! Installing filters in the well is mandatory. Even if the water will be used exclusively for irrigation, it must be purified from mechanical impurities - sand, clay, rock particles. Without purification, such water will quickly lead to clogging of pumping equipment and render it inoperable.
Before closing the trenches, it is necessary to test run the system to ensure the tightness of all pipe joints and bends. If the system is working properly, the water pressure in the pipe is good, then the installation of a water supply system in the country can be considered complete.
Step-by-step instructions for doing the installation yourself
When the plan and estimate are ready, the material has been purchased and the connection method has been selected, you can begin laying HDPE in the ground.
Required Tools
If you decide to do everything yourself, then you will need:
- shovels for excavation work;
- two gas keys;
- grinder or hacksaw;
- pipe cutters;
- construction level;
- pegs, cord, tape measure.
If you have a special soldering tool, the above will not be needed, only compression fittings.
Step 1
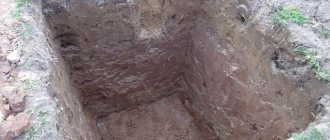
At the first stage, they dig a trench according to a previously developed scheme. The shape of the excavation depends on the type of soil and the depth of groundwater. Simple and less labor-intensive - rectangular shape. This option should be chosen when the trench depth is no more than 1.5 meters, since this method does not provide for strengthening the walls.
A popular shape is trapezoidal. It is allowed for laying water pipes from HDPE to a depth of 1.5 meters and below, which is relevant for most of Russia. In this case, there is no need to additionally strengthen the walls.
In places where groundwater lies close, it is recommended to choose a mixed form with reinforcement. The width is determined based on the data of the SNiP 2.04.02-84 collection. On average, it varies from 0.5 to 0.8 meters.
If the water supply route is located in a place that is difficult for equipment to reach or the length is short - 5–10 meters, you can dig a trench manually. In other cases, it is better to contact an excavator, especially if the water source is located outside the site and runs into an existing water supply.
Along the route, pegs are driven in on both sides of the future trench, and a rope is pulled. In the future, this will become a guideline for excavation. The land is dumped.
Step 2
The next step is to assemble the HDPE pipes into a complete water supply system. Water is supplied under pressure to check the seal. If the water supply is long and it is inconvenient to install it on the surface, sections of pipes are laid directly in the trench. In this case, it is better to weld using the coupling method. Next, you need to insulate the pipeline along its entire length.
Before laying, the bottom of the trench is covered with a 15 centimeter layer of sand. You should also fill the laid HDPE pipe with sand, this will facilitate access to the system in case of an emergency.
Step 3
The last step is cutting into the house, installing shut-off valves. The soil from the dump is poured back into the trench and leveled.
