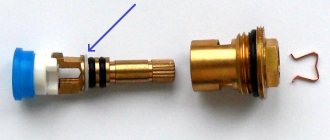
Most of us have a single-lever cartridge faucet installed in our kitchens and bathrooms. The cartridge is the main part of the faucet, which is responsible for opening, closing, turning the spout, closing types, the degree of jet intensity, etc. Therefore, as soon as any problems appear in its operation, the mixer cartridge needs to be repaired. The cartridge acts as a shut-off valve, however, this part may leak or fail for another reason. Then it will have to be changed.
Ways to solve shower problems
Sometimes troubles happen with the shower hose and watering can, more often due to wear of individual elements or poor water quality.
Poor water supply through the shower screen
Typically, water does not pass through the mesh very well if the holes in the mesh are clogged. Here, after removing the mesh, it is easy to clean it with an ordinary awl or needle.
One of the main enemies of faucets and shower heads is lime, which is found in large quantities in tap water. You can only get rid of it using a fine filter.
After screwing the mesh back, the water supply and direction of the streams are restored. Both the plastic panel with holes and the remaining parts of the shower and faucet can be wiped with a vinegar solution to remove plaque and stains.
Leaking shower hose and drain
If the leak appears due to wear of the internal part or winding, there is no point in repairing the hose; it is easier to buy a new one. Its cost is low, and the service life of new modifications is much longer.
During the replacement process, the mixer handle is moved to the position for supplying water to the spout, then with light movements I unscrew the old hose and fix the new one
If both the drain and the shower are leaking at the same time, the problem is a loose joint between the plug and the body. To correct the situation, first remove the locking screw. The next step is to tighten the union nut. This reduces leakage, but switching water from the drain to the shower is a bit difficult.
To completely eliminate the leak, you need to grind the plug onto the mixer body using special grinding pastes. They are sold in many stores.
We also recommend reading our article about other common faucet failures in a bathroom with a shower.
Practical advice
As you have already seen, the service life of cartridges is greatly influenced by the quality of water, its hardness and the presence of hard impurities - debris, sand, rust, etc.
Sediment, plaque and the presence of foreign particles wear out the plates and seals, which complicates the operation of the lever, leads to leaks or “squeezing”, when the hot flow with excess pressure displaces the cold flow through the cracks formed in the tap.
Experts strongly recommend finding out the composition of the water and the impurities in it and, if necessary, including a cleaning filter at the inlet in the water supply wiring diagram.
Wear and tear also depends on the quality of the products purchased. You shouldn’t save a lot, as this can ultimately result in much larger expenses not only for repairing the faucet cartridge, but also for your and your neighbors’ bathroom or kitchen.
What is a mixing diverter?
It is extremely simple to answer the question of what a diverter is in a mixer. This is a regular switch that redirects the flow of water. The mechanism is quite simple, but due to the presence of parts in the design that rub against each other and their direct contact with water, the product (of particularly low quality) quickly fails. Diverters differ:
Type
There are switches for the shower and kitchen sink spout. Consumers have been familiar with the first type of product for a very long time. It can be push-button (press/release position) or lever (up/down position). Almost all faucets with a hygienic shower head are equipped with mechanisms of the first type. For example: a new model of sanitary equipment from IDDIS Urban URBSBL2i10. By moving the diverter on the mixer to the upper position, the user turns on the hygienic shower, lowering the tap down.
The second type of switches appeared relatively recently. They are equipped with kitchen sink faucets, which provide for the use of water filters or dishwashers. The principle of operation is the same for all.
Functionality
Two-position and three-position spout diverters are used. The first type is classic. The second has an additional option and is often used exclusively on kitchen faucets when it is necessary to provide water supply in 2 directions. The price of 3-position models is higher - from 950 rubles.
Parameters
There are diverters for faucets with ½ and ¾ inch threads. When choosing a spare part, this technical parameter must be taken into account.
Manufacturing materials
Brass switches are considered affordable. Their body and internal components are covered with a protective coating - chrome, nickel (now extremely rarely used), enamel, ceramics, zinc, copper. Each diverter coating option has its own advantages and disadvantages. For example: chromium provides high hygienic qualities, enamel is durable, but is susceptible to mechanical stress, and nickel can cause allergies. Not long ago, consumers were offered a ceramic diverter for the mixer (not the entire mechanism, but only functional plates) and devices made from the innovative POM polymer. The price of switches is 30-45% higher than classic models, but so is their service life.
External data
Since the diverter is an integral part of the faucet design, its design matches the appearance of the faucet. It is recommended to replace it with a switch of the corresponding data and color scheme. According to consumers, the largest selection of diverters by style is offered by Kaiser (Germany). For example: a minimalist chrome-plated rotary mechanism with a ¾-inch thread. The price of the mechanism is from 680 rubles.
If your faucet diverter fails, you can buy a model from any manufacturer, the main thing is that it matches the technical parameters of the plumbing equipment.
This is interesting: Blanco mixer - models Mida and Fontas, Sora and Trima chrome, Daras Silgranit and Klea, product reviews
Causes of leakage
Leaking is the most well-known problematic situation that occurs with plumbing.
And it doesn’t matter whether it is in the kitchen or bathroom. Faucet leaks can occur for many reasons.
Table No. 1. Causes of leaking faucets.
Cause Solution Poor quality faucet Often, wanting to save some money, people prefer lower-cost faucets. But you should understand that cheap taps can leak water. It is unlikely that you will be able to avoid this problem if you have already purchased such a faucet. Therefore, when purchasing, always choose only tools from trusted manufacturers whose products you are confident in the quality of. It also happens that you buy a product from a well-known brand at a low cost. Here you need to be able to distinguish a fake from an original, because a common model is unlikely to be sold for pennies. Incorrect installation of the faucet This is the second most common reason. Most often it occurs in people who, without experience, install the mixer themselves. Also included here are cases of incorrect assembly of the faucet. With such errors, often even the most expensive faucets lose all their advantages, begin to drip, rust, and creak. To solve the problem, you need to trust the installation of faucets to people who have extensive experience in this and cannot make mistakes, even holding holding a mixer with unfamiliar designs or fastening systems, etc.
If you leave this work in the hands of a master, be sure to check the qualifications, otherwise you risk wasting time and money. Incorrect use of the mixer Although the mixer provides the ability to twist and move in the other direction, or rotate the screws, you still need to work with it with extreme caution. Problems in this direction can arise if you apply a lot of force during installation of the mixer, or turn the tap itself in the wrong direction angle, lifted up or pressed down, screws were unscrewed further than required. All this spoils the product and in the future can lead not only to leakage of the faucet, but also to a final breakdown. In this case, there is only one solution - buy another faucet and handle it with care. Wear of parts Few people think that the crane is literally “outdating” its usefulness.
Constantly turning the lever on and off and moving parts wears out the materials over time. This happens especially often with rubber gaskets. It is not difficult to solve this when some materials have been damaged. Here it will be enough to replace them. This can be prevented by carrying out preventative maintenance on the cranes. Equipment expiration Although this happens less often, even this reason can lead to a water leak. As a result, you will also have to buy a new faucet, which can last for several years if used properly.
Plumber set
In what cases is it possible to repair a mixer?
Not all faucet breakdowns can be repaired. Cartridge replacement or other repairs are carried out in the event of the following breakdowns:
- the cartridge is leaking;
- when turned on at full power, the ball mixer produces a weak water pressure;
- when turned on, water is simultaneously supplied to the spout and shower;
- Push-button switch failure.
More serious breakdowns occur extremely rarely, but require replacement of the entire mixer.
Cartridge mixer
Disassembling the mixer
Almost anyone can disassemble and repair a leaking single-jaw mixer. You don't need professional tools for this.
For repair you will need:
- screwdriver or knife;
- hex wrench of suitable size;
- pliers.
Tools needed to repair a faucet
Procedure
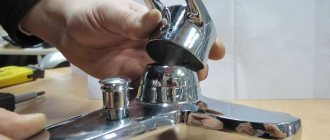
- Use a screwdriver (or knife) to remove the plugs on the lever that indicate the direction of the handle for supplying hot and cold water.
- Unscrew the screw and remove the handle.
- Carefully unscrew the ceramic and circular nut from the housing. This is done using a key or manually.
- Remove the cartridge from the housing.
Advice. The presence of grooves in the nut requires that it be dismantled with extreme care, otherwise the spare parts can be damaged without the possibility of correcting the defect.
The entire procedure for disassembling the mixer takes an average of 10 minutes and anyone can do it.
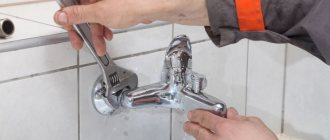
Unscrew the faucet carefully so as not to damage the surface of the tap
Fixing the leak
Leaks in single-lever faucets are often caused by failed cartridges. This happens due to abrasive particles of debris entering the interdisk space. In this case, the cartridge must be replaced.
When choosing a replacement element, it is worth considering that the holes in the cartridge can be of different diameters (3 or 4 cm). Cartridges may also differ in the latches on the bottom plate. Cartridges with silicone gaskets are recommended for replacement, as they are more durable when exposed to water.
After installing the new cartridge into the housing, the mixer is assembled in the reverse order of disassembly.
Unscrewing the tap - step by step
Faucet/Shower switch leaking
Often the problem is associated with wear of the internal oil seal. To fix the problem, it (the oil seal) must be replaced. Troubleshooting steps:
- The handle must be in the closed position.
- Remove the flexible shower hose.
- Use pliers to remove the switch button from the faucet.
- Using a pin or screwdriver, unscrew the adapter from the spout.
- Replace the worn o-ring.
Removing the shower/faucet switchTip. To avoid damage to the chrome surface of the faucet, it is better to do all work with a thick, soft cloth.
Popular cartridge sizes
Naturally, the cartridge sizes are standardized for each mixer model. For washbasins, sinks and showers, the most common sizes are 28mm, 35mm and 32mm. At the same time, parts from 40 mm to 46 mm are most often used for the bathroom (in particular, in Grohe and Kaiser). But why is there such a difference in almost identical mixers?
It is believed that the larger the ceramic mixer for a single-lever faucet, the better it is. In fairness, it is worth noting that with Chinese taps (with the exception of FRAP), where the diameter of the spout is often larger than that of branded ones, this rule is actually followed. But for branded models (Fiore Rubinetterie, Iddis, Sedal and others), a large cartridge is not always synonymous with quality.
Technical characteristics (diameters) of different mixer cartridges
Let's look at the technical characteristics using the example of a cartridge with a Touch-Z brass rod:
- Diameter – 45 mm;
- Height with leg – from 60 mm to 65 mm;
- The height of the cartridge without the rod is 47 mm – 50 mm.
Similarly, based on the characteristics, you can choose a cartridge for a kitchen faucet. Let's take Potato as an example. The diameter of the swivel spout is important here - it is recommended to use sizes from 26 mm to 30 mm. To supply hoses, a hole from 38 mm to 40 is used, depending on the model.
The listed sizes are considered standard, but for many original faucets they are not suitable due to their too large diameter. In such cases, non-standard components for 18 mm, 20 mm and 22 mm are used. Hose connections can also be made in holes from 25 mm to 26 mm or more.
How to fix a faucet with a cartridge
Most often, faucets with one lever are installed in the bathroom or kitchen. They are also called flag or single-lever. A special device, a cartridge, is responsible for opening/closing the water in it, which is why they are also called cartridge ones.
Cartridge tap
There are two plates with holes inside the cartridge. The lower one is fixed rigidly, and the upper one is movable. A rod is attached to it, and it, in turn, is attached to the handle. By turning the handle, we move the rod, and it moves the movable plate, which opens/closes the water and changes its pressure.
If there are problems with such a faucet, it can only be repaired by replacing the cartridge. The main problem with them is that they start to leak - water oozes or drips from under the handle. To repair a leaking or dripping cartridge faucet, you need to replace the cartridge. The only way.
Replacing the cartridge
The first step is to turn off the water, then remove the handle. To do this, first remove the colored plug - it covers the screw. After unscrewing the screw, pull the handle up, separating it from the stem. After the handle is removed, unscrew the pressure ring - it holds the cartridge. Now all that remains is to take it out.
Then, along with the cartridge, you need to go to the store or market and buy exactly the same one. The new one must match in size, the holes in its lower part must have the same shape and location. Basically, you need to find an exact copy.
How to disassemble a faucet with a cartridge
Assembly occurs in reverse order:
- place the cartridge (strictly vertically, twisting it a little around its axis so that the protrusions in the body fit into the recesses on the cartridge),
- tighten the clamping nut;
- install the handle;
- screw in the fixing screw;
- insert the plug.
An initial check can be done after the pressure ring has been installed. You can turn on the water and check if the tap is now flowing.
If the water flow becomes too weak
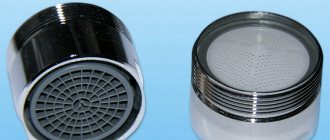
Most modern faucets are equipped with a mesh on the spout that traps solid particles that may be contained in the water supply. If the stream of water gradually becomes less elastic, and the pressure on other taps does not change, the reason is that this very mesh is clogged. In this case, you can fix the faucet in a couple of minutes.
Need to clean the mesh
Unscrew the nut with the mesh, which is located at the end of the spout. Rinse it, clean out clogged holes (you can use a needle or an old toothbrush). Place the cleaned mesh in place.
Preventive actions
Experienced plumbers recommend getting rid of problems with taps even at the stage of their use, for this you need to:
- Install filters. Modern water in urban systems “kills” any tap within six months.
- Do not unscrew the mixer unless necessary. Any intervention shortens the life of the seals.
- Close the tap tightly. Due to incomplete closure, the seals also wear out.
- Do not delay repairs if necessary. Most problems are much easier to fix in the early stages.
Thus, all malfunctions of the faucet in the bathroom can be prevented by an ordinary person.
Be careful when working and listen to our advice on prevention
THE FAUCET IS LEAKING IN THE KITCHEN - HOW TO FIX IT YOURSELF
To repair a kitchen faucet you will need:
- knife with a sharp end;
- hex and adjustable wrench;
- screwdrivers;
- a new cartridge, valve axle, rubber gasket, etc. - depends on which part you will change;
- WD40 is a technical aerosol that is useful if parts are “stuck” to each other. However, you can get by with the traditional tapping of a hammer on a screwdriver, but there is a high risk of damaging the mixer.
Regardless of which faucet you have installed, before starting repairs, you must turn off the water supply to the system and drain its remaining water into a sink or a separate container. To do this, just open the tap. Then you can begin to repair it, taking into account the design features.
To repair a single-lever faucet, you will need a hex wrench.
REPAIR OF SINGLE LEVER KITCHEN MIXER
The main principles of repair are sequence of actions and accuracy.
- Using a thin screwdriver or knife, pry and remove the decorative plug on the faucet body.
- In the resulting hole you will see a screw connecting the lever and the adjusting rod. Unscrew it using a hex wrench.
- Remove the lever from the body and unscrew the decorative casing. This can even be done by hand if the parts are not stuck to each other.
Removing the decorative casing
- There will be a locking (clamping) nut underneath it. Gently unscrew it with an adjustable wrench or by tapping it with a hammer on a screwdriver.
- If you disassemble the ball mixer, you will see a sealing collar under the nut. Inspect it for dirt, deformation and tears. Pull out the ball. Inspect its surface - it should be smooth and clean. It is necessary to remove the seals and support springs - their poor condition can cause the tap to leak.
- If you are disassembling a faucet with a cartridge, remove it and thoroughly inspect it.
- Replace the failed part.
- Reassemble the faucet in reverse order.
Installing a new cartridge
To extend the service life of the product and ensure smooth running of its rubbing parts, you can use a special silicone lubricant.
Removing the mixer handwheel
REPAIR OF TWO-VALVE MIXER
What to do if your two-valve faucet is dripping in your kitchen? Almost everything is the same.
- On the valve flywheel, pry up and remove the decorative plug.
- Using a screwdriver, unscrew the screw that secures the flywheel.
- Remove the flywheel. There will be a crane box in front of you.
- Unscrew it counterclockwise and inspect it.
Removing the crane axle box
- If it is a worm-type axlebox and its gasket is damaged, replace it separately - buy it in a store (costs pennies) or cut it yourself from rubber of a suitable thickness. The axle box with ceramic discs is replaced entirely.
- Reassemble the faucet in reverse order.
General scheme of mixer repair work
Everything is as simple as possible and slightly reminiscent of a construction set. But a leaking faucet is not the only problem you may encounter while using it in the kitchen.
FEATURES OF THE MAIN TYPES OF KITCHEN MIXERS
Such delights as thermostatic and touchless faucets are good for bathrooms. In the kitchen, more practical models - traditional two-valve and single-lever - are fighting for a place in the sun. The common elements for them are: body, spout (spout), aerator, sealing gaskets. Otherwise they differ significantly.
DEVICE OF DOUBLE-VALVE CRANES
Faucets with two valves that are familiar to the eye are designed quite simply. Under the flywheel, which you turn when operating the structure, there is a crane-axlebox - its locking element. Below is the design of such a kitchen faucet in pictures.
Axleboxes in a two-valve mixer (sectional view)
In products where several revolutions of the flywheel are required to supply or shut off water, worm axle boxes are installed. Their work is based on rotational-translational movements. The more you unscrew the valve, the further the axle box gasket will move away from the so-called “saddle”. The consequence of this is the flow of water into the internal cavity of the mixer, and then into its spout (spout).
Worm worm valve axle box for mixer
In models where it is enough to make only half a revolution to supply water, axle boxes with ceramic plates are installed. When you open the tap, the holes in them coincide and water flows into the spout.
Crane axle boxes with ceramic plates
The cost of faucet axle boxes is low, they are always available in plumbing stores, and their replacement is extremely simple.
DEVICE AND TYPES OF SINGLE LEVER MIXERS
More modern and practical are models of faucets with one handle (lever) that regulates pressure and temperature. Mixing water in them is carried out in a hollow ball with three holes or in a special cartridge.
The mixing element in ball models has three openings, two of which are inlets - designed to supply hot and cold water to this miniature container, and one outlet - for supplying water at a given temperature to the sink.
Ball mixer device
The ball itself is located on two rubber “saddles”. Its displacement relative to them, carried out when the lever moves, allows you to regulate the pressure and temperature of the water being poured out. The ball is secured at the top with a sealing collar and a lock nut.
Schematic structure of a ball model of a kitchen faucet
The operating principle of a mixer with a cartridge that replaces a ball is similar. At the same time, their internal structure is fundamentally different. There are still the same three functional holes, but inside the cartridge there is not a cavity, but special metal-ceramic disks. Due to their displacement relative to each other and the degree of overlap of the supply holes, when turning the lever, the water supply is adjusted.
Replaceable ceramic cartridges
When to change
As a rule, disk cartridges fail due to wear and tear on moving plastic parts. Ceramic plates wear out much less often. But, by and large, it doesn’t matter why the cartridge broke. In any case, it will have to be replaced, because it is a disposable part that cannot be repaired.
Signs of a cartridge failure:
- the water does not mix properly (only cold or only hot comes out of the tap);
- the water supply is disrupted (when the lever is turned to one of the extreme positions, nothing flows);
- when the lever is in a fixed position, the water temperature changes each time;
- it is not possible to turn on the water at full pressure;
- it is impossible to completely shut off the water;
- water leaks from under the handle;
- it takes effort to turn the lever.
The service life of the mixer is significantly reduced due to harmful impurities contained in the water: rust, lime, sand and other insoluble small particles. Mechanical cleaning and water softening filters will help solve the problem. However, nothing works forever, and any cartridge will have to be replaced sooner or later.
Leak in the valve area
Water may leak at the base of the valve for the following reasons:
- Poor sealing (poorly screwed head or, in older models, poor winding);
- The rubber gaskets are worn out (placed above the thread);
- The stuffing box is worn out. In this case, the tap flows in the open state.
In the first case, it is clear that you just need to tighten the head itself. If the stuffing box has deteriorated, then this is a signal that it is time to change the valve axle.
If the gaskets are worn out, then we repair the leaking faucet with our own hands according to the following plan:
- We turn off the water. Remove the decorative cover on the valve and unscrew the screw there. Then remove the valve itself.
- Using an open-end wrench, unscrew the valve axle box.
- We replace all the rubber bands and assemble everything in the reverse order.
Touch (contactless) faucets
Let's consider the latest existing type of mixers. These are contactless or, in other words, touch faucets.
The operation of such faucets is based on a sensor that detects movement. For example, when something is brought to the tap, the water supply turns on automatically. And you don’t need to turn anything. Such mixers are deservedly considered the most durable, and their service life can be up to 5 years or more. They are indeed very convenient for everyday use and reduce the amount of water consumed.
Touch faucet
True, their main drawback is the difficulty of repair. It is highly not recommended to do it yourself. The best solution in such a situation is to look for an experienced professional who understands this. It is unlikely that you will be able to repair the sensors yourself.
If the damage is minor, for example, a clogged aerator, then you can handle it just fine. Most often, a clogged aerator is determined by reduced water pressure, that is, it flows out in a thin stream. To check if this is true, remove the aerator and open the water. If the water pressure returns to normal, then it is time to replace the rusty aerator with a new one.
As it turned out, if you understand how the working mechanism of the mixer functions, then its repair is not so difficult.
If the lever goes down on its own
Spontaneous lowering of the mixer lever usually tells us that it is broken. When you press the flag, water may flow in a thin stream or not at all. Many people believe that the main reason for this lever behavior is a cartridge failure, but this is not always the case.
All residents of a city apartment or country house use plumbing differently. Some open the taps carefully, others, for example, children, jerk the flag sharply. In the latter case, damage to the inner part of the lever, which fits onto the head of the cartridge, may occur. If damaged, the walls of the square insert diverge to the sides, which leads to a certain amount of free movement of the part; when lifted up, the crane begins to fall.
Note! To determine the breakdown, you need to remove the round decorative insert, unscrew the screw and remove the lever. After this, they look at the inside of the flag: if it is damaged, then install a similar part from the old mixer
If you have high-quality plumbing, lowering of the lever may be caused by wear of the cartridge, which will need to be replaced.
Consequences of leaks
Often people simply turn a blind eye to the dripping faucet in the bathroom for years without taking any action. In fact, “chronic” leaks usually lead to much bigger problems. Therefore, a leaking shower mixer or faucet can lead to an emergency and extensive leakage. The most negative consequences of plumbing leaks in the bathroom are:
- Increased humidity inside the bathroom. The bathroom is already characterized by high humidity, which negatively affects the finishing materials and furniture inside the room, and a dripping faucet further increases the amount of moisture in the air.
- Annoying sounds. When a faucet or mixer leaks, the sound of falling drops is heard throughout the apartment, especially if the sink or bathtub is made of thin-walled metal. Historians claim that during the Middle Ages they even tortured people with such sounds, so it is not surprising that this situation irritates household members.
- Increased water consumption. Almost every apartment is now equipped with meters installed on water supply pipes, so when a faucet, faucet or shower in the bathroom leaks, water consumption, and therefore utility bills, increases significantly.
- Danger of flooding on lower floors. If you do not figure out in time why the faucet is leaking and do not eliminate the cause of the breakdown, the situation may worsen and result in a large leak that will ruin the renovation not only in your bathroom, but also in the apartment of your neighbors below.
Single lever faucets for the bathroom: understanding the basics
Important
There is not one, but several types of mixer systems, differing in operating principle and structure. The components needed for such plumbing equipment are different, otherwise they simply won’t fit. Therefore, when planning to repair a single-lever bathtub faucet, it makes sense to first disassemble the broken unit, remove the damaged or deformed part that has failed, and take it with you to the store to show the seller what exactly you need.
Types of single lever faucets
In fact, single-lever faucets are those types of faucets that have not two, but one lever-regulator, with which you can control the pressure and temperature of the water. However, such devices may differ in design features. There are two types of faucets with one regulator.
- Cartridge mixers.
- Ball mixer models.
The differences between these two types are that one has a special metal ball inside with a rod attached to it, as well as grooves and slots, and the second has a special cartridge installed inside which ceramic elements are placed, which significantly extends its service life. Both types of single-lever bathtub faucets are equipped with an additional hose and shower head, and, accordingly, also a switch for redirecting the water jets.
Causes of possible breakdowns and their elimination
For a true professional, and even an experienced amateur, repairing a single-lever bathtub faucet will not be difficult, but for a beginner this process may cause some difficulties. Therefore, it makes sense to first consider the list of possible breakdowns and the reasons that cause them, and then figure out how to properly stop the problem.
- The most common reason for faucet failure is a manufacturing defect or completely unsatisfactory quality of its manufacture. Therefore, experts do not recommend initially purchasing equipment of this type from unknown brands that use components for which replacements cannot be found on the market.
- The quality of water in the water supply can directly affect the service life of a single lever faucet. Sand, scale, rust and other solid particles can clog the cartridge, and lime can settle on the ball or other elements. Water hardness can also lead to cracking of the gaskets, which can lead to leaks that will have to be “treated” only by replacing them with new ones.
- The use of old-style components and consumables can negatively affect the uninterrupted operation of the mixer. Modern silicone and paronite are many times superior in performance to good, but long-outdated rubber.
- Regularly applying excessive force to the faucet lever will cause it to break. Moreover, there may be several options, from a broken rod to ordinary mechanical jamming.
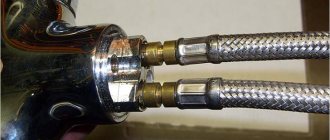
- Showers often fail because the hoses cannot withstand the load and burst, despite the metal braided spring.
These are the main causes of faucet breakdowns, which can be repaired with your own hands. To do this, you will have to disassemble them, having previously prepared all the necessary tools and consumables.
Prevention
Once all problems have been resolved, we strongly recommend taking several preventive measures to significantly reduce the risk of breakdown. Experts recommend following these simple rules:
- Install coarse water filters;
- Install salt filters to keep parts free of lime;
- Install faucets made of brass, they are considered durable and of high quality;
- Single-lever mixers are more modern in design and easier to repair;
- Do not use brushes or alkaline cleaners when cleaning the faucet body. It is better to use cream-like substances or gels that are suitable for the metal of the mixer;
- Remove all traces of detergent from faucets to preserve chrome;
- Change gaskets and other elements at least once every 2-3 years, and preferably more often. It will be much cheaper than a flood and replacing the faucet.
In this article we talked about the types of faucets and the repair features of each of them. Typically, this information is enough to fix basic faucet problems.
offers to purchase components for faucet repair in bulk with the possibility of fast delivery throughout Russia and the CIS countries. We are a direct manufacturer and provide wholesale supplies to private companies, small shops, and hypermarkets.
How to repair a faucet in a bathroom with a shower?
Faucet breakdowns are caused by a lot of reasons related to low-quality materials, improper installation and many other factors.
To eliminate the causes of the breakdown, you should call a specialist or you can try to do it yourself.
Causes and procedure for eliminating leaks in a single-lever faucet
To repair a single-lever mixer with your own hands, you need to determine the reasons for its breakdown. There can be many of them, let’s look at the main ones:
- mechanical damage caused by breakage of the housing or the formation of cracks in it;
- formation of a gap on the seats and ball;
- development on the gasket;
- aerator malfunction due to rusty material;
- gap on the aerator.
If the problem arose due to a broken housing, you should use a waterproof sealant or cold welding. The necessary parts are wiped with a rag, the damaged areas are carefully coated. However, such repairs will not last long, and soon the body will have to be replaced completely.
If the water pressure is weak, you need to remove the aerator and clean it and the mesh with a brush. The socket through which the liquid flows may also be dirty.
If the faucet is leaking, but the cause of the malfunction cannot be determined from the outside, then you need to completely disassemble the entire mechanism and look for the cause thoroughly, checking each part separately:
- First, shut off the water supply, then use a screwdriver to remove the plug.
- Next you need to unscrew the screw that holds the decorative cap.
- Then the cartridge is pulled out - to do this, unscrew the nut with a wrench. All parts should be inspected for defects. If none are found, move on.
- Having removed the faucet completely, we look at the gasket, springs, ball and rubber seal. Worn out parts should be replaced with new ones. The remaining ones are wiped with a rag to remove accumulated sediments and deposits.
One of the most common problems is debris getting trapped under the valve ball and seat. In this case, you will have to change the entire cartridge.
Causes and procedure for eliminating leaks in a two-valve mixer
The main reason for the breakdown of such cranes is their quality. The seals on the valve axle or the gasket may also be leaking. These parts can be replaced.
Step-by-step instructions for disassembling a two-valve mixer:
- shutting off the water supply,
- removing traffic jams,
- unscrewing the mounting screws,
- removing the valve axle using a wrench.
It is best to remove the plugs with a thin screwdriver so as not to damage them.
The screws must be unscrewed carefully, as they are most often subject to oxidation and are difficult to unscrew. You can use WD-40 or a few drops of acetic acid.
The valve axle is unscrewed from the body with a wrench counterclockwise. Pulls out with fingers. For repairs, it is necessary to inspect the seat in the body so that there are no cracks on it. Then the oil seal and gaskets are changed on the faucet axle. The assembled mechanism must be rubbed with silicone-based lubricant, and then assembled in the reverse order. Next you need to install the crane axle box and clamp it with a key. Do not overtighten the mechanism so as not to strip the threads in the housing. If it is torn off, then the entire mixer will need to be replaced.
Shower switch repair
There are several types of shower switches, let's look at some of them.
Spool
The leak in such switches comes from under the handle that opens and closes the water supply.
- Are the rubber rings on the rotary rod working or not,
- the gasket on the axle box is worn out,
- The axle box is twisted.
After correcting or replacing parts, the switch must be assembled and tested. Don't forget about lubrication of the switching mechanism.
To disassemble this mechanism, you need to turn off the tap, remove the cap, unscrew the screw and pull out the button with the spring.
- the spring has sagged and does not hold,
- Valve rings are worn.
If the spring has sagged, you should replace it with a new one or make it yourself. To do this, it is stretched and heated red-hot, after which it is dipped in cold water. After cooling, you need to heat it again for uniform hardening. You can also make a wire spring using the same method.
If the valve rings become brittle, they should be replaced. After replacement, the entire mechanism must be lubricated with Vaseline or another lubricant.
The main problem is that the plug does not fit well to the body and leaks. It could also be:
- poor rubbing,
- mechanism erosion,
- presence of solid particles in the housing.
In order to fix such a switch, you need to unscrew the screw, remove the handle, unscrew the nut and remove the locking ring. After a thorough inspection, the parts should be lubricated with Vaseline and assembled into place.
Step-by-step replacement of the gasket in a two-valve faucet
Now we’ll tell you how to replace the gasket in a classic valve tap. You can cope with this task with your own hands, since there is nothing difficult in the operation. The main thing is to do everything according to the instructions:
- Unscrew the valve body.
- Pull out the worn rubber gasket.
- From a piece of rubber or thick leather, cut out a similar element with sharp scissors. Use the defective gasket that was removed as a sample.
- Screw sealing tape or tow (flax) onto the thrust edge.
- Place the valve body in place by tightening it clockwise.
- The installed valve is tightened tightly with a wrench, but do not strip the thread.
Cutting out a gasket from rubber or leather is an emergency measure, but in general a new gasket can be bought at any plumbing store. This way you will save time and fix the faucet for a long time. A homemade part is unlikely to last as long as the factory version.
Combined flow of water: from the shower net and drain
There are at least several culprits for such a breakdown, but the most common and widespread is wear and obsolescence of the gaskets in the spool switch. This problem is resolved by replacing the seal rings and gaskets. However, there are also difficulties - sealing rings for the spool are practically not found in markets or retail stores. equipment, but are included in the package as spare ones.
If absolutely necessary, you can make such rings yourself; various dense rubber is suitable for them. But you can’t count on the durability of such a product.

