Leaking plumbing is a problem that everyone has to deal with sooner or later: either the faucet is leaking in the kitchen, or a similar situation is observed in the bathroom. Be that as it may, remember: it’s not just water leaking, it’s your hard-earned money “running away” down the drain! How to fix a faucet if it's dripping? The solution to this problem depends on the type of plumbing fixture and the cause of the leak.
How to fix a faucet if it's dripping?
Let us immediately make a reservation that such a seemingly trivial problem can lead to the most tragic consequences - for example, the mixer may become completely unusable or water will burst at the most inopportune moment. Therefore, you need to act as early as possible. And it’s good that there is nothing extremely difficult here - find out the cause of the leak, acquire the necessary tools/materials and, in fact, start working.
How does a kitchen faucet work?
DIY faucet repair
What types of mixers are there?
Let's start with the fact that, depending on the design features, there are two groups of plumbing taps.
- Single lever. The water pressure and temperature in this case are regulated by just one knob, which rotates in two planes. Cartridges are used here as rotating mechanisms (they can be ball or disk).
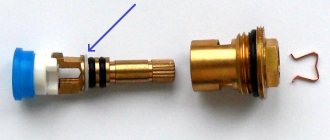
How does a single lever mixer work? - Double lever (such devices are also called valve devices). Their distinctive feature is that the pressure is regulated by handles located on the sides of the mixer. Special valve axle boxes (they come with rotating ceramic plates or worm-type ones) serve as locking elements here. But we note that the service life of crane axle boxes is half that of the cartridges mentioned above.
Valve mixer
Important information! The repair process is largely determined by what type of dripping plumbing faucet it is. But we’ll talk about this in more detail a little later.
Possible leak locations
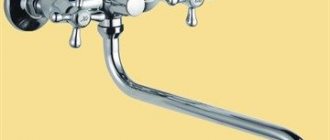
Long spout mixer
Features of ceramic taps
In addition to gaskets, a ceramic mixer contains a cartridge of two ceramic plates. In most cases it is necessary to change it.
In the cartridge of a single-lever mixer, the ceramic plates are fixed motionless relative to each other, and there is a microscopic gap between them - the mixing chamber. When the position of the cartridge changes, its inlet holes are differently aligned with the holes in the seat, through which cold and hot water flows, due to which the pressure is regulated.
Such a device is disassembled in several steps:
- Use a screwdriver or knife to pry off the red and blue plastic cap on the handle.
- Unscrew the screw located underneath it.
- After removing the handle, unscrew the clamping nut holding the cartridge and the rod.
- Remove the cartridge.
The two-valve ceramic faucet is disassembled, like its traditional counterpart - first the screw holding the wing is unscrewed, then the faucet-axle is removed. In this device, one of the cartridge plates rotates along with the wing, but the pressure is regulated in the same way - due to the coincidence of the holes.
Please note that commercially available cartridges may have slight differences, so you must go to the store with the original in hand.
Installation of a ceramic cartridge is carried out according to the “tongue and groove” principle, so you are unlikely to be able to install the “wrong” model: the protrusions on it simply will not fit the mounting holes in your mixer.
When assembling the single lever ceramic faucet, do not tighten the clamping nut too tightly. Otherwise, the adjustment lever will be difficult to turn.
A two-valve ceramic mixer may leak even if there is no damage to the cartridge plates. This means that they no longer press together tightly enough. This usually occurs due to deformation of the bottle cap-like silicone gasket that is supposed to support the bottom plate.
To correct the situation, a thin ring cut from technical rubber should be placed under this gasket.
Why might a faucet drip? Let's understand the reasons
As a rule, the cause of a leak can be easily determined by getting your bearings on the spot. Below are the most common causes of this problem.
Table. Why might a faucet drip? Common reasons
| Reason, photo | Short description |
| Poor installation of the device | If installation or assembly was carried out incorrectly, with errors, this will inevitably cause a leak (sooner or later). For example, if you tighten the nut very tightly during the process, this will damage the sealing gasket, which means it (the gasket) will wear out faster. A supply hose that is not secured tightly will cause a leak under the tap. |
| Ball cartridge clogged | The ball mixer has a by no means ideal design - the internal parts, which fit very tightly, react poorly to various types of impurities in the liquid. To eliminate a leak in this case, the faucet will have to be completely disassembled and thoroughly cleaned. |
| The oil seal is worn out | The main disadvantage of the oil seal (or, as it is also called, the oil seal) is that it wears out very quickly. This problem is easy to identify: if the tap is closed, then there are no signs of a malfunction, but if it is opened, water will immediately begin to flow from under the valves. This suggests that the reason lies in the wear of the oil seal. |
| Faucet wear | Any plumbing equipment has a limited service life, therefore, over time, users encounter problems such as wear of the threads or locking mechanism. In such a situation, nothing can be achieved by replacing individual parts or tightening the nuts - it is necessary to change the entire mixer. |
| Wear of the rubber gasket | Repeatedly turning the faucet on/off leads to wear of its elements (including the gasket). The material deforms, its dimensions change, and cracks appear on it. And if your faucet drips in the closed position, then the problem most likely lies in the gasket (it needs to be replaced). |
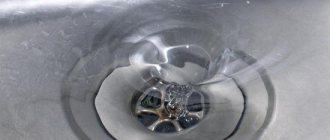
Leak between faucet and sink
Causes of leakage
Leaking is the most well-known problematic situation that occurs with plumbing. And it doesn’t matter whether it is in the kitchen or bathroom. A faucet leak can occur for many reasons.
Table No. 1. Causes of leaking faucets.
| Cause | Solution |
| Poor quality faucet | Often, wanting to save some money, people prefer lower-cost faucets. But you should understand that cheap taps can leak water. It is unlikely that you will be able to avoid this problem if you have already purchased such a faucet. Therefore, when purchasing, always choose only tools from trusted manufacturers whose products you are confident in the quality of. It also happens that you buy a product from a well-known brand at a low cost. Here you need to be able to distinguish a fake from an original, because a common model is unlikely to be sold for pennies. |
| Incorrect installation of the faucet | This is the second most common reason. Most often it occurs in people who, without experience, install the mixer themselves. Also included here are cases of incorrect assembly of the faucet. With such errors, often even the most expensive faucets lose all their advantages, begin to drip, rust, and creak. To solve the problem, you need to trust the installation of faucets to people who have extensive experience in this and will not be able to make mistakes, even holding in his hands is a mixer with unfamiliar designs or fastening systems, etc. If you leave this work in the hands of a master, be sure to check the qualifications, otherwise you risk wasting time and money. |
| Incorrect use of the faucet | Although the mixer provides the ability to twist and move in the other direction, or rotate the screws, you still need to work with it with extreme caution. Problems in this direction can arise if you apply a lot of force when installing the mixer, turn the tap itself at the wrong angle, or lift up or pressed down, screws were unscrewed further than they should be. All this spoils the product and in the future can lead not only to leakage of the faucet, but also to a final breakdown. In this case, there is only one solution - buy another faucet and handle it with care. |
| Wear of parts | Few people think that the faucet is literally becoming obsolete. Constantly turning the lever on and off and moving parts wears out the materials over time. This happens especially often with rubber gaskets. It is not difficult to solve this when some materials have been damaged. Here it will be enough to replace them. This can be prevented by carrying out preventative maintenance on the cranes. |
| Equipment expiration date | Although this happens less often, even this reason can lead to a water leak. As a result, you will also have to buy a new faucet, which can last for several years if used properly. |
Plumber set
How to fix a leaking faucet
Let’s say right away that in most cases there are no difficulties in replacing a leaking faucet, but beginners still often encounter some problems. However, preliminary preparation and strict adherence to step-by-step instructions will help cope with leaks and significantly increase the service life of the mixer.
In principle, repairing a faucet yourself is not such a difficult task.
If the lever goes down on its own
Spontaneous lowering of the mixer lever usually tells us that it is broken. When you press the flag, water may flow in a thin stream or not at all. Many people believe that the main reason for this lever behavior is a cartridge failure, but this is not always the case.
All residents of a city apartment or country house use plumbing differently. Some open the taps carefully, others, for example, children, jerk the flag sharply. In the latter case, damage to the inner part of the lever, which fits onto the head of the cartridge, may occur. If damaged, the walls of the square insert diverge to the sides, which leads to a certain amount of free movement of the part; when lifted up, the crane begins to fall.
Note! To determine the breakdown, you need to remove the round decorative insert, unscrew the screw and remove the lever. After this, they look at the inside of the flag: if it is damaged, then install a similar part from the old mixer. If you have high-quality plumbing, lowering of the lever may be caused by wear of the cartridge, which will need to be replaced.
Preparing for work
Before you begin directly repairing/replacing the mixer, you must turn off the water in the riser. Otherwise, problems with the tap will be aggravated by flooding of the apartment (not only your own, but also the neighbors below). Only after turning off the water can further work begin.
Water supply risers
To carry out repair work, you will need the following:
- some kind of vessel (to collect water);
- rags;
- Adjustable wrench;
- sponge;
- silicone seals;
- cleaning agent;
- screwdrivers;
- wrench;
- fluoroplastic sealing tape;
- rubber gaskets (new);
- pliers.
Fluoroplastic tape
All these tools/materials are quite enough to deal with a leaking plumbing faucet with your own hands.
On a note! If the mixer was purchased recently and you even saved the packaging, then you may find the manufacturer’s instructions and even a repair kit in it. In this case, the work will go much faster.
Repair kit for mixer (AKVAREM)
Tips and tricks
The water supply system in an apartment or private house is a source of increased danger. Therefore, when operating it, it is necessary to adhere to certain rules to avoid problems. Let's list them:
- Have the ability to quickly turn off water from the riser.
- A set of tools for performing repair work should always be at hand.
- It is necessary to keep in the house a set of replaceable components for faucets and mixers that are in use.
- Be prepared to urgently call emergency water services in the event of a serious accident.
- And, of course, you need to know the rules and procedures for independently eliminating an emergency situation.
Method No. 1. Replacing the gasket
If the rubber gasket needs to be replaced, you need to proceed according to the following algorithm.
Step 1. First, the valve is disassembled - the plug is removed, then the screw located under it is unscrewed and the core is unscrewed using an adjustable wrench (you need to turn it counterclockwise) to remove the valve axle box.
Replacing the gasket in the valve mixer
Step 2. The gasket must be replaced and secured in the axle box.
Step 3. At the end of the removal, all the elements are installed in their places.
Prices for bathroom faucets
bathroom faucet
Step-by-step process for replacing the gasket
Valve mixer leak elimination diagram
Note! If the faucet is leaking in the shower, then using the same adjustable wrench you need to unscrew the shower hose, replace the gasket, and then fasten it (the hose) in place. The gasket under the gander nut is also changed.
Unscrewed hose
Mixer body leaking
Selection and operation of a kitchen faucet
Breakdowns in the plumbing system occur with enviable regularity, and the reason for this may be the lack of proper regular maintenance. And above all, monitoring the operation of the water supply system is important.
The system operates stably only at stable pressure; sudden changes destroy it, and the sealing gaskets and threaded connections of locking devices are the first to suffer.
which faucet mixer to choose for the kitchen
The initial quality of the tap is of great importance. First of all - the material of manufacture. A good faucet or mixer is made of heavy alloys - brass or bronze, they are easy and simple to fix. Materials such as silumin are absolutely unsuitable for plumbing, although they are often used by unscrupulous manufacturers.
Single-lever devices are convenient to use and can be operated with one hand. You should avoid purchasing products from manufacturers in China and Turkey - they traditionally do not differ in quality and durability and begin to leak immediately after installation.
Method No. 2. Replacing the stuffing box seal
If the cause of a leaking plumbing faucet is wear of the seal, then you can fix the problem in one of two ways:
- unscrew the stuffing box nut, and then replace the stuffing box itself;
- make the liner yourself from fluoroplastic tape.
Another solution to the issue is to change the oil seal or the entire faucet.
If you do everything correctly and in accordance with our recommendations, the faucet will stop dripping and the valve will turn smoothly.
Video - How to repair a faucet
Single lever
Frequent breakdowns of a single-lever mixer include the following problems:
- faucet leakage;
- the occurrence of simultaneous flow of water into the area of the shower net and drain;
- presence of low water pressure;
- leakage in the area of the push-button switch;
- malfunctions in the area of the push-button switch.
Diagram of a single-lever mixer
A single-lever mixer can fail for various reasons. Typically, a leak can occur due to a small speck getting into the cartridge of the device. In these cases, the mixer is completely disassembled and the cartridge is replaced. In order to repair the mixer, you will need the following equipment:
- hex wrench;
- pliers;
- adjustable wrench;
- slotted screwdriver;
- sharp knife;
- new cartridge.
When all the tools and materials are prepared, you can begin repairing the mixer. The whole process is carried out according to the following scheme:
- First of all, use a knife to pry off the plug made of plastic material, and it is removed. This element is an indicator for the direction in which the lever must be turned to open cold or hot water. In addition, this element ensures that the hole for the locking screw is blocked;
- the screw is unscrewed and the handle is removed from the control lever. Typically, a single lever faucet has a hex-type screw, so you will need to use a hex wrench to unscrew it;
- decorative and union type nuts are unscrewed. These elements hold the cartridge in the seat;
- After that, remove the old cartridge. You need to place a new product in the area of the old cartridge. The installation is installed so that all the holes of this element completely coincide with the holes on the saddle;
- After this, you need to completely assemble the mixer.
Replacing the cartridge
Another unpleasant problem with a single-lever mixer, such as the simultaneous flow of water into the area of the shower net and drain, often occurs due to wear of the rubber elements in the place of the spool switch. This damage can only be eliminated by completely replacing the gaskets and rings. However, rubber rings are quite difficult to find on the open market; usually an additional set of these elements comes with the mixer. But if they are not there, then you can cut them out of rubber material yourself. But homemade rings will last much less.
A weak stream from the tap may be due to a clogged aerator. In these cases, the aerator mesh is removed, it is blown and washed from all sides. After this, the mesh can be installed back.
The aerator should be cleaned periodically.
The appearance of a mixer leak in the area of the push-button switch may occur due to wear of the oil seal. To fix this problem, you simply need to remove the old oil seal and install a new one. The seal can be purchased at any hardware store.
If the push-button switch itself has stopped working, then the cause of this breakdown may be a failure of the spring. This damage can be fixed quite simply - the old spring is removed and a new spring is installed in its place.
Method number 3. Ball valve repair
If the problem lies in the ball valve itself, then it must be disassembled and thoroughly cleaned, and, if necessary, the locking mechanism must be completely replaced. In this situation, you should act this way.
Schematic structure of a ball model of a kitchen faucet
Step 1. First, unscrew the screw and remove the lever.
Step 2. Then the threaded screw is unscrewed.
Step 3. The mixer dome is removed (along with its plastic part).
Step 4. The ball is removed and carefully inspected. If any defects or damage are detected, the ball must be replaced.
Step 5. The seals are removed and checked for wear and whether there is plaque on them.
Step 6. Dirt and deposits are removed from the seals, after which a special lubricant is applied.
Ball mixer disassembly diagram
Step 7. All parts are installed back. Connections are checked for leaks.
Touchless faucet with motion sensor
If the mixer is assembled correctly, there should be no leaks; the water temperature will be regulated by light turns of the lever.
Stages of installing faucets in bathrooms
Method number 4. Replacing the cartridge
We have already mentioned above that cartridges are more convenient to use than axle-box cranes, but if they break, then, alas, the entire mechanism will have to be replaced at once. Below is an algorithm of necessary actions.
Changing the cartridge
Step 1. First of all, unscrew the plug on the lever, after which the fixing screw is also unscrewed.
Step 2. Decorative elements are removed, then the nut that presses the cartridge is unscrewed.
Step 3. The mechanism is removed and carefully inspected (you need to find out what the condition of the gaskets at its end is). Note that they can be replaced.
Prices for kitchen faucets
kitchen faucet
How to remove a cartridge
Step 4. If it is impossible to replace the seals, a new disk element is inserted into the tap.
Step 5. All elements of the crane are put back together.
Scheme for self-installation of the cartridge in the mixer
Possible breakdowns and their elimination
There are several reasons why a two-valve faucet may leak. One of the most common causes of leaks is wear of the rubber gasket.
Replacing the gasket
If the faucet is dripping, it may be due to the wear of the rubber gasket. The main sign that the faucet requires replacing the rubber gasket will be the appearance of a leak from the mixer jib.
The rubber gasket should be replaced as soon as possible, otherwise leaking water will gradually destroy the inner surface of the housing. If you do not disassemble the mixer in time and do not replace the old part, then holes will appear on important components. In these cases, only a complete replacement of the mixer will be required.
Gasket replacement features:
- The first step is to remove the flywheel from the spindle. Next, the core is unscrewed with an open-end wrench;
- The old spacer is usually located at the back end of the core and is attached there in the area of the special protrusion. The old gasket element is removed;
- a new sealing element must be cut out of a piece of dense rubber base, while it is necessary to be guided by the shapes of the old worn-out gasket element;
- the cut out part must be installed in the original place of the old sealing element;
- the whole assembly comes together.
If the problem with a leaking single-lever faucet is a worn gasket, then you can repair your faucet in a few minutes. But it is important not to tighten it, otherwise it may lead to complete wear of the entire faucet.
Mixer design diagram
Unscrew the faucet head using an adjustable wrench
Unscrew the metal gasket on the tap
The gasket is removed and replaced
Replacing the oil seal
If the faucet in the bathroom is leaking, then it may all be due to the wear of the seal. Typically, a leak occurs when the tap is opened. In these cases, water will leak in the area between the gland clamp nut and the valve stem.
If the faucet drips due to wear of the seal, then how to fix the leaking faucet yourself? You can use the repair scheme:
- use a screwdriver to unscrew the oil seal nut;
- you can make the seal yourself from sealing tape;
- the old oil seal, which has become unusable, must be removed;
- you need to wrap a sealing tape around the valve, which will subsequently replace the old seal and prevent leaks from the tap;
- you need to tighten the nut in place.
If everything is done correctly, then water leakage will not occur after turning on the tap again.
Stages of replacing the oil seal
Replacing the liner
The cause of failure of the mixer with axle box is wear of the rubber gasket. Usually in a mixer it is located at the junction between the faucet axle and the mixer. More often, the faucet leaks because the gasket wears out, loses its elasticity, or completely collapses. You can fix a leaking faucet in the bathroom quite quickly; the main thing is that you must strictly follow the instructions.
How to disassemble the faucet in the bathroom and how to repair it:
- use a knife or screwdriver to remove the decorative plastic plug, which is used to indicate the cold or hot tap;
- you need to unscrew the screw located under the plug. The screw is unscrewed using a screwdriver. If the screw does not unscrew, then it needs to be warmed up by dousing it with hot water. After this, the screw can be easily unscrewed using pliers;
- after this you need to remove the flywheel;
- unscrew the nut that secures the axle box. Remove the nut from the housing;
- thoroughly clean the surface of the rod and sealing elements;
- It is imperative to inspect all the parts; there should be no hidden defects or damage;
- then the old liner is removed and a new one is installed in its place;
- the whole structure is assembled.
Crane axle parts
Stages of replacing a crane axle box
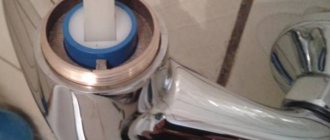
Gander repair
Sometimes failure of a single-lever faucet may be due to wear of the rubber gasket of the faucet jaw. Then it will be necessary to repair the gander. Over time, the rubber gasket that is installed on the gander wears out and you may see a lot of water dripping from the faucet, and then it may simply flow continuously.
Therefore, if your bathroom faucet is leaking, it may be due to a faulty gander gasket. In order to replace the rubber gasket on the gander, you need to unscrew the fixing element of the gander - the nut. To unscrew it, use an adjustable wrench. After this, the old gasket is removed and a new one is installed in its place.
Mixer jib device
Unscrewing the gander
The gasket is worn out
Replacing the gasket
Timely cleaning of the aerator is a guarantee of the longevity of the gander
Reinstalling the spout
Ball valve repair
If suddenly a ball valve is leaking in the bathroom, then you need to use the standard troubleshooting scheme. You can fix problems yourself.
Repair of a ball valve is carried out as follows:
- You need to use a hex screwdriver to slightly unscrew the screw that secures the faucet handle and remove it;
- after this we will see the rod that is attached to the ball. And also a threaded ring with four notches;
- Next, you need to carefully press on the recess and scroll it counterclockwise;
- then you need to remove the chrome dome using pliers, a ring should remain;
- It is necessary to carefully examine the plastic ring. If it has acquired a creamy color and unclear shapes, then perhaps the problem is this element and it needs to be replaced with a new one. If there are rust deposits on the plastic ring, they should be removed with a detergent;
- After this, you need to remove the ball from the socket. This element also needs to be carefully examined; if there are scratches or various defects on it, then it is better to replace it;
- You definitely need to inspect the inside of the faucet. Usually there are seals with springs in the recess; often these elements wear out and the faucet begins to drip. It is necessary to remove them and install new seals with springs;
- Next, we place the ball in place, with its hole located on the right;
- We collect all the other elements.
Ball valve device
Remove the handle
Replacing the ball mechanism
What to do if the new faucet is dripping?
Sometimes even a faucet that was purchased and installed relatively recently begins to leak. In such situations, the reason, as a rule, is simple to the point of banality - the device has a manufacturing defect, which is difficult to identify during external inspection.
Important information! Cracks and chips inside the structure can hardly be eliminated on your own - even an experienced plumber will not be able to do this. That is why the only correct solution is to return the faucet to the store and ask the seller to replace the defective model.
New faucet
Finally, we note that the faucet in the kitchen or bathroom can start dripping at any moment. To solve this kind of problem, you can go one of two possible ways - to involve a qualified specialist in the work or to try to do everything yourself. However, if you know the exact cause of the leak and how to properly eliminate it, then no difficulties should arise.
Note! To prevent a leak from appearing at the most inopportune moment, regularly carry out preventive measures - change gaskets in a timely manner, check the condition of locking mechanisms. All this will significantly extend the life of the crane!
How to fix a faucet depending on its type
What to do if the faucet in the bathtub is dripping, how to fix it? It is worth considering all the features of repairing the mixer device. Moreover, repairing a bathroom faucet with your own hands is not so difficult. Even those who have no experience in plumbing can handle this task. The main thing is to have the desire and equipment and materials. Regardless of whether the faucet is installed - a single-lever mixer or a double-lever, first you need to prepare for repairs.
Double wishbone
Single lever
Features of preparation for the repair process:
- First of all, before you fix a leaking faucet, you need to turn off the water supply. Typically the shut-off valve is located in the toilet;
- when turning the valve, do not turn it too much, otherwise you can break the locking mechanism, then you will have to not only repair a leaking single-lever valve, but also repair the valve;
- you need to turn the valve slowly; if it has not been used for a long time, then it needs to be developed, but this should be done slowly.
You should definitely prepare the equipment for repairing a single-lever mixer:
- spare taps;
- a set of keys, which must have a gas key;
- different types of screwdrivers - Phillips, flat;
- it is necessary to purchase new gasket elements with different diameters;
- a special tape that is designed to seal threaded elements;
- electric drill;
- seals made of silicone material.
Tools
So what should you do if your faucet is leaking? It’s worth figuring out what the reason is and only then you can fix the faucet in the bathroom.
Dripping from the gander itself
When this kind of leak occurs, the reason may lie precisely in the valves. As a rule, they do not completely block the water pressure, and it enters the gander through a small gap.
There are 2 types of valves:
Check it out here too!
Crochet a crop top: patterns and ideasHow to make a homemade metal detector - the best diagrams, instructions. Review of proven options for creating a simple do-it-yourself metal detector
How to choose a washing machine: advice from professionals, the main subtleties of choosing a reliable and high-quality machine. Types, types, programs and functions
- Ceramic crane axle boxes
- Mechanical
Mechanical ones can be repaired, here’s a little instruction on what to do if the faucet is leaking:
- We turn off the water. We unscrew the valve. It is secured with one screw, which is located under the decorative cover.
- Then you need to unscrew the head itself using an adjustable wrench.
- Replace the rubber gasket. We remove the old one and install the new one. The gasket is very cheap, so repairs will be cheap.
- We wipe the mechanism itself and the place for it with a cloth. We install everything in reverse order.
Typical causes of malfunctions
Failures of plumbing fixtures are largely associated with low quality products. You should not save money when purchasing by purchasing cheap faucets from little-known manufacturers. As a rule, when assembling them, low-quality components and consumables are used, which quickly fail.
It may be advisable to abandon the usual sealing options in favor of new analogues: instead of rubber gaskets, it is better to use modern analogues made of paronite or silicone. Their service life is much longer, and they are less deformed over time.
Installing a filtration system on water pipes will not only allow you to use high-quality water, but can also increase the service life of plumbing products
A common cause of malfunctions of mixing devices is also water flowing in pipes. Foreign inclusions and a high content of mineral particles lead to the formation of deposits, clogged filters, and cracking of seals.
Leak at the junction of the supply pipes
Water leakage at the points where the mixer body is connected to water pipes or hoses can occur for three reasons:
- Worn seals.
- Cracked faucet body or connecting fitting.
- Incorrect installation of flexible hoses.
If, upon inspection of the repair site, a crack in the faucet body is identified, then you can immediately begin choosing a new water tap, because this damage cannot be repaired.
Options for eliminating other causes of leakage will differ for taps with flexible supply hoses and for mixers that receive water from rigid plastic or metal pipes.
Repairing leaking pipes in the bathroom
Water leakage at the junction of the mixer body and the pipes built into the wall is eliminated in the same way as a valve mixer leak at the base of the spout, instructions for eliminating which are described above. In both cases, the connection of the two tubes occurs due to a union nut, under which there is a sealing rubber band.
The holes in the wall for the pipes are covered with decorative covers, which you should not forget to put on when reinstalling the mixer.
An important nuance of the gasket replacement procedure when installing a two-pipe mixer is the synchronous unscrewing and tightening of both union nuts.
Otherwise, a misalignment will occur, which can result in displacement of the gaskets and even licking of the threaded connection. And damage to the thread of the nut of an exclusive faucet can lead, at a minimum, to the need to install homemade parts with an unsightly appearance.
Eliminating leaks in supply hoses
Let's look at eliminating water leakage at the junction of hoses and the faucet body using the example of one of the most common faucet models.
The first step is to shut off the water supply to the tap and unscrew the flexible hoses from the water supply pipes. Then unscrew the mixer valves and drain the water from the pipes.
The faucet is attached to the sink body from below using a bracket pressed with a nut on a stud. It is necessary to unscrew the fastening with a wrench and carefully remove the mixer from the sink, pulling the hoses up through the hole.
In principle, you can not remove the faucet from the sink, but unscrew the water hoses directly below. But it’s unlikely that anyone will like to do gymnastic exercises in the limited space of a sink.
It is better to unscrew the hoses after removing them from under the sink, and you need to pull the tubes through the hole one at a time
Next, you need to unscrew the hoses from the valve body with a wrench and replace the O-rings on the fitting, having first cleaned all the grooves with an awl and cloth.
The thread length of the fitting itself, as well as the number of rubber rings, may vary. In some models, even the shape of the supply fittings to hot and cold water differs, so when unscrewing the fittings you should make sure which one is screwed into which hole
If the supply rubber pipes are worn out, it is better to buy new ones, because during reinstallation there is a high probability of their complete rupture. Due to the variety of fitting designs, you need to take old hoses to the store with you as an example.
After installing new rings or purchasing new hoses, you can mount the faucet in place, following the reverse procedure. When tightening the hose fittings, it is very important not to clamp them too tightly, because the thin O-rings may come out or simply “smear.” Sometimes it is enough to simply clamp the hoses with your hands.
The main problem with installing and dismantling the mixer is the limited working space. Often, long open-end wrenches simply cannot be positioned to unscrew the nut. In such situations, you can lubricate the threads of the stud with oil and unscrew the nut with pliers.
If the mixer is connected with a rigid line, then most often it is replaced, the specifics of which will be introduced in the following article.
If all the above steps were carried out correctly, the leak should stop. Although sometimes you have to unscrew and tighten the hoses again due to the poor quality of the O-rings and their displacement.
Briefly about the main thing
In order to know how to fix a faucet if it drips, you should first determine which faucet is installed, as well as how it is designed, since valve and single-lever devices differ in design and type of locking mechanism.
You can easily repair a faucet yourself if you have the necessary knowledge and tools. Most often, a leak is the result of wear on the gasket or deformation of the shut-off device.
To keep the faucet in working condition, it is necessary to carry out professional maintenance every two years.
Ratings 0
Conclusions and useful video on the topic
The presented video describes how to repair the most common failures of a shower mixer:
The reasons for failure of shower faucets can be very diverse. In some cases, they are easy to fix yourself using common tools. In other situations, you have to resort to the help of plumbers.
Unfortunately, sometimes the faucet cannot be repaired and has to be replaced. To prevent this from happening, it is important to take preventive measures, and when purchasing plumbing fixtures, choose modern models from well-known companies.
Tell us about how you repaired a faucet with a shower hose with your own hands. Share technological nuances you know that will be useful to site visitors. Please leave comments in the block below, post photos and ask questions about the topic of the article.
Leaking at the faucet mounting point
It may leak here due to worn-out gaskets or if there are defects on the body (microcracks, broken threads). Replacing the gasket couldn't be easier.
Check it out here too!
Homemade lanterns with your own hands: step-by-step instructions on how to make a beautiful and effective lantern (110 photos)Grout - use, reviews, leading manufacturers
Replacing a pressure tap - a step-by-step description of how to change a pressure tap with your own hands (80 photos + video)
First, the fastening union nuts are unscrewed, then the old rubber is removed and replaced with a new one. Reassemble in reverse order. But if there are defects at the mounting points, then you just need to replace the mixer itself or the pipes.
Repair and replacement: axle box
The new and old faucet axleboxes must match in thread, size and material (ceramic or rubber). The easiest way not to make a mistake is to take an old axlebox with you to the store.
Dismantling the faulty part is carried out as follows:
- remove the decorative cap from the flywheel and unscrew the fixing screw;
- use a wrench or wrench to remove the main product;
- the lower gasket is removed, the rotary rod is removed;
- The worn gasket is replaced.
If the crane axlebox has ceramic discs, then it will be easier to replace the entire crane axlebox. In most cases, sellers offer it assembled, but searching for discs separately will take a long time, and repairs will be more difficult.
Replacing the entire crane axle box
The axle box is dismantled as described above and taken with you to a plumbing store. An analogue is selected by eye so that the thread and size match.
Replacement is carried out in the following order:
- We wipe the area for the new product, remove any possible debris and dirt;
- try on the purchased product;
- apply waterproof lubricant - this will facilitate installation when screwing;
- to improve sealing, we additionally wrap the threads with 2–3 layers of fum tape;
- screw the faucet into the mixer manually;
- Next, open the blocked water in the riser;
- Using a wrench or an adjustable wrench, we tighten the axle box until the water stops flowing;
- install the flywheel;
- the crane box is installed.