The question of replacing a toilet arises in two cases: either a major overhaul with the replacement of obsolete plumbing, or failure of the old plumbing. Both cases pose a question to the home owner: order work from a qualified specialist (a specialist from the housing office or a private plumber), or change the toilet yourself. Replacing the toilet yourself will help you save a significant amount with an excellent final result. We'll tell you how to change the plumbing yourself, taking into account all the nuances.
Technologically, replacing a toilet is part of a major toilet renovation. The process itself consists of the following stages:
- Choosing a new toilet, taking into account all the nuances of the toilet room.
- Dismantling old plumbing.
- Repair of the toilet room (if necessary - replacement of sewer pipes, repair of floors, walls and other work).
- Installation and connection of new plumbing.
As you can see, work should begin with an analysis of the technical characteristics of the toilet room, your own wishes and the purchase of a new toilet.
Choosing a new toilet
The market offers a lot of toilet models and it’s easy for a beginner to get confused among the variety of types of plumbing fixtures. In fact, there is nothing complicated here. All presented models can be divided into several types according to technological features.
Bowl shape
- visor;
- funnel-shaped;
- disc-shaped
The choice of bowl shape depends on the individual characteristics of future users of plumbing fixtures. None of the above forms have any design advantages.
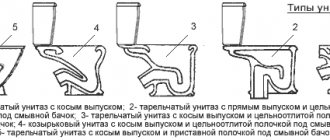
Outlet form
- vertical;
- horizontal;
- oblique (angle of the drain funnel 45 degrees).
The outlet drain is a narrowing of the toilet bowl that directly ends in a sewer drain. All forms have both their advantages and disadvantages, but oblique drains are in great demand on the market.
Design of the cistern
- autonomous from the toilet;
- combined with a toilet.
Which model to choose is a matter of taste of the owner.
Attaching the device to the floor
- two attachment points;
- four attachment points;
- special corners;
- other non-standard models.
The most popular among specialists are models with four attachment points. This does not mean that other models are attached less reliably.
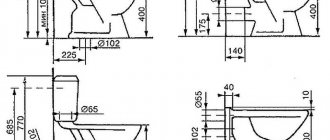
When choosing the toilet itself, the first technological feature that you should pay attention to is the type of flush. It must match the type of sewer drain in your toilet. If you do not plan to change the drain, select a toilet with the same type of drain as the previous one. Using adapters to connect plumbing fixtures with a different drain is strictly prohibited!
The type of cistern chosen determines what work should be done in the toilet. If the cistern is an independent, hinged one, you should take into account the mounting location and prepare the anchor.
Also keep in mind the size of the washroom. New plumbing fixtures should fit into your bathroom, not interfere with the installation of other equipment, closing the door, and leave enough free space for household members to use it comfortably.
Preparatory work for installation
Regardless of what will cover the floor (tiles or regular screed), you need to wait time for the mixture to dry on the floor surface. This will take about a week. This is due to the fact that the toilet is fixed using fasteners and dowels, which require a reliable and solid base. In this situation, the hardened solution will act as a similar base.
Next, you should prepare those participating in the communication installation process. The area where the drain will be connected must be cleared of various contaminants and salt deposits in advance. Otherwise, it will not be possible to connect the toilet to the sewer riser as needed. That is, the corner or corrugation in the outlet cup will not fit tightly, and a leak will definitely appear.
A tap should also be installed at the connection point of the drain tank so that it is possible to carry out repair and cleaning work without completely turning off the water.
Dismantling old plumbing
When replacing a toilet, the old plumbing must be removed. This is done in the following sequence:
- Turn off the water supply.
- Shut off the water supply to the drain tank by removing the supply hose.
- Drain the tank.
- Unscrew all fastenings of the tank and carefully remove it.
It is likely that the old bolts holding the cistern in place are rusty and partially corroded. Take kerosene or spray lubricant, moisten a rag and thoroughly wipe the rusted fasteners so that they are easier to use with tools. Carefully hold the fasteners with an open-end wrench or a screwdriver on one side, and on the other, unscrew the nut with an adjustable wrench.
- Carefully remove the toilet mountings. Old plumbing fixtures can be attached to the floor with anchors or dowels. If the fasteners are covered with rust, use the advice above.
- Disconnect the drain from the sewer pipe.
As a rule, the drain is tightly cemented. This method of fastening is found everywhere in old houses. A hammer and chisel will help you. In two places of the cement coating, pick up the layer with a chisel and tap it with a hammer. The cement should crack and some of it should spill out onto the floor (lay down an oilcloth for easy cleaning). Next, you should rock the toilet to loosen and turn the flush. Make sure it doesn't jump out of the pipe. Then you need to tilt the toilet and drain all the water down the drain. Carefully remove the drain from the drain.
It is unlikely that the old toilet will be used in the future. When dismantling it, do not stand on ceremony with the plumbing and, without regret, break off pieces from it if necessary. You can also use the lever method: punch a hole in the pipe and insert a strong wooden stick or metal cable to facilitate the dismantling process.
Be careful! Chips from plumbing fixtures are so sharp that they can easily pierce protective gloves and cut your hands. For work, choose the thickest possible gloves and try not to touch the chipped areas.
- Carefully plug the sewer drain with a wooden plug. Remember that the pipe not only spreads miasma, but also the gases escaping from it are a fire hazard. Do not smoke when working with sewerage!
- Replace pipes if necessary. If your pipes are old, made of metal, it is more advisable to replace them with a plastic version.
Installation of a hanging bowl and a hidden tank
It should be noted that the work on how to change a toilet of a conventional design to a wall-hung product with a hidden drain container yourself differs from the previous option in greater complexity. In this case, it will be necessary not only to replace the plumbing equipment, but also to repair the floor covering, build a false wall with its further finishing with tiles or other modern materials.
You have to attach the hanging bowl to a durable installation. After finishing the walls, the fixed metal frame will not be visible. When carrying out renovations in a combined bathroom, when decorating the interior, it is advisable to install a wall-mounted washbasin and a bidet of a similar design.
A detailed description of how to change a regular toilet to a wall-mounted one is as follows:
- Mark the location of the plumbing fixture. A sewer pipe with a diameter of 110 millimeters and an inlet is connected to it.
- Try on the purchased installation, which is a rigid frame for installation. You need to decide on the height. The standard placement is 450 millimeters from the floor to the seat and 100 millimeters from the floor covering to the bottom edge of the seat.
- Using a marker, mark the places of fixation to the floor and wall of the bathroom so that they exactly coincide with the mounting holes.
- They are prepared using a hammer drill and the frame is installed. Using a level, check the correctness of the installation work.
- Water is connected to the drain tank.
- The installation kit includes a diagram for cutting plasterboard sheets to cover the installation site. GCR is attached to the metal profile and to the installation. It is better if they are moisture resistant.
- Finishing is carried out taking into account the personal preferences of residents.
- When replacing a toilet bowl, it is connected to a corrugated sewer pipe and a drainage system, not forgetting the need for sealing.
- The bowl is screwed directly to the installation frame through drywall and tile using pins.
- The device is connected to the sewer system and the drain tank.
Despite the fact that the process of replacing an old toilet with a wall-mounted product takes a lot of time, the result of such a repair looks stylish and expensive. The work of installing an electronic plumbing fixture with the addition of automatic hygiene functions has much in common with fastening and connecting a conventional product, but there are still some nuances.
The fact is that to connect a smart wall-hung toilet, you need to provide it with power. For this purpose, a separate line is usually laid, since smart equipment is sensitive to voltage drops in the network.
Installing and connecting a new toilet
Installing a toilet with your own hands consists of a series of sequential works. Let's look at them step by step.
- Attach a pipe or a special corrugated tube to the toilet drain. It is preferable if corrugated adapters are not used, and the toilet flush goes directly into the sewer pipe. This case is rare, so for a better connection between the toilet and the sewer, use a rubber seal with a border. It should be inserted into the sewer pipe and carefully secured with sealant. You cannot use cement for its installation!
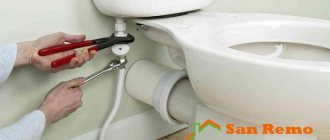
- Supply water to the drain tank. It is optimal to use a flexible hose with standard fasteners. Sometimes the diameters of the tank and pipe fasteners do not match; consider this point when choosing a flexible hose and its fastenings.
- We fix the toilet. We will describe the fastening methods in detail below.
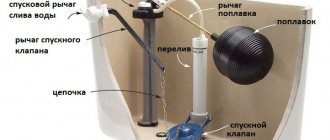
- Toilet assembly. Assembly features depend on the design of the toilet you choose. If the flush cistern is separate from the toilet, prepare dowels for it and carefully install the cistern in place. Install the water supply pipe and secure it. Test the system by turning on the water supply to the tank. At the same time, you can adjust its filling level. How to correctly carry out all the work with the tank, you can read in the instructions for its installation and configuration, included in the kit.
- Attach a toilet seat to the toilet. All fastening elements and installation instructions are included in the kit.
Types and features of toilet fasteners
You can strengthen the toilet in three main ways:
- Fastening the toilet to the floor using dowels or anchors embedded in the screed;
- Fastening the toilet to a wooden base, which is mounted into the screed using screws;
- Attaching the toilet with epoxy resin to the final floor.
Types of toilet fasteners when performing major repairs to the toilet floor.
If the installation of a toilet is carried out as part of major renovation work, the best methods of fastening it are to install it on a wooden base or using an anchor method. The anchors are prepared during the installation of the floor screed, according to the layout plan for the future toilet. Mount the anchors so that they ultimately protrude 5-6 cm from the floor. This is necessary so as not to spoil the whole work.
When choosing a method for attaching a toilet to a wooden base, select boards that are the same size as its base. Hammer nails into the boards in a checkerboard pattern to pierce them all the way through. The nails should protrude from the opposite side. The next step is to turn the boards over and place them at the site where the future toilet will be installed. Make a screed. After the solution has dried, you can begin installing the toilet. Screw it to the screed with screws.
We fix the toilet on the tiled floor
When installing the toilet on a tiled floor, use anchors with nuts or dowels. Be sure to put rubber gaskets on the fasteners so that the plumbing does not press through the tiles and rusty streaks and cracks do not form around the fastenings. Advice - use nickel-plated anchors or dowels, they do not rust.
If you are installing a toilet on a ready-made tiled (or other facing material) floor, use either epoxy resin or dowels to secure it so as not to damage the facing.
To install the dowels and then screw in the screws, you need to drill holes through the cladding and screed. It is important not to make them too deep, otherwise the waterproofing layer may be damaged. For thin screeds, use sealant to additionally secure the dowels. Place special rubber gaskets on the screws. In order not to damage the facing coating and to install the toilet more firmly, make a sealant cushion under it, and then press it down with screws.
If the cistern and toilet are separate, use a lightweight method of attaching the toilet to the floor - using epoxy resin. Treat the floor by thoroughly cleaning it using sandpaper (or an abrasive stone) in the area where the toilet is mounted. Vacuum thoroughly. Coat the treated and cleaned surface with a layer of resin of a few millimeters, place the equipment and wait until the adhesive dries.
Related materials
In addition to a set of tools, before changing the toilet with your own hands, you need to purchase building materials for installation, including:
- pipe for connecting to the water supply system;
- sealant;
- corrugated pipe for connection to the sewer riser;
- tap;
- FUM tape;
- fasteners.
When exchanging a toilet - an old product for a new one - the main point is to ensure a reliable seal. Any loose connection or gap may result in a leak. When connecting a plumbing fixture to a sewer system, the best solution is to use silicone sealant in a cylinder.
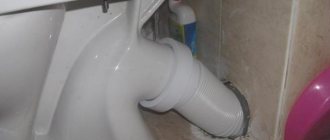
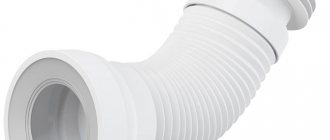
Before replacing a toilet in an apartment or house, you should purchase plastic corrugated pipe products to connect it to the pipeline that discharges wastewater. This product is convenient because it is flexible and suitable in most cases. When bending, the corrugation can take different positions, compressing and stretching. It is suitable for both horizontal outlet and angled outlet.
To seal the joints, use sealing tape or do it the old fashioned way, using tow. The set of fastening elements includes screws, bolts, dowels, nuts, washers, plugs for connecting all components and carrying out installation work. If any fasteners are missing, they can be purchased additionally.
Wall-hung toilet
Wall-hung toilets are becoming increasingly popular. Installation of a wall-hung toilet does not require contact with the floor, which is a significant advantage of this model. To secure this structure, make a special metal frame and attach it to the load-bearing wall using dowels or anchors. Place the toilet on the frame and attach it.
A wall-hung toilet involves several technological solutions for placing additional structures. For example, all the pipes can be hidden behind a plasterboard partition or a special plumbing cabinet can be built (its design involves the presence of shelves where you can keep toilet cleaners and other toiletries). When attaching a toilet to a wall, the pipes are either mounted into the wall or a branch is made to bypass the fastening devices.
Preparatory work
Of course, you remember that if you have ceramic tiles on the floor, then the floor must be level. If you neglect this detail, the toilet may split or crack. But if you don’t have tiles, then be sure to make an even screed. After completing the work, leave the floor to dry for at least three days. This is due to the fact that the toilet will be mounted using toilet dowels, and in order to securely fasten them, you will need a reliable base. So it’s better to take your time than to redo it later.
Since you are replacing the toilet yourself, you can now proceed to preparing communications:
Tools
Before starting work, you need to prepare tools and materials. What is needed for installation, besides a new toilet? You will need:
- impact drill or hammer drill;
- drill (the diameter of the drill is selected depending on the diameter of the fasteners);
- if installation is carried out on tiles, use a tile drill;
- hammer;
- chisel;
- screwdrivers;
- set of wrenches;
- adjustable wrench;
- putty knife;
- retractable knife;
- marker or pencil;
- roulette.
Additionally you will need:
- silicone sealant with a gun or in a special tube;
- FUM tape or sanitary linen;
- metallized tape;
- stuffing box;
- corrugation;
- tap;
- flexible hose for connecting the tank to the water supply;
- polyethylene film; bucket and rag;
- repair mortar;
- dowels, if they are not provided with the toilet.
Some installation methods require the use of cement mortar.
Specifics of connection without corrugation
A corrugated adapter is not needed if the plumbing product was purchased in advance and the sewer outlet was organized taking into account the type of release of a particular model.
In this case, the connection occurs using a rigid elbow, which has no unevenness on the inside and is not prone to blockages.
It is necessary to take into account the following features when installing using a plastic pipe:
- Distortions in the structure are unacceptable, as they lead to leaks;
- Joints and connections must be lubricated with silicone grease;
- The pipes are shortened using a hacksaw.
The ideal option is to connect the toilet directly to the sewer, when the dimensions of the outlet coincide with the sewer inlet in height, angle of inclination and diameter. In this case, adapters are not needed.
Installation
Work on fixing and installing the toilet proceeds as follows:
That's all the subtleties of replacing a toilet. In conclusion, I would like to note the following: if you find out another way to change a toilet with your own hands, this does not mean that it is wrong. There are simply always several methods for solving a particular issue.
Replacing a toilet is required when the old product becomes unusable. More often, dismantling an old toilet and installing a new one is in demand in older buildings, where all communications need to be updated. Replacing the toilet tank and other parts yourself is not difficult. However, it requires basic skills in working with tools (a hammer drill, a drill, etc.) and the ability to fill and lay tiles. Read how to install a toilet in a private house with your own hands and watch the video tutorial below.
