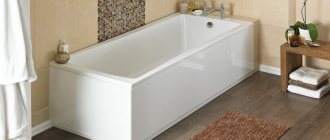
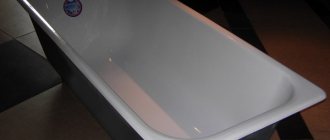
After selecting and installing a new bathtub, the question arises: what and how to seal the gap between it and the wall.
This must be done - the waterproofing procedure will avoid the accumulation of unnecessary moisture and the formation of mold.
A plastic bathtub border (also suitable for shower stalls and sinks with a flat edge) will help to avoid unpleasant odors, fungal infestation, stale damp air and other unpleasant consequences. See below for everything about the correct selection and installation of skirting boards.
Varieties
The choice often comes down to three main options for finishing plinths:
- Flexible tape with adhesive layer.
- Ceramic strips.
- Plastic border for the bathroom.
Ribbon
The first one is often chosen when they want to make a quick repair at minimal cost.
The tape is waterproof and made from synthetic rubber. Glue (butyl) is applied over the entire surface.
Some manufacturers add fungicides that prevent mold from growing.
Although the tape provides a secure fit and can compensate for the movement of the bathtub (relevant for acrylic containers), it does not last long, and there are cases of peeling due to high humidity. For uneven surfaces and wide crevices, there are tapes with three bendable parts, the middle of which does not have an adhesive coating.
Ceramics
The ceramic option is much more reliable. If earlier craftsmen had to cut tile elements themselves to close the wide gaps between the wall and the bathroom, now there is no need to do this. There are corner and flat ceramic parts on sale that will decorate the room, the finishing touch to the renovation.
PVC
Plastic skirting boards are the choice of many. Affordable price plus a set of excellent properties. Plastic plinth is made in two versions:
- Under the tiles.
- On the tile.
Curbs can be installed under the tiles only at the stage of laying them.
The upper edge of the corner is attached to the tile adhesive, its lower part protrudes and overlaps the edge of the bathtub. The method is most effective in combating moisture, but if you need to change or redo something, this can only be done by dismantling the tiles.
The “on tile” option is available at any time of renovation, and its installation is not difficult.
The types of plastics also differ. Some materials are rigid, others are more flexible and, together with a layer of sealant, can compensate for slight instability of the bathtub.
If the wall could not be brought to an ideal vertical, the gap from the wall may be significant along its entire length or in some places. It is recommended to use either a wide plastic corner, or seal the area using a mixture of brick chips, and then decorate it with wide ceramic elements.
Why does the gap occur and what is the danger?
A gap between the bathtub and the wall is formed in two cases: littered walls (there is no right angle at the junction of the walls) or the finishing sequence is broken.
The classic version defines the following sequence:
- Floors.
- Bathroom installation.
- Walls.
- Ceiling.
The right combination of colors in the interior - designer's advice
Making a fashionable wall lamp from a plastic pipe [with your own hands]
With this sequence, tiles, mosaics (or other material used for wall decoration) will lie on the side of the bathroom. And this ensures that there is no gap.
But in some cases, it may be necessary to replace the bathtub after finishing the walls, and then cracks appear.
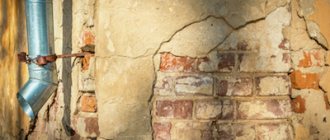
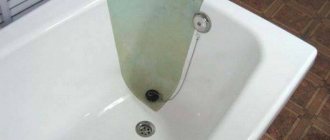
The ventilation under the bathroom is extremely poor. Stagnation causes mold fungi to begin to develop in a favorable microclimate. Mold in the gap between the bathtub and the wall not only spoils the appearance with its blackness, but also spoils the air in the room. A dark and slimy coating will not be immediately noticeable to the eye, but the smell of dampness and decay, even with forced ventilation, will be constantly felt. Especially when the temperature in the room rises. And besides the smell, the mold spores themselves can enter the body and cause an infectious disease.
This explanation should be sufficient, but there is also an aesthetic factor. A gap without decor around the perimeter of the bathroom, like a fly in the ointment, spoils the entire impression of a beautiful renovation.
Installation instructions for plastic border
Let's look at how to install a plastic border on a bathtub.
Tape
The easiest way is to glue flexible tape. You don't need to be a builder to do this:
- The surface is cleaned, degreased and dried.
- The tape is folded in half along its entire length.
- Measurements are taken and trimmed to length (a few centimeters to spare).
- The strip is applied along the wall and, as the protective film is removed, it is pressed tightly against the surface. There is no need to remove all the film at once. It will be more difficult to glue such a tape; it may stick where it is not needed, and the adhesive layer will weather and lose its properties.
- Careful pressing with a spatula and heating with a hairdryer will help bring the installation to perfection.
When gluing the tape, do not pull it! The tension of the material will lead to its rapid detachment.
Plastic skirting board for tiles
Preparation stage
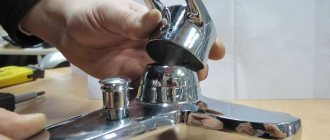
If there was an old curb on the bathtub, it is dismantled.
If liquid nails were used in a previous renovation, it may not be easy to tear them off. The situation is improved by heating with a hair dryer. Using a knife or chisel and solvent, scrape off remaining sealant, foam and other contaminants.
If there are signs of mold or mildew, the surface must be disinfected. Then degreasing (with white spirit, alcohol, or acetone) and drying (you can use a regular hairdryer for this).
How to treat mold. A chlorine solution, bleach, or a mixture of soda and vinegar can help. This may be a mixture of vinegar, hydrogen peroxide and boric acid. The household chemicals market offers ready-made disinfection formulations, such as CilitBang, Anti-mold from Baga, Mellerud, or Domestos.
Measurements
A tape measure is used to take measurements of the dimensions of the bathroom. A hacksaw is used to cut straight sections of the plank to the required length. Then one edge of each plank is trimmed to create 45° cuts that can easily meet at the corner. The corner cutting procedure will not be necessary if you purchased a ready-made joining corner.
Surface protection
Sealant and polyurethane foam can be difficult to remove without leaving traces. In order not to spoil the bathtub during the work, it is covered with newspapers.
You can protect the tiles using masking tape. You can stick it in the right places by placing the plinth in its rightful place.
The adhesive tape is glued closely - above and below the border.
Rough sealing of the gap
At the owner's choice, you can use silicone sealant, grout or polyurethane foam (remember that polyurethane foam, when dried, increases three times in volume). You cannot glue a border onto the foam! A good option is to use foam and grout over it. The surface is smooth and easy to work with.
Fixing the curb
Select the fixation method:
- liquid nails (they are firmly attached, but allow moisture to pass through);
- sanitary silicone;
- aquarium sealant;
- adhesive sealant.
The adhesive is applied in strips to the back side of the plinth (so that the fixation is not so much in the middle, but mainly along the edges, but the excess does not come out too much from under the strip).
Special attention to joints! The border is pressed against the wall, the excess is removed immediately with a clean cloth. At the end of the work, remove the masking tape with any dirt that has fallen on it.
Under tiles
The optimal width for such a border is considered to be 3 cm. One side is perforated. This side is placed vertically. In some cases, self-tapping screws can be used for more secure fixation. Then tile adhesive is applied on top and the tile is attached to it.
The bottom edge of the curb usually has a rubberized sealing layer. If it is not there, you need to fill the gap with silicone.
A baseboard in a bathroom is necessary to seal the gap between the wall and the bathtub. We'll tell you in this article why a ceramic border is good for a bathroom.
We will learn how to determine the installation height of a bathroom sink for maximum comfort here.
Acrylic liner is a popular way to restore a bathtub. But its installation requires knowledge of technology. Here https://aquacomm.ru/cancliz/mnogokvartirnyie-doma/santehnika/akrilovyj-vkladysh-v-vannu-ustanovit.html you will find plumbers’ recommendations for installing the liner.
Flexible sealing self-adhesive tapes
This is the cheapest and easiest way to seal the gap between the bathtub and the wall. This sealed sticker is made of high-density polyethylene, with a thickness of 150 microns. On the reverse side of these tapes, the manufacturer applied butyl glue. The shelf life of the border tape is 2 years. This is very little compared to a ceramic border, but this is more than compensated for by the low price. The cost of such tapes starts from 100 rubles per roll 3.5 m long.
To glue flexible sealing self-adhesive tape, you will need:
- The tape itself.
- Silicone sealant.
- Acetone (or any solvent).
- Clean rag.
- Construction knife.
- Pencil.
Before gluing, it is necessary to prepare the workplace. The surface to which the curb tape will adhere is thoroughly cleaned and degreased with a solvent. Then you need to draw a horizontal line to maintain the strictness of the line. Use silicone sealant along the crack and fill all the cavities. Only after this can you start gluing the border tape.
The backing should be torn off from the adhesive layer by no more than 15 cm. Begin gluing from the edge of the bathtub. Press the tape very tightly on one side and squeeze out any air bubbles (if any appear). Important: do not stretch the tape! When you reach the corner of the bathroom, carefully bend the tape and continue sticking further. Once you reach the edge of the tub, cut the tape and seal the edges with silicone sealant.
A fold should appear in the corners. It must be cut with a construction knife. Lubricate the cut area with a thin layer of sealant, and cut off a strip of tape 2 cm wide and close this seam.
After completing the work, give the butyl glue a day to gain strength.
This material can also be used for sinks. A serious advantage in this case is the ability to independently glue the detached element
Basic installation details
And a few more tips for those who plan to install a bathtub border with their own hands:
- For wall panels and acrylic bathtubs, it is important to choose the right means to degrease and clean the surface. They must not contain aggressive components (acids and alkalis). Abrasive particles are also contraindicated.
- You can achieve a perfectly dry surface by wiping them with paper towels rather than a cloth.
- The sealant is applied in an even layer, without gaps. This is not the case when glue can be applied pointwise.
- Tile and lining have vertical slots where water can also flow. To prevent this from happening. Each crack at the junction with the baseboard must be waterproofed with a small drop of silicone.
- When choosing an adhesive, pay attention to the setting speed. If it exceeds 10 minutes, you will have to look for something to support the baseboard for this time or periodically press the curb against the wall with your own hands again and again.
- Some types of glue can only be removed after drying with a blade. The use of solvents is not compatible with plastic.
- It is advisable not to take a bath for 24 hours after working with sealants.
How to glue molding to a bathtub
Most often, craftsmen advise laying moldings using sealants with silicone. However, any sealant darkens from water and after a couple of years lags behind the wall. For these purposes, it is necessary to use sealants intended for aquariums. Thanks to special additives, they do not darken and are not susceptible to fungus and mold. Especially if the composition includes MS polymers (Moment, Crystal).
It is better to use white or transparent ones with high hydro-repellent properties.
The ceramic border can be glued using epoxy resin or a special moisture-resistant solution.
If there is no sealant, liquid nails or tile adhesive will do. The plinth can only be installed on a dry, clean and grease-free surface.
Prices
Ceramic elements are sold individually.
These can be corners or narrow flat parts. The color is plain, with an ornament or an original design. The surface can be glossy, smooth, or textured. All these differences affect the price. But on average, elements cost 80 - 180 rubles. a piece.
Self-adhesive tape is sold in rolls. The packaging indicates the length of the product and either the total width, or separately the width and height of the strip. Average prices per linear meter are 50 – 150 rubles.
Plastic curbs can be sold separately or as an installation kit. Usually the elements have a standard length (1.8 m, 1.85 m, 2 m). 1 linear meter will cost only about 23 - 45 rubles. The average price of a set of accessories is 80 – 100 rubles.
Conclusion
As you can see, a plastic border is the most inexpensive way to decorate and protect your bathroom. Much depends on proper installation and further maintenance. But if everything is done correctly, the border will not let water through for many years.
Restoring bathtubs is several times cheaper than buying a new bathtub, and there are several ways to update plumbing fixtures. Restoration of a cast-iron bathtub by enameling and installing an acrylic liner is described in this topic.
Is it worth restoring an old bathroom and what methods are used for this, read this link.
What dimensions can a tiled molding for a bath have?
Modern ceramic modules can become a designer find in the overall style of the bathroom. They are distinguished by a wide choice of patterns, colors and decor. There are three main types:
- pencil - a thin strip designed for narrow and long crevices;
- corner - the most common type, designed for sealing medium-sized joints;
- frieze - a variant of a corner and tiles in the form of an influx.
The size of pencil borders is usually 15mm in width and 20cm in length. Dimensions of a standard tiled baguette: 5.5 cm - height and depth, length - 20 cm.
The baguette can come with a set of facing tiles.
Where to buy a quality bath corner
Currently, the corner can be purchased at construction markets, in huge construction stores and, of course, in online stores.
In an online store there is no opportunity to take a good look at the product in order to determine the quality and make sure that the desired pattern or shade is correct. In construction markets, goods are often stored in incorrect conditions, which can subsequently affect the quality and service life. This is especially true for self-adhesive models, which must be stored in dry and warm rooms. It turns out that large hardware stores are most convenient in this regard. Here you can view the product, check the quality, consult with a specialist and purchase additional items if necessary. The storage conditions for the goods are decent and the goods can be changed if necessary. Most importantly, you don’t have to wait days and weeks for the goods to be delivered.
Polymer materials are used to produce self-adhesive curb tape.
Surface preparation and preliminary work
The technology for laying the border around the bathtub may be different, but preparation of the base is mandatory. You should clean the wall and edge of the bathtub with a good, high-quality detergent, then rinse with water and degrease. For the latter purpose, soda ash is used; if it is not available, regular soda or alcohol is used. Before gluing the baseboard, you need to make the surface dry. To do this, you can wipe the base with a lint-free cloth and dry it with a hairdryer. When you have to re-glue the headband, you must carefully scrape off the remnants of the old glue.
To glue the border, the following tools and materials may be useful (depending on the type of profiles, some will not be needed):
- glue or sealant;
- mounting gun;
- level, preferably laser;
- rubber spatula;
- sandpaper on a block;
- pliers;
- Bulgarian;
- roulette;
- construction tape;
- sharp knife;
- profiles of the required length.