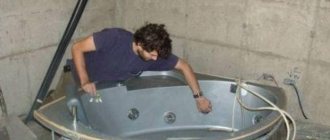
Installing a bathtub yourself is not too difficult, but it is a labor-intensive job. The container must be properly prepared, connected to communications, installed with the required slope and ensure that it does not wobble. To do this, it is advisable to choose the right materials and sequence of operations to make your work easier.
Installing a bathtub will not be difficult.
Installation of an acrylic bathtub
Acrylic is the most popular material for making bathtubs. In addition to an acrylic bathtub, homeowners often install a plastic liner over a cast iron or steel bathtub. This allows you to update the plumbing in the room without much effort and expense.
Installation of an acrylic bathtub (brand Kaldewei, Triton and others) can be done in several ways:
- On supports. Many acrylic bathtubs come with legs on which to install. This method is considered simple and convenient even for beginners. The supports are made of alloy steel that is resistant to corrosion. They are adjustable, which allows you to independently level the bathtub;
Installing the feet on the guides - On bricks. This is a “makeshift” analogue to mounting on supports. The bricks are laid in several rows to form unique legs for installing a bathtub. To hide unaesthetic brick structures, special panels are used that are covered with tiles;
- On the frame. This method is used to install built-in bathtubs. To implement it, a drawing is prepared according to which the frame is constructed. It consists of steel guides connected to each other by bolting or welding. After installing the bathtub, the frame is covered with panels, and tiles are attached on top of them.
Attaching the bathtub to the frame
Nuances for installing a corner acrylic bathtub
Corner baths are a universal option that is suitable for both large bathrooms and small bathrooms. They are symmetrical and asymmetrical, the sizes of the bends are standardized.
Installed corner acrylic bathtub
If you choose the right triangular bathtub, then in a small room you can fit not only a washbasin with a cabinet, but also a washing machine or bidet. But there are some nuances that you need to know about before installing a corner bathtub (Ravak - Ravak, Laguna and others):
- All corner baths are classified according to the type of location: right-handed and left-handed. This is very important for the proper connection of sewerage and water supply outlets;
- Before starting installation work, the walls must be leveled. If you don’t do this, it will be extremely difficult to level the bathtub;
- The corner bathtub is installed on legs. Supports are fixed around the entire perimeter, which will later be used to fasten the frame guides;
- In the place where the bathtub is adjacent to the wall, it is imperative to install a flexible baseboard. This will help avoid leaks.
Installation of a corner acrylic bathtub Part 1
and part 2
Installing an acrylic bathtub on a frame
A frame diagram is the simplest option for installing an acrylic bathtub. This method is ideal for built-in plumbing, will fit perfectly into any interior and provide ergonomics.
Step-by-step instructions on how to install an acrylic bathtub on a frame:
- First of all, the surface of the walls is leveled. It is important not only to plaster the surface, but also to cover the walls with a finish - primer and putty. Installation of tiles can be done immediately or after completion of installation work;
- Similar actions are carried out with the floor. The floor in the bathroom should be perfectly flat, without wide seams or irregularities. This will make it much easier to install the frame level;
- To install the bathtub, you need to prepare a building level (its length should not be less than the diagonal of the bathtub), a hammer with a rubber nozzle (to secure the frame), a wrench and an adjustable wrench. You may also need various gaskets and pipes to connect the water supply sewer;
- A flexible pipe is attached to the sewer outlet, the diameter of which must correspond to the outlet of the bathtub. A siphon is connected to it. The joints are treated with silicone sealant. After this, you need to wait at least 4 hours for the silicone to harden;
Connecting pipes to the sewer drain - Next, the frame is mounted. The wall guide is installed first - it will be the main one, so it is important to align it strictly according to the level. From this guide extend the side ones, to which the vertical posts from the floor are attached. They can be connected by welding or bolting (the first seems more reliable, but the second can be disassembled if something happens);
Installation of vertical guides - When all the guides are connected to each other, the level of the corners is measured. There is one strict rule: when installing bathtubs and uneven frames, the lowered corner is raised, and not the raised one is lowered. All corners are secured with metal corner strips to provide rigidity;
Ready frame system - If all corners are at the same level, then a bathtub is installed in the frame. The overflow from the siphon is connected to the side hole, and the outlet from the sewer is connected to the central hole. The water outlet (water pipe) is located above the bathtub, so you can work with it after the installation work is completed.
- To prevent water from the bathtub from spilling onto the floor, you need to close the gaps between the wall and the side rail using a curb. It is also called plinth;
Finishing the gap between the wall and the bathtub - The frame is closed using a screen. Additionally, it can be insulated so that the bath “keeps” the heat of the water longer. You can use tiles, panels or even artificial stone to cover the screen. It is best to work with durable, water-resistant materials.
Plasterboard screen
After completing the installation work, the mixer is installed. To connect it, open a water outlet, connect a faucet to it, if necessary, also connect a sink or shower hose.
Screen installation
A screen is not only a decorative element that can hide everything unnecessary, but also serves as an auxiliary element for storing, for example, household chemicals.
In addition, with the help of it you can give the room originality and uniqueness, because the modern market offers a wide variety of screens. They can be solid, with doors, with shelves, or pull-out units.
A blank screen is the simplest way to decorate a space, but it does not provide functionality, and when repairing or replacing communications, it will have to be dismantled.
For a small room it is also suitable with sliding doors; it does not take up much space and serves as an excellent storage place.
The screen most often consists of two plastic panels, which are mounted in a plastic or aluminum frame. It also has legs that allow you to easily adjust its height.
It can also be made from plasterboard, but in this case you should remember that it is important to choose a moisture-resistant model. Plastic surfaces come in a variety of colors and textures, so you can easily match it to your interior.
Video - a screen under the bathroom yourself (instructions from a professional):
The most popular option for decorating a space is a frame-based screen. Let's take a closer look at it.
First you need to mark the lines along which the frame will be located. You should also take into account the distance that the finishing materials will take.
To strengthen the frame, vertical profiles should be installed, which will add rigidity to the structure. Profiles for the frame can be made of metal or wood. The frame is attached to the floor using construction sealant or liquid nails.
The profile can be attached to the bathtub in various ways, it all depends on the material from which it is made. The most correct option for fastening the frame, according to experts, is liquid nails. Next, it is advisable to paint the frame with moisture-resistant paint. Now you can move on to installing the screen itself.
First, we prepare two guides - one is attached to the lower profile, and the other to the upper. It is important to ensure the compatibility of the grooves.
Then the plastic panels are cut to size; this can be done using a mounting knife. Now all that remains is to insert the finished plastic panels into the fusing ones and add handles to them to make it more convenient to open the “doors”.
How to install an acrylic clawfoot bathtub
Most well-known bathtub manufacturers supplement their products with special fasteners and installation parts. Supports come complete with models manufactured by Jika, Roca, Riho and others.
How to properly install an acrylic bathtub with legs yourself:
- On the bottom of acrylic bathtubs, which are mounted on legs, there are characteristic protrusions for connections. To attach the legs, you need to turn the bathtub over and attach the supports included in the kit to these protrusions;
General diagram of installing legs on an acrylic bathtub - To give the structure rigidity, the legs are also connected to each other. To do this, they are tightened with nuts and secured with studs;
- After this, the drain is processed (a siphon is connected to it). The water outlet does not need to be touched until the bath is installed on the floor. When all the preparatory work is completed, you can begin installing the bathtub;
Connection diagram of the bathroom to the pipeline - The legs are installed on the floor, using a level to check the evenness of the installation. If one corner is too raised, then, as stated above, all other corners rise. This is done very simply: the bathtub is turned over and some legs are adjusted to the desired level;
Adjustable legs for bathtub installation - For strength, we recommend lightly hammering the plastic supports with a hammer and a rubber working surface.
Acrylic and glass bathtubs must be handled very carefully. Plastic is subject to deformation under impact loads. When the installation process is completed, they begin to install the mixer, washing machine and other consumers.
Video: complete video instructions for installing a bathtub
Installing an acrylic bathtub on bricks
Let us immediately note that this method is quite rarely used for installing plastic bathtubs. For acrylic plumbing, not only ideal evenness is important, but also the complete absence of shock or other loads that contribute to deformation. Brick supports are quite difficult to install with your own hands so that they evenly distribute pressure over the entire plane of the bathtub.
Step-by-step instructions on how to install an acrylic bathtub on bricks:
- The height at which the bathtub will be installed is determined based on the size of the bathroom and the size of the liner. The optimal height is considered to be 3 bricks;
Parallel scheme for laying bricks for a bathroom - The classic chess pattern is used for installation. To implement this, the floor is leveled and the first row of bricks (2 pieces) with cement mortar is laid on it. 2 more pieces are installed on top of them, but in the opposite direction. So up to the required height;
Brick laying pattern - If you don’t have to take exact measurements of the bathtub to install a sliding frame system, they are required for bricks. In addition, you need to calculate the location of the supports so that there are no sagging points. For example, 4 brick supports at each corner and two in the central part;
- While the solution hardens, you can start connecting the water supply system. If this is not a model with hydromassage, then all work is performed according to the standard scheme. From the sewer there is an adapter and a siphon with an overflow, and from the water outlet there are pipes for installing a mixer.
Connecting a siphon to water pipes
After laying the bricks, you need to wait until the mortar hardens and only then install an acrylic bathtub on them. Of course, the appearance of brick supports leaves much to be desired, so a variety of options can be used for their decoration. These are tiles, decorative panels, a screen (as for a frame), etc.
Installation of a plastic bath
Installing a plastic bathtub with your own hands is no more difficult than installing an acrylic one. Moreover, all the options described above are suitable:
- On the frame;
- On the legs;
- On bricks or other available supports.
When installing a plastic bathtub, you need to be especially careful and careful. Any incorrect movement or miscalculation in the places where the supports are installed can cause cracks to form.
Installation process of a plastic bath
Rules for installing a plastic bathtub Standard:
- It is important to distribute the load evenly. This means that the supports, legs or frame must be positioned symmetrically across the entire plane of the bathtub. This will avoid deformation;
- To strengthen the frame and legs, special corners are often used. The corner is a rigid metal part that ensures the strength of the connection between the support and the surface of the bathtub. Of course, you can do without it, but then during operation the structure may begin to loosen;
- The pipes are connected before the bath is installed. In other words, first the supports or frame are installed, then the siphon and other outlets are attached (the shower stall is connected, etc.), and then the bathtub is installed;
- The last step is to install the hood, mirrors and curtains. For the latter, you will need to additionally secure the cornice to the walls or ceiling.
Sealing joints between the side and the wall
The main disadvantage of acrylic products is the difficulty in sealing junctions with walls; the following methods are used to solve the problem:
Silicone sealant . The most commonly used method for sealing joints, due to its cheapness and ease of application, is to stick protective masking tape along the contour of the bathroom and to the wall, squeeze the sealant out of a gun into the seam and level it with a finger soaked in a soapy solution. With certain skills, you can achieve an almost perfect, even sealing strip.
Adhesive tape . The industry produces a special self-adhesive border tape made of light rubber, which is glued to the walls and side surface of the bathtub. The technology for its installation is accessible to any housewife, but requires care; if mistakes are made, the tape can always be removed and another strip pasted.
Plastic plinth . A special corner with rubberized edges is available on the construction market - when installing, its body is inserted into the gap between the bathtub and the wall, pressing so that the rubber edging fits snugly against the wall tiles and sides.
Methods for sealing joints
Installation of a cast iron bath
A cast iron bathtub is considered the most durable and reliable, but it is absolutely not suitable for installation in a small bathroom (where there is also a toilet in the bathroom). It is most advisable to install it in a private home, since the average weight of such a structure reaches 500 kg.
Fastening a cast iron bathtub to supports and frame
Step-by-step instructions on how to install a cast iron bathtub:
- First, the old equipment is dismantled (if necessary). Afterwards, to install a new bathtub, you will need to level the floor, perhaps completely replace the screed;
Leveling the screed on the bathroom floor under the legs - To install a cast iron bathtub, mounting on legs or bricks is most often used. The frame is suitable only if the guides are made of durable metal that can withstand high pressure;
- Metal legs with plastic attachments are attached to the bottom of the bathtub - they are needed to control the height of the bathtub and protect the floor. The supports are attached in pairs - first on one side, then on the other. They are additionally bolted together to tighten the connection;
- If necessary, the outside of the bathroom is covered with a screen.
Installed cast iron bathtub with legs
Preparation
This process is very important for proper installation of the bathtub.
Make sure that all necessary tools are available when assembling the bathtub itself and attaching it to engineering systems.
In addition to preparing your tools, do the following:
Installation of a steel bath
It is much easier to install a metal steel bathtub than a cast iron one. It is not that heavy and, depending on the size, is perfect for installation in a small bathroom. As with the installation of a cast-iron structure, the old bathroom is first dismantled, then the walls and flooring are cleaned.
Steel bathtub on supports
Next, the bathtub is placed on legs or a frame is built for it. When the preparatory work is completed, the connections to the sewerage and water supply lines are ensured. After this, the bath is installed in its place and connected to the central water supply system.
Connecting drain fittings
The assembled siphon group must be secured at three points:
- Drainer;
- Overflow;
- Sewage pipe.
First, install the fittings in the drain hole. Fixation is carried out using a screw through the drain grate. The gasket is placed on the drain itself; it has a specific shape and provides sealing on both sides at once. TIP: Apply a little silicone sealant between the gasket and the bathtub body . Do not tighten the screw all the way.
Then, by adjusting the height of the corrugated pipe, the overflow is secured. Here the gasket is installed on the outside of the bathtub. It has a conical shape, and the “point” is directed “from the bath”. The screw is tightened all the way.
After this, press the screw on the drain hole.
TIP: the screw stops turning as soon as the plane of the drain grate begins to sag.
The last thing is inserted into the sewer, waste pipe. To facilitate this process, lubricate both the pipe and the entrance to the sewer with laundry soap.
Installing a bathtub in a tiled bathroom
All the methods described above imply that the tiles will be laid after the installation of the bathrooms. But what if you need to install an iron bathtub or shower cabin in a tiled room?
Installing a bathtub in a tiled room
- We will be of the opinion that the tiles are at a certain level and do not need to be re-laid. Then the installation process is greatly simplified;
- You need to level the floor and check it with the rules. You can install the bathtub on legs, a frame or bricks. Regardless of the method chosen, it is best to ensure a minimum gap between the wall and the bathtub;
- After connecting the plumbing connections of the toilet, bathtub and other consumers, it is important to close the gap between the wall and the side of the bathtub. To do this, use a flexible plinth (made of aluminum or plastic), sealant or pieces of tile;
Silicone for joints - First of all, the gap is covered with a layer of sealant. A plinth is installed on top of it. If the option with tile cladding is chosen, then sealant is first applied to the gap, and after it dries, the tile is installed. For its installation, you can use waterproof plaster;
- All that remains is to install the fan in the hood, mount the column or boiler, remove the remaining construction debris and check the correct connection.
Finishing
There are several main options for finishing the bathtub. You can do the following:
- tiling the bathtub;
- close the space between the top edge of the bathtub and the floor with moisture-resistant plasterboard;
- install a ready-made decorative screen.
Choose the method that you like best and get to work.
Regardless of the finishing method chosen, you must leave windows for access to the drain and pipes so that if they break, you can easily carry out the necessary repairs. It is strictly forbidden to close these places tightly.
Now you have all the necessary information to install and connect the bathtub yourself. Follow the recommendations received, and everything will definitely work out.
Good luck!
What do you think of this article?

