The process of constructing a pipeline with your own hands is actually simple, especially if you carefully understand how it is laid.
The first thing you need to understand is that you need to take care not only of the internal and external systems, but also remove the sewer pipe from the house.
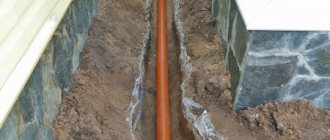
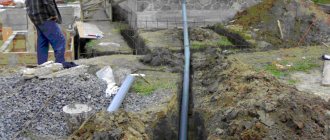
This is what the sewer pipe exiting the house looks like
Laying a pipe under the base
Electricity can be supplied to the cottage from any location.
But sewerage is something else. This will not work here and you will have to resort to serious construction tasks. Steel or PVC materials are used to supply wastewater. To lay it, you should dig a ditch 2 m deep or less. Then this ditch must be brought under the supports of the house. The parameters of the ditch depend on the depth of soil freezing.
The pipeline itself must be installed under the base. For these purposes, you should punch a hole in the foundation. To ensure that everything turns out as beautifully and accurately as possible, you can use the advantages of a diamond tool. The pipe should be routed through a special casing.
Factors responsible for the reliability of sewage systems in winter
To increase the stability of the soil, we fill the bottom of the trench with crushed stone. When the distance over which the pipeline is laid exceeds 5 m, concrete clamps are used to securely fasten the system. They are placed at a distance of 100–150 cm. It is important to fill the soil in small portions so that the structure does not deform and runoff does not penetrate outside.
In order for the sewer system to function normally in winter, glass wool or polyethylene foam should be used as insulation. In this case, it is important to place the drain pipe below the ground freezing level in order to prevent the system from freezing during the cold season. Depending on the region, these indicators will differ. Thus, in the southern regions the freezing depth is 20 cm, in the North – more than 100 cm. Therefore, it is necessary to choose the correct depth of the sewer pipes.
;
Sewerage
Did you find this article helpful? Share it with your friends:
Excavation work during the construction of external sewerage
Today, when building a private house, both machine and manual excavation work is used:
- The easiest way, of course, is to use special equipment. In this case, the dimensions of the trench are determined by the diameter of the pipes and the required slope. So, if you plan to use a pipe with a cross-section of 110 mm, then the width of the trench should be 600 mm, and how to determine the required depth is described above.
- If there is construction on the plots, the use of special equipment may be impossible, so excavation work will have to be done manually. The dimensions of the trench are similar. The depth of the dug trench should be 50 mm greater than the planned level of pipe laying, since additional sand will need to be added.
Stages of installation of an external pipeline
- Sand is poured into the bottom of the trench (50 mm layer) and compacted manually;
- Prepare the necessary parts - pipes, fittings, seals, etc.
- Laying starts from the foundation. As a rule, a hole for drainage is installed during the construction of the foundation. But if this has not been done, the diamond drilling method is used.
- To obtain a tighter connection, use silicone grease. To do this, a lubricating compound is applied to the smooth end of the pipe and inserted into the socket into which the sealing collar is inserted.
- If it is necessary to arrange a turn, then smooth bends should be used - shaped parts designed for collecting external networks.
- If the pipeline length is more than 12 meters, then inspection wells should be installed at turns.
- After the pipeline is assembled, the slope is checked, and then the pipes are filled with sand.
- When backfilling pipes, sand should be compacted on the sides of the pipes. Sand should be compacted in layers. Sand located above the pipes does not need to be compacted.
- The height of the sand backfill must be at least 15 cm above the pipe. After which you can begin the final filling of the trench with soil. The soil should be covered with a hill, since subsequently the land will inevitably settle.
Thus, when deciding at what depth to lay a sewer system, one should take into account the experience in the construction and use of sewer networks in the area of construction. If the minimum sewerage depth is selected (less than 0.7 meters), you should not neglect measures to insulate the pipes, as well as to protect them from damage by passing vehicles (if the pipeline runs under the roadway).
Preparatory work
The sewer network under the floor slab is usually assembled from plastic round pipes with a diameter of 110 mm. The width of the ditch with this cross-section is at least 0.6 m; a special shock-absorbing layer of sand or crushed stone 100 mm thick is poured onto its bottom.
You will also need:
- sleeves with a cross-section larger than the diameter of the pipeline;
- fitting elements (tees, bends with plugs, couplings);
- adapters;
- fasteners.
For sealing, a special gun is used, into which a balloon filled with silicone is inserted. Other tools are selected depending on the method of creating the outlet and piping.
Features of laying a sewer pipeline
The process of laying a pipe from a house to a septic tank or cesspool only looks so simple. In fact, it is quite complex. There are important rules for sewerage supply that must be taken into account during design and installation.
For example, most people install a sewer system under the foundation. This is relevant and can be done this way, but only in cases where the foundation is not too deep and the septic tank or pit is not too far from the house.
This applies if the hole is deep enough. The cesspool works effectively at depths that are below the sewer pipe. When drain levels rise, sewage can fill the drain pipe and cause a blockage.
Deeply located sewers can significantly reduce the risk of freezing. Snow in winter is also insulation. If you combine snow with a half-meter layer of soil, this will reliably protect the system from freezing.
If the foundation is deep, then it is not very rational, and sometimes even impossible, to lay a sewer underneath it. Here it is better to leave holes for the pipes even at the stage of pouring the base.
If for some reason it is not possible to use a cesspool, then the hole in the base of the house should be made as close to the edge of the ground as possible. To eliminate the risk of freezing, insulating materials can be used.
Selection of local sewerage
The easiest to make will be a simple cesspool. It is possible with both a filter and a sealed bottom. Everything will depend on exactly what level the groundwater rises to. It is manufactured:
- from cement rings,
- the method of lining the recessed walls using bricks,
- pouring concrete.
In other cases, perhaps a huge plastic container. Its disadvantage is the need for constant cleaning, which can cost a lot of money.
The next option is perhaps a homemade septic tank. Its essence is contained in the presence of several settling chambers. The wastewater, slowly moving through it, is cleaned and discharged into the ground or reservoir. Under such conditions, it will be necessary to prepare a couple of separate pits and line them according to the principle from the previous version. In order for the structure to be cleaned, much less cleaning is required.
The best way out of the situation is considered to be the installation of mini-sewage treatment plants. Despite the fact that they are much more expensive than previous options, with them you can forget about waste disposal. And the purified water can be used to water the plants in the garden.
Advice! The starting point for selecting the volume can be a figure of 0.15 m3, which is the minimum indicator of water consumed per day per person, i.e. for 4 people per day approximately 0.5 m3 will be consumed and discharged.
How to fill a trench
You probably think that there are no difficulties or peculiarities here? But no, it's not simple. Sewer trenches must be filled in according to special rules. These rules and regulations are regulated in SNIP.
Thus, it is possible to fill a trench only after all the necessary measurements have been completed and the readings fully correspond to the project.
You should fall asleep gradually. First, sand is poured on the side. This should be done in a small layer. Then you need to compact everything. Next, another layer is poured over the track.
They are finally filled with soil that remains from digging the ditch. To eliminate possible damage, check that there are no solid residues or frozen clods in the soil. This step must be performed in an even layer.
As you can see, the process of installing a wastewater treatment system is not that complicated. With the right amount of perseverance, the appropriate skills and tools, everything becomes possible. The main thing here is full compliance with the rules, design and safety precautions. And then everything will definitely work out.
To make a sewer system in your own home, you need to solve many related problems. The biggest difficulty is getting the pipeline out of the house. The reason is quite simple. The house always stands on a strong foundation.
It is poured to different depths, so there are several methods for removing the pipe:
- Laying a pipeline under the foundation;
- Installation through walls.
Sewer pipes are mainly laid under floors. This is due to technological necessity. Therefore, the installation of such a pipeline has to be done across the entire foundation area.
Local treatment plants (VOC or AC)
During normal operation, autonomous sewerage installations are capable of producing fairly clean water. It cannot be used as drinking water or for watering the garden, but as a technical one it is very possible. The basis of cleansing is the work of aerobic bacteria (they live in the presence of oxygen). The waste they process turns into sludge, settles to the bottom of a special tank, from where it is then pumped out. Pumping frequency is 1-4 times a year, depending on the intensity of use.
In general, an autonomous wastewater treatment plant is a good thing, but it has certain operational features that you must know before deciding what is better for the sewage system of a private house - a septic tank or an AC.
This is roughly what installations for an autonomous sewer system in a private house look like. This is AU Topas
At the outlet, the ACs have water purified by 90-95%. With this quality, it can be poured onto the ground, however, for this you must have laboratory tests on hand. Therefore, many still prefer to use an intermediate settling well from which the water is then used for technical purposes. The second option is to divert the wastewater to filter devices. This, of course, is reinsurance, but in emergency situations it saves.
What is used to clean wastewater?
Waste is processed by anaerobic bacteria (they live only in the presence of air). To provide them with air in the VOC, aerators are constantly running. In addition, during cleaning, the contents are pumped from one compartment to another using built-in pumps. So without electricity, these installations are inoperable.
Inside the AU is also divided into chambers (this is Topas)
If the electricity is turned off, bacteria can survive without air for no more than 4 hours, after which they die, and the wastewater ceases to be processed. To start the system, it needs to be populated with new bacteria, and reaching a working state is possible only after 2-3 weeks. All this time, the wastewater will flow, at best, semi-purified. This is where a sump well or filter unit comes in handy. It will improve the situation at least a little.
Features of operation
Since the volume of autonomous treatment plants is small, they need constant feeding: bacteria need nutrients for normal life. Therefore, this type of device is suitable for private homes of permanent residence - regular receipts are needed. In principle, preservation for a certain period is possible, but the procedure is not pleasant, and it will take a long time to return to the installation mode.
Bacteria that process waste in automatic wastewater treatment plants are also sensitive to active chemicals. Since the chamber volumes are smaller, the release of detergents or disinfectants can significantly damage the recycling process. Moreover, cleaning and antibiotic treatment can negatively affect.
Station after operation 3-6 months
VOCs are much smaller in size than septic tanks. They are calculated depending on daily water consumption, but there is such an indicator as salvo discharge. This is the amount of waste that an autonomous sewer installation can accept at one time. If this value is exceeded, untreated wastewater flows into other chambers, which significantly reduces the degree of purification. So, in this situation, you have to decide which plumbing fixtures and household appliances work at the same time. And if the bathtub is drained, no other devices should work for some time.
Briefly: advantages and disadvantages
Autonomous sewerage treatment plants are certainly convenient; with them, sewerage for a private home is implemented quickly - installation takes 10-12 hours. Pumping out excess sludge is necessary several times a year (1-4 times depending on the intensity of use, but maybe less or more often). The amount of sludge pumped out is very small (5-10 buckets depending on the model) and maintenance can be carried out independently, although the procedure is not the most pleasant. But they are doing this, since the visit of a specialist is not cheap at all.
This is what it looks like on the site
These home treatment plants have some disadvantages: the high cost of the equipment, dependence on the availability of electricity and the need to monitor the condition of the equipment.
How to make a hole in a concrete base
Any base, especially a slab base, is made of hard materials. During the drilling process, cracks may occur. Professionals often argue among themselves about how best to lay sewer holes in the foundation and have not come to a consensus.
For example, there were no technological spaces for the drain pipe in the base. How to do this yourself?
During the process of punching, various hard and rigid objects may be encountered along the way. Stones are easily destroyed with a jackhammer, reinforcement is easily drilled with a hammer drill. If there is no puncher, then punching should be done with a punch. Dust must be removed.
Where will the drain be?
And again we will touch on the problem of unpleasant odor. When you have to choose a location, remember that the drain should be located ten meters from the house. Not less. This is the most optimal distance. We do not recommend posting further, because... this will increase the price of the entire job.
Check out the three rules below to help you:
- The external sewer line is not installed at a right angle.
- There must be a significant distance from the water.
- The same applies to neighboring plots. Always remember the distance.
The drain itself is made of brick or concrete rings. Sometimes other building materials are used.
In some cases, setting up a cesspool simply won’t work. This depends on the volume of wastewater. If their level on private territory does not exceed one cubic meter per day, then you can forget about this point. But if it exceeds, then it is worth installing a sealed container to accumulate wastewater. This way you can avoid significant pollution of the soil and the environment as a whole.
Options for sewerage depending on the type of foundation
The complexity and method of laying sewer pipes largely depends on the type of foundation.
Sewerage and columnar base
The simplest method is to install sewer pipes through a columnar or pile-type foundation. This foundation allows for communications to be carried out both before the installation of pillars and after completion of the construction process.
When carrying out work, it is important to ensure that the trench is located at the optimal distance from the pillars. In this case, there will be no weakening of the soil around the supports, which can lead to a decrease in their bearing capacity
Sewerage in a columnar foundation
Sewerage through a strip foundation
It is better and easier to plan and lay sewer pipes before the process of pouring the concrete base strip. In this case, the method of laying communications depends on the type of strip foundation:
- With a shallow foundation, the pipes are laid below the freezing level of the soil, directly under the foundation. It is recommended to dig a trench before constructing the belt. Moreover, it is recommended to place the piece of pipe that will be located under the tape base in a sleeve, which is a piece of metal pipe.
- A deep strip foundation requires actions of a different nature. A hole is cut into the formwork into which an asbestos-cement or steel sleeve is inserted. It is fixed in the formwork and filled with concrete mortar. Communication pipes are subsequently inserted into this sleeve.
Sewerage in strip foundation
The second method is done as follows:
- A mark is made on the foundation where the sewer pipe should pass. The hole must be large enough to allow the pipe protection sleeve to be inserted.
- Using a hammer drill, a hole is made in the concrete.
- Occurring reinforcement bars are drilled out using a drill.
- A sleeve is inserted into the prepared channel and the space around it is sealed with cement mortar.
- A sewer pipe is passed through the protective sleeve, and the gap between them is filled with foam. It serves as a good heat insulator.
Sewerage in a slab base
The answer to the question “how to make a sewer system in a slab foundation” is simple. If the project provides for a base in the form of a monolithic slab, then sewerage must be carried out before pouring the concrete solution. The process looks like this:
- According to the layout of sewer pipes, trenches are dug.
- Select pipe sleeves.
Firstly, it will not allow the slab base to put pressure on the pipe, and also prevents damage to communications in the foundation slab when pouring concrete. Secondly, if an emergency occurs, for example, in the event of a rupture, you can pull out the damaged pipe and replace it with a new element. The absence of a sleeve does not allow such actions to be performed. In this regard, you should choose sleeves made of particularly durable material.
Place the pipes in protective sleeves.
Sewerage in the slab
The sewer system makes living in the house more comfortable
Therefore, special attention should be paid to the communication so as not to damage the foundation and ensure the flawless functioning of the sewerage system
When performing this type of work with your own hands, it is important to take into account all the features of laying sewerage in the foundation, depending on the type of foundation under the house
How to properly install thermal insulation?
In cold regions, it is recommended to supplement the sewer pipeline with thermal insulation. This technique allows you to extend the service life and eliminate the possibility of freezing at very low temperatures. Most often, polyurethane foam is used for this purpose. If you wrap the pipe in polyurethane foam and make a polyethylene shell on top, the pipe will not be afraid of frost.
In the photo - Using polyurethane foam protection for thermal protection of plastic or metal pipes.
If you lay pipes below the possible freezing point, the pipes will never freeze. In this case, additional protection is provided in case of extreme cold.
When performing thermal insulation, special attention is paid to joints and turning points. It is these areas that are quite weak in their exposure to cold.
So insulation of turning points is mandatory.
In the photo - Option for insulating turning points.
In Europe, a more technologically advanced method is used. An electric cable is placed next to the pipeline; if necessary, it acts as a heater for the pipe. For many residents of our country, this method is too expensive, because paying for energy is not the smallest expense item. Therefore, it is necessary to monitor the depth of pipe laying. In the central regions, it is better to choose a depth of 1 m. And in the northern regions, it is advisable to dig deeper trenches and carry out high-quality thermal insulation. To do this, you can use mineral wool or fiberglass. If the pipes are located above the ground, they are also insulated with similar materials. Since they can fill with water, waterproofing will be necessary for external use.
Preparing for sewer installation
Before the actual installation of sewer pipes, a number of preparatory measures are carried out:
Select pipe products and fittings. Sewage pipes can be made of plastic, metal-plastic, steel and galvanized. The cost of each type of product has significant differences, and pipe installation is also carried out differently. Polymer products are very popular because they are lightweight, durable and practical. They are practically not deformed or destroyed
When choosing sewer pipes, you should pay attention to the color of the material from which they are made. Pipes for indoor sewage systems are gray in color.
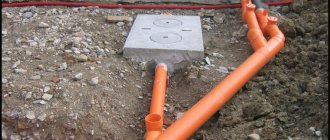
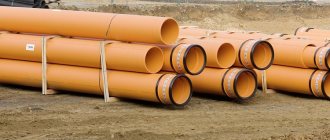
External sewerage, from the house to the septic tank or storage tank, is made of brown or red pipe products. Calculate the optimal value of the diametrical cross-section of the pipe. In this case, the maximum volume of fluid passed is taken into account. In most cases it is sufficient to use a pipe with a diameter of 32 mm. However, in large private houses, it is better to lay proper sewerage under the foundation using pipes with a diameter of 100 mm. Determine the optimal slope of the pipes being installed.
Sewer installation procedure
The drainage system of a private house consists of internal and external sewerage and a collection well. In cottages with more than two floors with their own bathrooms, the sewer network is additionally equipped with a drain pipe.
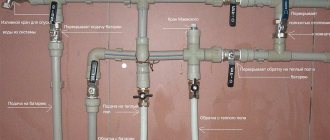
Water supply and sewerage systems are usually designed and installed simultaneously, since the same plumbing and household equipment are connected to them.
The procedure for laying the sewer network:
- Prepare a pipeline project taking into account all the devices connected to it, a slope of 2-3 cm per linear meter, and calculate the amount of building materials required.
- Purchase pipes, connecting elements and fittings.
- Cut the pipes into lengths in accordance with the project.
- Carry out internal wiring and bring the sewer pipe outside.
- Install the drain pipe.
- Lay external drainage.
- Build a collection well and connect a pipeline to it.
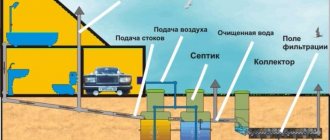
Scheme of the sewer system in a private house
Regardless of the complexity, any sewer system is usually represented by several parts:
- internal part - any communications in the room;
- external part – communications outside the house;
- septic tank
It’s great if the process of building a cottage or house and installing a sewer can be carried out simultaneously. To do this, you need to carefully consider the details and nuances. Such projects need to be created taking into account the supply, the location of bathrooms, and wells. It is also necessary to provide access to any pipe for cleaning.
Visual diagram of the site
Schemes must be developed to suit existing conditions. Here it is necessary to find the most convenient solutions that will allow the pipeline route to be brought to the base of the building as optimally as possible, while preventing destruction, soil subsidence, and deformation.
Installation of branch lines
When the installation of sewer risers is completed, you should proceed to the next stage - installation of drain lines that connect plumbing fixtures to the system (bathtub, toilet, sink, cistern). SNiP regulate the installation of outlet lines for internal sewerage made of cast iron or plastic to choose from.
Installation of toilet drain lines
The diameter of the pipes that are used to drain sewage from plumbing fixtures must completely match the diameter of the drain holes to avoid leaks.
When installing branch lines, it is allowed to cut the pipes with a hacksaw perpendicular to the axial section. In this case, it is imperative to treat the resulting hangnails. Fittings and pipe bends must not be cut. If necessary, pipe elements can be treated with soapy water or a specially designed lubricant.
The drainage lines of the internal sewerage must be located at a slope towards the wastewater outlet, for a natural mechanism for draining water.
Basic rules for installing a sewer system
Sewage system diagram
When designing and planning installation work, you need to take into account some basic factors:
- Type and location of the collection tank or septic tank.
- Will the system be used all year round?
- Number of consumers;
- Service – professional or independent.
For small houses, the most compact system with a simple circuit is preferable. Such projects are inexpensive and often more effective. When all water intake points are nearby, then you can use one riser.
Installation of this system should be carried out according to sanitary and technical rules. Often the septic tank should be located no closer than 5 m from a residential building. If there is a spacing deficiency, it can cause the foundation to crack. If the distance is too long, the pipeline will often become clogged. The septic tank should be located 30 m from the water source. It is prohibited to install the system next to a neighbor’s fence.
Prefabricated well
Last in the order of wastewater, but not in terms of its role in the operation of the sewerage system, is the collector or septic tank - a well into which sewage flows from the pipeline. The well is located so that it is at the lowest point of the drainage system.
Distance between the well and other objects located on the site and nearby:
| An object | Distance not less, m |
| non-residential outbuildings | 1 |
| residential buildings | 5-7 |
| water well | 50 |
| fence between plots | 2 |
| open waters | 15 |
Types of wells
For a private home, you can equip a well of one of three types:
- storage well or collector - a sealed container into which wastewater flows; when the collector is filled, the sewage is pumped out;
- a well with post-treatment, a septic tank - a container of several series-connected chambers in which wastewater gradually settles, the sediment is processed by bacteria, and partially purified water enters the last of the chambers and from there goes into the soil;
- deep treatment station - a well with filters and a bioreactor (a set of substances and bacteria), in which wastewater is purified from dangerous microorganisms and safe organic matter is separated, the purified water goes into the soil, and the separated organic matter can be used as fertilizer.
We recommend that you read: How do plastic air ducts work in ventilation systems?
The first two types of wells can be equipped with your own hands. Ready-made plastic containers or reinforced concrete rings are used for these purposes. Septic tanks are also built from brick and concrete.
It is difficult to equip a deep cleaning station with your own hands, as it requires special knowledge. It is easier to buy a well of this type and install it ready-made in a prepared pit.
Undermining under a concrete foundation
If the septic tank is located close to the house (within five meters), and the thickness of the foundation does not exceed one meter, the simplest option for installing a sewer system is to create a tunnel in the place where the pipeline intersects with the base of the house.
The trench is not very deep, which reduces the complexity of such an operation.
Before starting to lay under the foundation, marking work is carried out. The point where the pipe coincides with the future sewer passage is marked.
When performing such work, the thickness of the walls, which is the reference point, must be taken into account. If this rule is not followed, the trenches may not line up. Their connection will not occur in a specific place. We'll have to start all over again. This will cause additional financial costs.
When the trench is ready, a sewer pipe is laid in it, maintaining the required slope.
If the pipeline is shallow, the sewer passage must be insulated to prevent freezing of the channel and the formation of ice. It can cause blockage of the entire space.
Backfilling of the trench is carried out carefully, in small portions of soil. Thus, the removed pipe is not allowed to move, and its slope is not allowed to change
An additional pipe is passed directly under the foundation, the diameter of which is much larger than the sewer pipe. The length of this segment is made equal to the width of the foundation of the house. It plays the role of a sleeve in which the main pipeline is laid.
This device protects the sewer system in case of unexpected subsidence of the foundation. When repair work is carried out, it is much easier to replace the damaged area.
Doing the work yourself
To organize a sewer system in your home with your own hands, you need a diagram with which you can calculate what types of materials and plumbing fixtures will be needed and in what quantities. The drawing must be made to scale.
You also need to take into account factors such as:
- Soil type;
- Groundwater level;
- Volume of water use;
- Climatic features of the area.
Several types of laying sewer pipes are possible: under the floor, inside the walls, outside, but this is less aesthetically pleasing. Pipes laid in walls or under the floor are plastered at 2 cm or filled with cement. To reduce system noise, pipes are wound without air gaps.
Sewage system diagram
The design of the sewer system in a private house is not simple; it must take into account, in addition to depth and materials, location and requirements.
Namely:
- To install a septic tank or other type of wastewater treatment, the lowest place on the site is selected.
- The distance to a source of drinking water is at least 20 m.
- At least 5 m from the roadway.
- To an open reservoir - at least 30 m.
- To a residential building - at least 5 m.
Plastic pipes are well suited for sewer installation.
When drawing up a diagram, it is necessary to mark all water drain points and the riser. The riser should be easily accessible. It is usually installed in the toilet, because the toilet drain pipe has a diameter of 110 mm, like the riser.
The drain pipes from the bathtub and sink are usually combined into one line
It is important to remember that the toilet pipe should not have any inputs from other pipes. In addition, the diagram must include the location of the drain pipe
Self-installation
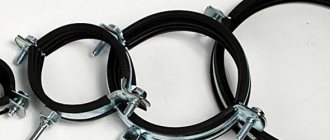
It is recommended to start installing it yourself in the house with the inside of the sewer system, as well as the ventilation for it. The sewer system must contain hatches in the pipeline for inspection and repair. The pipes are secured to the walls using clamps, hangers, etc. At joints it is necessary to use crosses, tees and large-diameter manifolds (about 100 mm). Adapters will help connect pipes of different diameters.
Ventilation is also important, as it performs two functions at once - air flow in rarefied areas and gas removal. Vacuum is most often formed when water is drained in the toilet and when the drain pump of the washing machine is operating. The influx of air prevents water from being captured in the siphon and forming a water seal, which makes a loud, unpleasant sound. The continuation of the riser on the roof is the vent pipe.
To install it correctly, you need to follow the rules:
- The diameter of the drain pipe is 110 mm to prevent the passage from being blocked by ice.
- The height of the chimney on the roof is higher than others, including stoves, fireplaces, etc.
- Location at a distance of 4 m from windows and balconies.
- The vent pipe must be separate from the general ventilation and have subsequent access to the attic.
When installing sewerage systems, safety regulations must be followed.
Through a sleeve with a check valve, the collector in the foundation exits to the external sewerage system. The diameter of the sleeve is 150-160 mm. If there is a check valve, reverse flow of wastewater is not possible if the pipeline is contaminated or the wastewater receiver is overfilled.
Laying depth
At what depth to lay the pipes depends on the deepening of the septic tank and the depth of soil freezing in the region. Moreover, pipes must be laid below this level.
They are laid according to the following scheme and rules:
- No turns from the house to the septic tank to prevent blockages.
- Pipes of the correct diameter.
- Identical pipe material in one pipeline.
- Compliance with the slope (approximately 0.03 m per 1 linear line).
If there is no slope or it is of insufficient degree, then you will need to install a sewage pump. Also, the external sewerage scheme should include additional wells, especially if there are turns in the pipeline from the house to the septic tank. They will help in maintaining the sewer system and eliminating any blockages or freezing that have occurred.
It is recommended to supplement the sewerage system, like the water supply system, with thermal insulation made of polyurethane foam and polyethylene, or lay an electrical cable.
Slab foundation and laying of communications
This type of foundation requires very precise calculations at the very beginning of the project.
After pouring such a foundation with errors, it will be impossible to lay the necessary communications. Therefore, a trench is dug first. All communications and sewer pipes are laid in it, dressed in special protective sleeves.
In a slab foundation, the sleeve plays a very important role. It protects the monolithic slab from high pressure and also facilitates the process of replacing a damaged section of pipe. If the sleeve is missing, it is simply impossible to replace the pipe in such a foundation. The pipe can also be damaged when the foundation is being poured.
Types of treatment plant.
Method one. Simplest. An elementary pit without a bottom. (If wastewater allows.) To improve filtration, it is better to use a single-chamber or two-chamber septic tank and a filter well. A more expensive option is a biofilter that supplies air.
- Single-chamber septic tank = cesspool + drainage layer.
Gravel is placed at the bottom of the well. Thanks to this, liquid particles are purified. Over time, deposits will form, then the layer should be replaced.
- Two-chamber septic tank = storage tank + filter well + overflow pipe.
This is the most popular option because it requires the least amount of cash outlay. In addition, this type is the most effective.
A two-chamber septic tank is popular for the home, as it does not require large financial costs for its equipment.
How to remove a pipe directly from the house
Having a finished house, the question immediately arises: how to remove the sewerage through the foundation? To remove the sewer pipeline from your own home, it is necessary to install a boundary system that connects the septic tank to the outgoing pipes.
The pipe outlet passes through the foundation. Moreover, the installation depth must exceed the freezing value of the soil. The work is performed in the following sequence.
Stage 1. A trench is dug in which the external and internal systems will be joined.
Stage 2. A hole is made in the foundation for the sewerage system. To work you will need:
- Hammer;
- Metal punch;
- Electric drill;
- Set of drills.
If it is not possible to make a hole with such tools, a special diamond installation is used.
The drilling process is always quite complicated, because you have to drill through a concrete foundation. If a reinforcing mesh was made, you will have to use a grinder. It is easy to handle the fittings. Sometimes you have to work for several days to get the hole you want.
First, the location where the pipeline will be installed is determined on the surface of the foundation. A circle is drawn in this place, and its diameter must exceed the size of the sewer pipe, together with the sleeve.
A hammer drill drills concrete to maximum depth. Any reinforcement bars encountered are cut off with a grinder.
To make a hole in a concrete foundation, builders use several methods:
- Diamond drilling. It is considered the best option. The foundation material does not receive damage during such work. This technology is one of the most expensive, even if you rent such a machine;
- Hammer. Percussion drilling is in progress. The negative side is considered to be chiselling, which causes the appearance of microcracks. Concrete begins to peel off from the reinforcing mesh;
- Impactless drilling. One of the safest methods, which requires a lot of time. A large number of smaller ones are drilled around the entire perimeter of the desired large hole. The concrete plug is knocked out with a sledgehammer, and the reinforcement is cut off with metal scissors.
Stage 3. First, a sleeve is placed in the made channel, then a pipeline is laid. The resulting cracks are closed with polyurethane foam. It also becomes a good heat insulator.
Selecting parts for the pipeline
First of all, we determine the material from which the elements are made.
Option #1 - cast iron pipes
Some time ago there was simply no alternative to such details. Their advantages include durability (such pipes last more than half a century), high strength and fire resistance. At the same time, cast iron is not resistant enough to impact point loads, from which it should be protected whenever possible. The disadvantages of the material include very heavy weight, high cost and difficult installation. In addition, the inner surface of such pipes is rough, which promotes the deposition of layers, which over time can completely block the path of sewage.
Option #2 - polypropylene products
The advantages of such elements are resistance to all types of corrosion and solutions of salts, alkalis and acids, durability, and high heat resistance. The latter quality allows the parts to easily withstand both low and high temperatures, which makes it possible to lay them in almost any conditions.
Another advantage is increased fire resistance. Polypropylene can withstand fire for quite a long time without releasing toxic substances. Attractive and affordable price. Some difficulty is associated with the installation of parts, which requires special equipment.
The most popular are plastic pipes for sewerage. They are lightweight, easy to install and have a smooth internal surface, which prevents the appearance of build-up on the internal walls of parts.
Option #3 - PVC parts
They can be made from non-plasticized or plasticized polyvinyl chloride. The characteristics of products made from these materials are similar. The advantages of PVC pipes include a low coefficient of thermal expansion, which allows the products not to expand or sag when heated, as well as resistance to UV radiation. In addition, a very large assortment of shaped elements is produced, which makes it possible to assemble a pipeline of any configuration.
Disadvantages of products include fragility at low temperatures, low resistance to fire and the release of toxic substances during combustion, as well as sensitivity to certain chemicals.
Rules for draining sewerage from a private house
To avoid damage to the communication line, the depth of the main sewer pipe at the exit from a private house must be at least 0.5 m from the blind area.
It is also necessary to take into account other requirements of SNIPs and SanPiNs:
- The distance from the sewer under the floor of the house to the storage tank is 5–10 m.
- It is not allowed to construct a cesspool at a distance of less than two meters from the neighboring plot and 30 meters from a well or borehole (for sandy soil, at least 50 meters).
- The slope is created so that the decrease for each meter of the pipeline is approximately 3 cm.
- The depth of the sewer line is below the freezing point of the ground. If this cannot be done, the pipe sections will have to be insulated or equipped with electrical heating.
The rules also take into account the installation of an inspection well with a hatch, which must be located at a distance of at least three meters from the building.
For gravity flow of sewage, the storage tank is located lower than the level of the building, or pumping equipment is installed.
Installation of a sewer line under the foundation of a house must be carried out according to certain rules. The pipes are assembled by inserting them into each other. Special rubber gaskets are installed in the sockets, the joints are thoroughly cleaned of dirt and coated with liquid soap or special lubricants.
Design stages
Sewage outlet diagram
The design of a sewerage system in a private house is created even before the construction of the pipeline begins. It should take into account the following points:
- is it possible to connect the sewerage system to the central communication complex;
- will live in the house permanently or temporarily;
- how many residents and potential guests are planned;
- How far are the rooms with sewer drains from each other?
If connection to a central system is not intended, choose what type of treatment facility will be installed: cesspool, septic tank, biotreatment station.
When building a new house, the sewer pipe from the house to the septic tank is designed simultaneously with the building plan. This allows all catchment points to be installed closer to each other, which facilitates the construction of a simple and efficient network with a single drain pipe.
For a large private cottage, you can make an exception and install a system of two risers, but the exits must be located at a distance of at least half a meter.
External network
Before you begin installing a common pipe across the site, you need to connect the inside of the sewer with the outside environment. To do this, install the so-called outlet element . Its installation is carried out from the place of wastewater intake to the riser.
Thus, the pipe is installed in the direction of wastewater flows from the toilet and plumbing. Piles and sockets are mounted strictly at an angle of 90 degrees.
When choosing the diameter of the pipes, take it into account so that it absolutely corresponds to the size of the riser. As for the length of the outlet elements, it cannot exceed 12 meters. You can also build a well for collecting sewage with your own hands. For this, brick, plastic, and reinforced concrete rings are used as the main material. Since the well will be installed in damp soil, to protect it the surface should be treated with a special primer.
When preparing a trench for further installation of an outlet drainage system, make sure that the soil is intact. And in order to completely prevent soil subsidence in the future, add sand to the trench with the pipe and compact it thoroughly. At all joints, a small excavation of the earth is made so that all pipes lie in a straight line without bending.
It should be noted: if the pipes lie at a depth of less than 70 cm, they must be insulated so that they do not freeze in winter.
Basic materials
The flow of clean water into the house and its further removal along with waste products must be of high quality, because the comfort and health of people depends on this. This means that materials for this communication system must be selected very carefully. The most important thing in this case is to choose normal pipes.
They can be made of metal, plastic, asbestos and other materials. Metal pipes are considered the most expensive. Firstly, the material is expensive, and secondly, a welding machine is required to install them. But this design is quite strong and reliable.
Asbestos is used exclusively for the sewerage system, since it is not suitable for water supply. These pipes have a very high level of sealing. As for plastic pipes, this is the best and cheapest option.
