Are you planning to change the heating appliances in your own home? For this, knowledge about the types of battery wiring, methods of connecting and placing them will be useful. Agree, because the correctness of the selected connection diagram for heating radiators in a particular house or room directly determines its effectiveness.
Correctly connecting the batteries is a very important task, because it can provide all rooms with a comfortable temperature at any time of the year. It’s good when fuel consumption is minimal and your home is warm on the coldest days.
We'll help you understand what you need to get your radiators running as efficiently as possible. In the article you will find a lot of useful information about ways to connect batteries and their implementation without the involvement of specialists. Diagrams and videos are provided that will help you clearly understand the essence of the issue.
Types of heating systems
The heating system in a private house can be:
- air;
- electrical;
- water.
Air system
This option operates without coolant. The air in the house is heated directly from heating devices - stoves or convectors. With this system, heating radiators are not used. Air heating is convenient for heating compact country houses. For large cottages it is used extremely rarely.
Electrical system
In such a system, heat is transferred through current conductors. Electric underfloor heating works on this principle. Heating using an electric system can be quite convenient. But its arrangement requires increased attention to safety rules, and during operation it is expensive for home owners.
Water system
A type of heating system in which heat is transferred through water (sometimes steam) as a coolant. The coolant flows from the heating device through pipes to the heating radiators. This option is considered the most convenient and practical. Most often, in country houses, heating is installed in this way.
Water heating of a private house Source heatsun.net
Equipment price
Approximate calculation of equipment for the heating system of a house with an area of 100 m2.
| Name | quantity | Cost (rubles) |
| Boiler | 1 | 40.000 |
| Chimney | 2 m | 3.000 |
| Shut-off and connecting valves | 1 | 2.000 |
| Boiler room piping equipment | 1 | 2.000 |
| Radiator 10 sections | 6 | 36.000 |
| Radiator mounting kit | 6 | 1.800 |
| Mounting bracket | 24 | 1.000 |
| Pipe (polypropylene) | 60 m | 10.000 |
| Fittings (set) | 1 | 5.000 |
| Total: | 100.800 |
The cost of installation work by a master will cost approximately 50,000 - 60,000 rubles.
Types of heating boilers
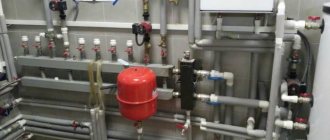
The central element of the heating system is the boiler - a heating device in which the coolant reaches the desired temperature. The heating connection diagram in a private house largely depends on what kind of boiler is used in it.
According to their purpose, boilers are divided into double-circuit and single-circuit. The first option is equipment designed for both heating and water heating. A single-circuit boiler heats only the heating medium. According to the installation method, they are divided into floor and wall.
Boilers also differ in the type of fuel with which the coolant is heated. There are boilers of the following types:
- gas;
- electrical;
- solid fuel;
- liquid fuel;
- combined.
To operate solid fuel boilers, coal, firewood, and less often peat and other types of solid combustible materials are used. Diesel or waste oils are used as liquid fuel for boilers of the corresponding type.
Solid fuel water boiler in a private house Source otoplenie-gid.ru
Most country cottages are heated by gas boilers. In non-gasified areas, heating with electricity is often used. Solid fuel and liquid fuel boilers are completely independent of communication networks. The first option is more attractive because it requires traditional firewood and coal, rather than dangerous flammable liquids.
The most prudent homeowners install combination boilers in their homes, designed to operate on different types of fuel. For example, you can install an electric boiler, supplemented with a combustion chamber for solid fuel, so that in case of damage to the electrical network, switch to wood heating.
Double-circuit boilers that provide homes with heat and warm water are predominantly gas devices. They are universal, as they eliminate the need for homeowners to purchase and install a separate water heating boiler.
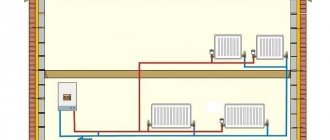
Scheme of double-circuit heating in a house Source pikucha.ru
See also: Catalog of companies that specialize in insulating country houses.
Wall marking
The installation of batteries in a wooden house (as in any other house) begins with marking the walls, according to which heating devices will be installed in the next stages of work. If a system with natural circulation of coolant is installed in the house, then the pipeline must have a constant slope of at least 6 degrees along the flow of water. Failure to comply with this rule will certainly lead to the appearance of air jams, and in the worst case, will not allow the system to function. For systems with forced circulation, this rule does not matter.
You need to mark the wall along which the brackets for the radiators will be installed. Radiators cannot be installed close to the wall - the distance between them should be about 5-10 cm. The radiator must be removed from the floor by at least 10 cm, and from the window sill by 8 cm. The markings are done level with a pencil. When marking, you need to take into account the width of the radiator sections so that the installed holders are strictly between the sections.
It is advisable to install foil material behind the radiators, which will act as a heat reflector. If there is a gap of at least 3 cm between this material and the radiator, it is possible to significantly increase the efficiency of the radiator and reduce heat losses.
When the marking is completed, holes of the required sizes are drilled in accordance with it. The dowels are driven in with a hammer, after which the brackets are secured using self-tapping screws. To make your work easier, you can purchase special battery holders equipped with threads that allow you to screw them directly into the dowel.
When selecting brackets, you need to take into account the type and characteristics of the radiators being installed so that the elements match each other. You also need to pay attention to the number of brackets used for one radiator (in most cases, three holders are enough, two of which are located at the top and one at the bottom).
Heating radiator design
The heating radiator consists of several heat exchange sections. The more sections, the correspondingly higher the battery power. There are models of radiators that can be “expanded” with new sections, if necessary, already during operation.
One collector passes through all sections at the top and one at the bottom. Each section has a vertical channel connecting the upper and lower manifold. This applies to all sections, including the outer ones. Therefore, the radiator has 4 outputs, but only two of them are used. One is connected to the coolant supply pipe, and the second is used to drain cooled water back into the boiler. Unused outputs are closed with plugs. This is how most radiators are designed.
Heating radiator diagram Source mr-build.ru
Useful tips
Many people believe that the radiator connection option is not that important when it comes to heat dissipation. After all, much will depend on the type of heat source chosen. For example, bimetallic heating radiators have higher heat transfer than cast iron ones. But imagine that cast iron devices are installed according to the diagonal principle of coolant movement, and bimetallic ones are installed along the bottom. In the first case, heat loss is 2%, and in the second - 12%. The difference in losses is as much as 10%. For a heating system, this is a fairly high indicator, which will affect not only the indoor temperature, but also the amount of fuel consumed
This is very important for private houses
Today, experts give recommendations regarding increasing the heat transfer of devices. To do this, you can install a reflective panel on the wall behind the radiator, for example, a regular piece of fiberboard trimmed with aluminum foil. But keep in mind that the distance from the wall to the radiator in this case should be at least 1.5 cm.
Types of pipe system
In the heating system diagram, the relative position of the coolant supply inlet and the return outlet is of fundamental importance. This depends on the direction of the coolant and the type of pipe system.
Single pipe system
This is a simplified option for arranging heating in a cottage. This option is quite economical, since it requires fewer pipes for wiring and is carried out with less labor for installation work. The system is a chain of radiators connected by one pipe. The coolant heated in the boiler enters each radiator in turn, flowing from one to another. That is, the “return” from one battery becomes the feed for the next, etc.
For single-pipe systems, you can now install special modules Radiplekt and Radiplekt Therm from Gibax, thanks to which you can maintain the temperature in the house using automatic or manual modes. Their installation is quite simple, and the minimum number of connections will provide an additional guarantee for the reliability of the connections.
The single-pipe scheme for connecting heating radiators in a private house has one significant drawback - with it, the radiators heat up unevenly. The first radiator will always be the hottest, and further from battery to battery the temperature will gradually decrease. Therefore, it is impossible to maintain the same temperature in all rooms with single-pipe heating.
Scheme of single-pipe heating of a two-story cottage Source utepleniedoma.com
For certain layout features, a single-pipe system may be quite suitable. So, if in a small house the chain of radiators starts from living rooms and ends with technical rooms, this option may be optimal. But in spacious cottages it is better to install two-pipe heating.
Two-pipe system
A more expensive option to install, but simple and easy to use. In this system, two pipe lines operate simultaneously. The first supplies hot water to each battery. That is, there is one pipe going into each radiator. The coolant, before entering the radiator, regardless of its location in the circuit, does not enter neighboring radiators, but goes directly. The second pipe collects the return from all radiators and delivers it to the heating manifold.
The advantages of the bottom type of wiring are that almost the same temperature is achieved at all heat exchange points. Such a system is better adjustable and ensures uniform heating of the entire building.
Scheme of two-pipe heating of a cottage Source ro.decorexpro.com
Beam (collector) system
The collector circuit is a variant of a two-pipe connection, but with more complex wiring. It is used in cases where it is necessary to hide pipes, for example under a floor covering. In this case, two collectors are installed - for the supply and for the return, and from each radiator one pipe extends into the first collector, and another one into the second.
Some connection schemes use two types of system. The entire house can be heated using the two-pipe principle, but for a separate area, such as a veranda or large living room, a combination of several radiators using the single-pipe principle is used. When developing a two-pipe scheme for connecting heating radiators in a private house, the main thing is not to get confused in the supply and return manifolds.
Radial (collector) heating circuit Source firmacz.ru
Single-pipe
The operating principle of a single-pipe heating system is circular circulation of liquid along one line. The heated coolant leaves the boiler and passes sequentially through each connected convector.
Each subsequent one receives water from the previous one; as it passes through, part of the heat is lost as a result of cooling. The further the battery is from the boiler, the lower its temperature. If one element fails, the operation of the entire circuit is disrupted.
To avoid this, it is recommended to install the wiring with a bypass path.
Installation is carried out horizontally or vertically ; in the second case, it is optimal to install the boiler at the lower level to ensure natural circulation of liquid.
Advantages of a single-pipe scheme: ease of installation, low cost of consumables, aesthetics (with horizontal wiring, the pipe can be hidden, for example, mounted under the floor).
Flaws:
- Interconnection of circuit elements - failure of one radiator leads to disruption of the entire system;
- High heat loss;
- Inability to control the heating of individual elements of the system;
- Limited heating area (up to 150 m2).
However, for a one-story house with a small area, it is more rational to choose this type of heating.
Diagonal top connection
Diagonal connection of radiators with top supply allows for the most efficient heating of rooms. Hot water is supplied to the upper entrance, inside it is distributed into sections, and, cooling, falls down, after which it is forced out into the lower entrance into the return manifold, located on the other side of the radiator.
Diagonal connection of radiators Source radiator-prado.ru
How to install correctly
Metal radiators, except cast iron, are quite lightweight. When fastening them, there are no problems with the load-bearing capacity of walls made of aerated concrete or brick. But in some cases, for example, frame houses or rooms with a large glass area, the equipment can be fixed to the floor.
To select fasteners, the battery load is taken into account. Cast iron can be hung on strong hooks or mounted with floor brackets, lightweight steel and aluminum can be hung on plate brackets or overhead corners. Installation diagram:
- for 8 sections - 2 on top and 1 on bottom;
- for every additional 5-6 sections - 1 more on top and 1 on the bottom.
Steel panel radiator diagram
With this arrangement of fasteners, the heating device will be stably and securely fixed to the wall. It is recommended to place the brackets closer to the outer sections.
Wall mount
Installation begins by marking the surface. First mark the points on the wall for attaching the lower brackets and screw them loose.
Then the center distance is set upward, the points are marked and the upper brackets are mounted.
The radiator is hung on the wall and checked for horizontalness. If necessary, make adjustments. After this, the brackets are finally fixed.
Two-way bottom connection
The supply is carried out into the lower inlet on one side, and the return comes out of the lower inlet on the other side of the battery. The efficiency in this case is lower than in the previous version. But this connection allows you to hide the pipes as much as possible.
Double-sided bottom connection of radiators Source hi.decorexpro.com
One way bottom top connection
Mainly used in multi-storey buildings. In cottages with 2 or 3 floors with single-pipe heating, it is also sometimes used. The difference between the lower and upper connections is that in the first case, hot water is supplied to the lower inlet and discharged under pressure through the upper inlet, and in the second case, the opposite happens. In both cases, the plant and coolant outlet are located on one side. It is worth noting that of all the existing options, the one-way bottom connection is the most ineffective.
Floor fixing
To securely install the radiator on a horizontal surface, floor brackets of various designs are used. These can be short legs with brackets, clamps, chain clamps, or supporting racks with movable brackets.
Floor mounting is carried out according to the following algorithm:
- First, insert a bracket or chain behind the lower radiator manifold and screw the nuts onto the ends.
- Screw the legs to the protruding parts of the rods.
- Place the radiator on the floor, firmly fix the legs using suitable fasteners.
- Put on decorative and protective caps.
Floor bracket
If the radiator is installed on stands, they are first mounted, then the equipment is hung on the movable brackets.
Radiator location
For high-quality heating of a cottage, you need not only to choose the right heating scheme, but also to correctly position the radiators in the rooms. Installation of heating batteries in a private house is carried out on the basis of calculations made by specialists. The number of radiators and sections for each radiator is determined taking into account various factors:
- volume of premises;
- level of heat loss of the building;
- radiator insert diagram;
- at what height the batteries will be installed, and much more.
What does it take for batteries to work efficiently?
An efficient heating system can save money on fuel costs. Therefore, when designing it, you should make informed decisions. After all, sometimes the advice of a neighbor in the country or a friend who recommends a system like his is not at all suitable.
It happens that there is no time to deal with these issues yourself. In this case, it is better to turn to professionals who have been working in this field for at least 5 years and have grateful reviews.
Image gallery
Photo from
Marking the wall and installing brackets
Position control before fastening
Connecting the radiator to the supply pipe
Connecting the radiator to the return pipe
When deciding to install new batteries or replace heating radiators yourself, you need to take into account that their efficiency is directly affected by the following indicators:
- size and thermal power of heating devices;
- their location in the room;
- connection method.
The choice of heating devices amazes the imagination of the inexperienced consumer. Among the offers are wall-mounted radiators made of various materials, floor and baseboard convectors. They all have different shapes, sizes, heat transfer levels, and connection types. These characteristics must be taken into account when installing heating devices into the system.
Among the models of heating devices on the market, it is better to choose based on the material and thermal power specified by the manufacturer
For each room, the number of radiators and their size will be different. It all depends on the area of the room, the level of insulation of the external walls of the building, the connection diagram, the thermal power indicated by the manufacturer in the product passport.
The location of the batteries is under the window, between windows located at a fairly long distance from each other, along a blank wall or in the corner of the room, in the hallway, pantry, bathroom, in the entrances of apartment buildings.
Depending on the location and method of installation of the heating device, there will be different heat losses. The worst option is a radiator completely covered with a screen
It is recommended to install a heat-reflecting screen between the wall and the heating device. You can make it yourself using one of the heat-reflecting materials - penofol, isospan or another foil analogue.
You should also adhere to the following basic rules for installing a battery under a window:
- all radiators in one room are located on the same level;
- convector fins in a vertical position;
- the center of the heating equipment coincides with the center of the window or is 2 cm to the right (to the left);
- the length of the battery is at least 75% of the length of the window itself;
- the distance to the window sill is at least 5 cm, to the floor - no less than 6 cm. The optimal distance is 10-12 cm.
The level of heat transfer from devices and heat loss depends on the correct connection of radiators to the heating system in the house.
By following the basic standards for the placement of radiators, you can maximally prevent the penetration of cold into the room through the window
It happens that the owner of a home is guided by the advice of a friend, but the result is not at all as expected. Everything is done like his, but the batteries don’t want to heat up.
This means that the selected connection diagram was not suitable specifically for this house, the area of the premises, the thermal power of the heating devices were not taken into account, or annoying mistakes were made during installation.
