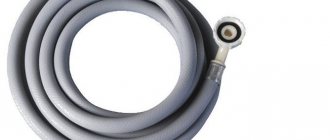
The last stage of connecting to the water supply is installing the washing machine inlet hose
Today we have to figure out how to connect a washing machine to the water supply. We will get acquainted with several solutions of varying complexity, differing in the ease of operation of the automatic machine and the fittings involved. In addition to water supply, methods of draining water from draining the machine into the sewer will be discussed. Let's get started!
Selecting a location
Connecting the washing machine to the sewer and placing it in the toilet, bathroom, kitchen, or less often in the hallway. In the last two options, installation and connection to the water supply is problematic, so it is better to place the equipment where it is convenient to supply water.
In some apartments where the kitchen and bathroom are combined, the washing machine drain is connected near the sink, under the countertop. This placement saves space, and the tabletop will protect the equipment from getting wet.
A common option for positioning the machine is to build it into a kitchen unit. It is practical and reliable if the body is compact.
If the location of the washing equipment is the bathroom, the owners prefer to place it on the side of the bathroom. Connecting the washing machine to the sewer is convenient here, since the drain pipes are nearby, there will be no problems with the wiring.
There are times when, besides the corridor, there is nowhere else to place the washing machine. Then the question arises, what is the easiest way to connect a washing machine to the water supply?
Since the main communications are in the bathroom, you will have to connect to the water supply using an additional structure made of plastic pipes running from the bathroom to the corridor along the baseboard or along the walls.
The coupling will act as a fastener. Installation methods for the washing machine are shown in the photo. With their help you can choose the one that suits you.
Can you see everyone?
Here is a brief description of all the connection diagrams that we are going to introduce the reader to:
| Image | Description |
| The water tap is installed between the cams (eccentrics) and the corners or water sockets under the faucet in the bathroom. For hot water, a chrome extension is mounted, the same length as the faucet. The advantage of the scheme is the convenient and accessible location of the tap, the disadvantage is that the mixer extends 8-10 cm from the wall. |
| The tap is screwed into the thread on the rigid cold water supply in front of the flexible hose, which is responsible for connecting the on-board faucet or toilet flush cistern. The union nut of the flexible connection is connected to the external thread of the faucet. Advantages: the tap solves the problem of sealing a flexible connection with an uneven edge of a steel thread; The connection node is in most cases hidden from the view of the visitor to the room and does not spoil its design. Disadvantage: inconvenient access to the tap |
| The connection is made with clamps to a smooth steel pipe at any convenient water supply point in the apartment or even directly to the riser to the valve at the entrance to the apartment. Advantage: arbitrary location of the tap, not tied to a threaded connection. Disadvantage: violation of the integrity of the water supply system. After turning off the washing machine, the clamps will remain on the pipes. |
Removing the shipping bolts
Before performing the main work, the transportation bolts are removed - fasteners that ensure the safe movement of washing equipment to its destination. Their main function is to protect the equipment tank from damage during transportation.
In standard models there are only four of them. They are located at the back at an equidistant distance from each other.
To remove the fasteners you will need a wrench for unscrewing 10, 14 mm nuts and pliers. Each bolt has a pin. He comes out first. Afterwards, pliers are used to remove the entire bolt using the tack-and-turn method. These steps will help you quickly remove the shipping bolts. The remaining holes are plugged with plastic plugs.
Partial protection against leaks
To protect against leaks, a special tray with a built-in float can also be used. When water enters the pan located under the washing unit, the float rises and closes the switch contacts. A signal is sent to the control unit, the washing process is interrupted, and the pump begins to pump out water.
Connecting to the water supply yourself
To properly connect the washing machine with your own hands, you first need to choose the most optimal location. The washing machine is connected through a regular outlet.
In some kitchens, the equipment is installed under the worktop, where it is quite problematic to reach nearby sockets.
Thus, it is more appropriate to place the equipment one and a half meters from the surface of the table SUP (connecting device with a fuse) with a switch, connect it to a ring circuit and mount the wiring using a rigid wire with a cross-sectional diameter of 2.5 mm from the connecting device to the socket located at the back of the machine.
Inlet hose with aquastop
Many manufacturers have turned even such a simple device as a water connection hose into a leak protection system. Devices with aquastop almost completely eliminate leaks as a result of damage to the internal hose.
The design of such elements consists of two shells located one inside the other. When the inner tube breaks, the outer shell retains water. In the part of the hose connected to the tap there is a mechanical valve that shuts off the water. It is powered by a special composition that expands when wet. Most models of products with hitchhiking have devices that signal when the valve is activated. A serious disadvantage of such equipment is the need for replacement after the valve in the protective block is activated. The outer wall is made quite strong and can withstand pressure up to 70 Bar (in a conventional pipeline this value does not exceed 10 Bar).
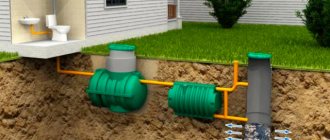
Connection to the sewer system using a siphon
You can connect the washing machine to the water supply in the bathroom through a siphon using the following algorithm:
- Install the siphon on the sink. If the device is not equipped with outlets for the washing machine, a plastic pipe should be connected to it.
- Insert a cut-in anti-siphon return valve into the drain hose. The device is a plastic structure with a connecting tip for a hose at each end.
- To ensure the drainage of water from a washing machine and other equipment, you need to use a siphon with two connections for the drain hose.
We carry out tests
Once again, carefully inspecting all the connections and connections, and just in case, checking the instructions, you can carry out a test run. At the same time, we consistently perform all the necessary operations and check that everything is happening as expected.
First, you need to fill the tank of the machine with water, noting the time it takes to fill it to the mark and checking it with the data specified in the passport. If it is discovered that any of the connections are leaking, the water must be drained and the leak repaired. If everything is fine, you can turn on the machine.
After five to seven minutes, the water is heated to the desired temperature. While the washing machine is operating, no extraneous sounds should be heard - after all, modern devices operate almost silently. If something grinds or knocks, this indicates a malfunction. Having determined that everything is in order, Next we will check how the squeezing device works, and then we will try the drain. At this point, the performance check of the washing assistant can be considered complete.
How to properly connect a washing machine to the sewer directly
Indeed, in some situations, the connection of the washing machine to the sewer does not occur through a siphon. The task is performed by a tee for connecting a washing machine, which allows you to insert the drain hose into the wide opening of the pipe.
The method is labor-intensive and is often used when washing equipment is located 1-2 meters from the sink siphon, if the machine is in the kitchen, or the sink, if in the bathroom.
There are still ways to connect a washing machine to the sewer directly.
The essence of the first is to replace the sewer tee going to the sink, the second is to perform a separate outlet.
Additional connection options
Separately, it is also possible to highlight non-standard methods of connecting a tap. They are used when conventional options are not possible or such options are more necessary.
No. 1. Installing a tap on a mixer
This type is often used in practice, as people like it because it is simple and accessible. But it cannot be considered too convenient, since this option has many negative sides.
This position of the tap has a bad effect on the mixer. The latter is subjected to very high loads, and this greatly reduces the service life of the mechanism. And the combination of two devices at once makes it difficult to use both the tap and the mixer.
According to experts, it is permissible to use such a solution only for a while, and you definitely need to think about how to properly connect the washing machine.
You need to be careful if you want to install a faucet on old faucets. But this operation will require a complex procedure that will cost a lot of time and money.
Expert opinion
I work in the household appliance repair industry. Extensive experience in restoring washing machines and dishwashers.
Ask a Question
But if it is necessary to use this particular connection option, it is good to immediately replace the old mixer with a new one.
Method No. 2. Installation on old pipes
Buildings from many years ago (especially Stalinist ones) are distinguished by a metal (most often cast iron) water supply network. In such cases, the ends of the pipes are damaged by rust, and this makes installation work difficult.
This installation complexity can be solved as follows:
- The ends of the pipes are processed with files. The ends of the elements are aligned, so the hose is laid next to the pipe.
- An extension cord is installed, at one end it is hidden by damaged ends. On the other edge, this part is mounted with a reinforced hose with a gasket.
You must be sure of the integrity of the assembly and protect the pipes from subsequent damage, for example, paint them with paint that protects against rust. But it’s better to change the pipes right away, and connecting other devices will not create difficulties.
Video
Method number 3. Double connection
There are washing machines, usually of Japanese and American production, with the ability to connect them directly to hot and cold water flow.
This type of SMA greatly saves electricity consumption, because there is no need to heat water, like the most common types of machines.
These washing machines are not very widely used due to the poor composition of hot water: it contains a lot of sediment, so there is a high risk of damage to parts and poor quality of washing clothes.
Where to route the drain hose
Connecting the washing machine drain hose through a siphon or directly to the general drain system is a reliable way to organize drainage. This way, water leakage is minimized if the hose is accidentally touched.
The option is aesthetically acceptable, since it becomes possible to hide communications elements behind a typewriter or other interior elements. The outlet of the washing machine hose into the sewer is connected to the sewer system.
Stage #7 - test activation
Having completed all the work described above, you need to check the correct installation by starting the washing machine one by one to operate in all modes.
The final stage of work is to check all systems of the washing machine. It must be carried out strictly according to the instructions and affect all sides of the connection.
To do this, you need to inspect all the assembled components, and then conduct a test run of the machine without laundry, during which you need to pay attention to the following options:
- the period of time (it should be short) during which the tank is filled;
- no leaks;
- correct functioning of the drain;
- uniform rotation of the drum;
- good spin;
- full heating of water, which occurs 5-7 minutes after the completion of water collection.
At all stages of operation of the unit there should be no extraneous sounds.
You can install and connect to communications yourself not only a washing machine. We suggest that you read the installation instructions for the dishwasher. The step-by-step guide we offer will provide effective assistance in carrying out the work yourself.
Electrical connection
How to connect a washing machine to electrical power correctly? To do this, use the following algorithm:
- The power of the washing machine is large, so it is advisable to install a separate switchboard line.
- Provide the outlet with grounding to eliminate static.
- Selecting a protective fuse. To do this, the power of the equipment (indicators from the technical characteristics) is divided into 220 V. The result obtained shows the amount of current consumed.
- Selection of RCD. Based on the current strength, it is selected by an order of magnitude higher than the nominal value of the machine. For a 16A machine, a 32 A RCD is suitable. Based on the current leakage, other characteristics are obtained. Devices connected to a separate line accept a value of 10 mA. Based on these characteristics, a 3.5 kW machine is compatible with a 16 A, 32 A, 10 mA machine.
- Socket. The socket for the machine is selected based on the markings on the back side. So, they find out the permissible voltage for which it is designed. If there are no markings, you have purchased a dangerous counterfeit and the socket should not be used.
Without electricity the car will not work
Well, we have supplied the water, organized the drainage, now all that remains is to supply the power supply. This will avoid many unpleasant (and possibly tragic) consequences. After all, high voltage coupled with water is a terrible force. Therefore, caution and caution again are the main tips when connecting current in wet rooms.
To keep your family safe, be sure to ground your distribution board. The grounding bus should be no thinner than three millimeters. We use only a three-wire outlet. By the way, if the washing machine is in the kitchen, it is quite possible to plug it into an outlet made for an electric stove. If you need an extension cord for connection, use only one that has grounding contacts.
The optimal solution would be to connect the machine with a separate wire leading from the meter. A circuit breaker is installed on it. It is better to invite an experienced electrician for this work. If a separate wire is not installed, use a portable RCD - residual current device.
And one more thing: never connect the ground to radiators, gas and water pipes. This is deadly!
The final stage of installation
When the water is supplied and the correct drainage has been carried out, make sure that the actions are correct. Connecting the washing machine yourself and providing the conditions for its operation is a labor-intensive task, but doable if all the nuances are followed. One of them is choosing the right position.
To prevent the washing machine from vibrating during washing and spinning, we connect it and install it vertically, adjusting the position of the body using the legs. For this purpose, a construction standard is used.
It is placed on the lid and the height of the legs is measured, with the level bubble located in the center. The measure is laid parallel to the front side, gradually making a shift towards the back wall. The process is repeated with the level positioned on the sides of the body.
Types and design of locking devices
Taps are now presented in a huge variety in the assortment of special plumbing stores. Let's take a closer look at the most commonly used options.
These are multi-turn mechanisms, they block the water flow due to the movement of the plate, and ball valves, which are turned on and off by changing the positions of a small ball located in the structure.
Connecting the SMA to the water supply
The choice of ball types provides certain advantages:
- reliable tightness;
- response speed, which allows you to quickly stop the water flow;
- a simple design that extends the service life of the crane.
In addition, this model of cutting device has a compact size, which allows it to be used under any conditions.
Ball valves are available in several varieties. Below are the main ones that are used in work related to connecting a washing unit at home.
Passage
Equipped with double-sided outlets, this makes it possible to block the watercourse by dividing the branch in two. These devices can be installed on a separate pipe, which is diverted from the common riser to any plumbing fixture, or they can be used for tapping.
Angle ball valve
Tee
Already from the name it is clear that such a mechanism has three holes. The first one is used to block the watercourse itself, the other two combine all the drainage outlets into one whole.
These components differ in appearance and design; they are usually used when cutting into water pipes. They are almost always connected with other parts, for example, with a mixer. This is impossible when using a conventional flow-through faucet, because this is how its design is designed.
three-way valve
Washing machine installation video
A common problem in operating a washing machine is that the appliance jumps and vibrates during the spin cycle. In addition to correct installation using a level, attention is paid to the floor covering where the machine stands.
If it is a tile, then it is better to place a rubber mat under it, which will prevent vibrations. Detailed connection of the washing machine with your own hands and correct placement in the video below.
- How to remove nail polish from clothes
- Liquid laundry detergent
Purpose of the crane
The function of the tap, which is attached to the washing machine to connect to the pipes, is very important. Using it, it is easy to shut off the water flow if unforeseen circumstances suddenly occur, for example, a breakdown of the SMA, which leads to leakage.
Expert opinion
I work in the household appliance repair industry. Extensive experience in restoring washing machines and dishwashers.
Ask a Question
The consequences of water hammer in water pipes are much more dangerous. This trouble is fraught with a violation of the integrity of the elastic hose of the machine, and then with a very significant flood, which will create inconvenience not only for the owners, but also for the neighbors.
To prevent this cataclysm, you need to connect the washing machine using a tap. This part should be in an easily accessible place, since it always needs to be reached quickly. In an extreme case, this will provide the opportunity to gain a few moments, and they can ultimately prevent flooding.
Replacing the inlet hose
If the water supply hose has visible damage and is leaking water, there is no need to repair it. These attempts will lead to nothing. You need to buy a new one and replace it. Before purchasing, be sure to check the length of the filler tube and the dimensions of the connection elements. It’s even better to take the old hose with you and the sales consultant will select an analogue. Before replacing, it is necessary to turn off the connection valve to reduce the pressure in the hose. To do this you need to wait for a few minutes. If this is not done, the forces applied to unscrewing can lead to damage to both the tap and the fitting. After dismantling the damaged element, a new one should be installed as described above.
Life time
Filling hoses from well-known manufacturers can serve properly for 5 years or more. During operation, it is necessary to ensure that there is no risk of mechanical damage and contact with aggressive acid- and alkali-containing substances on the surface. In addition, you should not save on the connection tap. The best option is to turn off the tap after using the washing machine until the next wash. This will relieve internal pressure and extend the life of not only the filling product, but also the solenoid valve responsible for shutting off the water.
If the water supply system does not have a connection tap installed, it can be integrated into the system using tees and adapters. If installing plumbing is not your thing, it is better to entrust such work to the experts. An experienced plumber will not only install the faucet, but will also be able to correctly connect both simple hoses and those equipped with leakage protection. The latter option is preferable, especially for residents of the upper floors of multi-story buildings.
How is a plumbing tee used?
The tee with the tap is made from such parts as: a body made of brass, which is plated with nickel, a rod, which is also made of brass, a ball valve, handles, rings and a clamping nut. The tee is used to connect household appliances to the water supply; it can also be used to install another water supply. It is easy to install the tee using a union nut using the union connection method.
Try to purchase locking equipment from trusted manufacturers
You can install the tap tee in any position convenient for you. A tee valve can also be used to move liquids with temperatures not lower than -10 and not higher than +85 degrees. The pressure in the pipes should not exceed 6 bar. The handle of this faucet rotates 90 degrees, and the weight is about 100 grams. This tee faucet comes with two outlets: three-quarter and half-inch. It can also have both external and internal threads. The manufacture of handles for such faucets is sprayed in black or red. The service life will be approximately four thousand cycles and repair of the crane is not possible. To avoid early failure of the tee valve, you must very carefully choose a high-quality tee valve in order not to become the buyer of a defective product or a counterfeit tee valve made of low-quality and cheap material.
You need to remember the advice of the experts to prevent buying a fake or defective product:
- The logo on the faucet must be clear;
- Letters on the product should not be smeared;
- It is necessary to buy strictly brass products and that the ball for stopping the water in them is also brass, since an analogue made of metal can lead to a flood and subsequently to quarreling with the neighbors below and, accordingly, to the payment of funds for repairs;
- It is imperative to ask about the quality of the product, this is necessary to ensure that the product is not made from recycled brass;
- If the funds for the purchase allow, then you need to choose something more expensive and of better quality;
- The locking ball must be perfectly smooth and reflective;
- If the water supply pressure in your home is not constant, but fluctuates, then you need to purchase a faucet with a stem inserted from the inside.
Based on these recommendations, you can purchase a high-quality faucet that will become a reliable protector from unforeseen situations.
Where can I install it?
There are several places in a residential area where it is most optimal to install a washing unit:
- Corridor . This installation solution is the most problematic, since there is no water supply or drainage. Everything will need to be tightened up, which takes time and effort. But there is still an interesting solution: install it against the wall of the bathroom and integrate it into existing furniture.
- Bathroom. (this could be a toilet, bathroom or a combined room). When installed in a toilet, there will be no problems with communication connections, but the room itself is very small. Therefore, the ideal option would be to install the unit next to the toilet. If the selected room is a combined room, then installation near a water supply is recommended. This is usually done next to the sink, and if the design of the unit allows, it can be installed directly under the sink. The second good option is to install it between the bathtub and the wall, but the size of the housing must be appropriate.
- Kitchen. The installation location can be determined in the built-in headset, and you can close the machine with the doors or leave it open. It is important that a water supply for washing is provided.
How to remove bolts for transport
After purchasing the washing machine and before installing it, you should:
- remove the packaging paper;
- Unscrew and remove the mounting bolts;
- Place plugs in place of the bolts.
This must be done, otherwise the machine will break down, especially since the warranty does not cover this action. This will be an installation error.
All you have to do is prepare a screwdriver and get to work. The device should not be turned on until the transport bolts have been removed, as this may lead to damage to the drum.
