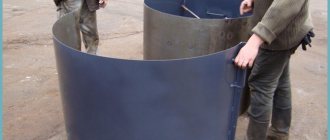
Installing an autonomous water supply system at a summer cottage is an important task that the home owner must solve. The well needs additional protection from adverse external influences. A well for a well provides protection.
Do-it-yourself well for a well.
Pit
From the point of view of the complexity of installation work, the simplest do-it-yourself well for a well is a pit, which has the following features:
- This is a depression dug around the head to accommodate the shutoff valves.
- Its depth is usually at least one and a half meters, and the walls need to be lined with brick or filled with concrete. In addition, if in the area where the property is located the soil freezes to a great depth, it is advisable to insulate the well body.
- The upper part of the pit can be covered, but this solution will not provide the required tightness.
Its main advantage is that it is possible to build a well for a well with your own hands, using improvised materials. But inside it there is a significant level of humidity, as a result of which it is impossible to install automatic control equipment there, as well as hydraulic accumulators and other devices.
Plumbing in a private house
To calculate how much plumbing will cost and purchase all the necessary materials, you need to know what type of water supply will be provided.
Types of water supply:
- A well is an excellent source of water, but only if the water suitable for cooking is located at a depth of up to 15 meters;
- A well is the dream of any resident of a country house, because the quality of this water is much better than that supplied centrally.
Let's talk about all types of water supply points in more detail.
Adapter
This type of well for a well, compared to a pit, refers to structures that are mounted directly on the casing of the source:
- It is usually made of plastic or steel. The second option is preferable, since it can provide better tightness.
- The housing is mounted so that the water supply pipe is located lower than the ground level.
The main advantage of installing an adapter is its affordable cost. But this option is only permissible if one casing is used for water intake. It is built under the condition that a well pump is installed on a pipe, since suspended systems are created differently. It is important to choose the right pump for the well so that you do not have to change the equipment later.
What is needed to supply water from a well?
When drilling individual wells using drilling equipment, a column of casing pipes is lowered into the mine, the material of which is polymers (unplasticized polyvinyl chloride UPVC, HDPE) or steel, sometimes plastic pipes are inserted inside metal ones at great depths. At this stage, the well arrangement diagram should be known, for example, if water is supplied to the water supply through an adapter, it is not recommended to attach it to the fragile plastic wall of the pipe; the column or its top should be made of metal.
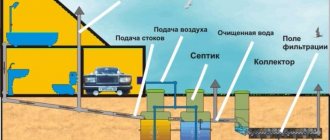
To understand how to install a water well after drilling, you should consider all the equipment and engineering structures that are needed to deliver water to the internal water supply of the house. To provide housing with well water you need:
Casing string . After passing the borehole channel, a column of pipes 6 m long is immersed into it, which are connected to each other by means of threads. It must have smooth, strong walls that can withstand external soil pressure, and a diameter suitable for immersion of the selected electric pump model.
Recently, individual drilling of Abyssinian wells by private individuals has become popular in cases where the water surface on the site is closer than 9 m from ground level. To do this, use a hydraulic drill to make a narrow hole in the ground and immerse a low-density polyethylene (HDPE) pipe with a homemade filter at the end inside, which is connected to a surface electric pump. The depth of homemade Abyssinians reaches 30 m; the casing and supply pipeline are simultaneously a HDPE pipe section lowered into the channel.
Devices for immersing the pump and suction hose into the source . When lowering a deep-well pump, always use a head or cover with an adapter connection, to which the unit is tied and the supply pipe is attached. When attaching the adapter, the water supply pipeline is passed through its side fitting, fixed to the wall of the column.
Piping diagram for a well with a deep-well pump
Electric pump . There are two groups of electric pumps for supplying water: submersible and surface, the first are lowered into the well to a great depth, so that they plunge without interference, a casing of a suitable diameter from factory well pipes is required. Surface electric pumps for water intake from depths of up to 9 m use a narrow hose or a water pipe of small cross-section, so a wide column is not required for their operation - this is the determining factor when using them to suck water from Abyssinians.
Automation. To turn off the pump after filling the water supply system, a pressure switch is used, a pressure gauge is installed to configure and control it, an expansion tank is used to store water reserves and maintain pressure in the line. The listed devices are the main components of a household water supply main with an electric pump; when using surface types, all of the listed elements and the pump are often assembled into a single unit - a pumping station.
Caisson
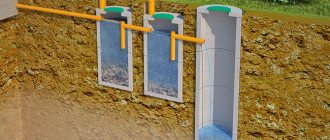
It is believed that the most advanced type of piping is a caisson well for a well:
- The head, automation, shut-off valves and water pipes are placed inside the sealed container.
- The design of the tank is similar to a pit, but it is distinguished by good water resistance, and, in addition, it has significant heat-saving parameters.
- Caisson wells are sold in specialized shopping centers, but you can also install them yourself. If you choose the second option, then you will be able to save a significant amount, since metal and plastic containers are quite expensive.
Conditions for the construction of an Abyssinian well
To organize an Abyssinian well on a country estate, it is not enough to prepare basic equipment and study the specifics of drilling. Before doing this, you need to make sure that the geological conditions on your site meet the required ones.
Soil layers can differ in a variety of physical and mechanical properties, including:
- Density.
- Structure.
- Hardness.
- And other characteristics.
Different equipment can be used to get through the layer of sandstone and sand. Rocks are processed using a core pipe with a carbide crown. Water-bearing sand is opened using a bailer and impact-rope technology.
Taking into account various physical and mechanical characteristics and the degree of drillability, the following groups of rocks are distinguished:
- Hard (rocky). During mechanical impact they quickly split and crush. This group includes calcareous deposits, marls, dolomites and sandstones.
- Lamellar. They can be cut using knives and simple drilling tools. The category of lamellar soils includes sandy loams, loams and clays.
- Bulk. They are not able to keep their shape, because... unconnected particles are concentrated in their structure. Upon contact with water, individual varieties begin to dissolve.
Beginning drillers can only handle the last two groups. To crush hard boards, a simple needle-hole tip is not enough. It is better to shift production to another location.
Other restrictions when organizing mining include the height of the water carrier. Liquid can only be extracted from thin-bore layers using a surface pump for an Abyssinian well. Such units are capable of extracting water from depths of up to 8 m.
Even if the technical characteristics of the model indicate a value of 10 m, it is worth taking into account the basic pressure loss in the column and the need to transport water along horizontal paths.
When faced with unsuitable surface water levels, the intake needle can be equipped with a pit. Before immersing the structure, a pit with a depth of 1 m is constructed. Then the driving of the column and installation of the pump in the pit begins.
Technology for constructing a caisson well
When constructing a well for a well of this type, various materials and products are used:
- Plastic cases
. They are the most affordable of all commercially available devices. They are characterized by high strength and tightness. At the same time, plastic walls conduct heat well; for this reason, caissons made of polyvinyl chloride should definitely be thermally insulated. In order to prevent deformation of this type of container, experts advise installing it on a concrete pad with a minimum thickness of 5 centimeters. - Metal cases
. They are made of steel with an anti-corrosion coating; the products have a high degree of mechanical strength and good water resistance. They, like plastic ones, need insulation. The main disadvantage is the high price. In order to ensure the tightness of all joints, it is necessary to weld the lower part of the caisson to the casing pipe, if possible. To prevent moisture from getting onto the walls of the well, you can make concrete blind areas along the perimeter.
Construction of a water well in a private house
How much does it cost to drill your own well?
Drilling wells will require some specialized tools to penetrate the soil to impressive depths. An artesian well is drilled exclusively by professionals who use drilling rigs. To estimate the cost of drilling a well, you need to know the depth of the required aquifers. The deeper the suitable water lies, the more expensive it is to drill wells.
Drilling equipment and tools
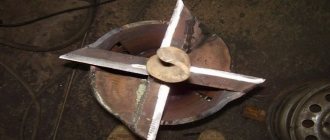
For a sand well, simpler equipment is suitable, designed to drill to shallow depths. A tripod with a winch can cope with this task - the winch raises and lowers the drilling device. The drilling device consists of a core pipe, a drill string, rods and a drill. As a rule, the drill is an ordinary coil. This entire design can be done with your own hands, having a drawing.
As you can see, you can’t get by with a shovel here, although it will certainly come in handy.
Well drilling
The drilling process can be described by the following steps:
- First, a hole of 1.5 x 1.5 m must be dug , the walls of which are lined with boards or pieces of plywood so that they do not crumble. Or you can drill 1 m deep, with a trunk diameter of about 15–20 cm. In this way, the pipe can take a stable vertical position;
- Now you need to install a tripod over this recess . The material for the tripod can be either metal or wood, but the main thing is stability. The place where the logs are connected is where the winch is attached. Rods of 1.5, 3 or 4 meters, fastened into one pipe with threads and fixed with clamps, make up the drill string;
- To know the diameter of the core pipe and the future well, you need to know the size of the pump. It must fit freely into the pipe, so the diameter of the pump and the internal diameter of the pipe must have a gap of at least 5 mm;
- Drilling a well is carried out by lowering and raising a drilling device. The bar must rotate and at the same time it is struck with a chisel. To do this, two people are enough - the first turns it with a gas wrench, the second hits the bar, breaking through the rock. To simplify this procedure, use a winch;
- You need to put special marks on the rod to understand when you need to pull the rod to clean the drill. This needs to be done every half meter.
- Different rocks are drilled using various techniques:
- Sand - with a spoon;
- Clay - with a coil or a spoon;
- Quicksand sands - by impact using a bailer;
- The gravel is pierced by alternating a chisel and a bailer;
- Hard rocks are loosened with a chisel and then lifted up.
How do you know how much time is left to drill? If you begin to find that the rock being lifted becomes wet, then the depth of the aquifer has been reached. The second indicator that the desired formation has been reached is easier drilling. The aquifer must be completely passed through and rest against the next solid rock - the aquifer layer.
Well filter
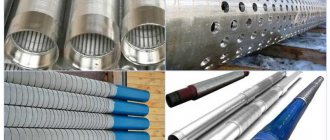
In order for the well to function, a special filter column must be lowered into it. It consists of a sump, filter and pipe. The filter can be purchased ready-made - an anti-sand filter for a submersible pump. But you can build it yourself using casing pipe, perforation and v-shaped wire.
The space between the pipe and the ground must be filled with crushed stone 5 mm in size or coarse sand. The level of this embankment must necessarily cover the filter . You also need to rinse the filter, for which the pipe is sealed from above and water is pumped into it with a pump. Next, we gel the well using a special nozzle or auger pump until the water becomes clean, free of sand and other unwanted particles.
Water supply from a well requires the use of a deep-well pump. It is immersed directly into the water supply pipe using a steel safety rope. A water pipe or hose with a diameter of 25 to 50 mm is connected to the pump. The larger the volume of water consumed, the larger the pipe diameter needed. Be sure to use a waterproof cable for the pump.
Additional well improvement work
In addition to drilling wells, you need to complete a whole list of works that you can do yourself:
- After immersion in the pump pipe, you need to install an automation unit that protects the unit from voltage surges and overheating;
- For wells, it is advisable to equip a hydropneumatic tank with a capacity of approximately 100 liters (or more). It will avoid water hammer and also stabilize the pressure. Thanks to its operation, the number of times the pump is turned on/off will be reduced;
- It is also necessary to organize the construction of a caisson in order to protect the equipment from bad weather and other natural phenomena. The caisson is installed below the ground level at which it freezes. Pipes are routed from the caisson directly into the house. The caisson itself must be insulated with thermal insulation material, for example, polyurethane foam, including its wall and lid.
Well maintenance
Any well must be promptly cleaned when such phenomena as a decrease in pressure, jerks in water supply and the presence of air, water with impurities, etc. are detected. If you ignore the problems that have arisen, you will soon need to drill a new well point.
A well that needs cleaning must be blown out with a compressor to remove sand and silt particles. There are other methods, such as acid and even short circuiting, but it is not recommended to do such things yourself, but leave them to professionals.
Internal water supply at home
Internal piping in the house is quite accessible for independent implementation. The pipes used for this are ½ and ¾ Ø . Pipe connections are easy to make with a special soldering machine and plastic pipe scissors. The main thing is to plan the pipe layout in advance in order to calculate the number of fittings needed.
Plumbing in a private home is one of the primary tasks. The simplest way to supply water to a house is a well, but the quality of the water from it is not the best. Having your own well is a troublesome matter at the construction stage - you need workers, equipment and certain skills. Maintenance of this source will also be your concern. However, if you compare the quality of water from a well with that supplied centrally, then such costs are completely justified. Moreover, you will not have to pay for each cubic meter of water consumed.
Pit preparation
At the initial stage, before making a caisson-type concrete well for a well, they begin to dig a pit:
- To avoid damage to the head, use only hand tools.
- The minimum size of the structure can be 100x100x100 centimeters, and the maximum - 150x150 centimeters with a depth of 180 - 200 centimeters.
- The parameters of the pit should be larger, since the volume will be partially narrowed due to the thickness of the walls, floor bedding and thermal insulation laid around the perimeter.
- A 20-centimeter layer of gravel-sand mixture is poured onto the bottom of the excavated pit. It is moistened and compacted until it begins to decrease in size.
Then they begin to build the walls.
Construction of a water well in a private house
There are two types of wells:
- Sand well;
- Artesian well.
“+” and “-” sand well
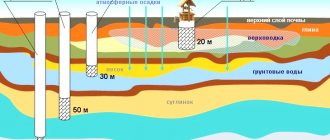
This name comes from the fact that the well is deepened to a sandy horizon, after which comes loam, which perfectly filters groundwater.
Advantages of a sand well:
- Small depth - sometimes such an aquifer can lie only 15 meters, the maximum occurrence of this layer is 50 meters;
- The ability to do all the work yourself, especially since manual drilling gives you a greater chance of getting into suitable water.
Disadvantages of a sand well
- Short lifespan of water - up to 8 years;
“+” and “-” artesian well
Artesian waters are found in limestone rocks, the depth of which can reach 135 meters. This is the highest quality water that everyone would like to have in their homes.
Advantages of an artesian well:
- Best quality and unlimited supplies;
- Such water does not need to be pumped out; it comes up on its own, as it is under pressure;
- Well operation up to 50 years.
Disadvantages of an artesian well:
- This is an expensive job and you cannot do it yourself; you need to contact specialists;
- Its use requires registration, since the limestone layer is state property.
As you can see, the question of choosing the type of water supply for a private water supply is far from simple. It all depends on how much you expect to spend on this event and what quality of water suits you.
Creating well walls for a well
The instructions describing the construction of the walls of a caisson well with a well provide for the step-by-step execution of the work:
- All surfaces are covered with dense polyethylene. Thanks to this, a waterproofing contour is created that provides protection from moisture to the equipment located in the caisson.
- Having stepped back 5 centimeters from the grid, they begin to install the reinforcement strapping, which is a lattice whose cell dimensions are about 20 - 25 centimeters.
- For reinforcement, use a rod with a thickness of at least 5 millimeters.
- Then the formwork is installed using beams and boards. Since the walls should be quite thick, it is necessary to provide space for spacers that will protect the structure being created from being squeezed out by the concrete mass.
- To prevent the solution from leaking, the inside of the formwork is lined with polyethylene, attaching it to the beams and boards using a construction stapler.
- The concrete mixture is poured and processed using a vibration compactor, allowed to dry completely, which takes almost 4 weeks. On the 10th day it is allowed to dismantle the board panels.
- When the walls are completely dry, holes are made in them with a hammer drill in the places where pipes are planned to be installed. To prevent damage, they are placed in special metal sleeves when laying. The gap between the edge of the hole in the walls and the sleeve is sealed with self-expanding foam.
An alternative to concrete walls is brickwork or reinforced concrete rings. But in the second case, increased attention must be paid to sealing the seams.
Construction of a deck in a private house
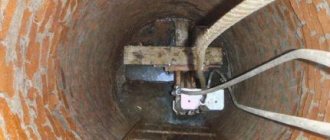
Before digging a well, take a water sample from a nearby well. If it is suitable, then you can start digging the well shaft, which you can do yourself. Then you need to pour the concrete rings, for which you can use the services of specialists or do it yourself.
"+" and "-" wells
If you have not yet decided between a well and another type of water supply, then first study the pros and cons.
Benefits of the well:
- Cheap cost of work compared to wells;
- The ability to do everything yourself;
- The well can be used without a pump (when the electricity is turned off) - just scoop up the water with a bucket;
- Long service life - up to 50 years.
Disadvantages of the well:
- Groundwater may enter the well, making the water unusable;
Well arrangement
To use well water, you need to install a pump that will pump water from the well into the water supply. To do this, you need to make a trench to a depth of about half a meter or a little deeper. To prevent freezing of the trench, you need to pour sand on its bottom - this will be a kind of cushion for the pipe. The pump itself can be installed near a well or, for example, in the basement of a house.
It is best to take a pipe for pumping out water with a diameter of 32 cm, but it all depends on the distance to the house - the greater the distance, the thicker the pipe should be. You must first make a hole in the foundation to lay the pipe into the house. It is necessary to insulate this place after installation so that the water supply does not freeze at sub-zero temperatures.
Important! According to the installation rules, the pipe must be laid at a certain angle of inclination. This prevents extremely unwanted stagnation of water. The final stage is distributing water to points.
Floor installation
When constructing a well above a well, a particularly important point is the correct installation of the ceiling, for which:
- A monolithic reinforced belt is made on the walls in the upper part, into which a reinforcing mesh is laid, and concrete mortar is poured into the formwork approximately 15 centimeters high.
- Boards with a thickness of 30 millimeters or more are placed on the contour, maintaining a minimum gap, while leaving space for the hatch.
- To ensure waterproofing, the boards are covered with polyethylene, secured with metal brackets.
- Formwork is built along the edge of the hatch and along the perimeter of the well and concrete is poured there, the mixture is leveled and left to dry. To ensure that the surface slowly loses moisture and the cement becomes as strong as possible, the well cover is covered with polyethylene. From time to time it is raised to moisten the concrete floor.
After the filling has dried, a hatch is installed in the hole. A steel corner is attached along its perimeter, and the lid is hung on hinges. To insulate it from the inside, polystyrene foam or polystyrene foam is used.
Pros and cons of the Abyssinian well
When starting to construct a needle well, it is important to consider all its pros and cons.
Benefits of a well
The positive properties of wells include:
- Easy organization with your own hands.
- Versatility and practicality.
- Small dimensions.
- Ease of repair and scheduled maintenance.
- Mobility.
It will take no more than 1 day to organize a hydraulic structure. Equipment preparation and the drilling process do not require outside assistance. At the same time, if during driving you encounter cobblestones or other hard rock, you can quickly dismantle the device and move it to a more favorable area.
Disadvantages of the well
The key disadvantages of the equipment are:
- Low flow rate compared to a traditional well.
- Loss of productivity during the dry season.
- Possibility of collision with obstacles.
If you need to connect a house in which a large family lives to the water supply, the needle well option is not suitable. However, such a well will become a good auxiliary system, supplying a sufficient amount of liquid for technical needs.
The nuances of installing factory structures
If you purchase a steel or plastic well made in a factory, the task of making a well for a well becomes much easier.
In this case, it is important to correctly install the purchased structure so that it provides reliable protection for the equipment that services the well:
- First, a pit is prepared, the dimensions of which must exceed the dimensions of the body by at least 30 centimeters.
- A gravel-sand “pillow” is made at the bottom of the pit. When the structure is plastic, a concrete screed with a thickness of at least 5 centimeters is poured over the embankment.
- A hole is made in the bottom of the well for installation of the casing pipe.
- The body is placed in a pit so that its neck is located 10 centimeters above the ground level. This will protect the well from surface runoff.
- The place where the casing pipe is connected to the well is sealed, for which you can use special sleeves welded to the bottom of the well.
- To level the caisson when installing it in a pit, beams are used. It is sprinkled with clay along the perimeter and compacted, creating effective waterproofing. To reduce heat loss, you can sprinkle it with expanded clay.
- Pipes and cables located in casings are placed in the technological openings of the walls and all connections are sealed.
- The pit is covered with soil.
- Install the well cover.
If desired, a narrow concrete belt is poured around the perimeter, which will protect the walls from moisture penetration and thereby significantly extend the life of the structure.
Features and stages of arrangement
Features of well construction will be discussed using caissons as an example, since they are used most often.
Plastic type
Sectional view of a plastic caisson.
It is a cylindrical plastic container. Square models are less common. This type of caissons is produced in industrial conditions.
Advantages include:
- good performance characteristics, including sealing capabilities;
- light weight;
- no corrosion, resistance to chemicals;
- long service life - more than 50 years;
- ease of transportation and installation.
Such systems are not without their drawbacks, including insufficient structural rigidity and the risk of floating . But they can be avoided if you fill the installed chamber along the contour with concrete mortar.
Installation algorithm:
- A pit of appropriate size is dug around the wellhead (its diameter must exceed the cross-section of the caisson, and its depth must exceed the height of the plastic tank).
- A concrete slab is placed at the bottom of the pit (you can fill the screed yourself).
- Afterwards, the container is installed, connected to the concrete base, and the space around is filled with a mixture of sand and cement.
Concrete type
There are 2 types of such devices. The first are monolithic concrete structures. For them, the best option is a rectangular or square shape. This reduces the cost of constructing formwork.
As with any other type of well, it is important to correctly calculate the size of the hole. It should be 30-40 cm deeper than the height of the concrete chamber. A reserve is also made for the thickness of the walls of the structure.
Concrete type caisson.
Typically, when constructing a pit, a cushion of crushed stone is placed at the bottom, which acts as a filter. But sometimes the bottom is simply concreted. When calculating the structure, you need to take into account the thickness of the layer of crushed stone or concrete. The well must be constructed so that its lid is at ground level.
A drainage layer of crushed stone is installed where the bottom is dry. If hydrological survey data show that there is a high level of humidity at the bottom, then you need to take care of the tightness of the structure and concrete this area so that groundwater does not flood the caisson.
The design requires a frame. It will require a steel plaster mesh with large cells. It helps to secure the reinforcement that is located inside the concrete layer.
The second type is a well made of concrete rings. It has the benefits of strength and durability, but unlike concrete construction, it requires assistance. Reinforced concrete rings are lifted and lowered using special equipment.
Work begins with the construction of a pit. Its parameters are calculated as indicated above. The height of the bottom depends on its type - on whether there will be a drainage layer or a sealed concrete screed.
Before installation, the concrete rings themselves must be treated with a waterproofing compound, for example, bitumen mastic. If this step is skipped, the material will quickly collapse. Before lowering into the pit, the bitumen mastic must dry.
The rings are lowered one at a time, the joints are treated with a special fastening compound. Some people believe that it is necessary to use polyurethane foam, since it is plastic and maintains its integrity even when the ground moves. A ceiling is laid on top of the last of the rings, equipped with a hatch necessary for repair and maintenance work.
Metal type
A metal well can be of any shape. It all depends on the available material.
For example, a quadrangular chamber can be made from rolled metal sheets 3-5 mm thick. For a round container, pieces of metal pipe are suitable (for the body a diameter of 1250 mm is required, and for the neck - 600 mm). When choosing a form, you should remember that the fewer seams it has, the more durable and reliable the well can be considered.
Work on installing the caisson begins with calculating the dimensions of the pit.
Installed well made of steel sheet.
Algorithm for subsequent actions:
- Dig a hole corresponding to the found parameters, the bottom is leveled.
- Lower the casing pipe, cut it at a distance of 40-50 cm from the equipped bottom and cover it with plastic - this is a temporary solution. Then a part of the desired shape for the bottom is made and a hole is made in it for the casing liner. The part is mounted using double-sided welding.
- If the well has a rectangular shape, then a quadrangular chamber is made from rolled stock and holes are cut out in its walls through which pipes or even cables will pass.
- The side walls are connected to the bottom. Then you need to install the lid of the container. All welds when constructing such a structure must be double-sided. Only then will the caisson be airtight.
- Install a special case for the ventilation system.
To provide the structure with anti-corrosion resistance, it is treated with a waterproofing compound. For these purposes, primer, paint, bitumen mastic, and other similar materials are used. Before applying such compounds, the surface is thoroughly cleaned of contaminants.
Independent hydrogeological surveys
When starting to build a well with your own hands, find out the approximate depth. This information will allow you to calculate and purchase the required amount of materials. They ask their neighbors what the water level is, whether it is technical or drinking water, or how stable the mirror is. They find out what layers were passed through during the development of the mine, and whether large stones were encountered.
Surveys give approximate values, provided that the terrain is flat and there is little hilliness. The aquifers in this case are almost horizontal and located at the same depth. The difference in trunk length is caused only by the height of the area where the wells are located.
The survey method does not give results if rocky and semi-rocky rocks lie high. Aquifer veins are located sporadically in them. It is also ineffective in very hilly terrain.
Drilling will help you find out the location of aquifers.
Only drilling can give an accurate picture. You can do it yourself, which is difficult, or use the services of a hydrological organization. If she conducted research in this area, then the necessary data is available.
It is important not only to determine the depth of the mine, but also to understand whether it is possible to extract water in this place. Taking into account the features of the landscape gives good results.
No or little water:
- on highly elevated areas;
- near wells;
- on the steep bank of the river;
- in areas with dense thickets of acacia or pine.
In some areas the water is of low quality, with high levels of iron and manganese. These include low banks of reservoirs and dried swamps.
When to dig a well in the country
The best time for excerpts is late summer-early autumn. It is at this time that the groundwater level is usually low. In spring it is higher due to snow melting, so digging will be difficult. It will be necessary to constantly pump out the water entering the mine, and it will be difficult to determine at what depth the primer will be located during the meager replenishment of precipitation.
If you dig when the groundwater level is high, there is a possibility of error and not calculating the depth. Then in the autumn-winter period there may not be enough water in the well. And if the dacha may be empty at this time, then for a residential building with year-round living this circumstance will become a problem.
Concrete and installation works
Laying concrete rings for a well.
A concrete layer of 80-120 mm is laid on a dense, leveled base. Lean concrete grade 100 is used for it.
It is prepared from the following calculation: 25 kg of cement is filled with 105 liters of crushed stone, 75 liters of sand and 20 liters of water. Volume fractions are measured with a 10-liter bucket. The accuracy of the concentration is not very important here.
We place the formwork from the board around the perimeter so that the base extends beyond the rings by 15-20 cm, its upper edge should be located at the height of pouring into the level. If there is no board of the required height, you can simply hammer nails at the required height around the perimeter inside the formwork, which will mark the height of the pour.
We prepare and pour concrete.
The fill is carefully leveled into a plane. When pouring along the edges of the formwork, you can simply run a rule or a suitable board along the upper ends of the formwork, as if using a template. The concrete base is left to harden for 7 days.
Using a grinder, we cut the well bore so that it protrudes 50 cm above the concrete and plug it with polystyrene foam.
Rolled waterproofing is spread over the base, its overlaps are fused using a torch. A hole is cut carefully around the barrel, without unnecessary gaps. The waterproofing must extend beyond the footing.
The waterproofing mixture is prepared according to the manufacturer’s recommendations.
Before mounting the rings, their mating surfaces are thoroughly cleaned, dust-free and wetted.
Scheme of a concrete ring.
The lower ring is placed directly onto the waterproofing using a truck crane. On the inside, the inaccurate joints are filled with a waterproofing mixture.
A layer of the mixture is applied to the upper end of the ring and the next one is installed. The mixture is again applied along the second ring and the floor slab is mounted. The truck crane can be released.
All excess mixture must be carefully removed with a spatula and a smooth surface should be formed without transition between the rings. It is important to do this on the outside of the well to perform vertical waterproofing.
Reinforcing mesh is laid along the bottom of the well.
The bottom of the well is filled with concrete grade 400. To prepare it, for every 10 liters of cement, 11 liters of sand and 24 liters of crushed stone are added. The pouring thickness should be 120 mm.
The same concrete is used to fill the shell on the well slab. It is concreted along the height of the cast iron rim with a slope from the hatch to the edge of the slab. To protect the concrete on the surface from cracking, it is also better to reinforce it.
Preparing the pit and trench
The internal diameter of the concrete ring for the well is 1.5 m.
The thickness of the walls of the ring is 10 cm. In order to make a hole for concrete rings, a circle with a diameter of 2 m is outlined. The distance between the soil and the wall of the concrete ring should be 15 cm.
In order to accurately calculate the diameter of the circle, drive a peg into its center and pull the twine using a shovel and thread.
After the circle is outlined, a hole 2 m deep is dug under the rings.
A trench is dug at the depth of soil freezing. For each region, the depth of freezing is different. For the Moscow region it is 0.5 m.
How to choose a mesh for an Abyssinian well filter
The mesh for the needle hole needs a special one - galloon weaving. This mesh looks like metal fabric. Galoon weaving implies diamond-shaped cells - they are not clogged with grains of sand, which are basically cube-shaped. There are different types of filter mesh, with different mesh sizes - for different sands. Ideally, the mesh should be selected based on the sand fraction in the aquifer. The filter should pass about 30-40% of sand. Then, when pumping the well, small sand fractions will come out with water, while larger ones will form a natural filter around our needle.
Filtration meshes are metal and synthetic. The finest-grained metal meshes are marked P60 and are designed for dusty sand. Synthetic meshes come in even finer weaving - up to P200. At the same time, it is not recommended to take the finest mesh “with a reserve” - the finer the mesh, the worse the well’s flow rate will be. The finest sand under the pressure of water is compressed around the needle filter, preventing the movement of water.
The pipe is cut into pieces of 1-1.5 meters, external threads are cut at the ends. The pipes will be connected using couplings of the appropriate diameter. Short pieces of pipe are needed to make it easier to drive it into the ground.
How does a well-needle filter work?
The very first and most important element of the needle well is the filter. It is made as follows: a 1.2-2 meter section of pancake pipe is taken and a meter section is marked for the future filter. On this section, holes with a diameter of about 8-10 mm are drilled in a checkerboard pattern so as not to weaken the pipe. A steel cone is welded at the end of the pipe near the filter, which will facilitate the passage of the pipe in the ground according to the principle of a spear.
The next step is to wind under the filter. The purpose of the winding is to create a gap between the pipe and the filter mesh, which is mounted on top of the winding. Without winding, water would be sucked into each hole of the filter pipe only through the section of the mesh directly above the hole. With winding, water will be sucked from a much larger surface of the mesh into the created gap, and then into the holes on the pipe. Thus, by performing reeling, we significantly increase the well's flow rate. Winding is usually done from wire of the same material as the filter mesh - for example, stainless steel to stainless steel, to avoid the formation of a galvanic couple. To help you when choosing, here is a metal compatibility table:
When assembling the filter, pay special attention to the compatibility of metals: some of them create a galvanic couple, and upon contact as a result of a chemical reaction they are quickly destroyed. For example, if you wind a pipe with aluminum wire and fasten a brass mesh on top, after a few months you will get holes where these incompatible metals touch. Therefore, in most cases, wire and mesh are taken from stainless steel, because... these materials are easy to obtain.
