Low filtration of the underlying soil is the cause of excess water in the area. It slowly goes into the lower layers or does not seep out at all. Cultivated plants grow poorly here or do not take root at all, the area becomes swampy, and there is a sense of slush. In such cases, a drainage system is needed, which should be properly organized.
We will explain in detail how to make a site drainage project. A system designed according to our advice will cope with its responsibilities perfectly. Familiarization with the proposed information will be useful for both independent owners and customers of landscape arrangement in a specialized company.
We have presented practical schemes for constructing drainage systems for suburban areas. The article describes in detail the factors that require consideration when designing and constructing drainage. The information offered for consideration is illustrated with photographs, diagrams, and videos.
Functions of water drainage structures
The main function of such a system is to remove moisture from the soil surface. However, there are cases when its installation is required:
The land is uneven, which is why excess moisture constantly accumulates in the depressions.- There are buildings on the site with a basement floor.
- The soil is predominantly swampy and waterlogged.
- The groundwater level is higher than the established norm, which leads to frequent flooding.
- The earth does not allow water to pass through.
When the groundwater level is high, basements are constantly flooded, mold, mildew, etc. form there.
By installing a drainage trench on a site, you can solve many problems and prevent premature destruction of buildings, destruction of plantings and other adverse consequences caused by waterlogging of the soil.
Drainage does an excellent job of removing melt and rainwater , which destroys the foundation and roof of a building, and also leads to the formation of puddles and ice. Usually, for this purpose, storm drains are built, which remove rain or melt water from the roofs into the collector. In simple words, these are vertical pipes installed on every house.
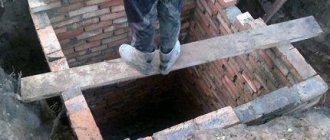
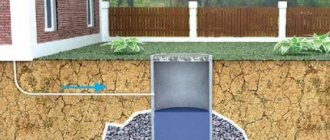
In private homes, it is necessary to install septic tanks. A septic tank is a sewer system in which domestic water is treated. This is necessary so that the water is purified from harmful impurities and enters the soil in its pure form.
The device consists of several sealed housings through which liquid gradually passes. All dirt and harmful impurities are retained in special partitions.
Cleaning drainage in a summer cottage
Water, passing through drainage channels, brings with it small, almost dusty, fractions of soil. These particles successfully pass through the geotextile and settle somewhere in the drainage channels.
If the system was installed in violation of the technology, then significant volumes of silt and debris end up in the drainage. And sometimes traffic jams form. Because of this, the drainage ceases to perform its functions.
It is recommended to clean drainage pipes with a brush on an elastic cable. This tool can also be used to clear clogs in sewer pipes.
If you are unable to remove the blockage yourself, contact a specialist. Using special equipment, specialists will clear the blockage and clean the drainage channels.
Installation requirements
When installing a drainage trench, the main thing is to take into account the depth of groundwater . During the flooding season, it rises by 10-15 cm. If you follow all the rules and recommendations, you can ensure uninterrupted operation of the drainage. In areas near water bodies, the level of underground sources is higher.
The deeper the pipes lie, the thicker and stronger they should be. You should also take into account such indicators as the density and structure of the soil, as well as the level of freezing (pipes must be installed at a distance exceeding this indicator).
Depending on this, the drainage system is:
- Surface if the pipes are installed at a distance of 300-400 cm.
- Deep - up to 3 meters.
When installing a drainage trench under a building, its distance from the bottom of the foundation must be at least 1.3 meters, otherwise when the soil freezes or floods, water will destroy the foundation. For garden plots this figure reaches 150 cm.
You should also consider:
When constructing storm drains, the depth of the ditch should be about 15 cm.- To reduce the level of soil moisture when planting plants and shrubs, drainage is laid at a depth of 40-60 cm, trees - up to 1.3 m.
- Collectors are installed in lowlands so that water flows there freely.
- Drainage wells must be installed at pipe bends, as well as every 15-20 m.
- Pipes are installed at a slope of 2 cm or more for clay soil, and 3 cm for sandy soil.
- To drain surface water, pipes are laid to a depth of up to 1 m.
The looser the soil, the less it freezes.
When calculating the depth, you can be guided by the following rule : if pipes with a diameter of up to 500 mm are installed, then 300 mm are removed from the soil freezing depth; if the diameter is more than 500 mm, then 500 mm are subtracted from this indicator.
You cannot combine underground drainage and storm drainage, because... In case of heavy rains, the system may not be able to withstand it. If this is not taken into account, then during heavy rains or snow melting, the water will not be able to be evenly distributed throughout the system and will return back to the drainage.
If it is overflowed it will result in:
- erosion of surface waters,
- destruction of revenge,
- damage to the foundation, etc.
We calculate based on the thickness of the foundation
In this case, a simple arithmetic operation will also help. Add another half meter to the depth of the foundation of the house. This is enough to prevent the foundation from being washed away. For example:
| Foundation depth | Add | Ditch depth |
| 1 meter | 0.5 meters | 1.5 meters |
The calculation will help create a drainage system at the correct depth. Remove moisture in advance and prevent dampness in the basements and erosion of the foundation of the building.
It is important to consider the season of construction work. In spring, groundwater comes as close as possible to the surface of the earth, and in summer it moves deeper. Their lowest level is observed in winter.
When calculating the depth of drains on a site, you can pay attention to the average thickness of the snow cover in a particular area. Snow is a good natural insulator.
Professionals advise combining both methods of calculating the laying depth of a drainage system in order to select the optimal parameters - those that are larger, with a margin.
A correctly calculated drainage system scheme will ensure its uninterrupted operation and will allow for a more efficient use of forces and resources.
Stages of work
To begin with, preparatory work is carried out:
- calculate the depth at which the trench will be laid;
- the slope is selected;
- the required number of wells is calculated, as well as the location of their installation;
- a method of drainage is selected (gutter, well, etc.).
Next, the route is marked; for this purpose, pegs are installed onto which the cord is pulled. Then, according to the markings, a trench of the required depth is dug.
It is best to install a trench in the summer, when there is no waterlogging of the soil.
After this, you can select the drainage material, for example:
- ceramic,
- metal,
- concrete, etc.
Each of them has its own characteristics, which determine the possibility of their installation at a certain depth. Plastic pipes are most often installed; they are easier to secure and are not as susceptible to corrosion. However, they are not durable and are easily damaged under heavy loads.
When installing drainage, do not forget about possible flooding. To avoid this, materials such as crushed stone, gravel and sand are suitable; geotextiles, fittings, etc. are also used. The work will require shovels, wheelbarrows, and special tools. If you have to dig deep, you won’t be able to do it without special equipment.
For septic tank
First, preparatory work is carried out, a trench of the required width and depth is dug, after:
A layer of soil is laid, at least 10 cm, crushed stone - 35 cm.- Tubes 25 m long are installed in the crushed stone.
- These pipes are connected to the risers and septic tank.
- A 10 cm layer of soil is poured on top.
- To prevent the water in the pipes from freezing, they are wrapped in geotextiles.
- A 30 cm layer of soil is poured onto the pipes.
The height of the risers should not be less than 50 cm, and to prevent moisture from entering there, they are equipped with umbrellas on top. It is possible to install a septic tank in this way for any type of soil, however, it is worth considering that clay will require more serious backfilling of the bottom.
Stormwater installation
If both a drainage system and a stormwater system will be installed in one area, then the drainage will be installed first .
However, one trench can be built for both communications, only the drainage will lie deeper, and the storm drain will be closer to the soil surface. Before installation, it is necessary to carry out preparatory work (marking the area, preparing the necessary tools).
To calculate the amount of materials for work, you need to draw up a diagram. As a result, you can find out the required length of the pipes, and add to it another 5-10% necessary to connect them to each other.
The method of laying storm drains and sewer systems is practically the same:
- Work must begin from the top point of the building. To secure the storm drain gutters evenly, you need to stretch the fishing line from top to bottom.
- Using self-tapping screws, attach the brackets on which gutters and pipes will later be installed.
- To ensure that water flows freely into the drain, funnels are installed below.
- It is best to seal the pipe joints with the sealants that come with the kit. If they are not available, then a waterproof sealant will do.
How to install drainage and stormwater in one trench?
In fact, stormwater and drainage perform one function - removing excess liquid formed from underground sources, rain, snow, etc. Such systems are simply necessary for a private home; they will protect not only the building, but also create favorable conditions for the growth of plants and trees.
To build a drainage and storm drain, it is not necessary to dig several trenches; using a junction tee, they can be connected and placed into one. Through this tee, water will flow into the central main in one stream. To ensure unhindered movement of water through the pipes, they are laid at an angle.
Before installation, you should consider some rules that will help you avoid mistakes:
First, you need to calculate everything correctly, since any inaccuracy can lead to serious damage, the correction of which will require large financial investments.- Stormwater and drainage should be located at different depths. This will prevent the drainage system from being overloaded if the storm drain fails.
- To ensure better water filtration, a layer of crushed stone and sand will be required.
- When installing perforated drains, they should be placed below the storm drain.
- The collector should be installed at a depth of no more than 130 cm.
Is it possible to build a system without pipes?
Installing a drainage system without pipes is possible, but this method is useless in places where there is a large accumulation of water. It is more often used in places with an arid climate, with difficult soil topography, and also where it is not possible to install pipes (a large number of plantings, etc.).
They begin to build the trench from the highest point, therefore, before starting work, you should draw up a plan that will indicate the locations of the highlands and lowlands.
After this you can begin installation:
- a trench is dug at the desired angle, and the bottom should be made semicircular (like a pipe);
- the ditch must be cleared of dirt, stones and other things that will impede the movement of water;
- lay geotextiles that will filter the liquid;
- pour sand on top and compact it.
In areas with a heavy load on the soil, it is recommended to lay a layer of turf, geogrid, etc. on a layer of sand. If such a drainage system is built near the foundation of a building, then the depth of the ditch depends on the height of the foundation (usually it exceeds its base by 30-40 cm).
You cannot dig a ditch around all the walls of the building, otherwise the load on the foundation will increase, which can lead to its destruction.
The bottom of the trench is carefully compacted so that the sand does not interfere with the movement of water and the ditch does not wash away. Clay or concrete is perfect for this, then crushed stone, first a layer of coarse fraction, then medium, and finally fine. The foundation of the building must be waterproofed, since moisture from the trench can lead to the formation of mold, rot, etc.
Methods for strengthening ditches
Drainage ditches have been used for a long time, so there are many ways to strengthen them. Conventionally, they are divided into two types:
- strengthening with improvised materials and plants;
- strengthening with special structures and devices manufactured industrially.
Let's take a closer look at them.
Henchmen
Strengthening a ditch in a summer cottage with the help of available materials is possible in small areas with small angles of inclination. The walls can be strengthened with slate sheets, car tires, stones or rhizomes of specially planted plants.
Advantages of this method:
- low cost, and when using used materials there is a complete lack of investment;
- low labor costs, because One person is enough.
Flaws:
- fragility of the structure;
- external unattractiveness.
If the ditch is small and the slope angles are less than 8 degrees, strengthening with plants will be sufficient. It is enough to plant small bushes or perennial grasses along the trench.
How to strengthen the walls?
It is necessary to strengthen the walls of the drainage trench, otherwise over time they will crumble, which will lead to destruction. Suitable materials for this include:
Geogrid is one of the most commonly used materials. It is characterized by increased strength, is not subject to corrosion, is not afraid of a humid environment and mechanical stress. Polymer fibers are used for its manufacture.- Geomats - in appearance the material resembles a washcloth, thanks to which it is easily fixed to the soil surface, moreover, it does not interfere with plant growth.
For production, polypropylene materials are used, from which the meshes are formed. They are then placed on top of each other and secured with polypropylene thread. - Homemade gabion - for its manufacture, a metal lattice frame with cells filled with crushed stone, pebbles, etc. is used.
- Geogrid - the structure consists of metal cells connected to each other by welding. It comes in two types, with and without perforation. The first is the most durable and is better suited for strengthening the drainage system.
The choice of one material or another depends on the angle of inclination of the trench:
- up to 8% - you can do without strengthening; it is enough to plant plants along the slope of the ditch;
- from 8-15% - biomats or geogrids are used;
- more than 15% are geogrids or gabions.
Step-by-step instructions for strengthening
Before starting work, it is necessary to clear the ditch of debris and stones, and then level it . Further:
- The reinforcement is installed using anchor bolts. The service life of the structure depends on the correct installation.
- Each strip of material is laid overlapping the previous one.
- Soil is poured on top of the fortification in a layer of 3-5 cm.
It is necessary to lay a chain-link mesh on top of homemade gabions, this will ensure greater structural strength.
General information
Frosts negatively affect the soil, moving it from its place, pushing fragments of the foundation out. Soil movements occur because the top soil layer, saturated with moisture from the abundance of precipitation, freezes. The drainage system removes excess moisture from the foundation through special channels.
Having a low groundwater level, the soil absorbs moisture during rainy autumn days and in the spring during floods. If there is a waterproofing system, the foundation is not protected from moisture. Over time, the walls of basements become overgrown with mold and mildew. Mo As a result of frost heaving in winter, soil moves and parts of the foundation are pushed to the surface. This is facilitated by the freezing of the moisture-saturated top layer of the earth. Timely removal of moisture using a drainage system eliminates the main cause - excessive moisture in the soil adjacent to the structure. The ice formed by this moisture grows in volume and breaks through the concrete coating, promoting the formation of cracks and splits.
Advantages and disadvantages
Among the advantages are:
- effective protection of buildings and plants from excess moisture;
- preventing flooding of the basement floors of the house;
- protecting the soil from various diseases that occur with excess moisture;
- increasing the service life of the foundation.
High humidity leads to many negative consequences, for example, mold and mildew on plants causes their death, and on buildings it leads to their premature destruction.
Flaws:
- large financial costs for materials and installation;
- the need for constant cleaning of the drainage, as it becomes clogged with silt and dirt;
- difficulties in installing the drainage system;
- If the slope of the pipes is incorrectly calculated, the water in them will constantly stagnate.
Complex issues of land reclamation
In the past, issues of land reclamation - land improvement, involving the determination of necessary drainage or irrigation - were very relevant and widely discussed. Collective farms and state farms were professionally involved in improving the fertility of lands.
The measures taken brought significant results over large areas.
Now summer residents need to work independently to ensure that the site remains alive and does not turn into a swampy area. Turning to specialists is not a cheap pleasure.
But you should not despair, because from the materials described, with a reasonable approach, you can make a simple but effective drainage system yourself.
Possible mistakes
In the absence of experience and knowledge in this area, it is better to entrust this work to specialists, since any mistake can lead to incorrect and ineffective operation of the drainage system.
Among the most common mistakes are:
Incorrect slope of drainage towards the well, resulting in water constantly stagnating.- Insufficient pipe depth.
- Incorrectly selected pipes for laying the drainage system.
- Lack of geotextiles, crushed stone, etc.
- Small number of taps.
- There is a large load on the drainage well, as a result of which it quickly overflows.
- Inability to clean the drainage system from accumulated dirt.
The simple secret of a drainage ditch is in the video:
If you are interested in what a trench is in construction, what its structure is, and development methods, take a look at this section.
Materials from which drains are made
Corrugated pipes with a perforated surface, covered with geofabric or coconut fiber for filtration, are suitable for the drainage system. The pipes have good flexibility and are easily connected to each other.
Important! By purchasing special pipes for drainage, you no longer need to cover them with geofabric during installation, which simplifies the work.
Geotextile protects pipes from freezing. In addition to fabric, the pipes around them are lined with foam plastic to absorb water; the trenches do not need to be laid with pre-drainage material. To lay drainage, it is necessary to dig ditches, lay purchased pipes and lead them into collectors or wells.
