Drilling a well to provide a house and plot with water supply is a labor-intensive and expensive process. Therefore, its failure will be a very unpleasant incident. In this regard, installing a well with a caisson allows you to protect the source of water supply from all kinds of external factors. The installation of this device has many advantages over wells without installing a caisson. Let's consider all the nuances of equipping a well with a protective tank.
Important points when arranging
Taking into account some technical nuances, you can significantly save on the construction of a well equipped with a caisson.
For example, use a factory-made caisson. If you place the well closer to the house, then:
- the volume of earthworks will be reduced;
- fewer pipes will be required;
- you will need a pump of small power, sufficient only to raise water to the surface.
You can also save money when choosing a drilling method. To make a well for personal use, you can do the work using a hand drill. Sometimes they use electric tools and percussion devices.
Point #1 – choosing a well drilling method
When choosing a specific tool, you need to proceed from the characteristics of the soil. When manually drilling a well yourself, you will have to make a lot of effort, but under favorable conditions you can reach the aquifer lying at a depth of up to 15 m.
It is recommended to make no more than five turns of the drill in one pass, otherwise it will be difficult to remove it.
A self-made drill gives the best results. The reason is that it is made for specific conditions, so it is more convenient to work with it
A shallow well can also be drilled using an auger. Its rotation is carried out both manually and using mechanisms. In any case, a tower in the form of a tripod is built over the future well to facilitate lifting the tool. When choosing the second method, you will also need an electric motor of suitable power.
The shock-rope method is also used to cut a well. The working tool here is a pipe, the edges of which are sharply sharpened (a driving glass with a strong edge along the lower edge). Due to its considerable weight, it crashes into the ground with great force, then it is removed using a system of ropes and freed from the ground.
When using the percussion-rope drilling method, a tripod up to two meters high is used. At its top point there is a block with a rope thrown over it. A percussion instrument is attached to it
The casing (pipe) is taken with a slightly larger diameter than the pipe section called the sleeve. It should be placed strictly in vertical position.
This is important for any drilling method. If this nuance is neglected, the soil may collapse
Experts advise using PVC pipes with a cross-section of 12.5 cm. The first pipe is lowered after passing one meter. Further, the length of the casing is added as it goes deeper. The sections are connected using threads at the ends of the pipes.
Point #2 – secrets of drilling a well
You can drill a well in any season, but the labor intensity of the work will vary. The worst option is spring. During this period, groundwater is at its highest level. Under such conditions, it is difficult to determine the location of the main aquifer.
Installing a well in summer is considered the best option, because... The water level stabilizes and its location is easy to determine. In autumn, the best month for carrying out this work is September. At this time, the rainy season usually has not yet arrived; it is possible to determine the aquifer without difficulty.
Precipitation in winter does not affect the state of groundwater. Manual drilling in winter is contraindicated, because... soils freeze very much
In winter, you can drill a well as long as the temperature does not drop below -20°. Due to freezing of the soil, the walls of the well are protected from collapses. Groundwater is at a minimum level.
Point #3 – optimal material for the caisson
There are several:
- from reinforced concrete rings;
- metal;
- plastic;
- brick.
Reinforced concrete rings and brick. This type of caisson practically does not provide tightness for a long time. This threatens the equipment with flooding and subsequent loss of performance.
Metal. If all requirements were met during the manufacture of metal caissons, they will have good tightness.
The earth is an aggressive environment in relation to metal, so the enclosing structures of such chambers are susceptible to oxidation, which can result in depressurization.
Plastic. Caissons made from polymer materials are comfortable, light in weight, and easy to install and operate. The probability of depressurization is quite small, because the material is not subject to corrosion. Plastic caissons last much longer than metal ones.
Step-by-step instructions for arrangement
It all starts with choosing a location for a well and choosing a method for arranging a water source.
The technology for arranging a water supply source consists of a number of sequential and responsible steps:
- Well. The first stage is drilling the well itself.
- Caisson. The second step is to begin the process of installing the caisson.
- Insulation. The third stage is to fill the pit with earth right up to the lid, then insulate the hatch.
- Installation of equipment. Stage four - after completion of the work, they begin to install equipment that should ensure an uninterrupted and efficient supply of water to the house and site.
The process of installing a caisson structure also consists of several operations.
Let's consider the main ones:
- A hole is made in the bottom of the caisson with some offset from its center for subsequent installation of the sleeve under the casing. The diameter of the sleeve must exceed the corresponding pipe parameter, measured along the outer contour, by 10-15 millimeters.
- Nozzles for water pipes and cables are welded into the side walls of the caisson.
- A pit is dug in such a way that the neck, after installation is completed, rises above the ground by no more than 20 cm. For ease of joining the chamber with the casing pipe, the diameter of the pit should be 0.2-0.3 m larger than its own corresponding size.
- The casing is cut at ground level.
- Supports in the form of beams are laid on the foundation pit. A caisson is placed on them.
- The casing pipe is joined to the caisson sleeve, the structure is adjusted horizontally, and then welded hermetically.
- The bars are removed from under the chamber and lowered into the well.
- Pipe and cable are inserted into the corresponding nipples.
The water in a newly drilled well is always dirty, so it must be pumped to clean it. Drillers advise not to use equipment purchased for permanent use for this purpose. The cheapest temporary pump will do the job just fine, and when the well is pumped up, you can start a permanent one.
When choosing an option for constructing a well, in order to avoid irrational costs, it is better to get advice from specialists. They will take into account all factors and justify the feasibility of implementing a particular project
It should be noted that the installation of such a protective tank as a caisson is not always necessary. It happens that a room suitable for placing equipment already exists in the area where the well is located.
In this case, a more rational solution would be to use it for its intended purpose and save on installing the caisson.
Caisson and its installation
Construction of a well with an adapter
Caissons
Let us note right away that the caisson is not installed in all cases. If there is a heated room nearby in which all the equipment can be placed, then you can refuse to install this container. This will save money and time spent on digging a pit and installing a caisson.
Caisson arrangement diagram
But most often, installing a protective tank for a well is a mandatory step.
First you need to purchase the caisson itself, which can be round or rectangular in cross-section and made of various materials.
- The plastic caisson is very convenient for self-installation due to its low weight.
The advantages include durability, tightness and good thermal insulation properties. But due to its small mass, the caisson can float under the influence of groundwater. Concrete helps combat this: a concrete base is built at the bottom of the pit, to which the tank is attached. There are ready-made containers on sale, or you can make them yourself from large-diameter plastic pipes. Plastic caisson - Metal caissons are very popular. They can be made from steel sheets 0.4 cm thick. The sheets will need to be welded to each other.
Metal caissonNote! After welding, be sure to treat the resulting box inside and outside with anti-corrosion liquid. .
- Previously, the caisson was made mainly from reinforced concrete rings. But arranging it from this material was a troublesome task and required the participation of lifting equipment. In addition, the caisson pillars are prone to collapse and deform under their own weight. But such a tank is durable.
Whatever caisson you choose, the principle of its installation is the same. Since plastic containers have been increasingly used lately, we will describe their installation.
Installation of caisson
Step 1. For any caisson, first of all, dig a pit, from the walls of which to the tank there should be about 0.3 m. The depth of the pit should be such that the neck of the installed caisson rises above the ground surface by at least 10 cm. This will protect the tank from falling into of melt water.
Caisson pit
Step 2. If at least in some seasons the groundwater rises high, it can push the container out. Therefore, around the well casing pipe, a flat concrete base 15 cm thick is poured onto the bottom of the pit.
Step 3. A hole is cut in the bottom of the caisson for the entrance of the well casing pipe. If you plan to place equipment in the tank, including a hydraulic accumulator, then it is better to move the hole for the well to one of the walls of the tank. Prepare holes for the outlet pipe.
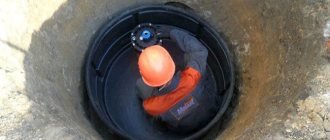
Step 4. Release the caisson to the bottom, making sure that the hole in the container is threaded onto the casing pipe. To do this, you can place beams over the pit and install a tank on them. Gradually moving the supports apart, slowly release the container, aligning it with the pipe.
Release the caisson to the bottom
Release the caisson to the bottom
Step 5. Install the caisson exactly in the pit according to the installation level.
Step 6. The casing pipe is cut, and the outlet pipes are brought into the container. The connections between the container and all the pipes are sealed with special caps.
Electrical cables, laying from the building to the caisson
Note! If a metal tank is installed, then all the junctions of the incoming and outgoing pipes with the tank are welded.
Step 7. Backfill the tank. In dense soil, a concrete screed can be poured around the caisson to prevent deformation of the container.
Backfilling of the caisson
Backfilling of the caisson
We insulate the neck and connect the external irrigation pipe
The installation of the caisson is completed. Now you can install the necessary equipment in it and the well.
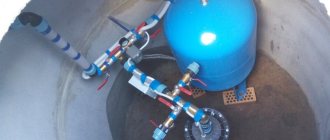
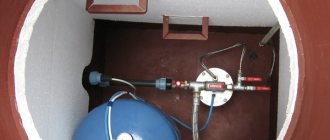
Equipment in a caisson
How to install a plastic tank?
Ready-made structures are often used as plastic containers for wells. They may even already have all the necessary technological holes provided. Sometimes, in order to save money, they can use a Eurocube or other suitable plastic chamber.
Installation of plastic caisson
Installation of a plastic tank is simpler than caissons made of other materials, but has several nuances.
- Often it is necessary to pour a concrete base with metal hinges built into it. The latter are needed to secure the container with slings. In factory caissons, there may be special eyes or protrusions at the bottom for anchoring.
- If it is necessary to increase the strength of the walls, then at the end of the installation work, they do not backfill with soil, but fill with cement.
Arranging a plastic caisson with your own hands is the easiest thing to do. In general, installing a tank yourself from any material will help you save money. But if you don’t have experience and confidence in your abilities, then it’s better to leave the work to professionals so that you don’t have to overpay for correcting mistakes.
Insulation
Submersible screw pump for well
If you do not make high-quality insulation of the caisson for the well and the pipes coming out of it, then water may freeze, and when water freezes it expands and, as a result, destroys the pipes. When installing a caisson for a water well, the floor is usually located below the freezing level of the soil; this is done so that the water in the well and in the hose does not freeze in winter. The water supply from the caisson to the house must be laid in a trench with a depth below the freezing level of the soil in a given area; the arrangement of a well without a caisson is done in the same way, only it will be necessary to insulate the well without a caisson. It is best to insulate a caisson for a well from freezing with polymer, organic and mineral thermal materials that are not subject to rotting. Iron caisson for wells have good thermal conductivity, so it must be insulated. Since metal is susceptible to corrosion, there must be a ventilation gap between the insulation and the metal wall. To create such a gap, the caisson is wrapped with a metal mesh onto which the insulation will be attached. Caissons for plastic wells are usually prudently equipped with shelves for insulation. If you purchased a plastic caisson for a well without special shelves, then it is wrapped with mineral roll insulation and secured with wire.
The plastic caisson for the well must be insulated
The caisson made of concrete rings has a ring thickness of about 15 cm, and this is quite enough to avoid the need for thermal insulation in a moderate climate. In cold climatic conditions, it is necessary to insulate such a concrete caisson for a well from the outside. The caisson covers are also covered with insulation on top and covered with waterproofing, and then with some durable material, such as a sheet of plywood or iron.
General installation tips
From an engineering point of view, the installation of a caisson for a well is required to accommodate equipment and protect the well head from damage, entry into the storm water intake area and contamination.
Installing a protective tank for a well is much more profitable in terms of operating costs - unlike above-ground structures, it does not require heating. Provided that it is below the level of the calculated freezing depth. Although there cannot be any other option - if it stands higher, it will simply be squeezed out in the winter.
A buried caisson can also be squeezed out by soil. Especially in cases where the site has problems with high occurrence of perched water. Therefore, it is recommended to “anchor” not only lightweight plastic systems, but also more stable metal systems.
Technically this is done very simply. A concrete slab is poured under the caisson for the well, to which the bottom of the caisson is attached using anchor bolts. In high, non-flooded areas, you can do without a concrete base - a fairly good sand cushion. But even here, having a heavy slab under the caisson will not hurt. Therefore, it is always better to plan it, outside the geological features of the site.
Independent construction of a well with a caisson is a very responsible and labor-intensive process that requires the right approach and careful preparation. In addition, you must follow the main rule: when constructing a well, there are no secondary components! Each element is important and must be approached with full responsibility.
Therefore, if you are not sure that you can do at least one process on your own, then it is better to seek qualified help from specialists, so that later you do not have to change or repair expensive equipment, risking being left without water supply for a while.
What is needed to set up a well
Well construction with adapter
The construction of a well provides it with everything necessary, which will allow the operation of this water source.
A fully completed well, in addition to the casing pipe that protects the drilled shaft from collapse and deformation, consists of a number of elements.
Well development
- A caisson is a container that surrounds and protects the well head and the necessary equipment from the action of groundwater, soil pressure and temperature changes.
- Water lifting equipment – submersible pump.
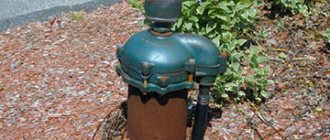
- The well head is a cover for sealing the well and suspending the pump.
- A hydraulic accumulator is a storage pressure tank, thanks to which the load on the pump is evenly distributed. Such a reservoir helps maintain the required pressure in the water intake system.
- Pump motor control system that regulates the water supply and protects the engine from running in “dry” mode and power surges, etc.
Let's look at the description of each element, including the installation process, in more detail.
What are caissons made of?
The reservoir in which the well head and all other equipment is located must be sealed, capable of maintaining positive temperatures inside and durable. Another important property of the caisson is its resistance to external influences, for example, soil pressure. Different materials can be chosen to make the camera. Each of them has its own advantages and disadvantages, discussed in the table.
Table 1. Pros and cons of caissons made of various materials.
| Material for making the tank | Advantages | Flaws |
| Concrete rings | strength; | the need to use special equipment for installation due to the weight of the rings leads to increased costs; |
| Monolithic concrete | the advantages are the same as those of concrete rings. | due to weight, pipes may bend during shrinkage; |
| Brickwork | efficiency; durability; strength; corrosion resistance; ability to retain heat without additional thermal insulation. | the hygroscopicity of concrete requires external waterproofing; |
| Plastic container | plastic does not allow water to pass through; ease of transportation and installation; durability; corrosion resistance. | low thermal insulation; |
| Metal tank | cheapness; ease of installation; strength. | the possibility of groundwater leakage at the joints between the rings. |
The choice of material is determined by your construction skills, budget and climate and soil characteristics. When installing a caisson with your own hands, you need to take into account both the general principles of installation and the specifics of the material.
Prices for caissons for wells
Well caisson
Installation work
The nuances of installing a pump in a well.
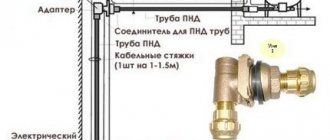
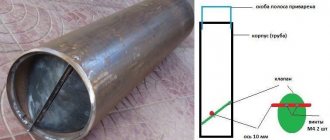
The downhole adapter that replaces the caisson is a quick-release bayonet connection. Its stationary part is fixed in a hole on the wall of the casing pipe. This element is a threaded pipe with a shaped flange. The shaped flange has a seat with grooves and a polished plane. The threaded pipe is inserted into the hole in the casing pipe from the inside. The adapter plane adjacent to the pipe wall has a cylindrical surface that replicates it. From the outside, a counter washer, also made with a cylindrical surface, is put on the threaded part. Compensation for the difference in diameters and sealing the connection is achieved by installing thick rubber gaskets on both sides of the pipe wall. The inner one is put on before lowering the adapter into the well. External – during fixation.
The moving part of the adapter is a branch, one of the terminals of which is equipped with a flange, which is the mating part of the bayonet connection, and the other has an internal thread for connecting the coupling of the supply pipe of the well pump. When installed, the threaded outlet points downwards. In this case, there is a blind mounting boss at the top, with the help of which the element is remotely installed into the mounting socket of the stationary part of the adapter. The mating plane of the movable element flange has a groove with an o-ring to seal the bayonet connection. It is better to fix the ring in the groove with sealing glue so that it does not get lost during manipulation.
Instructions for installing the downhole adapter.
The hole for installing the downhole adapter is made with a drill with a bit installed. The edges of the hole are cleaned with a roller cutter. At the end of a stored piece of pipe 2.5-3 m long, an external thread is cut with a tap according to the diameter of the thread in the adapter boss. Both parts of the adapter are connected, and through the upper open end of the casing, the assembly is lowered inward, and its threaded outlet is threaded into the hole. The inner sealing ring must be on. An outer sealing ring and a washer with a cylindrical surface are put on the threaded end inserted into the hole; the stationary part of the adapter is fixed to the pipe by tightening the nut along the external thread. The threaded outlet also has an internal thread, to which the crimp coupling of the horizontal section of the pipeline is connected. All threaded connections must be packed with FUM tape or other sealing materials.
After installing the stationary part, the movable part is removed to the surface. A crimp coupling and a pressure pipeline of the required length are attached to its lower end. A submersible pump with a check valve installed is connected to the other end of the pipe through a second coupling.
A stainless steel safety rope is tied to the pump and a power cable is connected. The knot is secured with a clamp to prevent it from untying. The pump with a pipe, cable, cable and moving part of the adapter is lowered into the well. The auxiliary tube installed in the boss allows you to remotely connect the two parts of the adapter. To prevent sticking of the adapter parts and increase the durability of the sealing ring, the contact surface of the moving part must be treated with silicone grease.
It is better not to unscrew the auxiliary pipe, but to leave it in the boss. This will make subsequent servicing of the adapter and servicing or replacement of the pump easier.
The top of the casing pipe and the auxiliary installation pipe are cut with a grinder to the required height, which, if necessary, can hide the placement of the well below ground level. Disguising the head can prevent the pump from being stolen.
A sealed well cap is placed on the cut and stripped end of the pipe. The cable and cable are exited through sealed leads. The corrugated cable is lowered into the trench and tied with tape to a horizontal pipeline.
Caisson or adapter - in what type of wells is it installed?
To provide water to individual houses, wells are drilled, which are divided into three categories:
Abyssinian . This type of well is installed when aquifers are located at a shallow depth from the surface; hydraulic drilling is carried out by individuals and organizations. The Abyssinian well is drilled within 24 hours; instead of casing pipes, a piece of HDPE pipe with a filter at the end is taken. The depth of the Abyssinian depends on the location of the aquifer and lies in the range of 5 - 30 m. The water surface in the Abyssinian should not fall below 9 m; external centrifugal electric pumps or stations, which are located in close proximity to the source, are used to draw in water.
To protect the external pump from precipitation and frost in winter, an insulated coffered well is installed in the Abyssinian area.
Wells in the sand . This is the main type when the water table from the ground level is below 9 m, the depth of the wells ranges from 20 to 60 m, a submersible pump is used for intake. When installing a deep-well electric pump, it is easier and more cost-effective to connect it through an adapter screwed into the side of the casing wall; the caisson is not mounted.
Artesian . To access water artesian basins, a well with an average depth of 100 m is drilled; in domestic water supply sources it can be larger, but at depths of more than 200 m, already significant costs increase sharply due to the use of industrial technology for drilling such distances.
Due to the pressure of earth layers on a deep water basin, water from artesian wells often rises to a great height and even comes to the surface; a surface electric pump is used for supply and a caisson well is installed accordingly. No one forbids extracting water from an artesian source with a deep-well pump, which has higher efficiency and characteristics; when installing it, it is more economical to use a well adapter to drain water into a house.
Although the use of an adapter is more rational when operating deep-well pumps for water intake, a caisson well has the advantages of convenience when it is necessary to remove and maintain a submersible electric pump, and it also protects the well channel from freezing in winter. Therefore, a caisson is often installed when lifting water with a submersible pump, placing automation in it: a pressure and dry-running switch, a pressure gauge, a hydraulic accumulator.
Surface pumps and pumping stations
How to equip a water well with your own hands, installing a pump
To equip a well, a pump must be installed. The best option for a well would be a submersible pump. This choice is determined by the volume of water consumption and the depth of the container.
The installation process involves lowering the pump on a cable to a depth. They also lower the cable that powers the engine and the pipe that will supply water. All elements should be tied. The functions of the cable are to fix the pump and engage the head.
Pump installation nuances:
- The first water from the well will be quite dirty, so it should be pumped. But in this case, another pump is used, which is not intended for constant operation of the well.
- The pump must be lowered directly into the water. In this case, the distance from the bottom to the equipment should be 3 m.
- The cable for fastening should be purchased from stainless steel.
After installing the pump, it is necessary to refine the well. To do this, make a header. However, it also performs other functions.
Video description
See how water drilling is done in an already built house:
Method 2 – above-ground pavilion
The second most popular way to install a water well, used primarily for summer water supply. In winter, light unheated buildings practically do not retain heat inside themselves. Their thermal efficiency can be increased by the following methods:
- bury the walls into the ground, reducing the height above the surface, and add soil from the outside;
- insulate from the inside with polystyrene foam or other heat-insulating material.
Insulated house made of thick timber over a well Source yandex.net
How to choose a caisson for a well
One of the first points that summer residents pay attention to is the thickness of the metal of the caisson wall. It is believed that 3 mm is bad and it will quickly rust, and 4 mm wall is the best choice because it is thick and will retain its properties longer
It's all a myth! Below we will dispel popular misconceptions and tell you how to choose a caisson for a well.
Here's what defines the right caisson:
- The main thing is high-quality waterproofing. Regular painting will not last long, and then corrosion will eat away any thickness of metal. In addition, very often, when installing a caisson manually, the paint is damaged. Therefore, if you don’t have a lot of money, then instead of a caisson with a metal thickness of 4 mm and waterproofing in the form of painting, buy a caisson with a 3 mm wall and make good waterproofing based on bitumen. Waterproofing is more important than the thickness of the metal! There is no need to waterproof the metal caisson from the inside; just paint it with any paint and everything will be fine.
- The second, but no less important point is the insertion of the pipe into the caisson. To do this, use a special sleeve for your casing pipe. Metal caissons with a flat bottom are not suitable, they are written about here.
- Third point. Which caisson is better, round or square? The round one is less convenient because its area is smaller and if you install the whole one (also round), there will be no space left in it. Servicing the well will be completely inconvenient. There are stories from sellers about the increased rigidity of the round caisson, that it will not be crushed, and so on. You shouldn’t pay attention to this, nothing will be crushed anywhere, there simply aren’t such tensions there.
- It is better to choose a caisson with a neck. It is more convenient to use and is better protected from the cold.
- And the last important point: bringing the water supply pipe from the caisson into the house. Usually a small pipe with a double-sided thread is cut into the wall of the caisson; a water supply pipe from the well approaches the internal thread, and a pipe extends from the external thread to the house. This allows the caisson wall to pass through, but the external threads will be buried underground and if there is a leak, everything will have to be dug up and repaired. This happens quite regularly. A good option would be to weld a sleeve into the caisson wall and run a water supply pipe through it; this will remove all connections inside the caisson and increase the reliability of the structure. Unfortunately, few people know how to do this.
The service life of such caissons will easily exceed the service life of the well.
Features of well protection from cold weather
Incompetent arrangement of the water intake often creates obstacles to the normal operation of the source. Errors and shortcomings are especially acute during the winter period.
Operation of a well that is not protected from freezing by reliable thermal insulation in frosty conditions makes it difficult for ice to form on the water surface and the formation of ice plugs in the pipeline.
As a result, the pumping equipment and the system as a whole operate under increased load. A large plug can deform or even rupture HDPE pipes, from which external water supply branches are most often constructed.
Plugs and ice crust in the well appear if the water intake is not operating at full capacity. Those. if there are breaks in operation sufficient for water to crystallize. Even if the owners of an autonomous water supply system do not count on such pauses in functionality, measures to prevent them in the form of installing an insulation system must be carried out.
Measures to insulate the water supply system are carried out from the point of entry into the house to a depth that is 20-30 cm below the level of seasonal soil freezing. This value can be found in the collections on construction climatology SP under the number 131.13330.2012 and in SNiP under the number 23-02-99.
The depth of freezing is determined in accordance with the conditions of the region and the type of soil covered by the freezing zone. Its value is obtained empirically based on long-term observations.
Proper arrangement of a water well will eliminate the formation of ice and ice plugs in the water supply (+)
If the water supply is introduced into the house through the foundation of an uninsulated basement, the branch before entering the heated room must also be insulated. The use of materials for insulating objects located in the ground has its own specifics.
Insulation materials must have the following properties:
- Do not absorb water or have a protective waterproof shell. If water is absorbed into the insulation and then freezes, then with a high probability, due to the increase in the volume of water when it turns into ice, the insulation layer will be destroyed.
- Do not lose their properties under soil pressure. The pressure of the earth mass from above or its movements can crush the insulation and increase its thermal conductivity.
- Not of interest to or susceptible to insects and rodents.
The last point is very important, because in the summer mice can take the insulation into their nests, and in the winter they can dig passages in it to get to the warm pipes. All this will lead to direct access of cold to the water supply elements.
Protecting insulation from mice and insects is one of the main problems when insulating objects located outdoors underground
Sometimes, to protect the well and water supply system from cold, it is enough to perform procedures that do not require special knowledge about the principles of insulation of an underground water supply system. The water that is supplied to the system from the depths has a positive temperature (usually from 7 to 13 degrees Celsius).
If there is a risk of water freezing, then it is necessary to adjust the operating mode of the system so that water is supplied in small portions, but as often as possible. Constant circulation of underground water, the temperature of which by definition is above 0º C, will prevent icing.
Insulating the head and pipes during not very cold winters in the southern regions of Russia or when the water supply is deep can be done without any special frills using sawdust or straw. To do this, you need to dig a hole near the head and a ditch along the water supply pipe, cover them with dry sawdust or straw and bury the hole again.
This procedure must be carried out every year in the fall, so that the sawdust and straw do not have time to rot by winter. To eliminate freezing for a longer period of time or if the proposed methods do not guarantee a positive result, a different approach to solving the problem is necessary.
Restoring water supply in winter is more difficult and more expensive than carrying out proper insulation, taking into account the design features of the system and climatic conditions
Peculiarities
The downhole adapter appeared recently, but is already replacing caissons in wells with great success, because this mechanism has a number of positive characteristics. A well adapter is an installation that provides a connection between the well outlet and the water supply system, which goes into the living space. The device is located in the casing at a level below the freezing point of the soil. Thanks to this installation, the functionality of the well and the design of an autonomous water supply for a living space is achieved in winter, even in severe frosts. The need for thermal insulation work for the plumbing system is automatically eliminated.
The device consists of two parts: external and internal. The first element is a fitting that is installed in a micro-hole prepared in advance in the casing tube. On the part of the pipe that remains inside, a recess is placed to fix both parts of the downhole adapter. On the outside there is a cut thread for connection to a water pipe, auxiliary sealing parts to protect against leakage and ingress of groundwater, as well as a union nut that firmly secures the entire system in one position.
The second element of the downhole adapter is placed inside the casing. It is a modernized elbow, one end of which is connected to a hose remote from the pump in the well, and the second to the part described in the previous paragraph. To do this, the part is equipped with a dovetail-shaped tenon and a rubber sealing ring, which makes the connection airtight.
To facilitate the installation procedure, the upper part of the internal part of the downhole adapter is equipped with a blind threaded micro-hole. A mounting tube is screwed into it, through which the product is immersed in the water well. There it is installed in the groove of another adapter element. After which the special installation pipe is simply unscrewed and pulled out. You can make a similar mechanism yourself.
The downhole adapter has the following advantages:
- reasonable price of products. Compared to the cost of the caisson, the adapter is 5–7 times cheaper. If the budget is not enough, you should pay attention to the data mechanism;
- the liquid at the mouth of the water well does not freeze;
- ease of installation. Installation of such equipment can be done by anyone who knows how to hold a drill;
- compactness. A casing pipe with an adapter does not take up useful space, and will not be a structure that spoils the entire appearance of the estate. Indeed, only the well cover, the diameter of which is 30–40 cm, will be placed above the ground;
- possibility of installation near the communication system;
- possibility of hidden installation of the pumping mechanism;
- aesthetics of the design. A well in a suburban area is practically invisible, which is very good for owners who are afraid of theft;
- reliability;
- possibility of use at high groundwater levels;
- 100% tightness of the system. Even during spring floods, the water remains clean. This condition is met if the equipment is installed correctly and the system is subsequently maintained;
- If the water system does not need to be used for a long time, the well adapter allows you to drain the water. It is enough to disengage the connection of the elements, and all the liquid will drain.
In addition to positive characteristics, the adapter also has negative aspects, such as:
- The rubber part (seal) may fail over time. But this depends on the manufacturer of this design and on the quality of the manufactured product;
- the joints may oxidize; to prevent this from happening, it is necessary to lower and raise the pump 1–2 times a month;
- the cable used to lift the pump does not hold it in the working position. This function is performed by the adapter. Possible premature wear or excess sealing of the connection due to constant vibration that comes from the pumping mechanism;
- Often problems arise with the gasket, which is located between the soil and the outer walls of the device. It may dry out, causing the seal to fail. As a result, groundwater will enter the mechanism, and subsequently the well will be destroyed;
- there is no possibility to connect additional sources of water intake from a well, for example, for watering a garden, for a separate outbuilding.
Plastic caisson
Recently, plastic caissons have become very popular; they can come in various shapes and sizes. So, let's look at the disadvantages and advantages of a plastic caisson.
Advantages:
- Compared to a metal caisson, a plastic caisson is much lighter.
- It does not corrode, which is why its service life is above 50 years.
Flaws:
- Weak strength. In some areas of the Moscow region, due to moving groundwater, a plastic caisson can become deformed and sometimes even float, so installation is carried out using a certain technology.
- The complexity of installation, as mentioned above, due to moving groundwater in the Moscow region, additional costs are required for sealing with the casing and exiting the pipeline.
- High price.
Cellar-caisson
Every owner is concerned about the issue of storing their harvest, which is usually sent to the cellar. Previously, ordinary pits were used for this, which were lined with bricks.
But today there is another solution that is more convenient and profitable. This is a caisson cellar, in which the optimum temperature is always maintained, suitable for both fresh and canned products, and there are no prerequisites for flooding with water.
A caisson cellar is an excellent solution for a country house.
Hydraulic accumulator and control system
At the next stage, after installing the pumping equipment, a storage tank is installed in the caisson or in the room. The hydraulic accumulator is a pressure tank that works according to the following principle:
- the pump pumps water into the container until it is filled;
- water is supplied to the consumer from the tank;
- as soon as the water level in the accumulator reaches a critical point, the pump turns on again.
The volume of the tank can reach 1 m3, the minimum capacity is 10 liters. It all depends on the amount of water consumed by the consumer.
Installation of a control system that regulates the operation of pumping equipment is carried out at the end of the well construction.
The control system automatically regulates the pump on and off. It is also equipped with protective mechanisms against power supply fluctuations and sudden drops in water levels in the well. The latter device is called a “dry” running sensor, which saves the engine from idling and, accordingly, from overheating. Automation also regulates the pressure in the system.
The condition of the pumping equipment and the quality of water supply to the consumer depend on the correct operation of the automatic system, so if you have even the slightest doubt that you can install and configure the equipment, then invite professionals. Ideally, commissioning and installation work should be carried out by employees of the company from which you purchased the equipment.
Selection and installation of equipment for water supply
Water supply equipment differs in type and installation location. The main elements are:
- a pump that is lowered into the well or placed on the surface;
- automation that ensures turning the pump on and off, protection against overloads;
- hydraulic accumulator - a container for storing water.
The hydraulic accumulator is of open and closed type. The open one is installed at the highest point of the building. A closed (membrane) hydraulic accumulator that maintains constant pressure in the water supply is preferable.
Surface pump for shallow well
Surface equipment is easy to install and is cheaper than submersible equipment. The scope of application is limited by the depth of the water level. If it exceeds 8 m, it is difficult for the pump to capture water. The maximum depth is 10 m, but in this case the equipment operates with minimal productivity and takes a long time to start up.
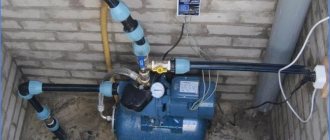
Surface pump.
The station is placed on the surface, the hose from it is lowered into the well. This simplifies installation and maintenance. The water intake pipe is small in diameter, which allows the station to be used in an Abyssinian well.
Submersible pump for deep well
From a depth of more than 10 m, water can only be raised with a submersible pump. Some products are equipped with automatic control, protection against voltage surges, and dry running.
Mandatory elements of water supply equipment for a private home are a hydraulic storage tank and automation. The deep pump ensures that water rises to a great height, so there are no restrictions on the choice of location for the membrane accumulator. It and the automation can be placed at a great distance from the source of water intake - this has little effect on productivity. An excellent choice of location would be a utility room, where it is dry and clean.
The deep pump is mounted by lowering it into the well to a level below the water level along with other devices:
- cable for supplying power to the electric motor;
- plastic pipe;
- stainless steel safety rope.
Tools and materials
There are three ways to work here that are worth considering. This is a complete arrangement of a well with your own hands without a caisson (2 options) and work using special equipment. All options involve going deep into the ground to the extent of freezing.
This means you will need a bayonet and a shovel. Bring a tape measure with you to measure depth. You will have to dig a hole in the ground in the shape of a rectangle or square, which will make it easier in the future to work with masonry, pour concrete or install well rings.
Depending on the chosen installation method, we will need the following as materials and tools:
- Old boards, possibly from pallets, hammer, nails, tape measure, screwdriver and screws.
- Suitable cement is M500 grade, crushed stone (granite or quartzite), river sand.
- Ordinary brick or well rings of the selected diameter.
- Trowel, mason's hammer, level, container for cement mortar, string.
conclusions
Installing an adapter for a well is an excellent alternative to a caisson when constructing a well whose depth does not exceed 50 m. Hydraulic structures of this type are on average designed to operate for 15-20 years.
There is no point in investing extra money in their arrangement. And by correctly installing a device made of high-quality material, you don’t have to worry that the well with the adapter will work properly throughout its entire service life.
We will be glad to hear your stories about how you constructed a well without a caisson using an adapter. Perhaps you can tell site visitors interesting technical nuances that are not mentioned in the article. Please write comments in the block below, ask questions, discuss the topic, post photos.
Financial plan
Initial Investment
In total, the initial investment in fixed and working capital amounts to 1,092 thousand rubles. However, the initial investment is not limited to this amount. Taking into account the purchase of feed, wages and unified social tax, covering current losses, with the assumptions made in the project model about the turnover of funds, the total investment during the first three quarters is estimated at 1890 thousand rubles. This volume of investment can be estimated as the lower realistic limit of investment.
Dynamics of investments
Major capital investments are made during the first quarter of the project's life. Next, it is necessary to invest in expanding the premises of the poultry farm to increase the number of chickens to 2000 chickens. Investments are estimated at 700 thousand rubles. The investment period is the 7th quarter. To cover the cash deficit, an additional 140 thousand rubles will be required. in the 7th quarter.
