Here you will learn:
- Model range of pumps “Malysh”
- Device and principle of operation
- Main types of breakdowns
- The procedure for disassembling and assembling the device
- Inspection of the position of the pump components
- How to replace the compound
- How to rewind a reel
- What to do if the device does not work well
- Adjusting the gaps
- Pump "Baby" works, but does not pump water
You can repair the “Malysh” pump yourself. This device is often used to solve household problems. For repairs, it is important to know how to properly disassemble and reassemble it, inspect and lubricate it.
Model range of pumps “Malysh”
Vibrating submersible pumps were invented a long time ago. Back in 1891, Russian engineer V. G. Shukhov used the principle of vibration for a pump. By the way, approximately the same system is used in a car fuel pump.
Later, the Argentinean T. Belloc modified the scheme - it is used without any changes today.
There are a great variety of vibration submersible pumps. But they all have approximately the same structure and the principle of their repair is the same
The Italians were the first to produce such devices for domestic needs. In the USSR, their development was undertaken in the late 1960s by Moscow designers under the leadership of M.E. Breitor. And since 1971, household vibration pumps began to be produced at enterprises in the USSR - the passion for unification had an impact.
Pumps were produced in Yerevan, Livny, Moscow, Bavleni and many other enterprises. We can name only the most famous brands: “Malysh”, “Neptune”, “Strunok”, “Sega”, “Rucheek”, “Urozhay”, “Bosna”, “Kashtan”.
All of them, in fact, differed in name and body shape. And that's not always the case. This also includes Italian and Chinese designs. For example, “Dzhereltse”.
All these are variations of the same scheme. Sometimes the names changed, but the essence remained the same. For example, the now famous “Malysh - M” was a little earlier “Sega” and “Rucheyok”. Therefore, the breakdowns of “Rucheyok” and the methods for eliminating them are very similar to its closest competitor, “Malysh”.
If you ignore the confusion with different names, then briefly all the variations come down to three or four types of submersible pumps:
- “Baby” is a model of a submersible vibration electric pump with a bottom water intake. The most powerful modification of all, but poorly suited for bottom work - it can pick up dirt or silt from the bottom and fail.
- “Malysh - M” option with upper water intake. A little weaker, but it doesn’t pick up dirt from the bottom. It rarely fails due to overheating - simply, even if the water level drops and the intake runs out, the body still cools - it remains submerged.
- “Malysh - K” is a model with a lower water intake, but is equipped with a thermal relay and a three-wire grounding wire. The presence of a thermal relay has a positive effect on service life and reliability, but increases its cost. Previously, this modification was exclusively for export.
- “Malysh - 3” is a compact model with a diameter of 80 mm for narrow wells.
In any case, vibration pumps are valued for their compactness, cheapness and simplicity. In addition, they are quite resistant to water hammer, which occurs when a water main is blocked, for example. Although you shouldn’t get carried away here either - such frequent practice still damages the pump.
Pumps of even the same model may differ slightly: polishing or powder coating of the body, for example. But their parts are usually interchangeable
Scope of application
The primitive design of vibration-type pumps ensures their simple operation. Due to the absence of bearings and rotating elements, they do not require regular lubrication. Slight heating of the mechanism during operation contributes to slow wear of parts. Vibration-type pumps successfully cope with pumping alkaline water; they are not afraid of the presence of mineral salts in the liquid and are resistant to temperature fluctuations. But before choosing such a unit, it is worth remembering its ability to vibrate. What does this mean?
The vibrations of the pump, due to which the liquid is taken and moved to the pipeline, have destructive properties. Due to their action, static objects or materials may begin to move, which is extremely undesirable. Typically, vibration-type pumps are used for the following purposes:
- Remove liquid from a recently dug well or pump out water for further inspection and cleaning of water-bearing springs.
- Provide water supply from a well for life support.
- A vibration pump is successfully used for watering a site, pumping water from a lake, river or other body of water.
- Also, using the unit, you can arrange the supply of liquid from a tank or tank.
- A vibration pump will help out if you need to remove water from a flooded basement, empty a pit, trench or other volumetric depression.
Comment! The absence of actions for collecting water from a well in the list is explained by opposing reviews about this area of application. For some, a vibration-type pump serves as an excellent assistant in delivering water from a well, while for others it caused harm, destroying the well itself and causing deformation of the foundation of the main building.
Device and principle of operation
Pump device.
Its body can be disassembled into 2 parts. A yoke is pressed into the bottom. These are 2 electric coils with a core, filled with a compound (polymer resin), an armature. In the upper half is the mechanical system. A vibrator with a piston rests on a shock absorber made of elastic rubber. You can install a check valve on the water intake pipe and pump it out.
The operating principle of the device is simple. When it is plugged into the network, the coil creates an electromagnetic field. The core begins to vibrate. The membrane prevents it from swinging too much, and the shock absorber returns it to a neutral position. A piston attached to the armature pushes an elastic mixture of liquid and air, and the water pump begins to work. This creates fluid movement in the hose or pipe.
The core performs 50 vibrations per second. At a similar speed, the piston performs translational and reciprocal movements. Portions of water controlled by the valve rush in a given direction and flow out of the outlet pipe.
The principle of operation of the mechanism
The operation of a vibration pump is based on changes in pressure in the discharge chamber. Main process steps:
- The flow of current to the coil winding ensures the formation of a magnetic field.
- The magnetized coil attracts the vibrator.
- Under the influence of this force, the piston bends inward and approaches the discharge chamber.
- Due to this movement, a rarefied atmosphere is formed in the chamber (4) and the pressure decreases.
- Liquid is sucked in from an external source through valves (8) and fills the internal space of the chamber (4).
- The vibration pump operates on alternating current, the name of which speaks for itself. Therefore, after a short period of time, the magnetization process stops and the rod, due to the action of the shock absorber (5), returns to its original place.
- The piston presses on the liquid located inside the chamber (4). Due to this action, the pressure inside the chamber (4) increases.
- Check valves closed by liquid pressure do not allow water to return to the source, so it moves into the discharge chamber (3).
- After a moment, magnetization reappears in the vibration pump. The piston on the rod moves back, and the liquid moves through the channels (11) to the hose (pipeline).
The frequency of the rhythms is 100 times in 1 second, and the movements of the rod and piston resemble vibration, due to which the unit is called a vibration pump.
Main types of breakdowns
Vibration pumps of the “Malysh” type were developed more than half a century ago by Soviet designers. But, despite this, they are still very popular among our compatriots. The reason for this is the affordable price and high reliability. But, despite this, submersible pumps “suffer” from a number of characteristic malfunctions that are also characteristic of the “Malysh”. The main types of “Malysh” malfunctions include:
- Detachment of the electromagnet.
- The gap between the piston and magnet coils does not meet the standards.
- When plugged in, the pump hums, but does not supply water.
Briefly about the main thing
The small, compact hydraulic unit “Malysh” is quite reliable and powerful equipment, which is most often used in rural areas and in summer cottages. Unfortunately, they, like all other pumps, are prone to breakdowns. Most often, these are minor breakdowns that you can easily fix yourself, without the help of a professional technician. But there are also serious faults that can only be repaired by a specialist. Pay attention to the correct disassembly and assembly of hydraulic equipment.
Have you already repaired the Malysh hydraulic unit on your own? Or do you still prefer to seek the help of professionals?
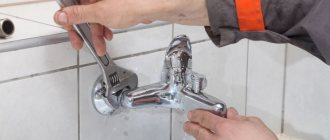
The procedure for disassembling and assembling the device
Answering the question “how to repair a baby pump with your own hands?”, first of all, you should clearly understand how to properly disassemble the pump without damaging its main components. Disassembling the device is carried out in the following order:
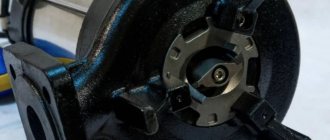
Pump Baby disassembled
- The first thing to do is to indicate the correct location of the upper and lower parts of the body relative to each other. To do this, a notch is made at the junction of the body and the lid with a nail or other sharp object.
- Next, remove the fixing screws of the cover. Here you need to be very careful not to deform the fasteners or damage the mechanisms inside the device. All screws are unscrewed several turns each and removed simultaneously after maximum loosening. When working with liquid, the bolts may rust and cannot be removed. In this case, the bolts are cut off with a grinder, and new ones are installed in their place.
- Next, the piston, armature and electromagnet are removed, and the gaskets are removed.
The disassembled device is reassembled in the reverse order. There are important points on which the correct functioning of the pump depends:
- First of all, the piston disc must be installed correctly. It is installed on a special saddle. It is important to strictly observe the distance between these components and their mutual parallelism. If the disc does not become parallel to the seat, the stem is most likely bent. In this case, you need to select the correct position of the gasket. The distance from the piston to the magnetic coil must be at least 4 mm.
- When assembling the water pump, you should make sure that the holes in the rubber gasket are clearly in place and coincide with the holes in the housing. Otherwise, moisture may enter the electrical part.
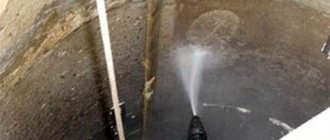
- Before full operation of the device, you should check it in a bucket or barrel. The pump is lowered into the container without connecting a hose. If the device is working properly, a stream of water with a height of 20-30 cm will emerge from the outlet pipe.
Frequent problems
- The Malysh pump does not pump water well - the problem is an incorrectly configured check valve.
- When the pump is turned on, the plugs in the electrical network are turned off urgently (the cable has melted) - the reason is the burnt-out armature winding. The cable needs to be replaced.
- The pump is running, but no water flows - the check valve has failed or the threaded connections of the rod have become loose. If the rod breaks, all that is required is its replacement.
- The Baby pump is heating up and shaking violently - the vibration dampening compound is peeling off. This layer will need to be replaced.
To disassemble the Baby pump, you need to unscrew all the screws that connect the housing together. It is recommended to apply small notches to the body; this will make the process easier during subsequent assembly.
Expert advice: when disassembling the pump, you need to unscrew not one screw at a time, but loosen each one a couple of turns.
When assembling the pump, pay attention to the position of the gasket and the upper part of the housing - they must match. Or if you made notches, use them as a guide. Advice from experienced people: after assembly and repair, check the functionality in a container with water so as not to remove the pump from the well again
Advice from experienced: after assembly and repair, check the operation in a container with water so as not to remove the pump from the well again.
Inspection of the position of the pump components
If you have disassembled the pump, check the correct position of its components.
- Make sure that the gap between the piston and the coil electromagnets is about 5 millimeters.
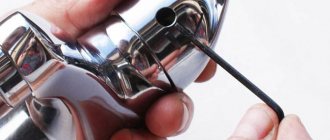
- Check the condition of the valve. It should flow freely in both directions. There should be no visible damage to the valve. To secure the valve more securely, lock its nut with an additional one.
- Make sure there is no mechanical damage to the piston assembly. Despite its firm hold, it should retain some flexibility. To ensure it is firmly attached to the hub assembly, unfasten the nut at the end. For reliability, the nut can be secured with an additional lock.
- You can also disassemble the bushing block. Remove the piston assembly, remove the washer that regulates the distance between the sleeve and the membrane (there may be several of these washers). Then remove the stop ring and remove the durable rubber membrane from the piston assembly side. You will see a cylinder made of aluminum. Press the bushing assembly against the spring and remove the cylinder. When reassembling, you can adjust the gap to 0.5 cm. The gap is changed by adding or removing washers on both sides.
- Disconnect the hose from the device and hang it in a bucket filled with water. We turn on the power supply and check the voltage in the network - it should be fixed in the range of 220-240 volts.
- Turn off the equipment and drain the water from the pumping device.
- We check the patency of the valve. We just blow it through our mouth. Air from the mouth should flow freely into the valve, but as the pressure increases, the hole should close, and you should feel that the piston assembly has moved. When blowing in the opposite direction, the air flow should pass without visible obstacles.
How to replace the compound
- Let's disassemble the device.
- We determine the place where the compound has peeled off from the submersible pump housing. This can be done by lightly tapping the body with a small hammer. In normal areas the sound will be dull, in damaged areas it will be ringing.
- We remove the assembly with the compound from the vibration pump housing.
- Using a grinder, we carefully apply a mesh of notches, up to 2 millimeters deep, to the inside of the body. We make the same mesh on the unit with epoxy compound.
- Cover both areas with notches with glue for glass surfaces (any sealant can be used)
- We return the assembly with the compound to its original position - fix it and wait until the sealant hardens.
- Putting the body back together.
How to rewind a reel
To rewind the vibration pump coils you will need the following materials:
- Copper wire with a diameter of 0.65 m (PETV brand);
- Epoxy resin, plasticizer, hardener.
Tools:
- Winding machine;
- Soldering iron
- Electric stove;
- Hammer;
- Screwdriver;
- Protective gloves.
It is recommended to repair the vibration pump outdoors or in a well-ventilated area, since to rewind the coils you will have to melt the epoxy resin, and it emits toxic substances, the inhalation of which is harmful to the body.
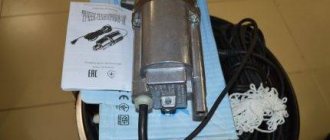
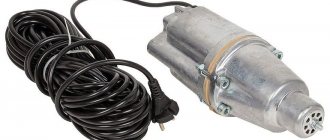
Pump Baby, ready for installation and connection
First we disassemble the submersible pump. We remove the filled electromagnet from the device. To do this you will have to melt the epoxy compound.
For this, an electric stove is best suited, on which you need to place the body of the unit. Wait until the epoxy warms up to a temperature of 160-170 degrees (this is indicated by the characteristic smoke coming from it - this smoke is toxic, try not to inhale it).
Next, we need a wooden log against which we can knock the electromagnet off the body. After the compound has warmed up, put on protective gloves and hit the body against the deck (the electromagnet should face down) until the electromagnet changes its position so that you can pry it with something and remove it.
While the case is hot, clean it of any remaining epoxy resin with a metal brush or flat-head screwdriver.
Now you need to use a hammer to knock the electromagnet out of the coil. To do this, you need to use a small wooden block as a wedge. It is recommended to do this with an assistant who will hold the coils while you knock out. If you fix the coil in a vice, then most likely the repair will end in deformation of its frame.
Once the electromagnet core is knocked out, unwind the coil and clean its frame of any remaining epoxy resin. Place the coil frame on the winding machine and wind the coil completely (approximately 8 layers). This can be done without a special machine, but it will take much more time.
Connect the beginning and end of the wire to the main part using a soldering iron. We put the electromagnetic core back into the coil frame. We thread the power connection cable through the seal into the housing. We separate the cable and strip its ends by 2-3 cm.
Solder the cable to the beginning of the coil winding. Carefully lower the coils into the housing. To ensure that the coils fit tightly into place, attach a small wooden block to the electromagnetic core and gently tap them into the desired position.
Now you need to make the epoxy compound. Secure the unit body in a vice. Mix epoxy, plasticizer and hardener in a metal bowl.
Fill the coils with the resulting mixture up to the top edge of the electromagnet. Wait 10-15 minutes for the compound to fill all the cracks. If, after the epoxy has dropped into the voids, its level decreases, then add additional amount of the mixture.
In order for the compound to completely cure, you need to wait at least 24 hours. After this, assemble the device body. After the repair is completed, test the operation of the pump in a bucket of water; you may need to adjust the gap between the armature and the electromagnet.
What to do if the device does not work well
If the pump is not functioning well, its power has decreased and there is no pressure, you should try to rinse it with clean water; perhaps the reason is that it is clogged with debris. Disassembly of the “Baby” is required if the causes of the breakdown were not established during an external inspection.
The repair includes the following stages:
- It is necessary to unscrew the bolts on the body connecting the two parts of the device. If they are rusty and cannot be twisted by hand, you can cut them off with a grinder.
- The piston and other internal parts should be cleaned of dirt. The pump coil is treated with a compound; it must be removed from the housing.
- The reel needs to be inspected, repaired and rewinded. If the rewind is burned out, you should replace it with a new one.
- An ohmmeter is used to check the functionality of the power cord. If it malfunctions, it can be shortened or a new one installed.
- Assembly of the device. Be sure to properly align the holes through which the water flows.
Check the functionality of the pump. If there is additional noise, the bolts need to be tightened better.
Competent DIY repairs
Failures can occur in electrical and mechanical parts. The equipment may fail partially or completely. Partial malfunction of the device may mean either a breakdown of internal parts or a violation of adjustment.
Most often, due to the operation of the device without water, it overheats and the automation fails. For the same reason, the insulation may overheat, the filling will delaminate, and the yoke may fall out of the body. In this case, the pump hums, does not pump liquid, and the body of the product may be damaged. It is possible to avoid such malfunctions by following the operating rules of the pump.
Mechanical failures of the vibration pump occur quite often.
Let's look at the most common causes of breakdowns:
- Limescale deposits on parts;
- Depressurization of the housing due to mechanical damage;
- Clogging of the insides with dirt;
- Loosening of bolt connections.
If you suspect a malfunction of the device, you must disconnect it from the power supply and remove it from the water. Before disassembling the pump, you should inspect it. Disconnect the supply hose and inspect the device from above for damage. Violation of the integrity of the housing can only be eliminated by completely replacing it. If everything is fine with it, you need to check the resistance of the coils with a tester. If the contacts close, the coil must be replaced.
This usually requires a specialist, because... It is very difficult to do this at home.
Pump repairs should be carried out when it is turned off.
The next step, if the coil is in good condition, is to bleed the pump. If air enters freely or the valve closes when taking a sharp breath into the inlet, then everything is fine with the pump. The device also needs to be shaken; the presence of extraneous sounds indicates a breakdown inside.
Adjusting the gaps
For stable operation of the unit, it is important that the working gaps between the electric drive parts are correctly set and adjusted.
Tools for pump repair can be purchased at a hardware store.
To check the size of the gaps, you need to connect the device to an electrical network with a voltage of 220 V. Adjustment is needed.
This is important because:
- Lower voltage may reduce the power of the device;
- A small voltage will affect the electric drive and the equipment may break down;
- Higher voltage can burn out the pump motor.
The gap between the core and the armature, according to the factory parameters, should be about 0.5 cm. If the gap size is changed, it needs to be adjusted. It’s easier to give the device to a specialist, but you can make the adjustment yourself.
In order to adjust the gaps, you need to remove or add washers under the rubber piston or armature. If you cannot accurately set the appropriate size, it is better to send the device to a service center. Additional washers increase the pressure, and reducing them weakens it. If the gap in the electric drive is less or more than normal, it can lead to breakdown.
The “Malysh” submersible pump is the optimal choice for providing water to your home or cottage. Like all equipment, such devices are prone to breakdowns, especially considering that it is constantly in water. It is quite possible to repair the device yourself. When purchasing a device, you must keep the instructions, since its diagram will be very important during repairs. Proper operation and preventative checks of the device will help reduce the risk of breakdowns or avoid them altogether.
Why does equipment break down?
A submersible well pump provides convenience and ease of use of the well. It lifts water from great depths to the surface, where it flows through communications to water intake points.
Domestic and foreign enterprises produce household submersible pumps. And although the pumping equipment is reliable, breakdowns may occur from time to time during operation.
All elements of submersible pumps are precisely fitted and can be easily disassembled. If during the assembly process the parts do not fit into place freely, then the order of installation of the individual components is incorrect
The smooth and smooth operation of a submersible pump is often disrupted by the following reasons:
- high (more than 50%) concentration of suspended particles in water;
- “dry” operation, when the device operates without touching the water;
- voltage drops above the permissible level that regularly occur in the network;
- poorly secured cable connections;
- the unit cable is not correctly attached in the well head area;
- The submarine cable is not secured correctly.
Malfunctions are caused by the absence of a filter or its excessive contamination, an unstable pressure switch or a poorly functioning accumulator.
In the absence of grounding, electrochemical corrosion affects the metal elements of the equipment. The pump stops pumping water normally and requires immediate maintenance.
If problems arise with a new pump that is under warranty, do not fix them yourself. It is better to take the device to a company service center. There, its functionality will be restored by experienced professional technicians.
Very often, the cause of the malfunction is errors made by users during the installation of the pump and its operation. Manufacturers and service center employees recommend that customers, immediately before connecting devices, carefully read the instructions and strictly follow everything that is written there. This will avoid many problems and extend the life of the pumping equipment.