A faucet or mixer is a small device, but extremely necessary in any home. Designers are developing more and more new design options for faucets, but the internal design of these products is not very diverse. Having studied the design of the water tap, it is easier to choose the appropriate mixer model. You can even install the faucet yourself or make the necessary repairs.
- 2 How are valve taps arranged?
2.1 Tap with one valve
- 2.2 Two-valve mixer
Types of cranes
Before repairing a faucet, you should definitely consider the types of faucets.
There is a small list of variations: Two-valve - a traditional type of mixer with the ability to open and regulate the flow of water.
Single lever - a more complex design that allows you to regulate both the water pressure and its temperature with one lever.
Thermostatic is a type of faucet that can automatically supply water at a certain temperature. This variation is used quite rarely.
The touchless faucet is controlled by an infrared sensor, which is directly connected to the valve. This option, as a rule, is most often used in public institutions; probably everyone has seen such a design at least once.
Fixing a broken faucet
Types of breakdowns
WE LIST THE TYPES OF DAMAGES AND THEIR REMOVAL.
Faucet leaking
This occurs when the tightness of the ball seals is broken during long-term use. Also, when small particles get into the rotating mechanism of the ball, as a result of which the sealing rubber does not fit tightly enough or wears out faster. Also, the ball itself may be damaged if it is made of low-quality materials or if small particles enter it.
If the tightness of the structure is broken, increased tightening of the connection of the structure along the threads with a winding wrench will help, creating a tighter fit to the ball.
If clogged, you should disassemble the structure and rinse and clean the internal parts. Clean the filter, it may be clogged. They also put an additional mesh on the pipes to retain small grains of sand and pieces of rust to prevent another breakdown.
Replace the ball if it is damaged. Replace seals when they are worn.
Crack on the faucet body
In this case, repair is of course impossible and the entire body has to be replaced.
Although, you can use cold welding to temporarily fix a leak, after first cleaning and degreasing the crack with acetone. In this way, you can eliminate the breakdown before purchasing a new crane and changing the design.
Water supply valve is difficult to close
...or opens, or even stops turning altogether.
This means that the rotating mechanism of the shutter is broken or clogged. It is necessary to disassemble, remove the shutter handle, unscrew all adjacent parts and replace with new ones.
Reduced water pressure
Don't rush to disassemble the faucet. First of all, turn on the water in the remaining water supply devices. Check with your neighbors to see if their pressure has also decreased in order to prevent utility companies from reducing the pressure. The reason may also be a clogged cleaning mesh.
Flanged ball valves are popular in the market. They are distinguished by their reliable design and are used for installation on pipes from small to large diameters. They have proven themselves to be the best.
For high-quality and prompt repairs you will need:
- Pliers
- adjustable wrench
- Hammer
- Allen key
- Spare parts (if you are sure of the cause of the malfunction)
- Cloths for wiping and minimizing dirt
- Liquid special rust remover
- Silicone grease for plumbing purposes
- Screwdriver
Repair of a single lever mixer with a ball mechanism
Mixer device
Types of breakdowns and their elimination:
- The tap is closed, water flows. The space between the ball and the seats is clogged. The ball cartridge is broken or cracked (it cannot be repaired, only replaced).
- The pressure is good, but the water from the faucet barely flows. It could be the aerator. It clogged due to hard water.
- Temperature regulation is broken.
In order to eliminate the malfunction and replace the gaskets or the main mechanism, you will need to dismantle the mixer:
- Remove the decorative plug and unscrew the adjusting lever through the hole.
- Remove the lever.
- Next, the eccentrics and the mixer dome are dismantled.
- Carefully remove water stone, rust and dirt.
- Take out the ball mechanism. If the integrity of the part is damaged, replace it.
- Replace all seals; this must be done regardless of the condition of the gaskets, for preventive purposes.
- Reassemble the mixer in reverse order.
If you follow the instructions exactly, the mixer will start working properly.
How to properly disassemble a 2-valve mixer
This job is also quite easy to do.
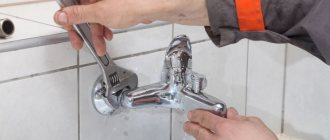
To accomplish this goal, you will need a screwdriver and an adjustable wrench.
- First of all, we shut off the water supply to the apartment (about a storage tank for water supply of 500 liters is written here).
- Remove the blue and red plugs from the taps. Having dismantled them, you will find screws that need to be unscrewed with a screwdriver.
- After this you will be able to see what condition the rubber gaskets are in. By their appearance, you will understand whether they need to be replaced or whether the poor operation of the mixer is due to the fact that deposits have appeared (read about equipment for deferrizing water in this article) or the connections have become loose.
- There is another reason for the disgusting operation of the faucet - limescale deposits accumulated inside it. To remove it, take a long, flat screwdriver and use it to try to remove all the dirt.
How to choose a faucet
In order for the selected model to serve you for a long time, you need to pay special attention to a number of factors when selecting shut-off valves:
- The faucet must have a sufficiently thick spout, otherwise it will begin to leak after a year of use;
- Be sure to read the manufacturer's instructions, which indicate the technical purpose of the crane. Not all touch and thermostatic models are suitable for showers, and some lever models are suitable for sinks;
- If the gaskets are made of rubber, then several times a year it will be necessary to carry out scheduled repairs - change them. Models with plastic gaskets are somewhat more expensive, but do not require frequent intervention;
- Touchless faucets have one drawback - their device requires power to the control circuit. It can be connected via wiring, an outlet or to a portable battery. Consider these features of sensor faucets in advance.
Special models
In addition to classic valve devices, more modern taps are now widely used:
- With thermostatic operating principle;
- Sensory.
In thermostatic devices, a thermostat is connected to the locking mechanism. It comes with valves (for domestic use) and without them (for use in public places). During installation, the desired water temperature is set, according to the instructions or your own preferences, and then it does not change as you use it. If necessary, you can change the settings.
Photo - model with thermostat
Touch models do not require touching handles or valves. They are equipped with an active infrared indicator that constantly monitors the area around the sink. If you bring your hands to it, the locking mechanism will unlock and water of a certain temperature will flow (again, due to the thermostat installed in the spout).
Video on the topic:
Kinds
A water tap is one of the types of shut-off valves. It is necessary to control and ensure water supply. The design of the faucet is represented by the following parts - spout, valves, locking mechanisms (balls or cartridges) and handles. These devices can be classified according to their design:
- Single valve;
- Two-valve.
The operating principle of a single-valve tap is considered very simple, since it is used to supply only one type of water - either cold or hot. Such mechanisms are equipped with special axle boxes made of ceramic or metal. A ceramic axle box consists of a pair of plates that are pressed tightly against each other. When you turn the valve, one of them changes its position and water begins to flow. In this case, the worm part performs translational movements as the valve rotates, due to which access to the water pipe is opened.
Photo - single lever tap
It should be noted that the operation of such a water tap will be longer if it is possible to change cartridges (in ceramics) or plates (in a worm mechanism). It is desirable that the faucet spout be made of durable, corrosion-resistant materials - copper, brass. Even alloy steel becomes covered with rust flakes over time, which in the future will cause spout leaks.
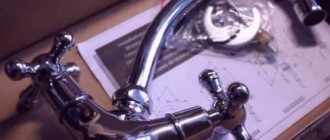
A two-valve water tap is an analogue of a mixer; they have the same device. Unlike a kitchen faucet, it is designed for mixing, so it can be used for installation in various conditions - shower, bath, etc. The body is made mainly of brass, coated with a thin layer of chrome - this increases the durability of the alloy and gives the spout a beautiful shine. Flow control is carried out by two axle-box valves, which can be ball or plate type.
Each water pipe (for hot and cold water) is connected to a separate outlet - its own valve. The hole is closed with balls or ceramic cartridges. When the valve is turned, the locking mechanisms open the pipe. Mixing is carried out directly in the spout, the spout of which is equipped with an aerator.
Photo - operating principle of a double-lever tap
There is also a shower type model. It differs in that its design, in addition to two axle boxes, also includes a watering can. The watering can is also equipped with a special aerator that breaks the water flow into a large number of streams, thereby ensuring better distribution of the liquid. In order for the flow to flow into the shower spout, an additional valve is used. But it doesn't work without axle boxes. First you need to open the taps supplying water, and then the shower drain valve. Its operating principle is based on blocking one channel and opening another. It also comes in ball and plate types.
Photo - valve retro model
Device
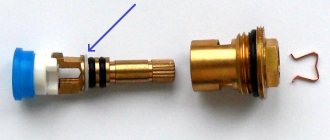
A ball valve is characterized by the presence of a control head, the manufacture of which is made of stainless steel. The faucet ball in the middle is hollow, it has holes and a pin, polished to a shine, and it is located in the mixer body. Hot and cold water is supplied through special brass tubes, as well as flexible wiring. A handle is attached to the pin, causing the ball to rotate.
Diagram of a two-handle ball mixer.
The special hole cartridge must be sealed, this is achieved with gaskets.
To prevent burns, the faucet cartridges have a ring that limits the angle of rotation of the handle in the direction where hot water is supplied. They are polished using ultrasound and ground tightly together. This type of grinding treatment prevents water from seeping through.
If you disassemble the cartridge by placing its washers on top of each other, they will attract like magnets. This method is decisive for checking the quality of the cartridge. The presence of additional mixers in the single-lever ball valve device is not provided. The device has no parts that can be worn out during operation of the faucet, since there are no gaskets, and all elements correspond exactly to each other.
Single lever mixer
The most common type. It is a simple design where the locking mechanism is a ball or disk. Depending on this, such taps are:
- Ball;
- Disk.
The handle used to regulate the pressure and temperature of the water is called a flag. Therefore, the second name for such a mixer is flag.
Single lever mixer design
The most common problem that owners of such a faucet encounter is that when the handle is raised, water flows out of it. This is a sign of a broken locking mechanism. Let's look at how to repair a faucet with a broken cartridge step by step:
The decorative cover is removed first. It is a flat small disk with red and blue markings. It is needed to visually determine the movement of the mixer when the water temperature changes; The flag is installed on the body using a screw connection. The screw is located immediately under the decorative strip. Depending on the faucet model, it has a different shape - flat, cross, etc. The flag is carefully removed from the base;
If the faucet is old, then the screw is most likely rusty. In this state it will not be possible to unscrew it. The only thing left to do is remove the handle by force. At the same time, a plastic nozzle will also be removed from the base, which is responsible for the direction of movement and the rigidity of the flag’s movement. Remember that with such repairs there is no guarantee of 100% success; The second decorative attachment is removed next. It acts as a cover and is installed on top of the body. It is installed using a ring nut, which in normal condition is easily unscrewed. Let's assume that the nut is rusty and cannot be unscrewed. Then the thread is simply torn off with a pipe tap or by hand. It has no constructive purpose and performs exclusively a decorative function; Next, use an adjustable wrench to remove the ring nut; The nut contains the cartridge. There are several protrusions on its surface - two or more
They perform the function of fixation - it is important not to damage them;
When the cartridge is removed from the mixer, you can tell from it whether it is suitable for subsequent work or not. If cracks, nicks, roughness are found on the surface of the part, or it does not hold tightly enough, the cartridge is replaced; There is another option: in old faucets, corrosion can damage the internal mechanism of the faucet (the place where the cartridge is installed)
Functionally, there are 3 holes for water passage and two or more grooves for installing a cartridge. In this case, repairs are impractical; it will be cheaper and faster to simply replace the mixer;
After installing a new cartridge, the mixer is assembled in the reverse order.
If the problem is the opposite, that the water flows under too little pressure, the aerator is clogged. An aerator is a metal mesh at the outlet of the faucet. It serves to spray a continuous stream of water into thin streams, filtering solid residues (lime, rust).
Aerator
How to clean the faucet aerator step by step:
- To do this you will need to buy a special product. Many plumbing supply manufacturers also sell all-purpose cleaning mixtures made with lye or other active ingredients. At home, you can also use citric acid and vinegar, descaling agents, and other abrasive cleaning powders to clean the faucet mesh;
- The aerator is attached to the tap with a threaded connection. It must be carefully unscrewed and removed from the base. If the mesh is tight, do not try to tear it off by force - this will lead to permanent failure of the filter. It is better to lubricate the threads with machine oil and try again;
- The dismantled sprayer must be soaked in water with an alkaline solution. Depending on the selected compound, a concentrated solution is prepared. In order to ensure the best dissolution of salts and scale, the water temperature should be 20 degrees and above;
- Remember that powders should only be dissolved in non-metallic containers. For example, these are glass jars or plastic basins;
- 20 minutes will be enough for complete cleaning. Periodically, the container needs to be shaken to better break down calcium and other contaminants.
Sometimes, instead of specialized compounds, even a simple dishwashing detergent is used. But it only works in hot water. Similarly, you will also get rid of scale and sediment on the shower aerator using hydrogen peroxide or ammonia alcohol.
Video on the topic:
Design
Before starting the repair process, you need to understand what the faucet consists of and determine the location of the breakdown. Structurally, a ball valve consists of a mixer, a shut-off device, a valve and clamping mechanisms. Detailed diagram below. The valve is connected to a ball, which acts as a lock in this system. When you turn the handle, the ball changes its position and opens the water pipes. Depending on its position, you can regulate the strength of the flow, its temperature (when connecting two water supply pipes - cold and hot) or completely stop the flow.
Photo - design of the ball model
Each pipe is led into a separate hole, but both of them are regulated by one lock. This is very convenient to use, since there is no need to alternately adjust flows of different temperatures. At the outlet there is a mixer in which the water flow is regulated.
Based on these design features, the most common problems encountered with a water ball valve are:
- Cracks in the body. Occurs when using shut-off valves for a long time or purchasing a low-quality device;
- Weak water pressure;
- Leakage of water from the faucet;
- Incorrect water temperature adjustment.
Video on the topic:
Assembly and installation of fittings
A ball valve can be installed on almost any section of the pipeline. Threaded models are easy to install yourself if you follow the instructions:
- Cut off part of the pipe at a pre-selected location.
- Screw the thread onto the pipe, wind the seal, and secure the shut-off valves.
- Install a welded or plastic mechanism using a welding machine or a special soldering device, respectively.
- When the crane is placed horizontally, place the rotary handle on top (deviation from the vertical is allowed no more than 45°).
- Install the structure taking into account the arrow located on the body of the product and indicating the direction of movement of gas or liquid through the pipeline. If there is no arrow, then the device can be installed on either side.
After installing the faucet with your own hands, you must check the part for functionality and tightness in all positions. Also, you need to make sure that nothing interferes with the free rotation of the handle or “butterfly”.
Types of single-lever mixers and their design
Despite the external similarity, there are two types of rotary or single-lever faucets - with a cartridge (cartridge) and ball - with a ball inside. You can repair any of them, but to do this you must first disassemble them. And so that you can not only disassemble, but also assemble, it is advisable to become familiar with the internal structure of each.
The design may be different, the structure remains the same
Cartridge mixer: structure
Cartridge mixers are so named because their shut-off and control mechanism is hidden in a special cartridge flask. In more expensive faucet models, the cartridge body is made of ceramic, in cheaper ones - from plastic. The good thing about these models is that they are easy to repair, but it is not always easy to achieve the required pressure with them - you need tighter control of the handle. But changing the water temperature is very easy - with a slight movement of the hand.
The structure of a single-lever faucet with a cartridge is simple. If you go from top to bottom:
- Switch with fixing screw.
- Locking (clamping) nut.
- Cartridge. The water flows are mixed in it, and the same device shuts off the water.
- The mixer body, which has a “seat” for the cartridge.
- Fasteners, studs and gaskets to ensure tightness.
- Spout (gander). It can be a separate part - in rotary models for the kitchen or part of the body - for sinks in the bathroom.
- If the spout is separate, gaskets are also installed below and there is also part of the body.
What does a single lever mixer with cartridge consist of?
The cartridge itself contains several (usually 4) ceramic or metal disks of a special shape. A rod is welded to the upper disk. By changing the position of the rod, we change the position of the plates relative to each other, changing the amount of water passing through the holes in the plates.
In order for the faucet/mixer to work normally, the plates are ground very tightly. For this reason, cartridge single-lever faucets are very demanding on water quality. Foreign fragments getting between the plates causes the faucet to leak or stop working altogether. To avoid this, some manufacturers install filters on the incoming pipes. But, it is better to install filters on the water supply and get clean water that can be safely supplied to household appliances.
Single lever ball mixer
It got its name from the element in which the water is mixed - a ball with cavities. The ball is usually metal, hollow inside. Its outer part is polished to a shine. The ball has three holes - two for the entry of cold and hot water, one for the exit of already mixed water. A rod is attached to the ball, which fits into a cavity in the handle. This rod with a rigidly attached ball changes the temperature of the water and its pressure.
The structure of a single-lever mixer with a ball water mixing mechanism
It is easier to adjust the parameters with such a device - the parts are well lapped, the handle moves easily. Mixers with a ball mechanism are less critical to the presence of mechanical impurities, but do not respond very well to the presence of hardness salts and excess iron. So for normal operation, pre-filtration is required here too.
Advantages and disadvantages
Many homeowners pay attention to the single-lever mixer, because its design, repair, and installation are simple, but at the same time very effective and functional. These more modern devices differ from two-valve ones not only in their more aesthetic appearance. They are also very convenient to use; they allow you to more accurately and quickly adjust the water temperature and reduce its consumption. But they also have disadvantages:
- Demanding on water quality. Single-lever faucets, due to the nature of their design, are very sensitive to impurities contained in tap water. Due to its poor quality, they often become clogged and then stop working. Models with ceramic cartridges especially suffer from this problem.
- Low maintainability. It is almost impossible to repair a single-lever faucet with your own hands; you can only replace some of its parts, for example, seals or the entire cartridge.
Remember! To increase the service life of a single-lever mixer, you can improve the quality of tap water by installing a special filter, as well as perform timely preventive maintenance of the device.
Main stages of repair
Repairing a faulty ball valve is divided into several stages:
Preparation
During preparation you should:
- Shut off the water supply to the riser.
- Open the tap and allow the remaining water in the pipes to flow down the drain.
- If a faucet is being repaired in a combined bathroom, located between the bathtub and the sink, you need to place a wide flat container under it to catch the flowing water.
Dismantling
Disassembly is performed in the following sequence:
- Pry up the two-color plastic insert covering the handle securing screw and pull it out.
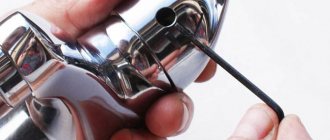
- Unscrew the hex screw holding the handle. Remove it by pulling up.
- The cartridge fastening nut is covered with a decorative cap. It must be unscrewed by hand.
Figure 6. Cartridge mounting nut
Using an open-end wrench or adjustable pliers, unscrew the flat bronze nut securing the cartridge.
Figure 7. Removing the cartridge
Remove the cartridge.
Repair
- Inspect the three gaskets on the bottom of the cartridge.
- If they are worn or dirty, clean them or replace them.
- If the cartridge itself is worn out or the polished ball inside is damaged, the entire cartridge will have to be replaced.
Important! If you decide to repair the faucet cartridge yourself, you should be especially careful. You need to disassemble it above the box to collect all the springs and O-rings that fall out of the mechanism. The likelihood that you will be able to find a malfunction inside the cartridge, much less fix it, is small
It’s easier to replace the entire assembly at once and not waste time searching for parts
The likelihood that you will be able to find a malfunction inside the cartridge, much less fix it, is small. It’s easier to immediately replace the entire assembly and not waste time searching for parts.
Assembly
The device is assembled in the reverse order.
Figure 8. Cartridge mounting tabs
When installing the cartridge, you need to ensure that the protrusions on its bottom fit into the corresponding recesses in the mixer body. Before installation, the cartridge must be lubricated with plumbing grease.
Do not use excessive force when tightening the nut to avoid stripping the thread.
After assembly is completed, a test run is carried out and checked: the mixer passes water or the leak has been eliminated.
Main types of mixer malfunctions
The most common problems that arise during the operation of a ball valve are:
- Faucet leaking. The reason is that small particles get between the seats and the ball, which disrupts the density of the adjacent elements. The seats are wearing out.
- Cracks on the device body. The main reason is due to the poor quality of the housing material. In this case, the mixer should be completely replaced. Temporary repairs can be made to hull cracks. Coat the cracks with sealant, and after it dries, clean the seams. This operation should be performed a couple of times, but it should be borne in mind that such repairs are not durable.
- The water temperature in the mixer is poorly regulated. This malfunction consists of clogging of the cartridge due to rust and the ingress of various small particles. The device element must be replaced.
- Poor water pressure from the faucet. A common cause may be simple clogging of the aerator mesh. The mesh is cleaned, and an excellent way to eliminate this problem would be to install filters on the supply pipes to the mixer.
Sometimes, as already mentioned, it is necessary to replace the gasket in the tap. We have already described in detail how to do this.
Ball mixer mechanism
The ball mixer recently began to be produced by manufacturers supplying products to the market, and replaced the stuffing box mixer. Its predecessor required constant replacement of rubber gaskets. Under the cover of the ball mixer there is a special handle for adjustment, which is carried out with a screw. Although the ball valve design is more rigid, it does not protect the valve from the effects of hard water.
Ball valve diagram.
To eliminate all malfunctions, do it in the kitchen or bathroom, where the use of the mixer should be intensive. The faucet should be disassembled if, upon inspection, a certain degree of water leakage was detected. In this case, water can flow in a thin stream or flow out under pressure. When disassembling a ball valve, you should know the structure of this mechanism, which has a fairly wide range of equipment, despite its small size.
The ball valve device includes a non-separable ceramic cartridge, which makes its operation reliable and durable. In the design, the elements fit tightly to each other, so there are no seals. The ball valve mechanism may periodically fail, since its design with tightly fitting parts does not affect the operation of the mixer.
Conclusions and useful video on the topic
The process of disassembling and repairing the device can be studied more clearly in the video:
And the last piece of advice: do not save when buying a faucet, since its service life is affected not only by the quality of water and other external factors, but also by the materials from which the faucet structure itself is made.
If you choose a cheap model, most likely it will be made of silumin (an inexpensive alloy of aluminum and silicon). Although such taps look very attractive both in price and appearance, they quickly lose their original luster and fail. Therefore, for long service without accidents and regular repairs, it is worth taking a closer look at time-tested brass.
Please leave comments and ask questions in the block below. Perhaps you have already had to deal with the repair of a ball mixer and managed to successfully cope with the breakdown. Share with our readers how you managed to fix your plumbing.
