The bathroom is usually supplied complete with legs or a frame on which this sanitary product is mounted. When making hot tubs, manufacturers are guided by the fact that the distance from the floor to its side should be about 60-65 cm.
However, sometimes situations arise when the standard height of the bathtub is inconvenient for use or water does not drain well from it. In this case, there is only one way out - to lift it. In this article we will tell you how to raise a bathtub above the floor using the 3 most popular methods, as well as the advantages of each of them.
Why do you need to raise the bathtub?
In general, the standard height of a bathtub above the floor, according to building rules and regulations, should be 60-65 cm. This standard was calculated in accordance with the average height of a person and has been tested for more than one generation.
If the font is installed at this height, then it is convenient and safe to use. However, situations arise when the bathtub has to be raised above the floor. Most often, this procedure is performed to solve the following problems:
- Water does not drain well. According to the quality standards adopted in our country, the font bowl must have a natural slope towards the drain hole so that the water flows into it by gravity and does not stagnate at the bottom of the bowl. Therefore, the bathtub must be installed strictly parallel to the floor. In some cases, due to a manufacturing defect or an unsuccessful form, water does not flow into the drain. Then you need to raise the legs of the bathtub to give it an artificial slope.
- Additional equipment needs to be installed . Usually there is only 15 cm between the floor and the bottom of the bowl. This space is enough for a compact flat siphon, but not enough for installing any other additional equipment. If you need to install a waste grinder or pump for hydromassage equipment, you will have to raise the bathtub by at least 10-15 cm.
- Inconvenient to use the bathroom . If the apartment is inhabited by people whose height is much higher than average, then using a standard-height font may be inconvenient. The greatest inconvenience is washing in the bathtub, as you have to bend low.
Remember that the standard installation height of the bathtub is calculated and recorded in SNiPs and GOSTs, as it is suitable for most people. However, if there is a need to raise the floor font, this can be done by lengthening the legs, constructing a podium from foam blocks or bricks, or using a frame.
What to pay attention to
From the very beginning you need to figure out how to remove the old siphon. To do this, you need to have a set of keys for the clamping nuts. They are easily unscrewed using a tool, and the entire system is disassembled into a certain number of component parts.
A mandatory element is draining the water, which acts as a water seal by unscrewing the plug. In some cases, the nuts “grow” to the thread and are almost impossible to unscrew by hand. This is where the grinder comes to the rescue.
Before you remove the old siphon yourself, you need to familiarize yourself with the drainage diagram in the bathroom. To unscrew the clamping nuts, you will need to use a set of wrenches, which will make it easy to disassemble the old system into a certain number of components. When attaching the drain and overflow neck, it is necessary to tighten the screw. At the same time, it is important not to damage the element by calculating your strength.
To ensure that the parts are securely fastened and there are no leaks, you will need silicone sealant to coat the joints. It is necessary to use it before starting assembly, since it can dry quickly. Replacing the drain can be done in a lying or sitting position.
When replacing the siphon, you should remember the rule that the tightness of the tank will depend on the quality of work. Only competently done repairs will solve the drainage problem. Expert advice will help you figure out how to properly replace the siphon yourself.
Drain installation
Proper installation of a drain in a bathroom requires compliance with the following recommendations:
- When carrying out work, the sequence must be observed.
- To process various connections, sealants will be required.
- Care should be taken when tightening parts.
- Tightening the threaded elements by hand ends by tightening them 1/4 of a full turn.
Connecting the bathroom to the sewer requires even tightening of the nut, so its stability should be checked every time. You should begin installing a siphon in the bathroom with your own hands only after the bowl has been securely fastened, which, if necessary, will need to be leveled and secured. There should be a gap of 15 cm or more between the container and the floor.
Difficulty lifting the bathtub off the floor
Before raising the bathtub, so that the drain works well, you need to calculate everything well. Flaws in installation can lead to discomfort during washing due to instability of the font, deformation of the walls or bottom of the bowl, and chipping of the enamel.
When choosing a method for raising the bathtub above the floor level, the following nuances should be taken into account:
- Heavy weight. Naturally, the weight of the font depends on the material from which it is made, as well as the size of the model. The heaviest are cast iron bathtubs, and the lightest are acrylic. However, when using a font, the weight of the water, as well as the weight of the person bathing, is added to the direct weight of the bowl itself. Under such conditions, the total weight of a plumbing fixture can reach 500 kg, which places a very large load on the legs.
- Small support area . Typically, 4-6 legs are used to install a bathtub; the total surface area hardly exceeds 10 square cm. If we take into account that the weight of the font, water and the person in it reaches 500 kg, then the load on each square centimeter of the supports reaches 50 kg. Due to such a load, the supports may simply deform, unable to cope with the weight of the plumbing product.
- Mechanical strength and wall rigidity . When choosing a method for raising the bottom of the bathtub above the floor level, you need to take into account that different materials have different rigidity. If cast iron models are so thick-walled and resistant to deformation that they can be installed on only 4 legs, then acrylic models have less rigidity, so when lifting them, you need to build a structure that evenly distributes the weight of the bowl between the supports.
Note! When choosing the method by which you will lift the bathtub, you need to take into account the 3 most important factors: the material from which the bathtub is made, the height to which the lift will be carried out, and the weight of the model.
The ratio of the heights of plumbing and sewerage
The sewer line in the apartment is a horizontal pipe (sink), which at one end is connected to a vertical pipeline (riser), and the other to the furthest plumbing fixture. Bends are installed between them for connecting plumbing fixtures or other appliances - a washing machine, a shower stall. Each device is equipped with its own drain set, located at a certain height from the floor.
The level of the deck at the point of connection to the riser is lower than the height of the opposite end. This is necessary for independent drainage of liquids. For normal operation of plumbing, it is important that the height of the drainage of appliances exceeds the level of the connection of the horizontal and vertical parts of the pipeline. However, questions are often asked - what to do if the sewage system is higher than the level of the drain of a bathtub, toilet or other device. It would seem that ordinary school knowledge about communicating vessels is enough to understand that it is necessary to change the ratio of heights between the drain and the outlet of the pipe into the riser. However, the situation where the sewer is higher than the drain level is not uncommon.
Frame mounting
If you lift an acrylic bathtub on legs, it may become deformed or even burst under load. To evenly distribute the load and increase the area of support, thin-walled fonts are installed on the frame.
The frame can be made from stainless steel metal corners. It can be prefabricated or welded, and the second option is characterized by increased strength.
The frame is ready
Before working on installing the frame, you need to make sure that you have everything you need:
- Stainless steel corners, the cross-section of which is sufficient to support the weight of the bathtub.
- Grinder with a metal disc.
- Welding machine.
- Self-tapping screws and anchors for attaching the frame to the walls and floor.
- A hammer drill for making mounting holes in the wall and floor.
- Screwdriver.
- Putty for treating seams to protect against corrosion.
Frame made of metal corners
Please note that when we raise the bathtub above the floor using a frame, it is quite difficult to give it a slope. Therefore, this method is suitable in cases where the bottom of the container has a natural slope towards the drain hole, and water flows well.
Causes of incorrect height ratio
The main reasons for the discrepancy between the levels of the tee and drain holes should be considered:
- errors made during installation or reconstruction of the system;
- the use of modern types of plumbing that require a different system configuration;
- re-equipment of kitchen or other premises, requiring installation of sewerage under the floor covering.
Owners of cafes or bars that open in unprepared premises often face similar problems. They constantly have to solve plumbing installation issues. For example, how to install a toilet if the sewerage system is higher than the drainage elements. In addition, many modern appliances are equipped with a floor outlet, which requires the assembly of a separate line.
Also read: Do-it-yourself homemade sewer pump - vacuum pump
Dimensions for installing bathtubs and showers
The shower cabin and bathtub are connected to the sewer using specially designed corrugations and pipes or tees with a diameter of 50 mm (see photo below). The level of the outlet from the wall of a pipe with a diameter of 50 mm should be 60 mm (from the level of the floor tiles to the axis of this pipe):
If this distance is higher, then you will have to build a podium for the bath.
By the way, the sequence of all repair measures depends on the type of bathtub. If the bathtub is ordinary, then first it is installed itself (details about installing a cast iron, acrylic or steel bathtub), and then the room is tiled. If the bathtub has a hydromassage device, then everything is done the other way around: the bathtub is installed last.
Types of utility wiring
Before designing the wiring, you should become familiar with what types of such structures exist. There are only three of them. Moreover, one, with pass-through sockets, is practically not used. Therefore, we will not consider it.
Type #1. Serial type wiring
To implement this, taps are made from the cold and hot water supply risers leading to the first consumer. Pipes are laid from it to the second and further. Each water collection point is equipped with a tee, to one of the outlets of which the consumer is connected.
Overall this is a very simple scheme. It can only be used where the number of water consumers is small.
This is due to the fact that if several water collection points are activated simultaneously, the pressure in them will weaken and may be insufficient for the correct operation of the equipment. This is the main disadvantage of series wiring.
Image gallery
Photo from
Assembling the system using tees
Simple and inexpensive type of construction
Combination of tee and collector circuits
Minimum set of fittings
However, for apartments with one bathroom and a small amount of plumbing used, this may be the best option. A significant drawback of the system is the inability to turn off one of the plumbing fixtures for replacement or repair.
Serial wiring is extremely simple to implement, but not very convenient to use. However, for small bathrooms this solution may be quite acceptable.
There are many more advantages to sequential wiring. First of all, it is simplicity in design and installation. There will be no complex schemes here, everything is done very simply.
In addition, such wiring is considered the most economical option. The consumption of pipes and other elements will be significantly lower than in other systems, and installation costs are also minimal.
Even a novice plumber can handle the design and subsequent installation of sequential, otherwise tee, wiring
Type #2. Collector type of wiring
The collector type scheme involves connecting each of the consumers to the main line. For this, a special element is used, which is called a collector - a device that distributes water flows.
In a more complex version, and this is best, each collector outlet is equipped with a shut-off valve. Collector-type wiring can be considered the most convenient option to use. There are several reasons for this.
Image gallery
Photo from
Parallel connection of devices
High consumption of pipes and fittings
Mostly hidden gasket
Collector water supply outlets
Firstly , the absence of pressure drops in the system. All consumers receive equally good water pressure, even if all water points operate simultaneously.
If the pressure in the system of an apartment or private house is too low for some reason, you can temporarily limit the water supply to one of the consumers, for example, to the toilet, thereby increasing the pressure for others.
The collector type of wiring is more convenient to use than the serial type. In this case, a separate line goes to each consumer, which guarantees no problems with pressure. However, such a system turns out to be more complex in design and installation.
Secondly , the ability to disconnect plumbing fixtures from the water supply if they need replacement or repair.
Thirdly , reliability. In fact, a single pipe goes to each consumer, without any connections or other elements. A leak can only appear in the collector area or near the device itself. Here it will be very easy to find. For this reason, pipes with manifold wiring can be safely installed using a hidden method.
Fourthly , ease of use. If there is a problem with a plumbing fixture and a leak appears, for example, at a faucet, you do not need to crawl under the sink. It is enough to close the shut-off valve on the manifold leading to the faulty device and wait for the specialists to arrive.
Even a woman or child unfamiliar with plumbing can do this. At the same time, all other equipment will work properly.
Professionals recommend using manifolds with shut-off valves for installation in water supply systems. With their help, if necessary, you can easily stop the water supply to a branch or plumbing fixture in need of repair.
However, collector wiring also has some disadvantages. First of all, it will cost the owner more than a sequential circuit. This is due to the fact that it will be necessary to lay a branch to each consumer. This will take a lot more material.
In addition, the installation of manifolds and shut-off valves will be required if the distributors are not equipped with them. And the circuit itself will be much more complicated than a sequential one.
Hydraulic testing of pipes
After all water and sewer pipes have been laid and all requirements for the placement of water outlets have been met, it is imperative to test the pipeline or, as experts call it, pressure testing.
Pressure testing must take place under increased pressure of 10 atmospheres using a special press. To do this, all water outlets, except the farthest one, are closed with plugs (they will later protect the pipes during finishing), and a ball valve is screwed into the farthest water outlet.
The system is filled with water, then shut off and a special crimping press is connected to the tap. The tap opens and a pressure of 10 atmospheres is injected into the pipeline using a press (all pressure testing machines are equipped with pressure gauges).
If the pressure does not drop within several hours, then the system can be considered sealed and can be safely walled up. If not, then you should find the leak, fix the problem and test again.
CONCLUSION
After laying the pipes and carrying out hydraulic tests, you can begin finishing – tiling the bathroom with ceramic tiles. The installation of plumbing fixtures should be carried out at the final stage.
Properly done piping in a bathroom using modern pipes and technologies will serve its owner for decades.
What dimensions should sewer outlets have to install different plumbing fixtures? Dimensions of sewer pipe outlets for plumbing connections
In previous articles, the rules that must be followed when installing plumbing were discussed. Now let’s figure out what sizes of sewer pipe outlets
.
The shower cabin and bathtub are connected to the sewer using specially designed corrugations and pipes or tees with a diameter of 50 mm (see photo below). The level of the outlet from the wall of a pipe with a diameter of 50 mm should be 60 mm (from the level of the floor tiles to the axis of this pipe):
If this distance is higher, then you will have to build a podium for the bath.
For a washbasin (sink), the height of the sewerage system from the floor (pipe outlet from the wall) should be 530...550 mm from the level of the clean floor to the axis of the pipe:
For an attached toilet – 180…190 mm (depending on the model):
For a wall-mounted toilet – 220…240 mm.
For a kitchen sink without a chopper – 300…450 mm.
For a kitchen sink with a chopper – 300…400 mm.
For washing machine and dishwasher – 600…700 mm.
(all distances are given from the level of the clean floor to the axis of the pipe)
Let me clarify: the above values are common, standard, but with today’s variety of companies and models, it is necessary to approach each case personally.
If you want to install some new, exclusive plumbing equipment, then you should first look at the technical map of installation and connection dimensions specifically for this equipment. This must be done earlier than supplying water and laying a drainage ditch - so as not to have to redo it, therefore it is better to purchase the desired plumbing fixtures in advance (if there is space for storage).
By the way, the sequence of all repair measures depends on the type of bathtub. If the bathtub is ordinary, then first it is installed itself, and then the room is tiled. If the bathtub has a hydromassage device, then everything is done the opposite: the bathtub is installed last.
How many bathrooms are needed? If we are talking about an apartment with an open plan, then first you need to impartially assess the dimensions of the place, as well as the locations of the risers to which all plumbing equipment will be connected. As a standard, it is better to equip two separate bathrooms - a guest and a master (again, if space allows). The guest room will only have a toilet and sink.
Naturally, residents living in houses with a standard layout do not have the ability to make several bathrooms, so you just need to decide the question: is it really necessary to bother with remodeling the bathroom or should you just limit yourself to replacing plumbing equipment and cosmetic repairs?
In the following article there is still little information about installing plumbing fixtures with your own hands.
in the light of water supply and sewerage design. Namely, about electronic sockets in the bathroom.
Should I follow the standard?
Most builders, finishers and plumbers are well aware that the standard, optimal height of a bathroom sink is 85 cm.
These standards were developed and tested back in Soviet times, but are still observed, especially when arranging bathrooms in administrative and commercial buildings. When renovating a private apartment, if necessary, you can deviate from the generally accepted installation standard.
In conclusion, I would like to say that inside your apartment, and even more so in a private house, you have the right to install a sink inside the bathroom at any height convenient in specific conditions.
Whether or not to follow installation standards is up to you to decide. However, years of practice and scientific research confirm that, after all, a height of 85 cm is the most optimal option for the convenience of all family members, proven over the years.
Features of entering communications into the apartment
Having decided on the type of pipe layout in the toilet and bathroom, we finish drawing up the project. For the system to work flawlessly, it is important that the entry of communications into the apartment is done correctly. Let's figure out how to do it right.
First of all, there should be a shut-off valve at the inlet, which will make it possible to shut off the water supply if necessary. If the shut-off valves are already in place, it is necessary to check their quality.
In new buildings, good quality components are usually installed; in old houses, outdated devices may be installed. It is advisable to install a good quality ball valve at the inlet.
Important point. If you need to close/open the device, this must be done smoothly. A sharp turn of the handle can provoke a water hammer, which can damage plumbing equipment.
Mandatory elements at the entrance of the water supply system to the apartment are shut-off ball valves, coarse filters and meters. Pressure control equipment, fine filters and other devices can be installed upon request
Immediately after the ball valve, it is recommended to install a special leakage protection system equipped with a controlled shut-off valve. After this, a self-cleaning main filter is installed. It will remove coarse impurities from the water, which significantly extends the service life of the devices.
Water meters should be installed behind it, if needed.
Next you can install the water flow regulator. This is not a mandatory element - it is only needed where there are problems with water pressure. Next, serial or collector wiring of open or hidden installation type is performed.
Rating of the best manufacturers
The ranking of the best manufacturers of drainage systems includes the following companies:
- Geberit (Switzerland);
- Kaiser (Germany);
- Viega (Germany);
- Abelone (Spain);
- Frap (China);
- Alcaplast (Czech Republic);
- Hansgrohe (Germany).
The most budget-friendly of high-quality systems are produced under the brands Viega and Alcaplast.
Material for making the drain and overflow
Let's look at the most popular drain and overflow options:
- Plumbing plastic is the most budget material. In addition, plastic is not afraid of corrosion, and therefore has a long service life. The main drawback is its unpresentable appearance, but if the harness is hidden under the screen, then this is a very good option. External elements are always chromed and look great;
- black metal is not a very good option, as it is heavy, not the easiest to install and does not look very good. It is better to look towards other options;
- Stainless steel is also a fairly durable option. The cost of such a harness is higher than a plastic one, but it will also look more serious;
- copper, bronze and brass – premium options, great for retro-style bathrooms, when the trim is not hidden behind the screen. Performance qualities are excellent; such systems are characterized by high wear resistance and mechanical strength/
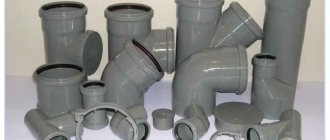
Types and design features of drainage devices
We select bathtubs of various types, and the modern market for plumbing products provides us with the opportunity to select various bathtub siphons. In order not to make a mistake and find a suitable model, you need to understand their design features.
Functional features of the models
Based on their functional features, drainage models can be divided into three main groups:
- classic;
- semi-automatic;
- clic-clac systems.
Models known to all of us that work very simply are considered classic. Before collecting water into the bowl, the drain hole in them is plugged with a stopper. When water needs to be removed, it is enough to pull the plug out of the mouth of the drain by pulling the chain that is attached to it.
As a result of the development of the plumbing industry, along with classic products, semi-automatic models began to enter the market. They are equipped with a special handle mounted on the overflow. It is designed to control drainage and overflow, connecting these two blocks to each other on the outer part of the font. The role of such a handle can be played by the cover of the overflow hole.
The operation of a semi-automatic siphon can be regulated by a lid located on the overflow hole: depending on its position, either the drain or overflow hole can open
The handle of a semi-automatic siphon can occupy one of two possible positions. At the first, the overflow opens and the drain closes: water can be collected. The second position of the handle opens the drain and closes the overflow: liquid flows out of the bowl.
The drain hole of the most modern siphon is closed by simply pressing the lid located on it, and pressing it again opens the drain, allowing water to flow out
The clic-clac system is the most functional. It appeared on the plumbing market relatively recently. In this model, the process of opening and closing the liquid drain is regulated by a special plug located at the mouth of the drain. If you press on this plug, it will close and act as a plug. Pressing the plug again opens the drain.
Various product configurations
Siphons also differ in their configuration. The following models can be considered the most popular today:
- Knee (tubular). The main part of the knee siphon is a pipe, which is most often made of metal or hard plastic. This pipe is located between the bathtub drain and the socket of the sewer passage. Once in it, the liquid flows down, then rises up along the first bend and descends into the sewer along the second. The purpose of this design is to form a water seal that prevents odors from the sewer from entering the bathroom. Usually this is a rather massive product. It is cleaned only in cases of significant blockages.
- Bottle shop. The configuration of such a siphon can be compared to a bottle or flask. In its lower part there is a kind of sump, which allows you to remove small debris from the siphon. To do this, simply unscrew the lid located at the bottom of the sump. A water seal is formed at the bottom of the bottle (flask). There is an outlet pipe in the central part of the structure. This is usually a corrugated plastic tube. This model is attractive because it is very easy to maintain. If the siphon becomes clogged, you can simply remove it, unscrew it and wash it.
- Corrugated siphon. This product consists of a single plastic corrugated tube that is shaped into an "S" shape. Bending is necessary to form the same water seal. The tube is fixed to the sewer drain using a clamp connection. The advantage of such a siphon is its mobility. The corrugation can be stretched, which ensures its versatility. But this design also has a significant disadvantage - the corrugation is impractical. If it gets clogged, it will take a lot of effort and time to clean it. It will be easier to replace it with a new one.
The presence of a hatch in the lower part of the bend, in which a water seal is formed, allows you to clean the product without dismantling it.
The bottle-shaped siphon is easier to clean than others. Simply unscrew the lid located at the bottom of the sump and you can gain access to the inner surface of the drainage device
During the installation of the font bowl, the space created under the bottom is calculated taking into account the fact that a siphon will be installed under the bathtub. A situation may arise in which, for objective reasons, this gap will be less than the required 15 cm.
In this case, you should pay attention to one of the varieties of the pipe model - a flat-type siphon made of plastic.
This is what the “elbow” of a flat siphon looks like: it is obvious that such a drain device can easily fit even in a small space under the font bowl
Its distinctive feature is that the main part of its design, intended to form a water seal, is made in the horizontal direction. This helps install the device in confined spaces. The flat siphon is easy to clean. To do this, it is enough to partially dismantle it.