Digging a well in a country house with your own hands is not so difficult, although at first glance the work seems overwhelming. A team of builders with special equipment will not be needed. There are craftsmen who can cope with this task alone. The material is concrete rings. In the old days, the mine was lined with logs, but now this method is almost never used. There is no need to drill a deep shaft. You just need to shovel the soil from under the walls until they sink deep enough and reach the aquifer. As they deepen, new tiers are placed on top. It will take a long time to dig yourself. To find out how deep the waters lie, you can ask your neighbors who have water on their property. If the village is just being built up, and there is no one to ask, it is necessary to call engineers with special equipment. Perhaps the only option is an artesian well.
Do I need permission?
According to the Law of the Russian Federation dated February 21, 1992 N 2395-01 “On Subsoil”, Article 19 allows for drilling wells for one’s own purposes without any permits, provided that no more than 100 cubic meters of liquid from the aquifer rise to the surface per day, and that the source is not centralized.
That is, if you want to obtain water from a source solely for watering your garden, agricultural or household needs, drinking, etc., you do not need to obtain any permits for either a summer house or a private home.
Methods
Let's look at how to properly dig a water well with concrete rings; There are only two methods here - closed and open. We have already given the general algorithm for their implementation, now we will pay attention to the nuances.
Alternate installation of reinforced concrete products
We remind you of the procedure: place the first of them in a suitable place and begin to remove the earth under the sides from the outside and inside, making sure that the structure falls without distortions, straight down. The verticality of the walls can be controlled using a plumb line. When the building element is level with the surface, roll out the second reinforced concrete product and repeat the sequence of actions, using a shovel. Then the third, removing the soil with a winch.
You need to continue this until you reach the horizon, and then form the bottom, perform waterproofing, and arrange the top.
See how to dig a well with your own hands step by step; the video explains it well.
We will list the advantages of the technology:
- you can see how tightly all the “floors” fit together;
- it is permissible to use rubber gaskets for tightness;
- If there is such support, the walls will not crumble.
The downside, not unreasonably, is considered to be working in cramped conditions (there is not enough space inside the ring for a person), because of which you can go 7-8 m deeper.
Installation of concrete products after reaching the aquifer
We remind you that here the pit is created all at once, to the bottom, but on the condition that there is no soil shedding. But at the first sign of a collapse, it is necessary to lay the ring and return to the original method. If everything is in order, then you will only need to insert them into the shaft at the end, using a manipulator or crane.
The earth is first thrown out with shovels, then lifted in buckets with a tripod and on a winch, then it must be used to fill and compact the gaps between the walls. Verticality is also controlled using a plumb line.
The advantages are that the shaft is wider, which means it is easier to reach greater depth, and sealing can be done from the outside. But it is impossible to check the quality of insulation during construction and it is easy to miss the moment of shedding, and these are disadvantages.
See how in this case the technology of digging a well from concrete rings by hand is implemented, the video is very educational.
Main table dispenser AquaPro 919H/RO (hot and cold water)
Main table dispenser AquaPro 929CH/RO (cooling/heating)
Floor dispenser AquaPro 311 (empty, without cooling)
How to find a place?
First you should search for water. The easiest way is to ask your neighbors. If they don't have a source, have they looked for it? If neighbors' attempts are unsuccessful, it will be impossible to find the liquid. You can determine the place where to dig yourself. If there is a source, then before looking for water on your personal plot, you should start from the following factors:
- Terrain.
- Soil type.
- Climatic conditions.
- Nature and plants.
How to determine where is the best place to dig?
The best way to find liquid at a site is through geological exploration.
Having discovered a source or supposed place with water, you should not rush to dig, it is better to check its quality. Does it have any aftertaste, is it cloudy or dirty, etc.
Advice : if you are digging a source for drinking water, it is recommended that you first send it to a laboratory for analysis. The test will be for: microbiology, inorganics, organics, herbicides, radionuclides and pesticides. You can check for fertilizers and petroleum products, iron and manganese.
It is not recommended to dig near the following objects:
- landfills;
- car washes;
- swamps;
- farms and pigsties;
- tanks with sewage and the like.
If the soil in your area is rocky and there are large blocks, then setting up a mine will cause serious difficulties. For this purpose, geological exploration is carried out. This includes:
- studying the nature of the soil and the characteristics of the local rock;
- determining the depth of the source.
Finding water on your own property can make it easier to study the flora. For example, sedge, sedge, and coltsfoot grow mainly in damp areas. If the groundwater is high, then you will see the following trees: spruce, birch, alder. This may be the optimal location.
Important : the search should not be carried out in ravines, river banks, or gutters. In such places, fluid drainage is carried out artificially.
There is another popular way to search for water on your own site. For this, a slingshot made of willow branches is used. It is held in a vertical position, where the aquifer is close, and the tension of the slingshot barrel is felt in your hands. Instead of willow twigs, metal wire is also used, from which 2 equal L-shaped frames are made. If you hold them in a horizontal position with your elbow bent, the frames begin to move and cross where there is liquid.
Type and structure
If you have decided on the location, all that remains is to choose what kind of mine you will make your mine. You can only dig a mine well, and you can drill an Abyssinian well. The technology here is completely different, so what follows will be about the mine well.
Well shaft type
The most common one today is a well made of concrete rings. Common - because it's the easiest way. But it has serious drawbacks: the joints are not at all airtight and through them rain and melt water enters the water, and with it what is dissolved in it and what has drowned.
Disadvantage of a well made of rings and logs
Of course, they try to seal the joints of the rings, but the methods that will be effective cannot be used: the water must be suitable at least for irrigation. But simply covering the connections with a solution is very short-lived and ineffective. The cracks are constantly increasing, and then through them not only rain or melt water enters, but also animals, insects, worms, etc.
There are rings with a lock. Between them, they say, you can lay rubber gaskets that will ensure tightness. There are rings with locks, but they are more expensive. But gaskets are practically never found, as are wells with them.
The log mine also suffers from the same “disease,” only there are even more cracks. Yes, that's what our grandfathers did. But, firstly, they had no other way, and secondly, they didn’t use so much chemicals in the fields.
From this point of view, a mine made of monolithic concrete is better. It is cast right on site using removable formwork. They poured out the ring, buried it, put up the formwork again, stuck in reinforcement, and poured another one. We waited until the concrete “set”, removed the formwork again, and started digging.
Removable formwork for a monolithic concrete well
The process is going very slowly. This is the main drawback. Otherwise there are only positives. Firstly, it turns out very cheap. The costs are only for two galvanized sheets, and then for cement, sand, water (proportions 1: 3: 0.6). It's much cheaper than rings. Secondly, it is hermetically sealed. No seams. Filling occurs approximately once a day and due to the uneven upper edge the result is almost a monolith. Just before pouring the next ring, scrape off the surface of the raised and almost set cement laitance (a gray dense film).
How to identify an aquifer
According to the technology, the soil is removed inside the ring and under it. As a result, under its own weight, it settles. This is the soil that you take out and will serve as a guide.
As a rule, water lies between two waterproof layers. Most often it is clay or limestone. The aquifer is usually sand. It can be small, like seaweed, or large interspersed with small pebbles. Often there are several such layers. As the sand goes, it means water will appear soon. Once it appears at the bottom, you need to dig for some more time, removing the already wet soil. If the water is coming actively, you can stop there. The aquifer may not be very large, so there is a risk of going through it. Then you'll have to dig until the next one. The deeper the water will be cleaner, but how much deeper is unknown.
Next, the well is pumped - a submersible pump is inserted and the water is pumped out. This cleans it, deepening it a little, and also determines its flow rate. If the rate at which the water rises suits you, you can stop there. If it’s not enough, you need to quickly go through this layer. With the pump running, they continue to remove soil until they pass through this layer. Then they dig until the next water carrier.
Bottom filter in a well
Construction of a bottom filter for a well
If you are satisfied with the speed of incoming water and its quality, you can make a bottom filter. These are three layers of cameos of different fractions, which are laid on the bottom. They are needed to ensure that as little silt and sand gets into the water as possible. In order for the bottom filter for a well to work, the stones must be laid out correctly:
- Large stones are placed at the very bottom. These should be quite large cobblestones. But in order not to greatly reduce the height of the water column, use a flatter shape. Lay them out in at least two rows, and do not try to have them stand close together, but with gaps.
- The middle fraction is poured in a layer of 10-20 cm. The dimensions are such that stones or pebbles do not fall into the gaps between the lower layer.
- The top, smallest layer. Pebbles or small stones in a layer of 10-15 cm. Sand will settle in them.
With this arrangement of fractions, the water will be cleaner: first, the largest inclusions settle on large stones, then, as you move up, smaller and smaller ones.
Shaft depth
Conventionally, aquifers can be divided into several horizons. For a full-fledged well, it is enough to dig into the first one. Typically the depth ranges from 5 to 30 meters. Depending on how wells enter the aquifer, dacha wells are divided into 3 types (diagram below):
- Perfect with sump (B).
- Perfect (B).
- Imperfect (A).
In the third case, water inflow is possible through the bottom and side walls. In the second case, exclusively through the walls, and as for the sump, the shaft will be located in the rock. Due to this, the fluid supply increases significantly.
Based on the characteristics of the soil in your area, you need to choose the most affordable method of installing your well.
Where to install a water supply facility
Choosing a location for an individual water supply source is not very easy, especially if a small area is already occupied by impressive residential and commercial buildings.
Even if you want to save meters, when planning a place to build a personal well with your own hands, it is recommended to adhere to the following rules:
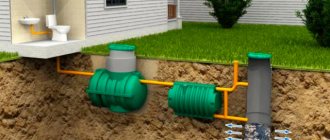
- A drinking well should not be located near manure heaps, latrines, bathhouses, cesspools, barnyards and similar objects. There should be at least 20-25 m between the well and the source of probable contamination.
- There is no need to build a well on the slopes of river banks or ravines. Due to the decreasing flow of underground water, the flow rate will be significantly reduced.
- The minimum distance between the well and the foundation of a house or utility block must be at least 5 m. Water currents will be directed into the well, like into a reservoir formed in the ground, washing away the soil from under the foundations, particle by particle. The corner of the building located nearby will certainly sag.
Ponds with standing water are considered an undesirable neighborhood. Water will certainly infiltrate through permeable rocks, which is extremely dangerous for the drinking category.
According to sanitary standards, the distance from the well to the specified objects should be at least 20 m, ideally 50 m (+)
It is prohibited to locate a well near sources of biological and chemical pollution, as well as on slopes, near ravines and on river banks.
What time of year should you dig?
Is there a difference when it's better to dig? Yes. The ideal time of year is late summer and January. To cut a spring in winter, there must be frost for at least three weeks.
Digging during this period has its advantages:
- The groundwater level is very low.
- There is practically no perched water.
- It is easy to calculate the debit, since at this time of year it is minimal.
If you plan to dig yourself, with your own hands, then you need to start in early August in order to be in time before the rainy season.
Important : the selected time of year should be as dry and dry as possible.
Digging technique
Drilling is performed using several technologies:
- open;
- closed;
- mine;
- tubular.
Let's take a closer look at these types of wells.
Open
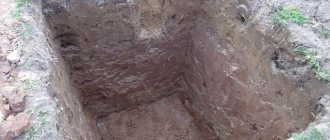
You can dig a mine in an open way. To do this, dig a hole of the required depth. The diameter of the shaft should be 20 cm larger than the diameter of the reinforced concrete ring. After lowering the concrete products, they must be connected to each other. The joints are also sealed. The resulting space between the walls of the shaft and the ground is filled with earth.
Closed
A summer source can be made in a closed way.
Before digging a well, it is necessary to prepare a hole in the ground up to 2 m deep. A reinforced concrete ring is carefully inserted into it. As it deepens, the installed co-construction will gradually sink down. The second, third rings and so on are carefully mounted on top. The latter should rise above the soil level.
Important ! As new rings are installed, all joints must be sealed.
Construction using this method requires certain skills.
Shakhtny
A shaft that should be strengthened to prevent soil from collapsing. Previously this was done using logs. Currently, the shaft or shaft is reinforced with concrete round rings. As a result, the source is protected from wastewater and pollution.
Financial expenses
To dig a well on a summer cottage will require certain financial costs. It is necessary to purchase materials, hire specialists and possibly equipment. The final cost of the work will depend on a number of factors, for example, the depth of the shaft, the digging method, materials for strengthening the walls.
If concrete rings are used, their price averages 1.5-3 thousand rubles, and installation of a ring can cost 3-4 thousand rubles. On average, the cost of installing a well with 10 rings is 35 thousand rubles, and with three rings it will cost about 15 thousand rubles.
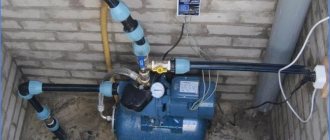
But water from a shallow well cannot be used for food consumption, but only for technical purposes and irrigation. Setting up a year-round water supply system from a well to a bathhouse or house also leads to increased costs.
Tools
The set of tools and materials may differ depending on what types of wells will be built.
Tools:
- cable;
- homemade winch;
- buckets;
- shovels with short handles;
- ropes;
- wheelbarrow;
- hammer/drill;
- carpentry tools (when working with wood);
- jackhammer;
- scrap;
- ladder;
- flashlight;
- pump;
- insurance;
- level;
- helmet.
Materials:
- reinforced concrete rings;
- cement;
- sand.
Our services
Turnkey wells near Moscow
We will do all the work from scratch
Read more…
Arrangement
we will build a well house and much more
Read more…
Construction of wells
We will get to work on any type of soil
Read more…
Well rings with lock
We sell rings with seam connections of factory quality
Read more…
The right place to dig a well
Wells by purpose
Well for home
Well for a summer residence
Well for the site
Advantages of digging wells with us
All work is guaranteed
Delivery of materials and equipment - at our expense
We work as quickly as possible
Affordable prices for everyone
We use our own building materials
Before digging, we carefully examine the soil
Safety precautions
To build a well with your own hands, it is extremely important to follow certain precautions:
- When digging, the head is protected by a helmet.
- Bucket handles must be strong and reliable.
- The rope for lifting the bucket must be strong.
- The carabiner must be reliable.
- From time to time you should check the carabiner, rope and handle on the bucket.
- Digging is done one by one.
- It is necessary to make sure that the ladder is reliable and durable.
- Work should be carried out in strong, high and leak-proof shoes and overalls.
- Reinforced concrete products must be installed very carefully.
- The harness with the stone should be lifted slowly and carefully.
- Insurance required.
- If there is a gas leak, go upstairs immediately.
- Keep children away from the work area.
- Do not dump the raised soil closer than 3 meters from the hole.
- Warn the digger about lifting and lowering objects.
Briefly about the occurrence of groundwater
The average depth of aquifers is from 4 to 30 m. The layers that are closer to the surface are called perched water. Water is sometimes extracted from them for technical and economic needs. The flow rate is not always sufficient and constant throughout the year. The main source of replenishment is precipitation, which is not sufficiently purified by the soil.
Between the perched water and the layer with drinking water there are several layers. They are permeable and impenetrable. The first ones freely pass and filter water and consist of sand, pebbles, crushed stone, and gravel.
Waterproof layers are clay and loamy masses, rocky rocks without cracks that prevent the penetration of dirty runoff. Moisture condenses between 2 such waterproof layers. When the top layer is opened, the water level rises, sometimes it flows like a fountain. The flow rate is constant regardless of the time of year.
Common Mistakes
- A small number of rings.
- If it is necessary to deepen the mine, then you should not dig in one ring from the outside, but rather clean the source.
- If it is necessary to deepen, then the shaft is completely dug.
- Avoid superficial restoration of joints. The seams should be completely cleaned of mortar.
- If the old source is running, it is better to spend money on digging a new one.
- Do not leave seams through which water can leak.
- Do not abandon a dug mine without cover.
How to make a mine from concrete rings?
The process of making and installing rings with your own hands is a labor-intensive stage of work. Reinforced concrete wells are manufactured in the following sequence:
- Marking is being carried out on the site.
- The bottom is leveling out. A diameter of up to 1.5 m is enough.
- The concrete well is immersed after excavation to the height of the ring using a tripod or winch.
- The first ring is mounted, measurements are taken all the time.
- As you go deeper, a second one is installed, and so on. Using a crowbar we level it.
- The well can be sealed from the inside using a rubber band, which is placed in the gap between the rings. If there are loops, they bend inward.
- A filter is installed at the bottom of the source.
- Groundwater protection is carried out. Waterproofing is done using special mastics.
- Before caulking the seams between the rings, you need to connect them with anchors.
Before digging a well by hand, it is necessary to have the exact diameter of the concrete ring. The pit for reinforced concrete wells should be 200 mm wider in width. While digging a hole, be sure to check the level; the shaft must be vertically level. As the hole is dug independently for the reinforced concrete rings, the soil gradually rises upward. Everything happens in stages, the bucket goes down and goes up the winch.
Advice : knowing how to dig a mine at your dacha, you can handle all the work yourself. The well must be waterproofed to protect the source from groundwater penetration.
If a boulder is encountered, it is removed if possible. Although in some cases the mine is filled up and arranged in another place.
Stage four. We protect the structure from surface water
To keep your well clean, it must be properly protected. Water should enter the shaft only from below, and therefore the walls must be reliably insulated. To do this, we firmly connect the rings to each other, resorting to one of two possible methods.
Well
- We drill the walls of the rings and fix them with metal brackets mounted on bolts.
- We twist the rings with steel wire, catching it on the loading eyes. To twist the wire we use a metal rod, for example, a crowbar.
Pay attention to the waterproofing of the seams between the rings! If water leaks through the seams, this will lead to contamination of the well. To seal the seams, you should use a substance that will not affect the quality of the water.
External and internal sealing of concrete rings with traditional bitumen materials
We strengthen the seams according to the following scheme.
Step 1. Place pieces of linen rope in the voids between the rings (an excellent material - natural and environmentally friendly).
Step 2. Cover the ropes with a solution of sand, cement and liquid glass. By doing this we will achieve reliable waterproofing, which will also be completely neutral when in contact with water.
Step 3. On top of the upper rings, dig a meter-deep pit.
Step 4. Waterproof the outer surface of the rings using liquid bitumen mastic.
Step 5. Place a thermal insulation layer around the upper rings (we can use any foamed polymer, for example, polystyrene foam).
Step 6. Fill the pit around the well with clay. This is called a "clay castle".
Clay well castle
Clay well castle
Video – Clay castle
How to seal seams: mine waterproofing
When the well is completely drilled and the rings are all in place, they need to be waterproofed from the inside.
If it will be carried out in wet soils, then coating compounds are recommended. For example, you can use bitumen mastic. She must treat the outside of the rings. This will significantly extend their service life. The joints are additionally coated from the inside.
Concrete shafts are often wrapped with roll insulation, such as dense polyethylene, as waterproofing. Film is much cheaper. However, it is used exclusively from the outside. You need to quickly dig around the rings in a circle and wrap them with film.
Important ! The film will last for several years if you buy a durable one with reinforcement. But it is better to allocate a budget for coating insulation.
Some summer residents resort to additional waterproofing by making a clay castle. This is especially true if clay rises to the surface when digging. It can be used by filling the well from the outside.
Warranty issue
“SV Stroy” necessarily provides a guarantee for all work performed. Its validity period is one year from the date of delivery and acceptance of the well. The guarantee takes into account:
- reliability of design;
- stable well performance (uninterrupted water supply);
- the absence of impurities in the water that are uncharacteristic of the chemical composition of the local soil.
When digging wells, we strictly follow all technologies and use only the highest quality consumables. A formal contract is concluded with each client, which sets out the rights and obligations of both parties.


